Producten
-

Elektor Digital Vanderveen Trans Tube Amplifiers (E-book)
Menno van der Veen is well known for his research publications on tube amplifiers used in audio systems. In this book he describes one of his research projects which focuses on the question of whether full compensation for distortion in tubes and output transformers is possible. In the past, a variety of techniques have been developed. One of them has largely been forgotten: trans-conductance, which means converting current into voltage or voltage into current. Menno van der Veen has breathed new life into this technique with his research project titled “Trans”. This book discusses all aspects of this method and discusses its pitfalls. These pitfalls are addressed one by one. The end result is a set of stringent requirements for Trans amplifiers. Armed with these requirements, Menno then develops new Trans amplifiers, starting with Transie 1 and Transie 2. These DC-coupled, single-ended tube amplifiers have unusually good characteristics and are suitable for hobbyist construction. Next the Trans principle is applied to amplifiers with higher output power. A trial-and-error process ultimately leads to the Vanderveen Trans 30 amplifier, which optimizes the features of Trans. The characteristics of this amplifier are so special and unique that Menno believes he has struck gold. To ensure that variations in tube characteristics cannot interfere with optimal Trans behavior, Menno makes use of simulations and comparison with other amplifier types. This book reads like an adventure story, but it is much more – it is an account of solid research into new ways to achieve optimal audio reproduction.
€ 29,95
Leden: € 26,96
-

Elektor Publishing Vintage Radio Equipment
Resonances From Aether Days A Pictorial and Technical Analysis from WWII to the Internet Age From the birth of radio to the late 1980s, much of real life unfolded through shortwave communication. World War II demonstrated—beyond a shadow of a doubt—that effective communications equipment was a vital prerequisite for military success. In the postwar years, shortwave became the backbone on which many of the world's most critical services depended every day. All the radio equipment—through whose cathodes, grids, plates, and transistors so much of human history has flowed—is an exceptional subject of study and enjoyment for those of us who are passionate about vintage electronics. In this book, which begins in the aftermath of World War II, you’ll find a rich collection of information: descriptions, tips, technical notes, photos, and schematics that will be valuable for anyone interested in restoring—or simply learning about—these extraordinary witnesses to one of the most remarkable eras in technological history. My hope is that these pages will help preserve this vast treasure of knowledge, innovation, and history—a heritage that far transcends the purely technical.
€ 79,95
Leden: € 71,96
-
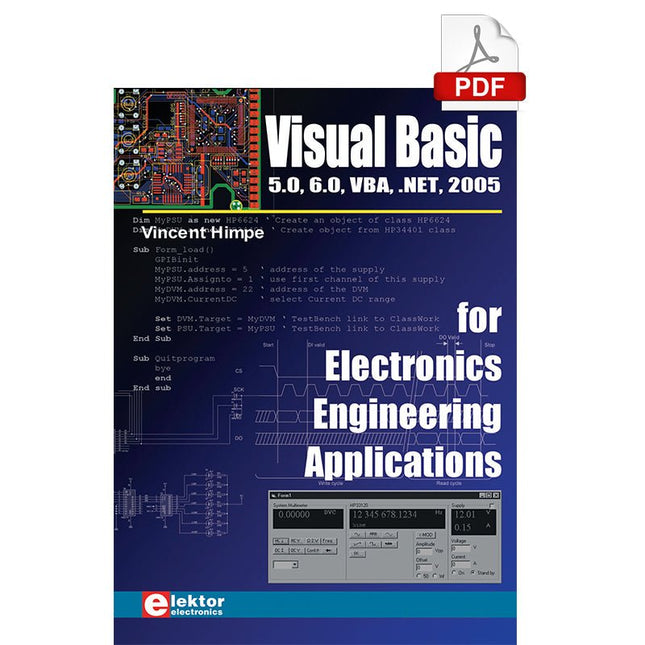
Elektor Digital Visual Basic for Electronics Engineering Applications (E-book)
The PC has long-time outgrown its function as a pure computer and has become an all-purpose machine. This book is targeted towards those people that want to control existing or self-built hardware from their computer. Using Visual Basic as Rapid Application Development tool we will take you on a journey to unlock the world beyond the connectors of the PC. After familiarising yourself with Visual Basic, its development environment and the toolset it offers, items such as serial communications, printer ports, bit-banging, protocol emulation, ISA, USB and Ethernet interfacing and the remote control of test-equipment over the GPIB bus, are covered in extent. Each topic is accompanied by clear, ready to run code, and where necessary, schematics are provided that will get your projects up to speed in no time. This book will show you advanced things like: using tools like Debug to find hardware addresses, setting up remote communication using TCP/IP and UDP sockets and even writing your own internet servers. Or how about connecting your own block of hardware over USB or Ethernet and controlling it from Visual Basic. Other things like internet-program communication, DDE and the new graphics interface of Windows XP are covered as well. All examples are ready to compile using Visual Basic 5.0, 6.0, NET or 2005. Extensive coverage is given on the differences between what could be called Visual Basic Classic and Visual basic .NET / 2005.
€ 39,95
Leden: € 35,96
-
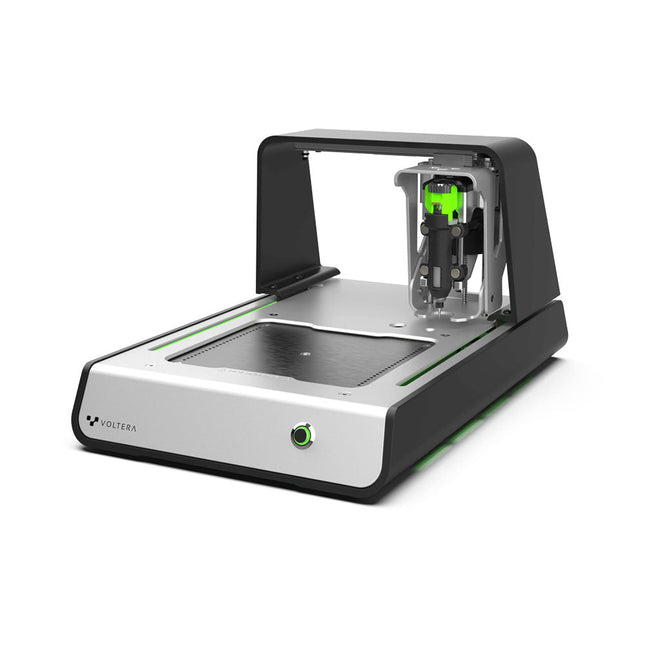
Voltera Voltera V-One Desktop PCB-printer
Soldeerpasta doseren en reflowen in één De Voltera V-One maakt dubbellaags prototype printplaten op uw eigen bureau. Gerber-bestanden gaan erin, geprinte printplaten komen eruit. De dispenser legt een zilver-gebaseerde geleidende inkt om uw schakeling ter plekke te printen. Het assembleren van printplaten is eenvoudig met de V-One's soldeerpasta verdeler en reflow functies. Plaats uw printplaat op het printbed en importeer uw Gerber-bestand in Voltera's software. Geen stencils meer nodig Voltera's software is ontworpen om gemakkelijk mee uit de voeten te kunnen. Vanaf het importeren van uw Gerber-bestanden tot het moment dat u op print drukt, leidt de software u veilig door elke stap. Compatibel met EAGLE, Altium, KiCad, Mentor Graphics, Cadence, DipTrace, Upverter. Inbegrepen V-One PCB-printer V-One dispenser V-One probe Spuitmondstuk Kopjes 3 x 4" FR1 substraatpakket 2 x 3" FR1 substraatpakket Substraatklemmen Duimschroefpakket Hello World-set Soldeerdraad Pincet Voeding Voedingsadapter Kabels Gebruiksaanwijzingen Downloads Specifications V-One Software User manuals Safety datasheets Technical datasheets Voltera CAM file for EAGLE Substrates and templates Meer Info Frequently Asked Questions More from the Voltera community Technische Specificaties Printspecificaties Minimum trace width 0.2 mm Minimum passive size 1005 Minimum pin-to-pin pitch (conductive ink) 0.8 mml Minimum pin-to-pin pitch (solder paste) 0.5 mml Resistivity 12 mΩ/sq @ 70 um height Substrate material FR4 Maximum board thickness 3 mm Soldeerspecificaties Solder paste alloy Sn42/Bi57.6/Ag0.4 Solder wire alloy SnBiAg1 Soldering iron temperature 180-210°C Drukbed Print area 135 x 113.5 mm Max. heated bed temperature 240°C Heated bed ramp rate ~2°C/s Footprint Dimensions 390 x 257 x 207 mm (L x W x H) Weight 7 kg Computervereisten Compatible operating systems Windows 7 or higher, MacOS 10.11 or higher Compatible file format Gerber Connection type Wired USB Certificatie EN 61326-1:2013 EMC requirements IEC 61010-1 Safety requirements CE Marking Affixed to the Voltera V-One printers delivered to European customers Ontworpen en geassembleerd in Canada. Meer technische informatie Quickstart Explore Flexible Printed Electronics on the V-One Voltera V-One Capabilities Reel Voltera V-One PCB Printer Walkthrough Unpacking the V-One V-One: Solder Paste Dispensing and Reflow All-in-One Voltera @ Stanford University's Bao Research Group: Robotic Skin and Stretchable Sensors Voltera @ Princeton: The Future of Aerospace Innovation
-

Weller Weller WE1010 Digitaal Soldeerstation (70 W)
High-quality soldering station with the most important tools and consumables, ideal for universal soldering applications. Features 1-Channel Power Unit, digital, 70 W Power unit, 1 channel with soldering iron WEP 70 and safety rest PH 70 70W solder iron with ergonomic handle and providing toolless tip change ESD safe station, iron and heat-resistant silicon cable for safe handling Using ET soldering tips Standby mode and auto setback conserves energy, protects equipment Password-protected to preserve settings Specifications Dimensions: 150 x 120 x 98 mm Weight: 1.4 kg Display: Digital LC Display Temperature range: Adjustable from 100°C - 450°C (200°F - 850°F) Voltage: 230 V Channels: 1 Temperature range (depends on tool) °C: 100-450 Temperature range (depends on tool) °F: 200-850 Temperature accuracy °C: Average tip temperature can be „offset“ to +/- 5°C at idle with no load Temperature accuracy °F: Average tip temperature can be „offset“ to +/- 9°F at idle with no load Temperature stability °C: ±6 Temperature stability °F: ±10 Heat-up time (ca) in seconds (50-350°C / 120-660°F): 28 sec. Heating output: 85 W
€ 157,60
-

Weller Weller WT 1010 Digitaal Soldeerstation (90 W)
High-quality soldering with the most important tools and consumables, ideal for universal soldering applications. Features Power unit, 1 channel 1-channel Soldering Station digital 90 W (95 W) WTP 90: The soldering iron for universal use with power response tips. Tip family XNT & THM (high mass tips) Lock function Specifications Dimensions W x D x H (mm): 149 x 138 x 101 Dimensions W x D x H (inch): 5.87 x 5.43 x 3.98 Weight (ca) in kg: 1.9 Channels: 1 Voltage: 230 V, 50/60 Hz Heating output: 90 W (95 W) Temperature accuracy °C: ±9 Display: Backlit LCD Temperature range: Adjustable from 50°C - 450°C (150°F - 850°C)Adjustable temperature range varies among tools Temperature stability °C: ±2 Temperature accuracy °F: ±17 Temperature stability °F: ±4 Temperature range (depends on tool) °C: 100-450 Temperature range (depends on tool) °F: 150-850 Equipotential balance: yes Fuse: 0,5 A WT compatible: yes ESD-safe: yes Power cord: EMEA
€ 538,45
-

Weller Weller WT1013 Digitaal Soldeerstation (95 W)
The Weller WT 1013 soldering station set includes the WT 1 supply unit, the WP 80 soldering iron and the WSR 201 safety rest. It is stackable and thus creates more space in the workplace. With an integrated usage sensor, the soldering tool switches off automatically. Specifications Channels 1 Voltage 230 V Power 95 W Display Backlit LCD Temperature range 50 °C - 450 °C Temperature stability ±2 °C Temperature accuracy ±9 °C Fuse 0.5 A Equipotential bonding on WT compatible on ESD-safe on Power cable EMEA Dimensions 149 x 138 x 101 mm Weight (approx.) 1.9 kg
€ 441,65
-

Velleman Whadda 3D Kerstboom Kit
De Whadda 3D Kerstboom Kit is bedoeld voor hobbyisten en beginners die geïnteresseerd zijn in solderen en elektronica. Met dit bouwpakket bouw u een feestelijke LED-kerstboom. Kenmerken 16 knipperende rode LED's Er zijn extra groene en gele LED's meegeleverd om uw boom aan te passen Kan worden opgehangen en door draden worden gevoerd Werkt op 12 V DC (bijvoorbeeld in auto's) Specificaties Laag stroomverbruik 8 mA Voeding 9 V-batterij (niet meegeleverd) Afmetingen 102 x 88 x 80 mm Gewicht 65 g Downloads Manual
€ 10,95
-
Velleman Whadda Elektronische Dobbelstenen
This electronic dice with 7 red LEDs rolls when the push button is released and works with a 9 V battery (not included). Downloads Manual
€ 6,50
-

Elektor Publishing Wireless Power Design
From Theory to Practical Applications in Wireless Energy Transfer and Harvesting Wireless power transmission has gained significant global interest, particularly with the rise of electric vehicles and the Internet of Things (IoT). It’s a technology that allows the transfer of electricity without physical connections, offering solutions for everything from powering small devices over short distances to long-range energy transmission for more complex systems. Wireless Power Design provides a balanced mix of theoretical knowledge and practical insights, helping you explore the potential of wireless energy transfer and harvesting technologies. The book presents a series of hands-on projects that cover various aspects of wireless power systems, each accompanied by detailed explanations and parameter listings. The following five projects guide you through key areas of wireless power: Project 1: Wireless Powering of Advanced IoT Devices Project 2: Wireless Powered Devices on the Frontline – The Future and Challenges Project 3: Wireless Powering of Devices Using Inductive Technology Project 4: Wireless Power Transmission for IoT Devices Project 5: Charging Robot Crawler Inside the Pipeline These projects explore different aspects of wireless power, from inductive charging to wireless energy transmission, offering practical solutions for real-world applications. The book includes projects that use simulation tools like CST Microwave Studio and Keysight ADS for design and analysis, with a focus on practical design considerations and real-world implementation techniques.
€ 39,95
Leden: € 35,96
-

Elektor Digital Wireless Power Design (E-book)
From Theory to Practical Applications in Wireless Energy Transfer and Harvesting Wireless power transmission has gained significant global interest, particularly with the rise of electric vehicles and the Internet of Things (IoT). It’s a technology that allows the transfer of electricity without physical connections, offering solutions for everything from powering small devices over short distances to long-range energy transmission for more complex systems. Wireless Power Design provides a balanced mix of theoretical knowledge and practical insights, helping you explore the potential of wireless energy transfer and harvesting technologies. The book presents a series of hands-on projects that cover various aspects of wireless power systems, each accompanied by detailed explanations and parameter listings. The following five projects guide you through key areas of wireless power: Project 1: Wireless Powering of Advanced IoT Devices Project 2: Wireless Powered Devices on the Frontline – The Future and Challenges Project 3: Wireless Powering of Devices Using Inductive Technology Project 4: Wireless Power Transmission for IoT Devices Project 5: Charging Robot Crawler Inside the Pipeline These projects explore different aspects of wireless power, from inductive charging to wireless energy transmission, offering practical solutions for real-world applications. The book includes projects that use simulation tools like CST Microwave Studio and Keysight ADS for design and analysis, with a focus on practical design considerations and real-world implementation techniques.
€ 32,95
Leden: € 29,66
-
Zhongdi ZD-11E PCB Holder
This adjustable circuit board holder is ideal for clamping PCB for soldering, desoldering or rework. Kenmerken 2 adjustable grips on a retractable stand to accommodate various board sizes. The adjustable clamps allow the PCB to rotate 360 degrees and stay set in any position. The base of this rigid metal stand features four rubber feet to ensure stability. Specificaties Product size 30 x 16.5 x 12.5 cm Max. holding size 20 x 14 cm Weight 450 g
€ 7,95
-

Zhongdi ZD-129A Magnifying LED Desk Lamp
Deze bureaulamp is ideaal voor op uw werkplek. Met de 5-inch 5D-lens kunnen de subtielste klusjes worden gedaan. De lamp heeft 80 geïntegreerde leds. Kenmerken Lens grootte: 5 inch Lens materiaal: glas Dioptrie: 5D Lichtbron: T5 22 W fluorescentielamp (80 stuks leds) Spanning: 220-240 V Vermogen: 22 W
€ 50,00
-

Zhongdi ZD-153A Soldeerdampafzuiger
De dampen die vrijkomen tijdens het solderen zijn mogelijk schadelijk voor de gezondheid. Deze soldeerdampafzuiger wordt stevig met een beugel aan de werktafel bevestigd. Dankzij de 3 assen kan de soldeerdampafzuiger perfect op de juiste plek worden gepositioneerd, d.w.z. direct boven de opstijgende soldeerdampen. De schadelijke soldeerdampen worden afgezogen door een krachtige maar stille ventilator, en gefilterd door een actief koolstoffilter. Kenmerken Zuigt soldeerdampen weg Absorbeert giftige gassen en dampen van soldeerwerkzaamheden Vermindert de kans op hoofdpijn, oogirritatie en misselijkheid Instelbare absorptiehoek voor nauwkeurige plaatsing Eenvoudig vervangbaar actief koolstoffilter Krachtige ventilator Laag geluidsniveau en lange levensduur Specificaties Absorptiecapaciteit: 1 m³/min (max.) Stroomverbruik: 23 W Voeding: 220-240 VAC Hoeveelheid actief koolstoffilter: 7 g Maximaal absorptiegewicht: 2 g Afmetingen: 220 x 270 x 168 mm (B x H x D) Gewicht: 1,4 kg
€ 52,95
-

Zhongdi ZD-8962B ESD-soldeerstation (70 W)
Het ZD-8962B soldeerstation heeft een instelbaar temperatuurbereik van 160°C tot 480°C met een uitgangsvermogen van 70 W. Dankzij het geïntegreerde verwarmingselement in de soldeerpunt bereikt het station de gewenste bedrijfstemperatuur in slechts 8 seconden. Een groot digitaal display biedt real-time monitoring en toont zowel de ingestelde doeltemperatuur als de actuele temperatuur van de soldeerbout voor nauwkeurige controle. Bovendien is het station ESD-veilig, waardoor gevoelige elektronische componenten volledig beschermd zijn tegen elektrostatische ontlading tijdens gebruik. Specificaties Vermogen 70 W Ingangsspanning 220-240 V AC/50 Hz Uitgangsspanning 20 V Temperatuurbereik 160°C – 480°C Opwarmtijd ~8 s Display Groot LED-display met twee regels voor weergave van de gewenste en actuele temperatuur Speciale functies ESD-bescherming, Slaapstand/energiebesparende functie, Schakelen tussen °C en °F Inbegrepen ZD-8962B Soldeerstation Soldeerbout Soldeerpunt N12-1 Soldeerbouthouder met koperborstel en spons Soldeerdraadhouder met loodvrije soldeerdraad (10 g) Stroomkabel (EU) Manual
€ 69,95€ 59,95
Beste prijs
-

Zhongdi ZD-8965 Desoldeerstation
De ZD-8965 is een digitaal temperatuurgecontroleerd desoldeerstation uitgerust met aardingsbeveiliging en een LCD-display voor temperatuurweergave. Ondanks het compacte en robuuste ontwerp is dit krachtige desoldeerstation eenvoudig met één hand te bedienen. De ZD-8965 is voorzien van een soldeerpistool met een geïntegreerd filter dat al het geëxtraheerde materiaal opvangt, waardoor continu gebruik mogelijk is door simpelweg de filters te vervangen. Bovendien is er een temperatuursensor in de punt ingebed, waardoor een snelle reactie op temperatuurschommelingen mogelijk is, voor consistente prestaties. Kenmerken Pas de temperatuur moeiteloos aan tussen 160°C en 480°C met de handige omhoog/omlaag-knoppen op het voorpaneel. LED-display om de temperatuur in °C/°F aan te geven Beschikt over een ergonomische pistoolgreep met een trekker voor snelle en efficiënte verwijdering van soldeerafval. Het verbeterde soldeerpistool is voorzien van een trigger aan de achterkant, waardoor het uitzonderlijk handig is om componenten te vervangen en te reinigen. Wordt geleverd met een hoogwaardig soldeerpistool en een stevige houder. Uitgerust met een krachtige verwarming die keer op keer zorgt voor optimale desoldeerprestaties. Specificaties Station Spanningsvoorziening 220-240 V Stroomverbrui 140 W Vakumdruk 600 mm HG Desoldeerpistool Stroomverbruik 140 W (18 V DC)Opwarmvermogen: 140 W Temperatuur 160-480°C Verwarmingselement Keramische verwarming Inbegrepen 1x ZD-8965 Desoldeerstation 2x Reserve soldeerpunten 3x Reinigingsnaalden voor desoldeertips 3x Reservefilter voor desoldeerpistool 1x Reservefilter voor desoldeerstation 1x Manual
€ 99,00
-

Zhongdi ZD-915 Desoldeerstation
De ZD-915 is een digitaal desoldeerstation met ESD-bescherming en digitale weergave van zowel de actuele als de ingestelde waarde op een LCD-scherm. Dit desoldeerstation heeft een hoog vermogen in een compacte en robuuste behuizing en maakt desolderen eenvoudig, omdat het met één hand kan worden bediend. De ZD-915 heeft een soldeerpistool dat een filter bevat dat eventueel opgezogen materiaal opvangt, zodat u alleen de filters hoeft te vervangen om weer door te kunnen gaan. Er zit ook een temperatuursensor in de punt, zodat temperatuurschommelingen snel kunnen worden opgevangen. Features De temperatuur is eenvoudig in te stellen met eenvoudige omhoog/omlaag knoppen. 140 W temperatuurgeregeld soldeerstation met instelbaar bereik van 160°C tot 480°C. Het desoldeerstation is speciaal ontworpen voor loodvrij desolderen. De zijkant van het station is voorzien van een standaard houder met spons. Een verlichte aan/uit-schakelaar is op de voorzijde aangebracht. Specificaties Station Voeding 220-240 V Vermogen 140 W Vacuum druk 600 mm HG Desoldeerpistool Vermogen 24 V AC 80 WOpwarmbegrenzing 130 W Temperatuur 160-480 °C Verwarmingselement Keramisch element Inbegrepen 1x ZD-915 Desoldeerstation 2x Reserve soldeerstift 3x Reinigingsnaald voor desoldeerstiften 1x Reserve filter voor desoldeerpistool 1x Handleiding
€ 107,00
-

Elektor Digital Zonne-energie (E-book)
Dit praktijkboek richt zich tot iedereen die geïnteresseerd is in de techniek, de planning, de opbouw en het mogelijke rendement van zonnestroominstallaties. Het boek bevat veel nuttige informatie, van de principes van het genereren van stroom uit zonlicht via de dimensionering van leidingen, de werking van omvormers, laadregelaars en accu's tot en met de beschrijving van complete autonome of netgekoppelde fotovoltaïsche generatoren. Zowel de leek als de (meer of minder ervaren) elektrotechnicus kan dit boek ook als leidraad gebruiken bij de aansluiting van een generator op het elektriciteitsnet conform de voorschriften van de netbeheerder. Het boek bevat bovendien wetenswaardigheden over veiligheidsbepalingen en over de belasting door een deugdelijke constructie van fotovoltaïsche generatoren. Ontwerp, planning en montage worden aan de hand van een groot aantal illustraties gedetailleerd en op een ook voor leken begrijpelijke wijze behandeld. Bovendien geeft het boek waardevolle informatie over de kosten en eventuele opbrengst van zonnestroomgeneratoren. Tenslotte bevat dit boek een overzicht van belangrijke internet-sites waar u gratis software kunt downloaden voor het ontwerp en de dimensionering van netgekoppelde en autonome fotovoltaïsche installaties. U hoeft dus geen kostbare PC-programmatuur aan te schaffen!
€ 19,95
Leden: € 17,96


