Bestsellers
-
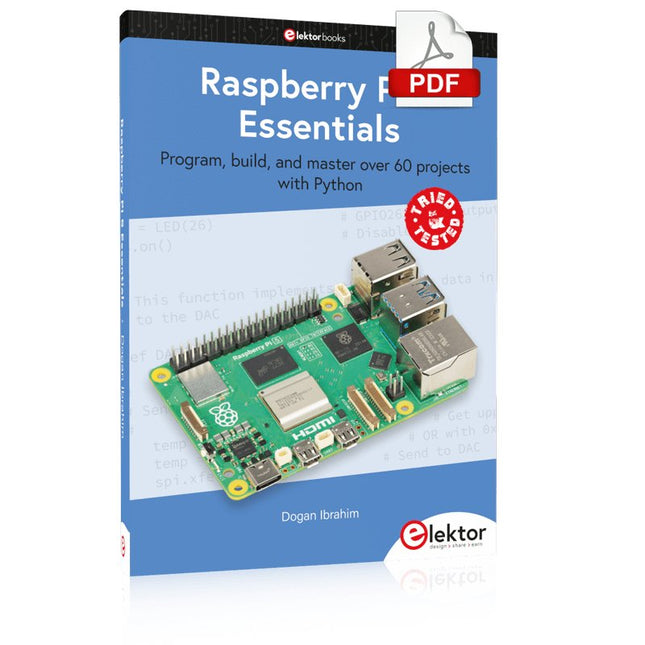
Elektor Digital Raspberry Pi 5 Essentials (E-book)
Program, build, and master over 60 projects with Python The Raspberry Pi 5 is the latest single-board computer from the Raspberry Pi Foundation. It can be used in many applications, such as in audio and video media centers, as a desktop computer, in industrial controllers, robotics, and in many domestic and commercial applications. In addition to the well-established features found in other Raspberry Pi computers, the Raspberry Pi 5 offers Wi-Fi and Bluetooth (classic and BLE), which makes it a perfect match for IoT as well as in remote and Internet-based control and monitoring applications. It is now possible to develop many real-time projects such as audio digital signal processing, real-time digital filtering, real-time digital control and monitoring, and many other real-time operations using this tiny powerhouse. The book starts with an introduction to the Raspberry Pi 5 computer and covers the important topics of accessing the computer locally and remotely. Use of the console language commands as well as accessing and using the desktop GUI are described with working examples. The remaining parts of the book cover many Raspberry Pi 5-based hardware projects using components and devices such as LEDs and buzzers LCDs Ultrasonic sensors Temperature and atmospheric pressure sensors The Sense HAT Camera modules Example projects are given using Wi-Fi and Bluetooth modules to send and receive data from smartphones and PCs, and sending real-time temperature and atmospheric pressure data to the cloud. All projects given in the book have been fully tested for correct operation. Only basic programming and electronics experience are required to follow the projects. Brief descriptions, block diagrams, detailed circuit diagrams, and full Python program listings are given for all projects described.
€ 32,95
Leden: € 29,66
-

FNIRSI FNIRSI HRM-10 Interne weerstands- en spanningstester voor batterijen
De FNIRSI HRM-10 is een draagbare, zeer nauwkeurige interne weerstands- en spanningstester voor batterijen. Dit apparaat biedt echte vierdraadsmetingen en is ontworpen voor zowel nauwkeurigheid als gebruiksgemak. Het meet automatisch tegelijkertijd de interne weerstands- en spanningswaarden en geeft de resultaten op het HD-kleurenscherm weer. Gebruikers hebben de mogelijkheid om het spannings- en weerstandsbereik handmatig aan te passen aan hun behoeften. Het apparaat bevat ook een sorteermodus die automatisch de goede en slechte batterijen filtert op basis van door de gebruiker ingestelde drempels. Bovendien ondersteunt het de opslag van historische gegevens en is het mogelijk meetgegevens in tabelformaat te exporteren. Kenmerken Hoge meetnauwkeurigheid Tabelgegevens exporteren Meetresultaten automatisch evalueren 8 drempelinstellingen HD-kleurenscherm Opvouwbare standaard 1000 mAh lithiumbatterij Specificaties Spanning Weerstand Meetbereik 0-100 V (DC) 0-200 Ω Nauwkeurigheid ±0,5% ±0,5% Uitrusting Automatisch, 1 V, 10 V, 100 V Automatisch, 20 mΩ, 200 mΩ, 2 Ω, 20 Ω, 200 Ω Instrumenttestsignaalfrequentie 1 Khz (AC) Oplaadbaar USB-C (5 V/1 A) Ingebouwde batterij 1000 mAh lithiumbatterij Gebruikerskalibratie Ja Sorteermodus Ja Geschiedenisrecord Ja Export van opgenomen gegevens Ja Werkomgeving –10°C tot +45°C, relatieve vochtigheid <80% Opslagomgeving –20°C tot +80°C, relatieve vochtigheid <80% Afmetingen 158,7 x 80,5 x 28,4 mm Gewicht 225 g Inbegrepen 1x FNIRSI HRM-10 interne weerstandstester 1x Clip-testlijn 1x USB-C datakabel 1x Manual Downloads Manual Firmware V0.3
€ 49,95
-

Elektor Digital Nucleo Boards Programming with the STM32CubeIDE (E-book)
Hands-on in more than 50 projects STM32 Nucleo family of processors are manufactured by STMicroelectronics. These are low-cost ARM microcontroller development boards. This book is about developing projects using the popular STM32CubeIDE software with the Nucleo-L476RG development board. In the early Chapters of the book the architecture of the Nucleo family is briefly described. The book covers many projects using most features of the Nucleo-L476RG development board where the full software listings for the STM32CubeIDE are given for each project together with extensive descriptions. The projects range from simple flashing LEDs to more complex projects using modules, devices, and libraries such as GPIO, ADC, DAC, I²C, SPI, LCD, DMA, analogue inputs, power management, X-CUBE-MEMS1 library, DEBUGGING, and others. In addition, several projects are given using the popular Nucleo Expansion Boards. These Expansion Boards plug on top of the Nucleo development boards and provide sensors, relays, accelerometers, gyroscopes, Wi-Fi, and many others. Using an expansion board together with the X-CUBE-MEMS1 library simplifies the task of project development considerably. All the projects in the book have been tested and are working. The following sub-headings are given for each project: Project Title, Description, Aim, Block Diagram, Circuit Diagram, and Program Listing for the STM32CubeIDE. In this book you will learn about STM32 microcontroller architecture; the Nucleo-L476RG development board in projects using the STM32CubeIDE integrated software development tool; external and internal interrupts and DMA; DEBUG, a program developed using the STM32CubeIDE; the MCU in Sleep, Stop, and in Standby modes; Nucleo Expansion Boards with the Nucleo development boards. What you need a PC with Internet connection and a USB port; STM32CubeIDE software (available at STMicroelectronics website free of charge) the project source files, available from the book’s webpage hosted by Elektor; Nucleo-L476RG development board; simple electronic devices such as LEDs, temperature sensor, I²C and SPI chips, and a few more; Nucleo Expansion Boards (optional).
€ 39,95
Leden: € 35,96
-

Elektor Publishing PLC Programming with the Raspberry Pi and the OpenPLC Project
ModbusRTU and ModbusTCP examples with the Arduino Uno and ESP8266 Introduction to PLC programming with OpenPLC, the first fully open source Programmable Logic Controller on the Raspberry Pi, and Modbus examples with Arduino Uno and ESP8266 PLC programming is very common in industry and home automation. This book describes how the Raspberry Pi 4 can be used as a Programmable Logic Controller. Before taking you into the programming, the author starts with the software installation on the Raspberry Pi and the PLC editor on the PC, followed by a description of the hardware. You'll then find interesting examples in the different programming languages complying with the IEC 61131-3 standard. This manual also explains in detail how to use the PLC editor and how to load and execute the programs on the Raspberry Pi. All IEC languages are explained with examples, starting with LD (Ladder Diagram) over ST (Structured Control Language) to SFC (Special Function Chart). All examples can be downloaded from the author's website. Networking gets thorough attention too. The Arduino Uno and the ESP8266 are programmed as ModbusRTU or ModbusTCP modules to get access to external peripherals, reading sensors and switching electrical loads. I/O circuits complying with the 24 V industry standard may also be of interest for the reader. The book ends with an overview of commands for ST and LD. After reading the book, the reader will be able to create his own controllers with the Raspberry Pi.
€ 39,95
Leden: € 35,96
-

The Elektor RF & Communications Collection (USB-stick)
Op deze USB-stick vindt u een selectie van meer dan 350 artikelen over RF, radio en communicatie, gepubliceerd in Elektor Magazine. De inhoud bestaat uit zowel achtergrondartikelen als projecten met de volgende onderwerpen: Basisradiogerelateerde circuits, maar ook complexere circuits zoals filters, oscillatoren en versterkers. Ontwerp, constructie en theorie van antennes voor het efficiënt verzenden en ontvangen van radiosignalen. Ontwerp en analyse van RF-circuits, waaronder filters, mixers, PLL's en frequentiesynthesizers. Hulpmiddelen en technieken voor het voorspellen van de voortplantingspaden van radiogolven en het meten van de RF-signaalsterkte. Technieken voor het verwerken van digitale signalen in RF-systemen, inclusief modulatie- en demodulatiemethoden. Projecten op radio-ontvangers, AM, FM, SSB, CW, DRM, DAB, DAB+, Software Defined Radio en meer. Projecten over Wi-Fi, Bluetooth, LoRaWAN en meer. U kunt de artikelzoekfunctie gebruiken om specifieke inhoud in de volledige tekst te vinden. De resultaten worden altijd weergegeven als vooraf opgemaakte PDF-documenten. U kunt Adobe Reader gebruiken om door artikelen te bladeren, en u kunt de geïntegreerde zoekfuncties van Adobe Reader gebruiken om exemplaren van afzonderlijke woorden en uitdrukkingen te vinden.
€ 49,95€ 39,95Beste prijs
-
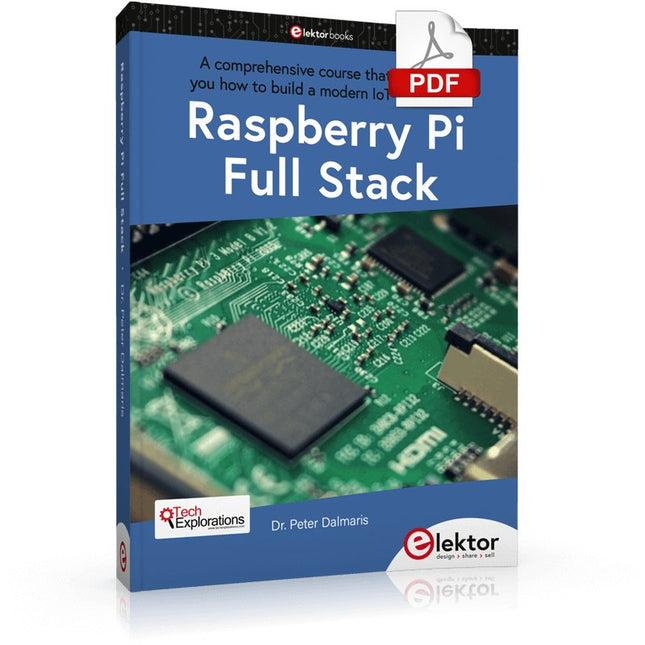
Elektor Digital Raspberry Pi Full Stack (E-book)
Dit boek neemt u mee op een wervelende tour van full-stack web applicatie ontwikkeling met behulp van Raspberry Pi. U leert hoe u een applicatie vanaf de grond kunt opbouwen. U zult ervaring en kennis opdoen van technologieën waaronder: Het Linux-besturingssysteem en de commandoregel. De programmeertaal Python. De Raspberry Pi General Purpose Input Output pins (GPIOs). De Nginx webserver. Flask Python microkader voor webtoepassingen. JQuery en CSS voor het maken van gebruikersinterfaces. Omgaan met tijdzones. Creëren van grafieken met Plotly en Google Charts. Gegevensregistratie met Google Sheet. Applets ontwikkelen met IFTTT. Het beveiligen van uw applicatie met SSL. Sms-berichten ontvangen op je telefoon met Twilio. Dit boek leert u ook hoe u een draadloze Arduino-sensorknooppunt op afstand kunt instellen en er gegevens van kunt verzamelen. Uw Raspberry Pi webapplicatie zal in staat zijn om Arduino node data te verwerken op dezelfde manier als het data verwerkt van zijn onboard sensor. Raspberry Pi Full Stack leert u veel vaardigheden die essentieel zijn voor het bouwen van Web- en Internet of Things-toepassingen. De applicatie die u in dit project zult bouwen, is een platform waarop u kunt uitbreiden. Dit is slechts het begin van wat je kunt doen met een Raspberry Pi en de software en hardware componenten die je zult leren kennen. Dit boek wordt ondersteund door de auteur via een speciale discussieruimte.
€ 34,95
Leden: € 31,46
-

Elektor Publishing High-End Tube Amplifier Design
A Toolbox for Audio Lovers and Engineers Without any ambition to reach scientific levels, this book aims to be a toolbox for both audio lovers and high-end equipment designers. The elementary theory presented is the bare minimum for readers to grasp the operation and practical use of electrical, electromagnetic, physics, and electronic operations available in the designers’ toolbox. Each tool is explained in a minimum of words and theory without needless coverage of underlying equations or figures. The book chapters guide you through the process of designing quality amplifiers with vacuum tubes, from the very beginning, considering both technical and subjective requirements – in theory and practice. The book is a compilation of the author’s notes used in his professional and educational career but was nevertheless primarily written as a result of true love for the audiophile hobby.
€ 69,95
Leden: € 62,96
-
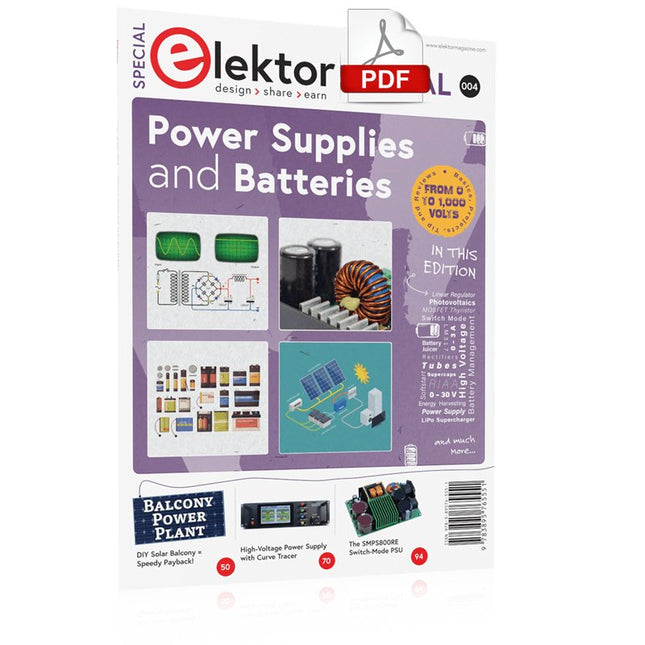
Elektor Digital Elektor Special: Power Supplies and Batteries (PDF)
Whatever the methods or even then financial means you have to make your circuits work, the power supply should rank high if not Number One in your considerations. The design block simply called “power supply” is hugely underrated both in electronics creation and repair. Yet, the “PSU” has enormous diversity and comes in wildly differing guises like AC/DC, generator, battery (rechargeable or not), PV panel, benchtop, linear or switch-mode, to mention but a few. The output ranges are also staggering like nano-amps to kiloamps and the same for voltages.This special covers the features and design aspects of power supplies.ContentsBasics Battery ManagementWhat to be aware of when using (Lithium) batteries. Fixed-Voltage Power Supply using Linear RegulatorsThe best result right after batteries. Light Energy HarvestingA small solar panel is used in an energy harvesting project to manage and charge four AAA cells. Mains Powered Adapter DesignBasic circuits and tips for transformers, rectification, filtering and stabilization. LM317 Soft StartThe high inrush current pulse should be avoided. Controllable RectifiersSome suggestions to keep the power loss in the linear regulator as low as possible. Components Worksheet: The LM117 / LM217 / LM317 Voltage Regulators SupercapsLow voltage but lots of current… or not? Reviews JOY-iT RD6006 Benchtop Power Supply Kit Siglent SDL1020X Programmable DC Electronic Load Projects Balcony Power PlantDIY solar balcony = speedy payback! DIY LiPo Supercharger KitFrom handcrafted to mass market Dual-Anode MOSFET ThyristorFaster and less wasteful than the old SCR Battery JuicerDo not throw away, squeeze! High-Voltage Power Supply with Curve TracerGenerate voltages up to 400 V and trace characteristics curves for valves and transistors High Voltage Supply for RIAAFor RIAA tube preamps and other applications. MicroSupplyA lab power supply for connected devices Phantom Power Supply using Switched CapacitorsVoltage tripler using three ICs The SMPS800RE Switch-Mode Supply for the Elektor Fortissimo-100Reliable, light and affordable Soft Start for PSUBe nice to your power supply – and its load UniLab 20-30 V, 3 A compact switch-mode lab power supply Tips Soft Start for Step-Down Switching Regulators Low Loss Current Limit Powerbank Surprise A Virtual Ground Battery Maintainer Battery Pack Discharger Connecting Voltage Regulators in Parallel
€ 11,95
Leden: € 10,76
-
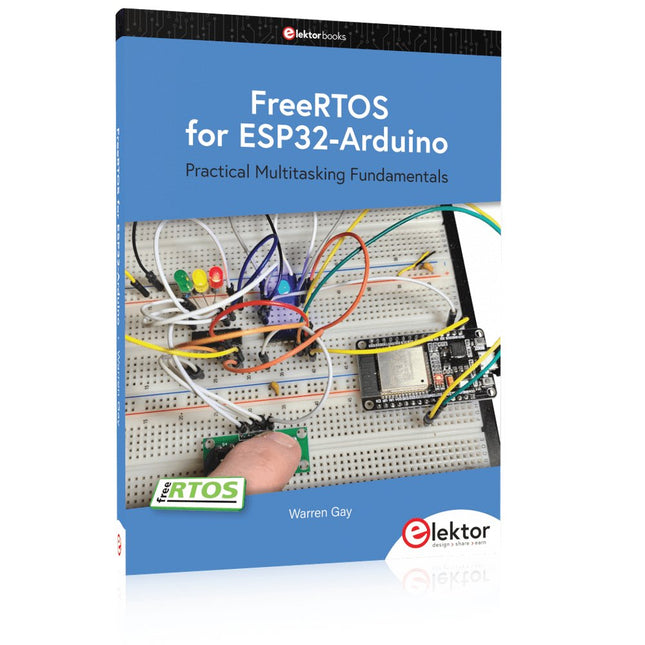
Elektor Publishing FreeRTOS for ESP32-Arduino
Practical Multitasking Fundamentals Programming embedded systems is difficult because of resource constraints and limited debugging facilities. Why develop your own Real-Time Operating System (RTOS) as well as your application when the proven FreeRTOS software is freely available? Why not start with a validated foundation? Every software developer knows that you must divide a difficult problem into smaller ones to conquer it. Using separate preemptive tasks and FreeRTOS communication mechanisms, a clean separation of functions is achieved within the entire application. This results in safe and maintainable designs. Practicing engineers and students alike can use this book and the ESP32 Arduino environment to wade into FreeRTOS concepts at a comfortable pace. The well-organized text enables you to master each concept before starting the next chapter. Practical breadboard experiments and schematics are included to bring the lessons home. Experience is the best teacher. Each chapter includes exercises to test your knowledge. The coverage of the FreeRTOS Application Programming Interface (API) is complete for the ESP32 Arduino environment. You can apply what you learn to other FreeRTOS environments, including Espressif’s ESP-IDF. The source code is available from GitHub. All of these resources put you in the driver’s seat when it is time to develop your next uber-cool ESP32 project. What you will learn: How preemptive scheduling works within FreeRTOS The Arduino startup “loopTask” Message queues FreeRTOS timers and the IDLE task The semaphore, mutex, and their differences The mailbox and its application Real-time task priorities and its effect Interrupt interaction and use with FreeRTOS Queue sets Notifying tasks with events Event groups Critical sections Task local storage The gatekeeper task
€ 49,95
Leden: € 44,96
-
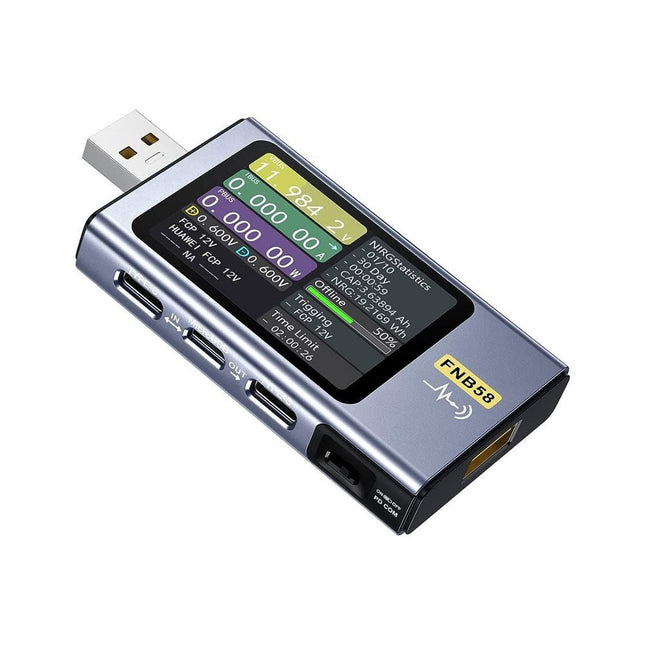
FNIRSI FNIRSI FNB58 USB-tester (met Bluetooth)
De FNB58 USB-tester (met Bluetooth) is een uitgebreide en zeer nauwkeurige USB spannings- en stroommeter. Hij beschikt over een 2,0" full-color HD TFT-display, ingebouwde USB-A, micro-USB en USB-C interface. Met dit apparaat kunt u de voeding of het stroomverbruik van producten meten, of het laadvermogen van mobiele telefoons en voedingen bepalen. Ook kunt u het snellaad protocol van laders in kaart brengen. Kenmerken USB-A en USB-C interface 2,0 inch HD-display Alle gegevens in één oogopslag Brede compatibiliteit Ultra nauwkeurige gegevensdetectie Speel met snellaad technologie Automatische protocol detectie (PD2.0, 3.0, 3.1, PPS, QC2.0, 3.0, FCP, SCP, AFC, PE, DASH VOOC, SuperVOOC en meer) Eenvoudige gebruikersinterface, eenvoudig te bedienen 4 functiecurve weergaves (real-time spannings- en stroomcurve, offline curve-opname, D+/D- spanningscurve, snelle meting van de rimpelspanning van de voeding) Kabeldetectie 10 groepen berekeningen van de accucapaciteit energieopslag Op PC aan te sluiten voor datalogging en firmware-updates Bluetooth-app voor Android-apparaten Specificaties Spanningsbereik 4-28 V Stroombereik 0-7 A Vermogensbereik 0-120 W Equivalente waardes interne weerstand bij belasting 0-9999,9 ? D+/D- spanning 0-3,3 V Capaciteit 0-9999,99 Ah Stroomverbruik 0-9999,99 Wh Kabel weerstand 0-9999,9 ? Interfaces micro-USB, USB-A, USB-C Afmetingen 42 x 13 x 82 mm Downloads Manual Firmware V0.68
€ 49,95
-
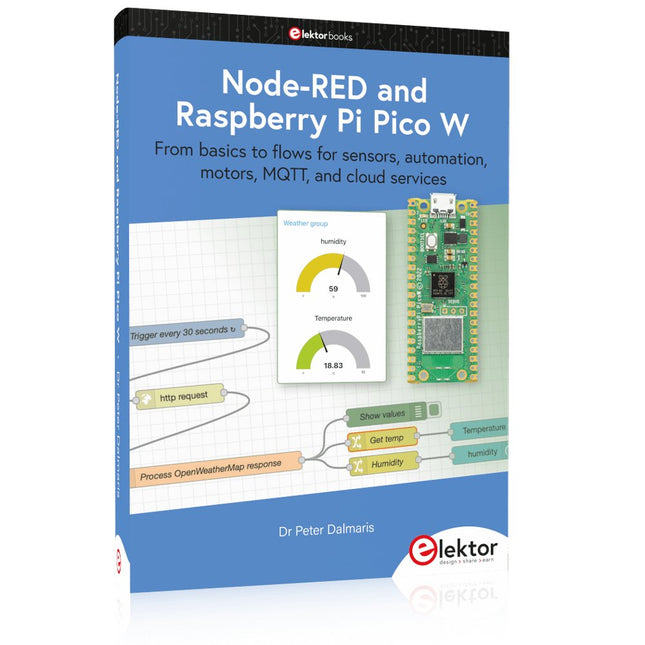
Elektor Publishing Node-RED and Raspberry Pi Pico W
From basics to flows for sensors, automation, motors, MQTT, and cloud services This book is a learning guide and a reference. Use it to learn Node-RED, Raspberry Pi Pico W, and MicroPython, and add these state-of-the-art tools to your technology toolkit. It will introduce you to virtual machines, Docker, and MySQL in support of IoT projects based on Node-RED and the Raspberry Pi Pico W. This book combines several elements into a platform that powers the development of modern Internet of Things applications. These elements are a flow-based server, a WiFi-enabled microcontroller, a high-level programming language, and a deployment technology. Combining these elements gives you the tools you need to create automation systems at any scale. From home automation to industrial automation, this book will help you get started. Node-RED is an open-source flow-based development tool that makes it easy to wire together devices, APIs, and online services. Drag and drop nodes to create a flowchart that turns on your lights at sunset or sends you an email when a sensor detects movement. Raspberry Pi Pico W is a version of the Raspberry Pi Pico with added 802.11n Wi-Fi capability. It is an ideal device for physical computing tasks and an excellent match to the Node-RED. Quick book facts Project-based learning approach. Assumes no prior knowledge of flow-based programming tools. Learn to use essential infrastructure tools in your projects, such as virtual machines, Docker, MySQL and useful web APIs such as Google Sheets and OpenWeatherMap. Dozens of mini-projects supported by photographs, wiring schematics, and source code. Get these from the book GitHub repository. Step-by-step instructions on everything. All experiments are based on the Raspberry Pi Pico W. A Wi-Fi network is required for all projects. Hardware (including the Raspberry Pi Pico W) is available as a kit. Downloads GitHub
€ 49,95
Leden: € 44,96
-

Elektor Digital Programming with Node-RED (E-book)
Design IoT Projects with Raspberry Pi, Arduino and ESP32 The Internet of Things (IoT) is becoming a major application area for embedded systems. As a result, more and more people are becoming interested in learning about embedded design and programming. Technical colleges and universities are moving away from legacy 8 and 16-bit microcontrollers and are introducing 32-bit embedded microcontrollers to their curriculums. Many IoT applications demand precision, high processing power, and low power consumption. Produced by IBM, Node-RED is an open-source visual editor for wiring the Internet of Things. Node-RED comes with a large number of nodes to handle a multitude of tasks. The required nodes are selected and joined together to perform a particular task. Node-RED is based on flow type programming where nodes are configured and joined together to form an application program. There are nodes for performing complex tasks, including web access, Twitter, E-mail, HTTP, Bluetooth, MQTT, controlling GPIO ports, etc. One particularly nice aspect of Node-RED is that the programmer does not need to learn how to write complex programs. For example, an email can be sent by simply joining nodes together and writing only a few lines of code. The aim of this book is to teach how Node-RED can be used in projects. The main hardware platform used with most of the projects in this book is Raspberry Pi 4. Chapters are included to show how Node-RED can be also be used with Arduino Uno, ESP32 DevKitC, and the ESP8266 NodeMCU microcontroller development boards.
€ 34,95
Leden: € 31,46
-
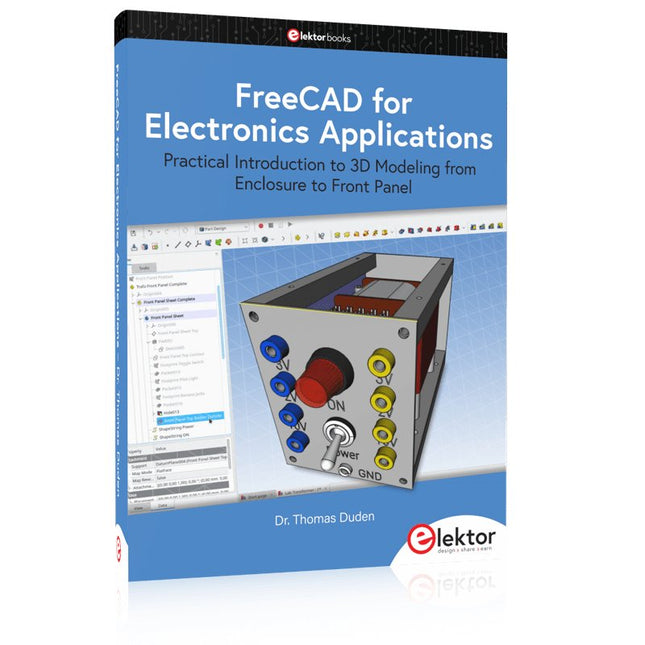
Elektor Publishing FreeCAD for Electronics Applications
Practical Introduction to 3D Modeling from Enclosure to Front Panel Embedding a vintage component, creating a professional looking home for a circuit board, or even designing a complex apparatus complete with a chassis – these and many other challenges turn into a stimulating pleasure with FreeCAD. Once you have internalized the basic processes, there are virtually no limits to your imagination. Starting to use a new software is never straightforward – especially with a tool as versatile as FreeCAD. Manageable, but at the same time easily usable individual components provide the starting point in this book. Putting these components together later results in assemblies. In the FreeCAD universe, a workable trajectory is demonstrated. The described procedure is illustrative so the examples are easily applied to custom tasks. The devices were made by the author and illustrated with photos. Creating a 3D design is requiring some effort but the initial investment pays off soon. Besides the impressive spatial representation of the projects, the extracted drawings yield a solid base for documentation and production. Extended FreeCAD capabilities like the unfolding of sheet metal parts enormously add to efficiency and pushes models forward into practical assembly. Soon you will definitely not want to do without FreeCAD!
€ 44,95
Leden: € 40,46
-

Elektor Bundles 555 Timer Projecten (Bundel)
Deze bundel gaat helemaal over het ontwerpen van projecten gebaseerd op de 555 timer IC. Het boek bevat meer dan 45 volledig geteste en gedocumenteerde projecten. Samen met de kit, die meer dan 130 through-hole componenten bevat, kunt u alle beschreven projecten bouwen op een breadboard. De opzet maakt het ook gemakkelijk om de projecten aan te passen en ermee te experimenteren. Meer dan 45 builds voor de legendarische 555 Chip (en de 556, 558) Enkele van de projecten in het boek zijn: Afwisselend knipperende twee LED's De knippersnelheid van de LED's wijzigen Aan/uit-schakelaar van de aanraaksensor In-/uitschakelvertraging Lichtafhankelijk geluid Donker/lichtschakelaar Tone Burst-generator Timer voor lange duur LED's achtervolgen LED-roulettespel Verkeerslichten Continuïteitstester Elektronisch slot Schakel over naar debouncen van contacten Elektronisch speelgoedorgel Alarmsysteem met meerdere sensoren Metronoom Spanningsvermenigvuldigers Elektronische dobbelstenen Weergaveteller met 7 segmenten Motorbesturing Dobbelstenen met 7 segmenten Elektronische sirene Diverse andere projecten Kit-inhoud Weerstanden 1x 15 kΩ 1x 68 kΩ 2x 47 kΩ 1x 82 kΩ 2x 820 Ω 1x 8,2 kΩ 3x 10 kΩ 1x 1,8 kΩ 1x 6,8 kΩ 14x 2,2 kΩ 10x 680 Ω 1x 27 kΩ 1x 5,6 kΩ 1x 560 kΩ 1x 4,7 kΩ 1x 3,3 kΩ 3x 33 kΩ 1x 36 kΩ 2x 100 kΩ 5x 1 kΩ 1x 3,9 kΩ 2x 56 kΩ 2x 12 kΩ 1x 10 kΩ potentiometer 1x 1 MΩ potentiometer 2x 50 kΩ potentiometer 3x 20 kΩ potentiometer 1x 10 kΩ potentiometer 1x 10 kΩ potentiometer 1x 50 kΩ potentiometer 1x 100 kΩ potentiometer 1x 50 kΩ potentiometer Condensatoren 1x 0,33 μF 1x 1 μF 1x 10 nF 1x 22 nF 1x 47 nF 1x 100 nF 1x 10 μF elektrolytisch 1x 33 μF elektrolytisch 2x 100 μF elektrolytisch LED's 10x 5 mm rode LED 10x 3 mm rode LED 3x 3 mm gele LED 3x 3 mm groene LED 1x 7-segment-LED met gemeenschappelijke kathode Semiconductors 3x 555 timer 1x CD4017 counter 1x CD4026 counter 1x CD4011 NAND-poort 4x 1N4148-diode 1x IRFZ46N MOSFET 1x Thermistor 1x Lichtafhankelijke weerstand (LDR) Diverse 1x Passieve buzzer 1x Actieve buzzer 1x SG90 servo 1x 8 Ω miniluidspreker 1x 9 V DC borstelmotor 1x 5 V relais 1x 9 V batterijclip 7x Drukknopschakelaars 1x Broodplank 1x Breadboard-jumperdraden
€ 69,95€ 54,95Beste prijs
-

Elektor Bundles Arduino UNO Q (Bundel)
Deze bundel bevat de Arduino UNO Q (2 GB) en het nieuwe boek "Arduino UNO Q and AI". De Arduino UNO Q is het eerste UNO-bord met een hybride dual-brain-architectuur, waarbij een krachtige Linux-processor wordt gecombineerd met een realtime-microcontroller – zo worden geavanceerde rekenkracht en nauwkeurige besturing op één bord samengebracht. Aangedreven door een Qualcomm Dragonwing QRB2210 MPU met Debian Linux en een STM32U585 MCU voor realtime taken, is de UNO Q gebouwd voor toepassingen van de volgende generatie. Van Edge Computing en AI tot robotica en automatisering, het levert hoge prestaties zonder in te boeten aan gebruiksgemak. Sluit gewoon uw randapparatuur aan en ga aan de slag – er is geen extra hardware nodig. Kenmerken Dual-core architectuur: Linux MPU + realtime MCU Qualcomm Dragonwing QRB2210 met ondersteuning voor Debian Linux STM32U585-microcontroller voor deterministische besturing Voert Arduino-schetsen uit via Zephyr OS Ideaal voor AI, IoT, robotica en industriële projecten Specificaties Microprocessor (MPU) Qualcomm Dragonwing QRB2210:Quad-core Arm Cortex-A53 @ 2,0 GHzAdreno GPU 3D-grafische accelerator2× ISP (13 MP + 13 MP of 25 MP) @ 30 fps Microcontroller (MCU) STM32U585Arm Cortex-M33 tot 160 MHz2 MB flashgeheugen786 KB SRAM RAM 2 GB LPDDR4 Voeding Via USB-C-connector 5 V max bij 3 AIngangsspanning (VIN): 7-24 V Geheugen 16 GB eMMC USB 1× USB-C-poort met host/device-rolschakeling, stroomrolschakeling en video-uitgang Connectiviteit Wi-Fi 5 (2,4/5 GHz) met ingebouwde antenneBluetooth 5.1 met ingebouwde antenne antenne Interfaces I²C/I³CSPIPWMCANUARTPSSIGPIOJTAGADC Video Ondersteuning voor video-uitvoer via USB-CMIPI DSI-pinnen op JMEDIA-header Extra 4× RGB-LED's die door de gebruiker kunnen worden aangestuurd8×13 blauwe LED-matrix1× Qwiic-connector, spanning 3V3, I²C1× drukknop voor de gebruikerJCTL: MPU Remote Debug connector Audio Microfoon IN / Hoofdtelefoon UIT / Lijn UIT op JMISC MPU-besturingssysteem Linux Debian OS met upstream-ondersteuning Realtime-besturingssysteem Arduino Core op Zephyr OS Containerisatie Ondersteuning voor Docker en Docker Compose Ondersteunde besturingssystemen voor Arduino App Lab Windows: Windows 10 of later (64-bit)macOS: macOS 11 of later (64-bit)Linux: Ubuntu 22.04 of later en Debian Trixie (64-bit) Afmetingen 68,85 × 53,34 mm (UNO-vormfactor) Downloads Datasheet User Manual Pinout Schematics Boek: Arduino UNO Q and AI – Learn to Build Intelligent Embedded Systems Bouw slimmere embedded systemen met de Arduino UNO Q. Dit boek biedt u de tools, kennis en het vertrouwen om ideeën om te zetten in intelligente, werkende oplossingen met het Arduino UNO Q-platform. Ontdek hoe u intelligente embedded systemen kunt bouwen met de Arduino UNO Q en AI. Ontgrendel het volledige potentieel van de Arduino UNO Q, een next-generation platform dat de realtime kracht van de STM32U585-microcontroller combineert met de flexibiliteit van een Qualcomm Dragonwing QRB2210-microprocessor. Leer hoe u snel realistische toepassingen kunt prototypen met de Arduino IDE voor low-level embedded besturing en Python in Arduino App Lab voor high-level ontwikkeling. Bouw vertrouwen op met praktische projecten die u stap voor stap begeleiden van basisfunctionaliteiten tot volledig werkende systemen. Verken kant-en-klare, op AI gebaseerde Arduino App Lab-voorbeelden en ontdek hoe deze uw ontwikkeling kunnen versnellen en de time-to-market verkorten. Zet uw eerste stappen in de wereld van Edge AI met een duidelijke en praktische introductie tot Edge Impulse Studio – geen eerdere AI-ervaring vereist. Volg een volledige, realistische workflow om een Keyword Spotting AI-toepassing te ontwikkelen, inclusief dataverzameling, modeltraining, optimalisatie en on-device inferentie met behulp van Edge Impulse Studio. Overbrug de kloof tussen embedded systemen en machine learning en leer hoe u intelligentie direct op uw hardware kunt implementeren. Perfect voor embedded engineers, docenten, studenten en makers die voorop willen blijven lopen in AI-gedreven productontwikkeling. Deze bundel bevat: Arduino UNO Q (2 GB) (t.w.v. € 50) Boek: Arduino UNO Q and AI (t.w.v. € 35)
€ 84,95€ 74,95Beste prijs
-

Elektor Digital LTspice Essentials (E-book)
An Introduction to Circuit Simulation LTspice, developed by Analog Devices, is a powerful, fast, and free SPICE simulator, schematic capture, and waveform viewer with a large database of components supported by SPICE models from all over the world. Drawing a schematic in LTspice is easy and fast. Thanks to its powerful graphing features, you can visualize the voltages and currents in a circuit, and also the power consumption of its components and much more. This book is about learning to design and simulate electronic circuits using LTspice. Among others, the following topics are treated: DC and AC circuits Signal diodes and Zener diodes Transistor circuits including oscillators Thyristor/SCR, diac, and triac circuits Operational amplifier circuits including oscillators The 555 timer IC Filters Voltage regulators Optocouplers Waveform generation Digital logic simulation including the 74HC family SPICE modeling LTspice is a powerful electronic circuit simulation tool with many features and possibilities. Covering them all in detail is not possible in a book of this size. Therefore, this book presents the most common topics like DC and AC circuit analysis, parameter sweeping, transfer functions, oscillators, graphing, etc. Although this book is an introduction to LTspice, it covers most topics of interest to people engaged in electronic circuit simulation. The book is aimed at electronic/electrical engineers, students, teachers, and hobbyists. Many tested simulation examples are given in the book. Readers do not need to have any computer programming skills, but it will help if they are familiar with basic electronic circuit design and operation principles. Readers who want to dive deeper can find many detailed tutorials, articles, videos, design files, and SPICE circuit models on the Internet. All the simulation examples used in the book are available as files at the webpage of this book. Readers can use these example circuits for learning or modify them for their own applications.
€ 32,95
Leden: € 29,66
-
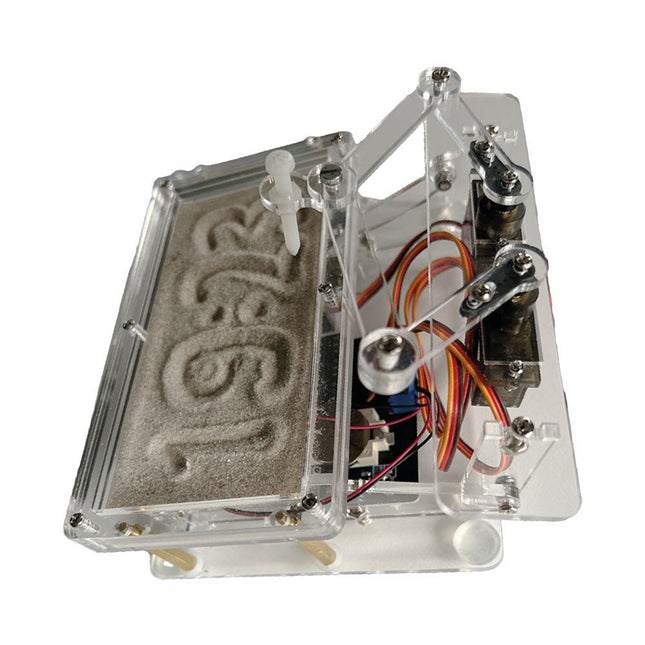
Elektor Labs Elektor Zandklok voor Raspberry Pi Pico
Een op de Raspberry Pi Pico gebaseerde Eye Catcher Een standaard zandklok laat meestal slechts zien hoe de tijd verstrijkt. Deze door een Raspberry Pi Pico aangestuurde zandklok toont daarentegen de exacte tijd door de vier cijfers voor uren en minuten in een zandlaag te "graveren". Na een vooraf ingestelde periode wordt het zand door twee trilmotoren vlak getrild en begint alles weer van voren af aan. Het hart van de zandklok wordt gevormd door twee servomotoren, die via een pantograafmechanisme een schrijfpen aandrijven. Een derde servomotor tilt deze pen op en neer. Het zandbakje is voorzien van twee trilmotoren om het zand weer vlak te trillen. Het elektronische deel van de zandklok bestaat uit een Raspberry Pi Pico en een RTC/driverbord met een real-time klok, plus drivercircuits voor de servomotoren. Een gedetailleerde bouwhandleiding is beschikbaar via download. Kenmerken Afmetingen: 135 x 110 x 80 mm Bouwtijd: ca. 1,5 tot 2 uur Inbegrepen 3x Voorgesneden acrylaatplaten met alle mechanische onderdelen 3x Mini servomotoren 2x Trilmotoren 1x Raspberry Pi Pico 1x RTC/driverkaart met geassembleerde onderdelen Moeren, boutjes, afstandhouders en draden voor de montage Fijnkorrelig wit zand
€ 49,95€ 39,95Beste prijs
-

Elektor Digital FreeRTOS for ESP32-Arduino (E-book)
Practical Multitasking Fundamentals Programming embedded systems is difficult because of resource constraints and limited debugging facilities. Why develop your own Real-Time Operating System (RTOS) as well as your application when the proven FreeRTOS software is freely available? Why not start with a validated foundation? Every software developer knows that you must divide a difficult problem into smaller ones to conquer it. Using separate preemptive tasks and FreeRTOS communication mechanisms, a clean separation of functions is achieved within the entire application. This results in safe and maintainable designs. Practicing engineers and students alike can use this book and the ESP32 Arduino environment to wade into FreeRTOS concepts at a comfortable pace. The well-organized text enables you to master each concept before starting the next chapter. Practical breadboard experiments and schematics are included to bring the lessons home. Experience is the best teacher. Each chapter includes exercises to test your knowledge. The coverage of the FreeRTOS Application Programming Interface (API) is complete for the ESP32 Arduino environment. You can apply what you learn to other FreeRTOS environments, including Espressif’s ESP-IDF. The source code is available from GitHub. All of these resources put you in the driver’s seat when it is time to develop your next uber-cool ESP32 project. What you will learn: How preemptive scheduling works within FreeRTOS The Arduino startup “loopTask” Message queues FreeRTOS timers and the IDLE task The semaphore, mutex, and their differences The mailbox and its application Real-time task priorities and its effect Interrupt interaction and use with FreeRTOS Queue sets Notifying tasks with events Event groups Critical sections Task local storage The gatekeeper task
€ 39,95
Leden: € 35,96
-

Elektor Publishing The Book of 555 Timer Projects
Over 45 Builds for the Legendary 555 Chip (and the 556, 558) The 555 timer IC, originally introduced by the Signetics Corporation around 1971, is sure to rank high among the most popular analog integrated circuits ever produced. Originally called the IC Time Machine, this chip has been used in many timer-related projects by countless people over decades. This book is all about designing projects based on the 555 timer IC. Over 45 fully tested and documented projects are presented. All projects have been fully tested by the author by constructing them individually on a breadboard. You are not expected to have any programming experiences for constructing or using the projects given in the book. However, it’s definitely useful to have some knowledge of basic electronics and the use of a breadboard for constructing and testing electronic circuits. Some of the projects in the book are: Alternately Flashing Two LEDs Changing LED Flashing Rate Touch Sensor On/Off Switch Switch On/Off Delay Light-Dependent Sound Dark/Light Switch Tone Burst Generator Long Duration Timer Chasing LEDs LED Roulette Game Traffic Lights Continuity Tester Electronic Lock Switch Contact Debouncing Toy Electronic Organ Multiple Sensor Alarm System Metronome Voltage Multipliers Electronic Dice 7-Segment Display Counter Motor Control 7-Segment Display Dice Electronic Siren Various Other Projects The projects given in the book can be modified or expanded by you for your very own applications. Electronic engineering students, people engaged in designing small electronic circuits, and electronic hobbyists should find the projects in the book instructive, fun, interesting, and useful.
€ 34,95
Leden: € 31,46
-

Elektor Publishing Les oscilloscopes anciens & modernes pour les débutants
Ce qui se passe en électronique est par définition invisible à l'oeil nu. L'instrument qui permet précisément de rendre visibles les signaux électriques, celui par le truchement duquel les effets de l'électronique se manifestent à nous, c'est l'oscilloscope. Hélas, quand on commence à faire de l'électronique, c'est souvent sans oscilloscope. Et l'on en est réduit à tâtonner, aussi bien physiquement que mentalement. Le jour où l'on goûte à la visualisation des signaux sur un écran, c'est une révélation. Plus personne ne souhaite se priver de cet enchantement. Pas de retour en arrière. En électronique, si l'on veut progresser dans le plaisir et dans la compréhension, il faut un oscillo. Commence alors une période d'interrogation : comment choisir ? Et à peine cette question-là aura-t-elle trouvé sa réponse, il en viendra une ribambelle d'autres que l'on peut résumer en une seule : comment se servir de l'oscilloscope de telle sorte que ce qu'il affiche corresponde bien à la réalité des signaux ? Dans ce livre, Rémy Mallard, répond clairement à ces questions. Il donne aussi de nombreuses informations pour aider son lecteur à élucider lui-même de nouveaux mystères qui ne manqueront pas de surgir. Ceux qui le connaissent déjà comme l'auteur d'un livre sur l'électronique dont le titre est un programme à lui tout seul : L'électronique pour les débutants qui sèchent les cours mais soudent sans se brûler les doigts, ainsi que d'un livre d'initiation à la programmation des microcontrôleurs PIC, savent qu'ils trouveront ici un ouvrage utile, qu'ils rouvriront souvent.
€ 44,95
Leden: € 40,46
-
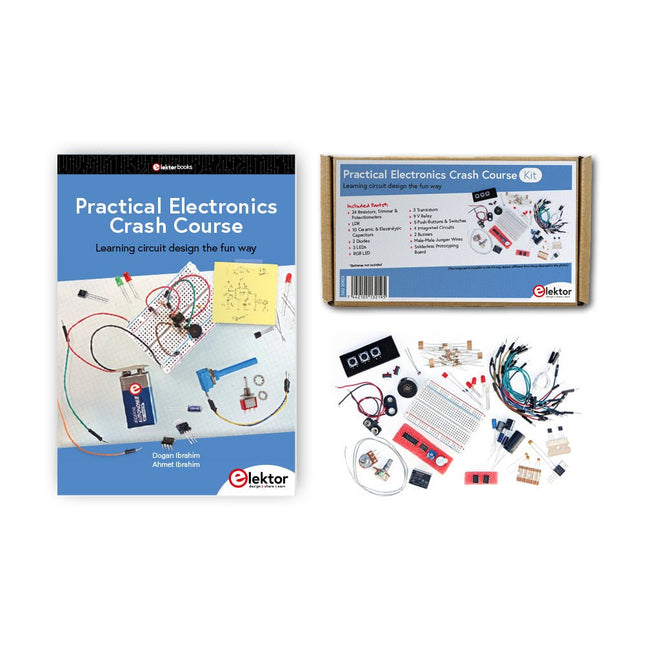
Elektor Bundles Practical Electronics Crash Course (Bundel)
Beginnen met elektronica is niet zo moeilijk als je misschien denkt. Met deze bundel (boek + kit) kun je de belangrijkste concepten van elektrotechniek en elektronica op een leuke manier verkennen en leren door verschillende experimenten uit te voeren. Je leert elektronica op een praktische manier zonder ingewikkeld technisch jargon en lange berekeningen. Het resultaat is dat je snel je eigen projecten zult maken. Deze kit bevat de onderdelen die nodig zijn om de meeste gedetailleerde voorbeelden uit het boek op een breadboard te bouwen en in het echt uit te proberen. De kit kan natuurlijk ook zonder het boek gebruikt worden om andere schakelingen te bouwen en je eigen experimenten te doen. Inhoud van de kit 1x 39 Ω, 1 W weerstand 1x 47 Ω weerstand 1x 180 Ω weerstand 1x 330 Ω weerstand 3x 1 kΩ weerstand 1x 2,2 kΩ weerstand 1x 3,9 kΩ weerstand 1x 6,8 kΩ weerstand 1x 10 kΩ weerstand 1x 15 kΩ weerstand 1x 22 kΩ weerstand 1x 33 kΩ weerstand 1x 47 kΩ weerstand 1x 56 kΩ weerstand 1x 82 kΩ weerstand 1x 120 kΩ weerstand 1x 680 kΩ weerstand 2x 100 kΩ weerstand 1x 10 kΩ-trimmer 1x 10 kΩ lineaire potentiometer 1x 100 kΩ lineaire potentiometer 1x LDR 1x 1 nF keramische condensator 2x 10 nF keramische condensator 1x 100 nF keramische condensator 1x 1 µF, 25 V aluminium elektrolytische condensator 2x 10 µF, 25 V aluminium elektrolytische condensator 1x 100 µF, 25 V aluminium elektrolytische condensator 1x 470 µF, 25 V aluminium elektrolytische condensator 1x 1000 µF, 25 V aluminium elektrolytische condensator 1x RGB-LED, gemeenschappelijke kathode (CC) 1x 1N4148 kleine signaaldiode 1x 1N4733A 5,1 V, 1 W zenerdiode 3x LED, rood 2x BC337 NPN-transistor 1x IRFZ44N N-kanaal MOSFET 2x NE555-timer 1x LM393-vergelijker 1x 74HCT08 quad EN-poort 3x Tactiele schakelaar 2x SPDT-schakelaar 1x relais, SPDT, 9 VDC 1x Actieve zoemer 1x Passieve zoemer 50 cm massieve draad, 16 AWG, zonder mantel 2x PP3 9 V-batterijclip 1x Broodplank 20x verbindingsdraad Deze bundel bevat: Practical Electronics Crash Course Kit (t.w.v. € 45) Boek: Practical Electronics Crash Course (normale prijs: € 45)
€ 89,95€ 69,95Beste prijs
-

Elektor Digital Practical Audio DSP Projects with the ESP32 (E-book)
Easy and Affordable Digital Signal ProcessingThe aim of this book is to teach the basic principles of Digital Signal Processing (DSP) and to introduce it from a practical point of view using the bare minimum of mathematics. Only the basic level of discrete-time systems theory is given, sufficient to implement DSP applications in real time. The practical implementations are described in real time using the highly popular ESP32 DevKitC microcontroller development board. With the low cost and extremely popular ESP32 microcontroller, you should be able to design elementary DSP projects with sampling frequencies within the audio range. All programming is done using the popular Arduino IDE in conjunction with the C language compiler.After laying a solid foundation of DSP theory and pertinent discussions on the main DSP software tools on the market, the book presents the following audio-based sound and DSP projects: Using an I²S-based digital microphone to capture audio sound Using an I²S-based class-D audio amplifier and speaker Playing MP3 music stored on an SD card through an I²S-based amplifier and speaker Playing MP3 music files stored in ESP32 flash memory through an I²S-based amplifier and speaker Mono and stereo Internet radio with I²S-based amplifiers and speakers Text-to-speech output with an I²S-based amplifier and speaker Using the volume control in I²S-based amplifier and speaker systems A speaking event counter with an I²S-based amplifier and speaker An adjustable sinewave generator with I²S-based amplifier and speaker Using the Pmod I²S2 24-bit fast ADC/DAC module Digital low-pass and band-pass real-time FIR filter design with external and internal A/D and D/A conversion Digital low-pass and band-pass real-time IIR filter design with external and internal A/D and D/A conversion Fast Fourier Transforms (FFT)
€ 32,95
Leden: € 29,66
-
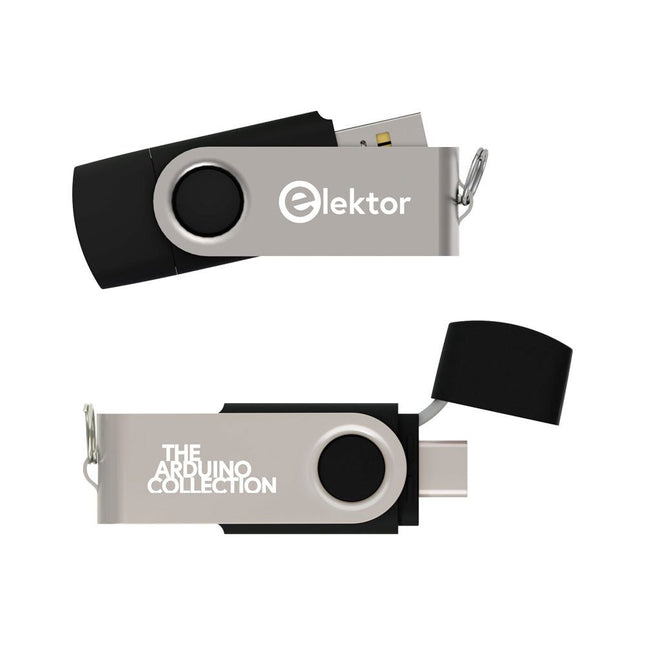
Elektor Classics The Elektor Arduino Collection (USB-stick)
Deze USB-stick bevat een selectie van meer dan 300 artikelen over Arduino gepubliceerd in Elektor Magazine. De inhoud bestaat uit zowel achtergrondartikelen als projecten met de volgende onderwerpen: Software & hardware ontwikkeling: Tutorials over de ontwikkeling van Arduino-software met behulp van Arduino IDE, Atmel Studio, Shields en essentiële programmeerconcepten. Educatie: Een microcontroller Bootcamp biedt een gestructureerde aanpak voor het programmeren van embedded systemen. Data acquisitie & meten: Projecten zoals een 16-bits datalogger, draaibank toerenteller en een AC netanalyser voor het vastleggen en analyseren van real-time signalen. Draadloze communicatie: Leer hoe je draadloze netwerken implementeert, een Android interface maakt en effectief communiceert met microcontrollers. Robotica en automatisering: Omvat de Arduino Nano Robot Controller, ondersteunende boards voor automatisering, en een verkenning van verschillende Arduino-shields om de functionaliteit te verbeteren. Zelfbouw-projecten: Unieke projecten zoals laserprojectie, Numitron klok en thermometer, ELF ontvanger, Theremino, en touch LED interfaces laten creatieve toepassingen zien. Of u nu een beginner bent of een ervaren maker, deze collectie is een waardevolle bron om te leren, te experimenteren en de grenzen van de Arduino-technologie te verleggen.
€ 49,95€ 34,95Beste prijs
-
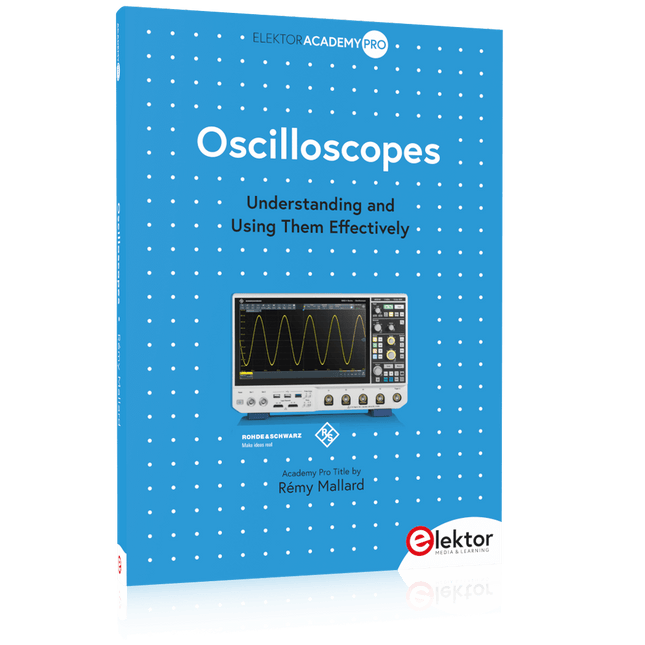
Elektor Publishing Oscilloscopes (Book)
Understanding and Using Them Effectively What happens in electronics is invisible to the naked eye. The instrument that allows to accurately visualize electrical signals, the one through which the effects of electronics become apparent to us, is the oscilloscope. Alas, when one first ventures into electronics, it is often without an oscilloscope. And one is left fumbling, both physically and mentally. Observing an electrical signal on a screen for the first time is a revelation. Nobody wishes to forgo that marvel again. There is no turning back. In electronics, if one wishes to progress with both enjoyment and understanding, an oscilloscope is essential. This marks the beginning of a period of questioning: how to choose one? And no sooner is that question answered than a whole string of others arises, which can be summed up in just one: how does one use the oscilloscope in such a way that what it displays truly reflects the reality of the signals? Rémy Mallard is a passionate communicator with a gift for making complex technical subjects understandable and engaging. In this book, he provides clear answers to essential questions about using an oscilloscope and offers a wealth of guidance to help readers explore and understand the electrical signals behind electronic systems. With his accessible style and practical insights, this book is a valuable tool for anyone eager to deepen their understanding of electronics.
€ 44,95
Leden: € 40,46


