Producten
-

SB Components RangePi - LoRa USB-dongle gebaseerd op RP2040 (EU868)
De RangePi - LoRa USB Dongle maakt gebruik van de Semtech SX1262 die communicatie tot 5 km mogelijk maakt. De RangePi kan worden gebruikt met elk apparaat dat gebruik maakt van een USB-aansluiting, waardoor er geen extra apparatuur nodig is om verbinding te maken met het LoRa-netwerk. Specificaties 1,14' LCD RP2040 MCU Tot 5 km afstand UART Inbegrepen 1x RangePi 1x antenne Downloads STEP File Productafmeting 3D PDF File Schematisch bestand GitHub
-
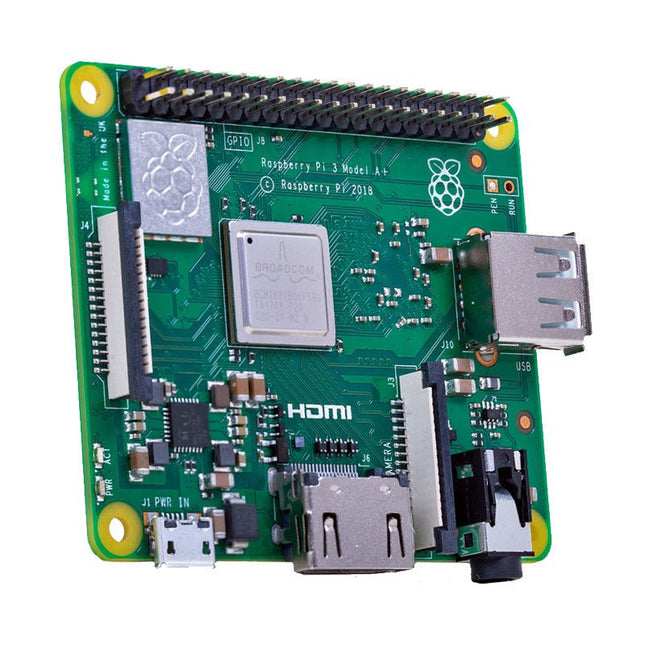
Raspberry Pi Foundation Raspberry Pi 3 A+
Like the Raspberry Pi 3 B+, the Raspberry Pi 3 A+ boasts a 64-bit quad-core processor running at 1.4 GHz, dual-band 2.4 GHz and 5 GHz wireless LAN, and Bluetooth 4.2/BLE. The dual-band wireless LAN comes with modular compliance certification, allowing the board to be designed into end products with significantly reduced wireless LAN compliance testing, improving both cost and time to market. The Raspberry Pi 3 A+ has the same mechanical footprint as the Raspberry Pi 1 A+. Specifications Processor Broadcom BCM2837B0, Cortex-A5364-bit SoC @ 1.4 GHz Memory 512 MB LPDDR2 SDRAM Connectivity 2.4 GHz and 5 GHz IEE 802.11.b/g/n/ac wireless LANBluetooth 4.2/BLE Video & Sound 1x full size HDMIMIPI DSI display portMIPI CSI camera port4 pole stereo output and composite video port Multimedia H.264, MPEG-4 decode (1080p30)H.264 encode (1080p30)OpenGL ES 1.1, 2.0 graphics SD Card support Micro SD format for loading operating system and data storage Input Power 5 V/2.5 A DC via micro-USB connector5 V DC via GPIO header Environment Operating temperature, 0-50°C Dimensions 65 x 56.5 mm
-
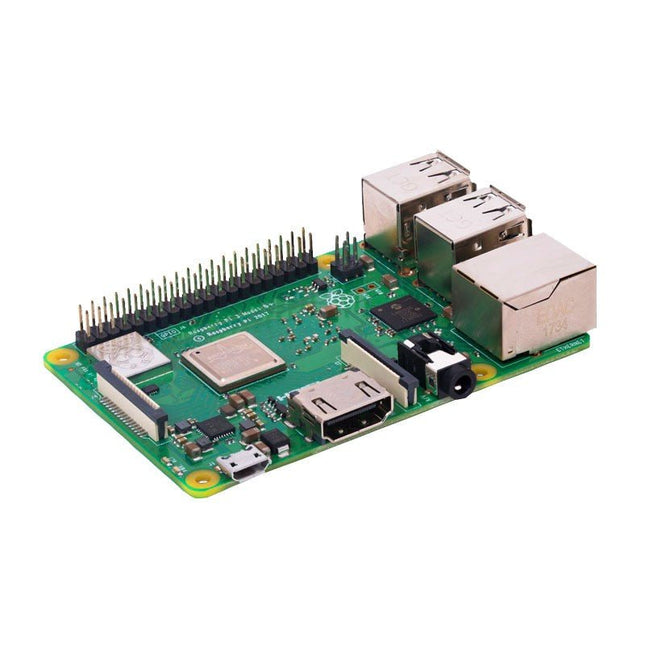
Raspberry Pi Foundation Raspberry Pi 3 B+
Vergeleken met de eigenschappen van zijn voorganger, zijn de snelheid en het vermogen van deze Raspberry Pi 3 B+ met 15% toegenomen zonder de compatibiliteit (elektrisch en mechanisch) met de Raspberry Pi 3 B, 2 en B+ modellen te belemmeren. Features Quad-core processorversnelling: ongeveer 10% meer verwerkingscapaciteit Ondersteuning voor H.264 MPEG-4, H.264 en Open GL ES 1.1 & 2.0 grafisch beheer 1 GB LPDDR2 SDRAM 802.11ac dual band draadloze communicatie (2,4 GHz/5 GHz) Power over Ethernet (PoE) mogelijk Nieuwe Ethernet controller Verbeterde energiebeheer Verbeterde thermisch beheer Nu met WiFi 802.11ac (2.4 GHz/5 GHz) Verhoogde verbindingssnelheid en bandbreedte Groter bereik wanneer aangesloten op het 5 GHz-kanaal Achterwaartse compatibiliteit binnen toepassingen Verbeterde streaming HD-video via WiFi Verhoogde effectiviteit als draadloos toegangspunt Verbeterde rekenprestatie Snellere core processor (4x 1,4 GHz) Voeding over Ethernet mogelijk PoE dankzij de PoE HAT (binnenkort beschikbaar) De RPi 3 B+ heeft voor zijn voedingsstroom geen stopcontact meer nodig, hij kan ergens ver weg (<100 m) via de ethernet verbinding gevoed worden. Daardoor worden installatie en distributie van Raspberry Pi netwerken eenvoudiger en effectiever Nieuwe Ethernet controller Ethernet van de Raspberry Pi 3 B+ is 3x sneller (~300 Mbps) Snellere gegevensoverdracht via het netwerk Specificaties SoC Broadcom BCM2837B0 64bit ARMv8 quad-core CPU CPU ARM Cortex-A53 (64-bit) quad-core 1400 MHz GPU Dual-Core VideoCore IV Multimedia Co-Processor RAM 1024 MB USB 4x USB-A 2.0 GPIO 40 Pins Ethernet Gigabit Ethernet via USB 2.0 Wireless LAN 802.11b/g/n/ac (2.4 GHz/5 GHz) Bluetooth 4.2 + LE Audio/Video 4-polige stereo uitgang / composiete video poort Aansluitingen Full size HDMI / CSI camera / DSI display poort / microSD poort (verbeterd) Voedingsaansluiting Micro-USB (5 V | < 2,5 A) Afmetingen 85 x 56 x 17 mm
-

Elektor Digital Raspberry Pi 3 – Basic to Advanced Projects (E-book)
This book is about the Raspberry Pi 3 computer and its use in various control and monitoring applications. The book explains in simple terms and with tested and working example projects, how to configure the Raspberry Pi 3 computer, how to install and use the Linux operating system, and how to write hardware based applications programs using the Python programming language. The nice feature of this book is that it covers many Raspberry Pi 3 based hardware projects using the latest hardware modules such as the Sense HAT, Swiss Pi, MotoPi, Camera module, and many other state of the art analog and digital sensors. An important feature of the Raspberry Pi 3 is that it contains on-board Bluetooth and Wi-Fi modules. Example projects are given in the book on using the Wi-Fi and the Bluetooth modules to show how real-data can be sent to the Cloud using the Wi-Fi module, and also how to communicate with an Android based mobile phone using the Bluetooth module. The book is ideal for self-study, and is intended for electronic/electrical engineering students, practising engineers, research students, and for hobbyists. It is recommended that the book should be followed in the given Chapter order. Over 30 projects are given in the book. All the projects in the book are based on the Python programming language and they have been fully tested. Full program listings of every project are given in the book with comments and full descriptions. Experienced programmers should find it easy to modify and update the programs to suit their needs. The following sub-headings are given for each project to make it as easy as possible for the readers to follow the projects: Project title Description Aim of the project Raspberry Pi type Block diagram Circuit diagram Program listing
€ 29,95
Leden € 23,96
-
Raspberry Pi Foundation Raspberry Pi 4 (4 GB) Officiële Starterkit
Bespaar € 10 met deze starterkit in vergelijking met afzonderlijke aankoop! Deze speciale Raspberry Pi 4 starterkit bevat alles wat je nodig hebt om meteen aan de slag te gaan met 's werelds populairste minicomputer als ontwikkel- en multimedia-apparaat. Inhoud van de kit Raspberry Pi 4 B (4 GB RAM)De Raspberry Pi 4 is een compleet computersysteem in een klein formaat dat multimedia en desktop prestaties levert die vergelijkbaar zijn met die van een basis x86 PC systeem. Broadcom BCM2711 SoC 64-bit quad-core ARM Cortex-A72 (1,5 GHz) VideoCore VI @ 500 MHz 4 GB LPDDR4 SDRAM Gigabit Ethernet 802.11ac Wi-Fi Bluetooth 5.0 2x USB 3.0, 2x USB 2.0 en 1x USB-C (voor stroomvoorziening) 2x micro-HDMI (tot 4Kp60) 1x MicroSD (voor opslag) Officiële EU voeding (5,1 V, 3 A) voor Raspberry Pi 4 (wit)De officiële Raspberry Pi USB-C voeding (15,3 W) is speciaal ontworpen om de Raspberry Pi 4 van stroom te voorzien. MicroSD kaart (32 GB, klasse 10) met SD adapter (voorgeïnstalleerd met NOOBS)Deze microSD met voorgeïnstalleerde NOOBS (New Out Of Box Software) is een eenvoudig te gebruiken installatiemanager voor het besturingssysteem van de Raspberry Pi. Officiële behuizing voor (wit/rood)Deze perfect passende behuizing beschermt de Raspberry Pi 4. Officiële HDMI kabel voor Raspberry Pi 4 (wit, 1 m)De officiële Raspberry Pi micro-HDMI naar HDMI (A/M) kabel (wit, 1 m) is ontworpen voor de Raspberry Pi 4. Koellichaamset voor Raspberry PiDeze aluminium koellichamen koelen het board en voorkomen dat de Raspberry Pi oververhit raakt.
-
Raspberry Pi Foundation Raspberry Pi 4 (8 GB) Officiële Starterkit
Bespaar € 10 met deze starterkit in vergelijking met afzonderlijke aankoop! Deze speciale Raspberry Pi 4 starterkit bevat alles wat je nodig hebt om meteen aan de slag te gaan met 's werelds populairste minicomputer als ontwikkel- en multimedia-apparaat. Inhoud van de kit Raspberry Pi 4 B (8 GB RAM)De Raspberry Pi 4 is een compleet computersysteem in een klein formaat dat multimedia en desktop prestaties levert die vergelijkbaar zijn met die van een basis x86 PC systeem. Broadcom BCM2711 SoC 64-bit quad-core ARM Cortex-A72 (1,5 GHz) VideoCore VI @ 500 MHz 8 GB LPDDR4 SDRAM Gigabit Ethernet 802.11ac Wi-Fi Bluetooth 5.0 2x USB 3.0, 2x USB 2.0 en 1x USB-C (voor stroomvoorziening) 2x micro-HDMI (tot 4Kp60) 1x MicroSD (voor opslag) Officiële EU voeding (5,1 V, 3 A) voor Raspberry Pi 4 (wit)De officiële Raspberry Pi USB-C voeding (15,3 W) is speciaal ontworpen om de Raspberry Pi 4 van stroom te voorzien. MicroSD kaart (32 GB, klasse 10) met SD adapter (voorgeïnstalleerd met NOOBS)Deze microSD met voorgeïnstalleerde NOOBS (New Out Of Box Software) is een eenvoudig te gebruiken installatiemanager voor het besturingssysteem van de Raspberry Pi. Officiële behuizing voor (wit/rood)Deze perfect passende behuizing beschermt de Raspberry Pi 4. Officiële HDMI kabel voor Raspberry Pi 4 (wit, 1 m)De officiële Raspberry Pi micro-HDMI naar HDMI (A/M) kabel (wit, 1 m) is ontworpen voor de Raspberry Pi 4. Koellichaamset voor Raspberry PiDeze aluminium koellichamen koelen het board en voorkomen dat de Raspberry Pi oververhit raakt.
-
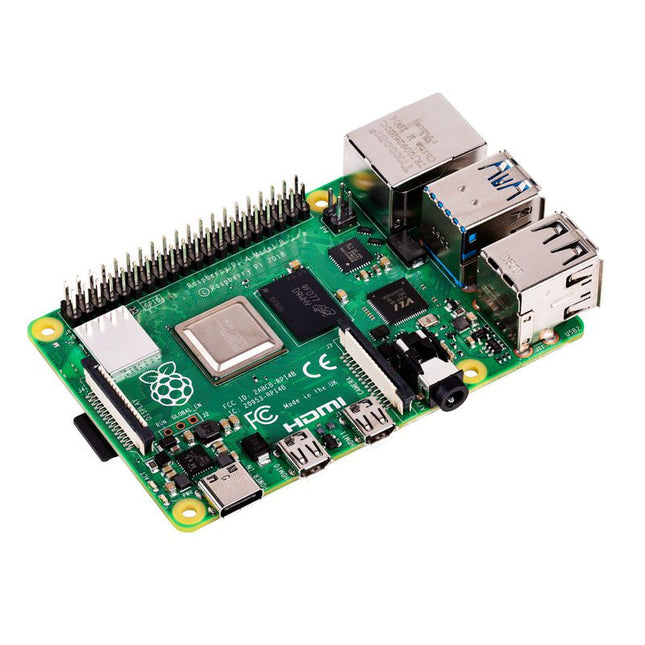
Raspberry Pi Foundation Raspberry Pi 4 B (1 GB RAM)
De Raspberry Pi 4 B is 3x sneller dan zijn 3 B+ voorganger en biedt 4x snellere multimedia prestaties (vergelijkbaar met de desktop prestaties van een entry-level x86-gebaseerde PC). Features Krachtige 64-bit quad-core processor Ondersteuning voor twee schermen met resoluties tot 4K via een paar micro-HDMI-poorten Hardware videodecodering tot 4Kp60 Tot 8 GB RAM Dual-band 2,4/5 GHz draadloze LAN Bluetooth 5.0 Gigabit Ethernet USB 3.0 PoE-mogelijkheid (via een aparte PoE HAT add-on) Specificaties SoC Broadcom BCM2711 CPU 64-bit ARM Cortex-A72 (4x 1,5 GHz) GPU Broadcom VideoCore VI RAM Up to 8 GB LPDDR4 Wireless LAN 2,4 GHz and 5 GHz IEEE 802.11b/g/n/ac wireless LAN Bluetooth Bluetooth 5.0, BLE Ethernet Gigabit Ethernet USB 2x USB-A 3.02x USB-A 2.0 GPIO Standard 40-pin GPIO header (fully backwards-compatible with previous boards) Video 2x micro-HDMI ports (up to 4Kp60 supported)2-lane MIPI DSI port (display)2-lane MIPI CSI port (camera) Audio 4-pole stereo audio and composite video port Multimedia H.265 (4Kp60 decode)H.264 (1080p60 decode, 1080p30 encode)OpenGL ES, 3.0 graphics SD card microSD (for operating system and storage) Power 5 V | 3 A (via USB-C)5 V | 3 A (via GPIO)Power over Ethernet (PoE) enabled – (requires separate PoE HAT) Raspberry Pi 4 B 2 GB RAM 4 GB RAM 8 GB RAM
-

Raspberry Pi Foundation Raspberry Pi 4 B (2 GB RAM)
De Raspberry Pi 4 B is 3x sneller dan zijn 3 B+ voorganger en biedt 4x snellere multimedia prestaties (vergelijkbaar met de desktop prestaties van een entry-level x86-gebaseerde PC). Features Krachtige 64-bit quad-core processor Ondersteuning voor twee schermen met resoluties tot 4K via een paar micro-HDMI-poorten Hardware videodecodering tot 4Kp60 Tot 8 GB RAM Dual-band 2,4/5 GHz draadloze LAN Bluetooth 5.0 Gigabit Ethernet USB 3.0 PoE-mogelijkheid (via een aparte PoE HAT add-on) Specificaties SoC Broadcom BCM2711 CPU 64-bit ARM Cortex-A72 (4x 1,5 GHz) GPU Broadcom VideoCore VI RAM Up to 8 GB LPDDR4 Wireless LAN 2,4 GHz and 5 GHz IEEE 802.11b/g/n/ac wireless LAN Bluetooth Bluetooth 5.0, BLE Ethernet Gigabit Ethernet USB 2x USB-A 3.02x USB-A 2.0 GPIO Standard 40-pin GPIO header (fully backwards-compatible with previous boards) Video 2x micro-HDMI ports (up to 4Kp60 supported)2-lane MIPI DSI port (display)2-lane MIPI CSI port (camera) Audio 4-pole stereo audio and composite video port Multimedia H.265 (4Kp60 decode)H.264 (1080p60 decode, 1080p30 encode)OpenGL ES, 3.0 graphics SD card microSD (for operating system and storage) Power 5 V | 3 A (via USB-C)5 V | 3 A (via GPIO)Power over Ethernet (PoE) enabled – (requires separate PoE HAT) Raspberry Pi 4 B 1 GB RAM 4 GB RAM 8 GB RAM
-

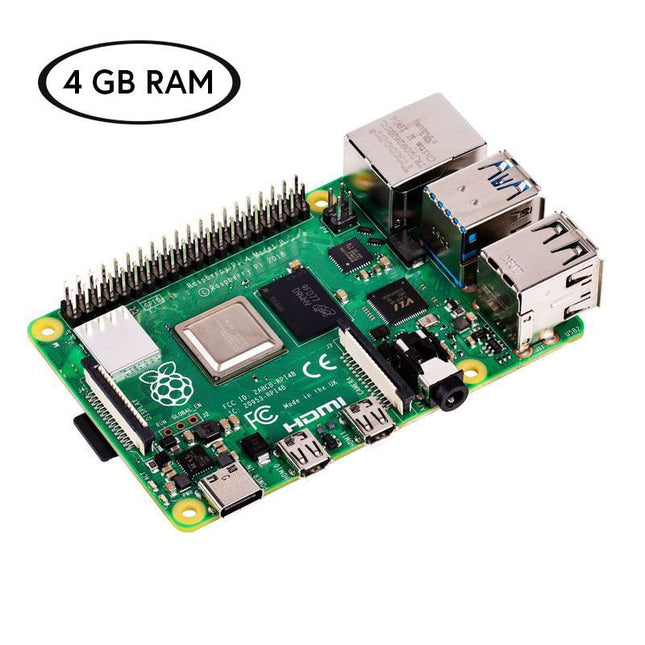
Raspberry Pi Foundation Raspberry Pi 4 B (4 GB RAM)
De Raspberry Pi 4 B is 3x sneller dan zijn 3 B+ voorganger en biedt 4x snellere multimedia prestaties (vergelijkbaar met de desktop prestaties van een entry-level x86-gebaseerde PC). Features Krachtige 64-bit quad-core processor Ondersteuning voor twee schermen met resoluties tot 4K via een paar micro-HDMI-poorten Hardware videodecodering tot 4Kp60 Tot 8 GB RAM Dual-band 2,4/5 GHz draadloze LAN Bluetooth 5.0 Gigabit Ethernet USB 3.0 PoE-mogelijkheid (via een aparte PoE HAT add-on) Specificaties SoC Broadcom BCM2711 CPU 64-bit ARM Cortex-A72 (4x 1,5 GHz) GPU Broadcom VideoCore VI RAM Up to 8 GB LPDDR4 Wireless LAN 2,4 GHz and 5 GHz IEEE 802.11b/g/n/ac wireless LAN Bluetooth Bluetooth 5.0, BLE Ethernet Gigabit Ethernet USB 2x USB-A 3.02x USB-A 2.0 GPIO Standard 40-pin GPIO header (fully backwards-compatible with previous boards) Video 2x micro-HDMI ports (up to 4Kp60 supported)2-lane MIPI DSI port (display)2-lane MIPI CSI port (camera) Audio 4-pole stereo audio and composite video port Multimedia H.265 (4Kp60 decode)H.264 (1080p60 decode, 1080p30 encode)OpenGL ES, 3.0 graphics SD card microSD (for operating system and storage) Power 5 V | 3 A (via USB-C)5 V | 3 A (via GPIO)Power over Ethernet (PoE) enabled – (requires separate PoE HAT) Raspberry Pi 4 B 1 GB RAM 2 GB RAM 8 GB RAM
-

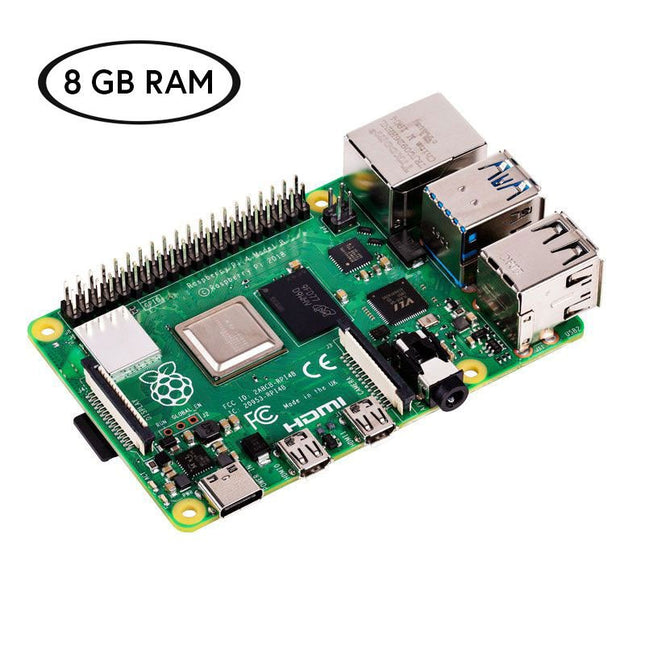
Raspberry Pi Foundation Raspberry Pi 4 B (8 GB RAM)
De Raspberry Pi 4 B is 3x sneller dan zijn 3 B+ voorganger en biedt 4x snellere multimedia prestaties (vergelijkbaar met de desktop prestaties van een entry-level x86-gebaseerde PC). Features Krachtige 64-bit quad-core processor Ondersteuning voor twee schermen met resoluties tot 4K via een paar micro-HDMI-poorten Hardware videodecodering tot 4Kp60 Tot 8 GB RAM Dual-band 2,4/5 GHz draadloze LAN Bluetooth 5.0 Gigabit Ethernet USB 3.0 PoE-mogelijkheid (via een aparte PoE HAT add-on) Specificaties SoC Broadcom BCM2711 CPU 64-bit ARM Cortex-A72 (4x 1,5 GHz) GPU Broadcom VideoCore VI RAM Up to 8 GB LPDDR4 Wireless LAN 2,4 GHz and 5 GHz IEEE 802.11b/g/n/ac wireless LAN Bluetooth Bluetooth 5.0, BLE Ethernet Gigabit Ethernet USB 2x USB-A 3.02x USB-A 2.0 GPIO Standard 40-pin GPIO header (fully backwards-compatible with previous boards) Video 2x micro-HDMI ports (up to 4Kp60 supported)2-lane MIPI DSI port (display)2-lane MIPI CSI port (camera) Audio 4-pole stereo audio and composite video port Multimedia H.265 (4Kp60 decode)H.264 (1080p60 decode, 1080p30 encode)OpenGL ES, 3.0 graphics SD card microSD (for operating system and storage) Power 5 V | 3 A (via USB-C)5 V | 3 A (via GPIO)Power over Ethernet (PoE) enabled – (requires separate PoE HAT) Raspberry Pi 4 B 1 GB RAM 2 GB RAM 4 GB RAM
-
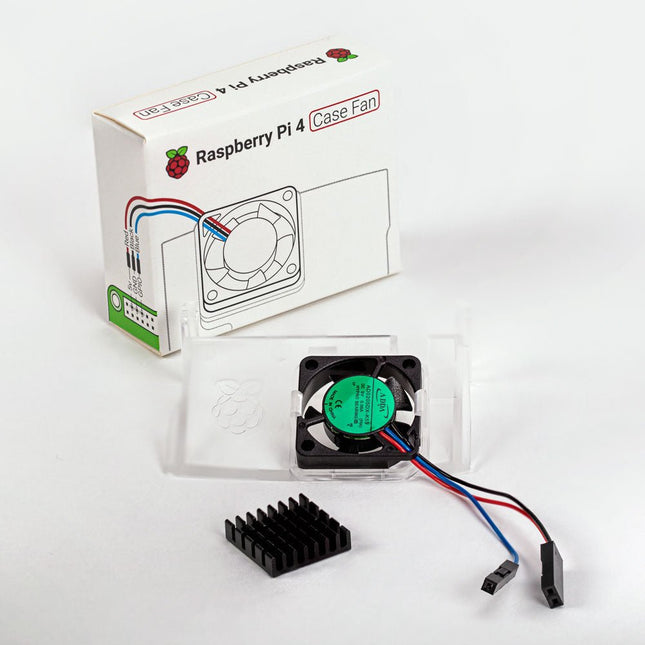
Raspberry Pi Foundation Raspberry Pi 4 Case Fan
Designed for overclockers and other power users, this fan keeps your Raspberry Pi 4 at a comfortable operating temperature even under heavy load. The temperature-controlled fan delivers up to 1.4 CFM of airflow over the processor, memory, and power management IC. The bundled heatsink (18 x 8 x 10 mm) with self-adhesive pad improves heat transfer from the processor. The Raspberry Pi 4 Case Fan works with Raspberry Pi 4 and the official Raspberry Pi 4 case.
€ 6,95€ 3,50
Leden identiek
-
Elektor Digital Raspberry Pi 4 OR 5 AND Pico (E-book)
Cool Projects for Test, Measurement, and Control The Raspberry Pi has dominated the maker scene for many years. Freely accessible I/O pins have made it one of the most popular processor boards of all time. However, the classic Raspberry Pi has no analog inputs. Direct measurement of analog values is therefore not possible. Consequently, photodiodes, NTCs, Hall sensors, etc. cannot be read directly. In addition, the pins are connected directly to the exposed contacts, i.e. without a driver or protection circuit. This can quickly destroy the central controller and thus the entire Raspberry Pi. These problems can be elegantly solved with the Pico. As a front-end, it can easily handle a wide range of measurement tasks. In addition, the Pico is much cheaper than a classic Raspberry Pi 4 or 5. If a faulty circuit leads to the destruction of the Pico, this is relatively easy to handle. This makes the combination of a classic Raspberry Pi 4 or 5 and the Pico an ideal pair. The book introduces the broad and highly topical field of modern controller technology using the combined force of a Raspberry Pi 4 or 5 and a Raspberry Pi Pico. In addition to a detailed introduction to the operation and functionality of the controller boards themselves, the book also focuses on data acquisition and processing with digital processors. Especially the combination of both systems offers a wide range of interesting possibilities. Some practical projects from the contents: USB between Raspberry Pi 4 or 5 and Pico I²C Communication and Pico as an I²C device Voltmeter and Computer Thermometer Pico W as a Web Server and WLAN Scanner Frequency Meters and Generators OLED Displays on Raspberry Pi 4 or 5 and Pico Energy Saving Monitor Which Astronauts are in Orbit? Mini Monitor for Current Bitcoin Exchange Rate
€ 32,95
Leden € 26,36
-

Raspberry Pi Foundation Raspberry Pi 400 (US)
De Raspberry Pi 400 biedt een quad-core 64-bits processor, 4 GB RAM, draadloos netwerken, uitvoer op twee schermen, 4K-videoweergave en een 40-pins GPIO-header. Het is een krachtige, compacte computer ingebouwd in een draagbaar toetsenbord. Specificaties Processor Broadcom BCM2711 quad-core Cortex-A72 (ARM v8) 64-bit SoC @ 1.8 GHz RAM 4 GB LPDDR4-3200 Connectivity Dual-band (2.4 GHz and 5.0 GHz) IEEE 802.11b/g/n/ac wireless LANBluetooth 5.0, BLEGigabit Ethernet2 × USB 3.0 and 1 × USB 2.0 ports GPIO Horizontal 40-pin GPIO header Video & Sound 2 × micro HDMI ports (supports up to 4Kp60) Multimedia H.265 (4Kp60 decode)H.264 (1080p60 decode, 1080p30 encode)OpenGL ES 3.0 graphics SD card support MicroSD card slot for operating system and data storage Keyboard US keyboard Power 5 V DC via USB connector Operating temperature 0°C to +40°C Dimensions 286 × 122 × 23 mm (maximum)
-
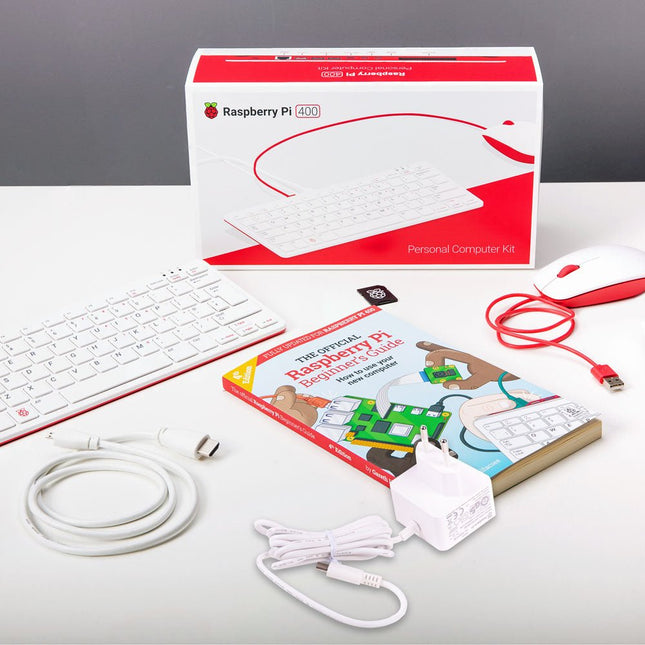
Raspberry Pi Foundation Raspberry Pi 400 Kit (EU)
De Raspberry Pi 400 biedt een quad-core 64-bits processor, 4 GB RAM, draadloos netwerken, uitvoer op twee schermen, 4K-videoweergave en een 40-pins GPIO-header. Het is een krachtige, compacte computer ingebouwd in een draagbaar toetsenbord. Specificaties (Raspberry Pi 400) Processor Broadcom BCM2711 quad-core Cortex-A72 (ARM v8) 64-bit SoC @ 1.8 GHz RAM 4 GB LPDDR4-3200 Connectivity Dual-band (2.4 GHz and 5.0 GHz) IEEE 802.11b/g/n/ac wireless LANBluetooth 5.0, BLEGigabit Ethernet2 × USB 3.0 and 1 × USB 2.0 ports GPIO Horizontal 40-pin GPIO header Video & Sound 2 × micro HDMI ports (supports up to 4Kp60) Multimedia H.265 (4Kp60 decode)H.264 (1080p60 decode, 1080p30 encode)OpenGL ES 3.0 graphics SD card support MicroSD card slot for operating system and data storage Keyboard US keyboard Power 5 V DC via USB connector Operating temperature 0°C to +40°C Dimensions 286 × 122 × 23 mm (maximum) Inhoud van de kit Raspberry Pi 400 (US layout, QWERTY) Officiële EU voedingsadapter (5,1 V/3 A) voor Raspberry Pi 4 (wit) Officiële Raspberry Pi muis (wit/rood) Officiële HDMI-kabel voor Raspberry Pi 4 (wit, 1 m) microSD-kaart (16 GB, Class 10) met SD-adapter (met voorgeïnstalleerde NOOBS) The Official Raspberry Pi Beginner's Guide (4th Edition)
-
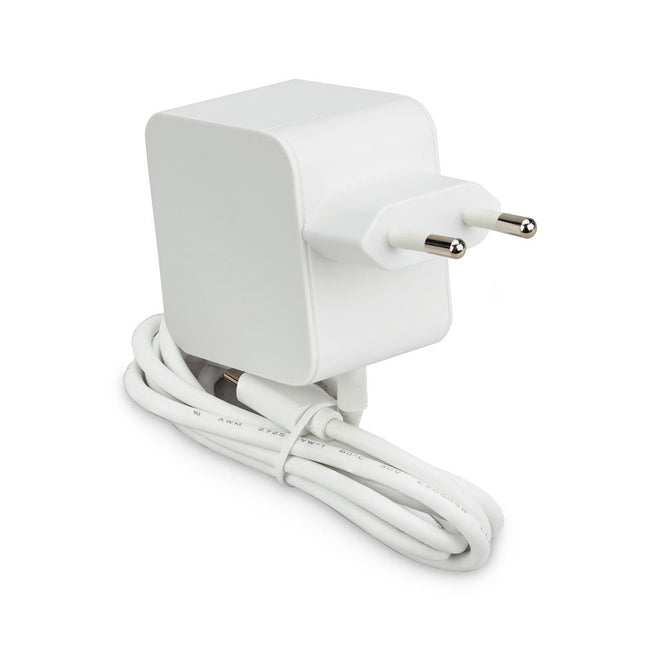
Raspberry Pi Foundation Raspberry Pi 45 W USB-C Voeding
De Raspberry Pi 45 W USB-C Voeding is een ideale keuze voor het voeden van USB-C-compatibele Raspberry Pi-producten. Het is met name geschikt voor Raspberry Pi 5-gebruikers die randapparatuur met een hoog vermogen willen gebruiken, zoals harde schijven en SSD's. Het levert tot 5,1 V/5 A en ondersteunt USB PD (Power Delivery)-onderhandeling, waardoor de Raspberry Pi 5 automatisch het optimale vermogensprofiel kan selecteren. Deze mogelijkheid stelt de Raspberry Pi 5 in staat om de USB-stroomlimiet te verhogen van de standaard 600 mA naar 1,6 A, wat extra vermogen levert voor randapparatuur die is aangesloten via de vier USB-A-poorten. Dankzij het uitgebreide assortiment ingebouwde vermogensprofielen is de Raspberry Pi 45 W USB-C-voeding ook een uitstekende optie voor het voeden van PD-compatibele apparaten van derden, zoals smartphones, tablets en laptops. Beschikbare profielen zijn onder meer 9,0 V/5,0 A, 12,0 V/3,75 A, 15,0 V/3,0 A en 20,0 V/2,25 A, die allemaal maximaal 45 W leveren. Specificaties Ingang 100-240 V AC Uitgang 5,1 V/5,0 A, 9,0 V/5,0 A, 12,0 V/3,75 A, 15,0 V/3,0 A, 20,0 V/2,25 A (Power Delivery) Connector USB-C Kabel 1,5 m, 17AWG (wit) Regio EU Downloads Datasheet
-
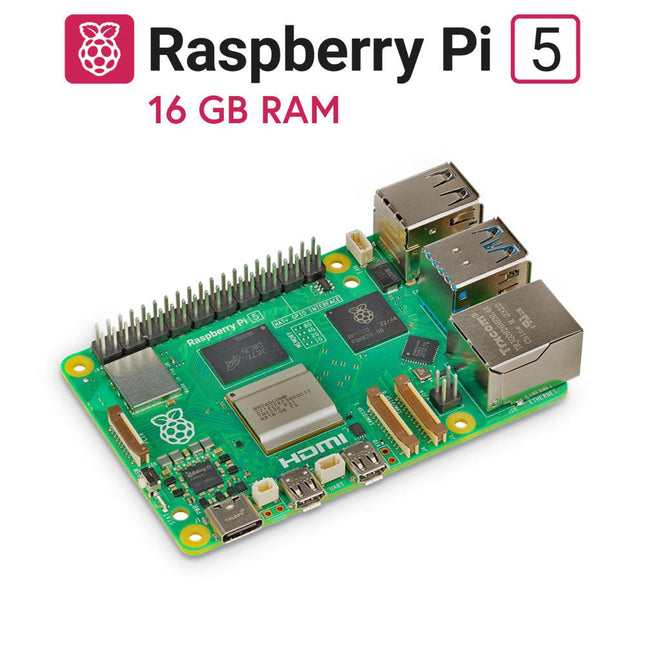
Raspberry Pi Foundation Raspberry Pi 5 (16 GB RAM)
De Raspberry Pi 5 levert meer prestaties dan ooit tevoren. Dankzij de snellere CPU, GPU en RAM is de Raspberry Pi 5 tot 3x sneller dan zijn ook al snelle voorganger. Naast de snelheidsboost biedt de Raspberry Pi 5 (die beschikt over het nieuwe Raspberry Pi RP1 silicium voor geavanceerde I/O-mogelijkheden) voor het eerst ook de volgende functies: RTC, een aan/uit-knop en een PCIe-interface. Kenmerken 64-bit quad-core ARM Cortex-A76 processor (2,4 GHz) VideoCore VII GPU (800 MHz) 16 GB LPDDR4X RAM (4267 MHz) Raspberry Pi silicon RP1 I/O-controllerchip Real-time clock Aan/uit-knop PCIe 2.0 UART-connector Ventilatorconnector Specificaties SoC Broadcom BCM2712 CPU ARM Cortex-A76 (ARM v8) 64-bit Kloksnelheid 4x 2,4 GHz GPU VideoCore VII (800 MHz) RAM 16 GB LPDDR4X (4267 MHz) WiFi IEEE 802.11b/g/n/ac (2,4 GHz/5 GHz) Bluetooth Bluetooth 5.0, BLE Ethernet Gigabit Ethernet (met PoE+ ondersteuning) USB 2x USB-A 3.0 (5 GBit/s)2x USB-A 2.0 PCI Express 1x PCIe 2.0 GPIO Standaard 40-pins GPIO-header Video 2x micro-HDMI poorten (4K60)2x 4-lane MIPI (DSI/CSI) Multimedia H.265 (4K60 decode)OpenGL ES 3.1, Vulkan 1.2 SD-kaart microSD Stroomvoorziening 5 V/5 A (via USB-C)Power over Ethernet (PoE+) Raspberry Pi 5 2 GB RAM 4 GB RAM 8 GB RAM Downloads Datasheet Unboxing the Raspberry Pi 5 First Insights
-

Raspberry Pi Foundation Raspberry Pi 5 (2 GB RAM)
De Raspberry Pi 5 levert meer prestaties dan ooit tevoren. Dankzij de snellere CPU, GPU en RAM is de Raspberry Pi 5 tot 3x sneller dan zijn ook al snelle voorganger. Naast de snelheidsboost biedt de Raspberry Pi 5 (die beschikt over het nieuwe Raspberry Pi RP1 silicium voor geavanceerde I/O-mogelijkheden) voor het eerst ook de volgende functies: RTC, een aan/uit-knop en een PCIe-interface. Kenmerken 64-bit quad-core ARM Cortex-A76 processor (2,4 GHz) VideoCore VII GPU (800 MHz) 2 GB LPDDR4X RAM (4267 MHz) Raspberry Pi silicon RP1 I/O-controllerchip Real-time clock Aan/uit-knop PCIe 2.0 UART-connector Ventilatorconnector Specificaties SoC Broadcom BCM2712 CPU ARM Cortex-A76 (ARM v8) 64-bit Kloksnelheid 4x 2,4 GHz GPU VideoCore VII (800 MHz) RAM 2 GB LPDDR4X (4267 MHz) WiFi IEEE 802.11b/g/n/ac (2,4 GHz/5 GHz) Bluetooth Bluetooth 5.0, BLE Ethernet Gigabit Ethernet (met PoE+ ondersteuning) USB 2x USB-A 3.0 (5 GBit/s)2x USB-A 2.0 PCI Express 1x PCIe 2.0 GPIO Standaard 40-pins GPIO-header Video 2x micro-HDMI poorten (4K60)2x 4-lane MIPI (DSI/CSI) Multimedia H.265 (4K60 decode)OpenGL ES 3.1, Vulkan 1.2 SD-kaart microSD Stroomvoorziening 5 V/5 A (via USB-C)Power over Ethernet (PoE+) Raspberry Pi 4 vs Raspberry Pi 5 Raspberry Pi 4 Raspberry Pi 5 SoC Broadcom BCM2711 Broadcom BCM2712 CPU ARM Cortex-A72 (ARM v8) 64-bit ARM Cortex-A76 (ARM v8) 64-bit Kloksnelheid 4x 1,5 GHz 4x 2,4 GHz L2-cache 1 MByte gedeeld 4x 512 KByte L3-cache N/A 2 MByte gedeeld GPU VideoCore VI (500 MHz) VideoCore VII (800 MHz) RAM 2 GB LPDDR4 (3200 MHz) 2 GB LPDDR4X (4267 MHz) WiFi IEEE 802.11b/g/n/ac (2,4 GHz/5 GHz) IEEE 802.11b/g/n/ac (2,4 GHz/5 GHz) Bluetooth Bluetooth 5.0, BLE Bluetooth 5.0, BLE Ethernet Gigabit Ethernet (met PoE ondersteuning) Gigabit Ethernet (met PoE+ ondersteuning) USB 2x USB-A 3.02x USB-A 2.0 2x USB-A 3.0 (5 GBit/s)2x USB-A 2.0 I/O-controllerchip N/A Raspberry Pi Silicon RP1 PCI Express N/A 1x PCIe 2.0 Real Time Clock (RTC) N/A RTC en RTC-batterijconnector Aan/uit-knop N/A Aan/uit-knop aan boord Koeling N/A Ventilatorconnector GPIO Standaard 40-pins GPIO-header Standaard 40-pins GPIO-header UART via GPIO 1x UART-connector SD-kaart microSD-slot (DDR50) microSD-slot (SDR104) Video 2x micro-HDMI-poorten (4K60)1x 2-lane MIPI DSI-poort (beeldscherm)1x 2-lane MIPI CSI-poort (camera) 2x micro-HDMI-poorten (4K60)2x 4-lane MIPI (DSI/CSI) Audio 4-polige 3,5 mm audio jack (stereo audio en composite video) N/A Multimedia H.265 (4K60 decode)H.264 (1080p60 decode, 1080p30 encode)OpenGL ES, 3.0 graphics H.265 (4K60 decode)OpenGL ES 3.1, Vulkan 1.2 Stroomvoorziening 5 V/3 A (15 W)Power over Ethernet (PoE) 5 V/5 A (25 W), USB PDPower over Ethernet (PoE+) Raspberry Pi 5 4 GB RAM 8 GB RAM 16 GB RAM Downloads Datasheet Unboxing the Raspberry Pi 5 First Insights
-
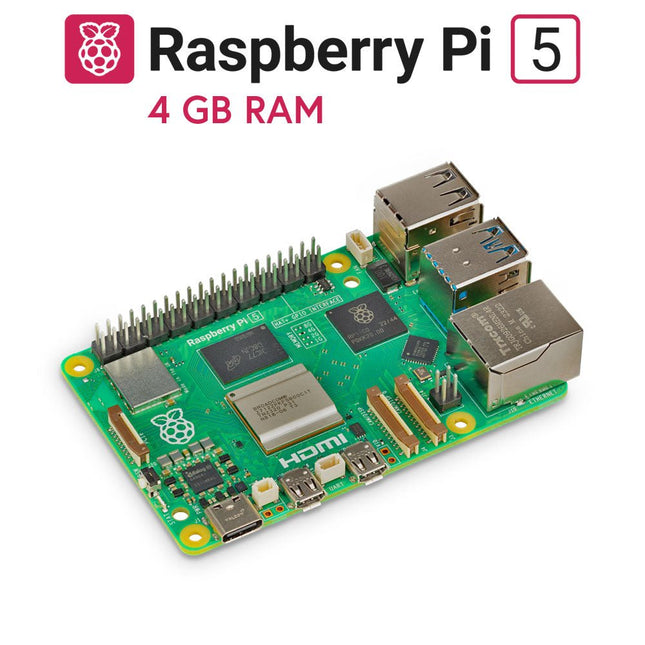
Raspberry Pi Foundation Raspberry Pi 5 (4 GB RAM)
De Raspberry Pi 5 levert meer prestaties dan ooit tevoren. Dankzij de snellere CPU, GPU en RAM is de Raspberry Pi 5 tot 3x sneller dan zijn ook al snelle voorganger. Naast de snelheidsboost biedt de Raspberry Pi 5 (die beschikt over het nieuwe Raspberry Pi RP1 silicium voor geavanceerde I/O-mogelijkheden) voor het eerst ook de volgende functies: RTC, een aan/uit-knop en een PCIe-interface. Kenmerken 64-bit quad-core ARM Cortex-A76 processor (2,4 GHz) VideoCore VII GPU (800 MHz) 4 GB LPDDR4X RAM (4267 MHz) Raspberry Pi silicon RP1 I/O-controllerchip Real-time clock Aan/uit-knop PCIe 2.0 UART-connector Ventilatorconnector Specificaties SoC Broadcom BCM2712 CPU ARM Cortex-A76 (ARM v8) 64-bit Kloksnelheid 4x 2,4 GHz GPU VideoCore VII (800 MHz) RAM 4 GB LPDDR4X (4267 MHz) WiFi IEEE 802.11b/g/n/ac (2,4 GHz/5 GHz) Bluetooth Bluetooth 5.0, BLE Ethernet Gigabit Ethernet (met PoE+ ondersteuning) USB 2x USB-A 3.0 (5 GBit/s)2x USB-A 2.0 PCI Express 1x PCIe 2.0 GPIO Standaard 40-pins GPIO-header Video 2x micro-HDMI poorten (4K60)2x 4-lane MIPI (DSI/CSI) Multimedia H.265 (4K60 decode)OpenGL ES 3.1, Vulkan 1.2 SD-kaart microSD Stroomvoorziening 5 V/5 A (via USB-C)Power over Ethernet (PoE+) Raspberry Pi 4 vs Raspberry Pi 5 Raspberry Pi 4 Raspberry Pi 5 SoC Broadcom BCM2711 Broadcom BCM2712 CPU ARM Cortex-A72 (ARM v8) 64-bit ARM Cortex-A76 (ARM v8) 64-bit Kloksnelheid 4x 1,5 GHz 4x 2,4 GHz L2-cache 1 MByte gedeeld 4x 512 KByte L3-cache N/A 2 MByte gedeeld GPU VideoCore VI (500 MHz) VideoCore VII (800 MHz) RAM 4 GB LPDDR4 (3200 MHz) 4 GB LPDDR4X (4267 MHz) WiFi IEEE 802.11b/g/n/ac (2,4 GHz/5 GHz) IEEE 802.11b/g/n/ac (2,4 GHz/5 GHz) Bluetooth Bluetooth 5.0, BLE Bluetooth 5.0, BLE Ethernet Gigabit Ethernet (met PoE ondersteuning) Gigabit Ethernet (met PoE+ ondersteuning) USB 2x USB-A 3.02x USB-A 2.0 2x USB-A 3.0 (5 GBit/s)2x USB-A 2.0 I/O-controllerchip N/A Raspberry Pi Silicon RP1 PCI Express N/A 1x PCIe 2.0 Real Time Clock (RTC) N/A RTC en RTC-batterijconnector Aan/uit-knop N/A Aan/uit-knop aan boord Koeling N/A Ventilatorconnector GPIO Standaard 40-pins GPIO-header Standaard 40-pins GPIO-header UART via GPIO 1x UART-connector SD-kaart microSD-slot (DDR50) microSD-slot (SDR104) Video 2x micro-HDMI-poorten (4K60)1x 2-lane MIPI DSI-poort (beeldscherm)1x 2-lane MIPI CSI-poort (camera) 2x micro-HDMI-poorten (4K60)2x 4-lane MIPI (DSI/CSI) Audio 4-polige 3,5 mm audio jack (stereo audio en composite video) N/A Multimedia H.265 (4K60 decode)H.264 (1080p60 decode, 1080p30 encode)OpenGL ES, 3.0 graphics H.265 (4K60 decode)OpenGL ES 3.1, Vulkan 1.2 Stroomvoorziening 5 V/3 A (15 W)Power over Ethernet (PoE) 5 V/5 A (25 W), USB PDPower over Ethernet (PoE+) Raspberry Pi 5 2 GB RAM 8 GB RAM 16 GB RAM Downloads Datasheet Unboxing the Raspberry Pi 5 First Insights
-

Raspberry Pi Foundation Raspberry Pi 5 (8 GB RAM)
De Raspberry Pi 5 levert meer prestaties dan ooit tevoren. Dankzij de snellere CPU, GPU en RAM is de Raspberry Pi 5 tot 3x sneller dan zijn ook al snelle voorganger. Naast de snelheidsboost biedt de Raspberry Pi 5 (die beschikt over het nieuwe Raspberry Pi RP1 silicium voor geavanceerde I/O-mogelijkheden) voor het eerst ook de volgende functies: RTC, een aan/uit-knop en een PCIe-interface. Kenmerken 64-bit quad-core ARM Cortex-A76 processor (2,4 GHz) VideoCore VII GPU (800 MHz) 8 GB LPDDR4X RAM (4267 MHz) Raspberry Pi silicon RP1 I/O-controllerchip Real-time clock Aan/uit-knop PCIe 2.0 UART-connector Ventilatorconnector Specificaties SoC Broadcom BCM2712 CPU ARM Cortex-A76 (ARM v8) 64-bit Kloksnelheid 4x 2,4 GHz GPU VideoCore VII (800 MHz) RAM 8 GB LPDDR4X (4267 MHz) WiFi IEEE 802.11b/g/n/ac (2,4 GHz/5 GHz) Bluetooth Bluetooth 5.0, BLE Ethernet Gigabit Ethernet (met PoE+ ondersteuning) USB 2x USB-A 3.0 (5 GBit/s)2x USB-A 2.0 PCI Express 1x PCIe 2.0 GPIO Standaard 40-pins GPIO-header Video 2x micro-HDMI poorten (4K60)2x 4-lane MIPI (DSI/CSI) Multimedia H.265 (4K60 decode)OpenGL ES 3.1, Vulkan 1.2 SD-kaart microSD Stroomvoorziening 5 V/5 A (via USB-C)Power over Ethernet (PoE+) Raspberry Pi 4 vs Raspberry Pi 5 Raspberry Pi 4 Raspberry Pi 5 SoC Broadcom BCM2711 Broadcom BCM2712 CPU ARM Cortex-A72 (ARM v8) 64-bit ARM Cortex-A76 (ARM v8) 64-bit Kloksnelheid 4x 1,5 GHz 4x 2,4 GHz L2-cache 1 MByte gedeeld 4x 512 KByte L3-cache N/A 2 MByte gedeeld GPU VideoCore VI (500 MHz) VideoCore VII (800 MHz) RAM 8 GB LPDDR4 (3200 MHz) 8 GB LPDDR4X (4267 MHz) WiFi IEEE 802.11b/g/n/ac (2,4 GHz/5 GHz) IEEE 802.11b/g/n/ac (2,4 GHz/5 GHz) Bluetooth Bluetooth 5.0, BLE Bluetooth 5.0, BLE Ethernet Gigabit Ethernet (met PoE ondersteuning) Gigabit Ethernet (met PoE+ ondersteuning) USB 2x USB-A 3.02x USB-A 2.0 2x USB-A 3.0 (5 GBit/s)2x USB-A 2.0 I/O-controllerchip N/A Raspberry Pi Silicon RP1 PCI Express N/A 1x PCIe 2.0 Real Time Clock (RTC) N/A RTC en RTC-batterijconnector Aan/uit-knop N/A Aan/uit-knop aan boord Koeling N/A Ventilatorconnector GPIO Standaard 40-pins GPIO-header Standaard 40-pins GPIO-header UART via GPIO 1x UART-connector SD-kaart microSD-slot (DDR50) microSD-slot (SDR104) Video 2x micro-HDMI-poorten (4K60)1x 2-lane MIPI DSI-poort (beeldscherm)1x 2-lane MIPI CSI-poort (camera) 2x micro-HDMI-poorten (4K60)2x 4-lane MIPI (DSI/CSI) Audio 4-polige 3,5 mm audio jack (stereo audio en composite video) N/A Multimedia H.265 (4K60 decode)H.264 (1080p60 decode, 1080p30 encode)OpenGL ES, 3.0 graphics H.265 (4K60 decode)OpenGL ES 3.1, Vulkan 1.2 Stroomvoorziening 5 V/3 A (15 W)Power over Ethernet (PoE) 5 V/5 A (25 W), USB PDPower over Ethernet (PoE+) Raspberry Pi 5 2 GB RAM 4 GB RAM 16 GB RAM Downloads Datasheet Unboxing the Raspberry Pi 5 First Insights
-
Elektor Publishing Raspberry Pi 5 Essentials
Program, build, and master over 60 projects with Python The Raspberry Pi 5 is the latest single-board computer from the Raspberry Pi Foundation. It can be used in many applications, such as in audio and video media centers, as a desktop computer, in industrial controllers, robotics, and in many domestic and commercial applications. In addition to the well-established features found in other Raspberry Pi computers, the Raspberry Pi 5 offers Wi-Fi and Bluetooth (classic and BLE), which makes it a perfect match for IoT as well as in remote and Internet-based control and monitoring applications. It is now possible to develop many real-time projects such as audio digital signal processing, real-time digital filtering, real-time digital control and monitoring, and many other real-time operations using this tiny powerhouse. The book starts with an introduction to the Raspberry Pi 5 computer and covers the important topics of accessing the computer locally and remotely. Use of the console language commands as well as accessing and using the desktop GUI are described with working examples. The remaining parts of the book cover many Raspberry Pi 5-based hardware projects using components and devices such as LEDs and buzzers LCDs Ultrasonic sensors Temperature and atmospheric pressure sensors The Sense HAT Camera modules Example projects are given using Wi-Fi and Bluetooth modules to send and receive data from smartphones and PCs, and sending real-time temperature and atmospheric pressure data to the cloud. All projects given in the book have been fully tested for correct operation. Only basic programming and electronics experience are required to follow the projects. Brief descriptions, block diagrams, detailed circuit diagrams, and full Python program listings are given for all projects described.
€ 39,95
Leden € 35,96
-
Elektor Digital Raspberry Pi 5 Essentials (E-book)
Program, build, and master over 60 projects with Python The Raspberry Pi 5 is the latest single-board computer from the Raspberry Pi Foundation. It can be used in many applications, such as in audio and video media centers, as a desktop computer, in industrial controllers, robotics, and in many domestic and commercial applications. In addition to the well-established features found in other Raspberry Pi computers, the Raspberry Pi 5 offers Wi-Fi and Bluetooth (classic and BLE), which makes it a perfect match for IoT as well as in remote and Internet-based control and monitoring applications. It is now possible to develop many real-time projects such as audio digital signal processing, real-time digital filtering, real-time digital control and monitoring, and many other real-time operations using this tiny powerhouse. The book starts with an introduction to the Raspberry Pi 5 computer and covers the important topics of accessing the computer locally and remotely. Use of the console language commands as well as accessing and using the desktop GUI are described with working examples. The remaining parts of the book cover many Raspberry Pi 5-based hardware projects using components and devices such as LEDs and buzzers LCDs Ultrasonic sensors Temperature and atmospheric pressure sensors The Sense HAT Camera modules Example projects are given using Wi-Fi and Bluetooth modules to send and receive data from smartphones and PCs, and sending real-time temperature and atmospheric pressure data to the cloud. All projects given in the book have been fully tested for correct operation. Only basic programming and electronics experience are required to follow the projects. Brief descriptions, block diagrams, detailed circuit diagrams, and full Python program listings are given for all projects described.
€ 32,95
Leden € 26,36
-
Elektor Publishing Raspberry Pi 5 for Radio Amateurs
Program and Build Raspberry Pi 5 Based Ham Station Utilities with the RTL-SDR The RTL-SDR devices (V3 and V4) have gained popularity among radio amateurs because of their very low cost and rich features. A basic system may consist of a USB based RTL-SDR device (dongle) with a suitable antenna, a Raspberry Pi 5 computer, a USB based external audio input-output adapter, and software installed on the Raspberry Pi 5 computer. With such a modest setup, it is possible to receive signals from around 24 MHz to over 1.7 GHz. This book is aimed at amateur radio enthusiasts and electronic engineering students, as well as at anyone interested in learning to use the Raspberry Pi 5 to build electronic projects. The book is suitable for both beginners through experienced readers. Some knowledge of the Python programming language is required to understand and eventually modify the projects given in the book. A block diagram, a circuit diagram, and a complete Python program listing is given for each project, alongside a comprehensive description. The following popular RTL-SDR programs are discussed in detail, aided by step-by-step installation guides for practical use on a Raspberry Pi 5: SimpleFM GQRX SDR++ CubicSDR RTL-SDR Server Dump1090 FLDIGI Quick RTL_433 aldo xcwcp GPredict TWCLOCK CQRLOG klog Morse2Ascii PyQSO Welle.io Ham Clock CHIRP xastir qsstv flrig XyGrib FreeDV Qtel (EchoLink) XDX (DX-Cluster) WSJT-X The application of the Python programming language on the latest Raspberry Pi 5 platform precludes the use of the programs in the book from working on older versions of Raspberry Pi computers.
€ 39,95
Leden € 35,96
-

Elektor Digital Raspberry Pi 5 for Radio Amateurs (E-book)
Program and Build Raspberry Pi 5 Based Ham Station Utilities with the RTL-SDR The RTL-SDR devices (V3 and V4) have gained popularity among radio amateurs because of their very low cost and rich features. A basic system may consist of a USB based RTL-SDR device (dongle) with a suitable antenna, a Raspberry Pi 5 computer, a USB based external audio input-output adapter, and software installed on the Raspberry Pi 5 computer. With such a modest setup, it is possible to receive signals from around 24 MHz to over 1.7 GHz. This book is aimed at amateur radio enthusiasts and electronic engineering students, as well as at anyone interested in learning to use the Raspberry Pi 5 to build electronic projects. The book is suitable for both beginners through experienced readers. Some knowledge of the Python programming language is required to understand and eventually modify the projects given in the book. A block diagram, a circuit diagram, and a complete Python program listing is given for each project, alongside a comprehensive description. The following popular RTL-SDR programs are discussed in detail, aided by step-by-step installation guides for practical use on a Raspberry Pi 5: SimpleFM GQRX SDR++ CubicSDR RTL-SDR Server Dump1090 FLDIGI Quick RTL_433 aldo xcwcp GPredict TWCLOCK CQRLOG klog Morse2Ascii PyQSO Welle.io Ham Clock CHIRP xastir qsstv flrig XyGrib FreeDV Qtel (EchoLink) XDX (DX-Cluster) WSJT-X The application of the Python programming language on the latest Raspberry Pi 5 platform precludes the use of the programs in the book from working on older versions of Raspberry Pi computers.
€ 32,95
Leden € 26,36
-
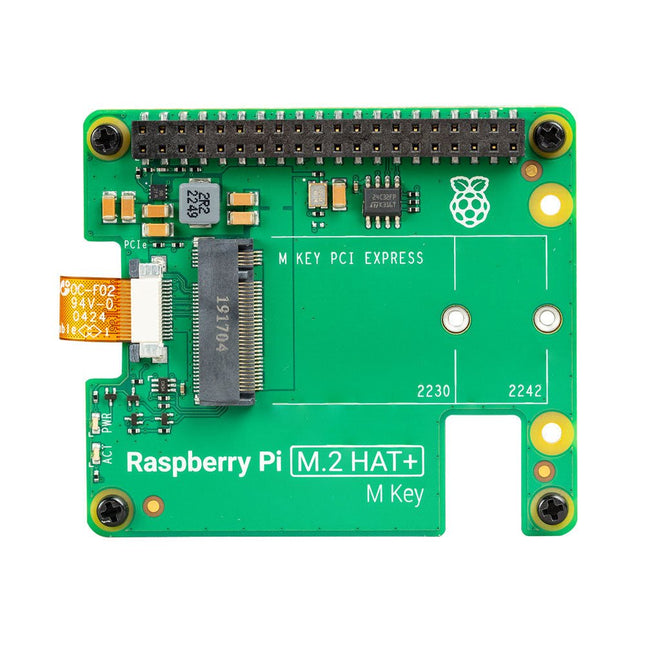
Raspberry Pi Foundation Raspberry Pi 5 M.2 HAT+
Met de Raspberry Pi M.2 HAT+ kunt u M.2-randapparatuur, zoals NVMe-schijven en AI-versnellers, aansluiten op de PCIe 2.0-interface van Raspberry Pi 5, en ondersteunt snelle (tot 500 MB/s) gegevensoverdracht naar en van NVMe-schijven en andere PCIe-accessoires. Raspberry Pi M.2 HAT+ ondersteunt apparaten met de M.2 M key edge-connector, in de 2230- en 2242-vormfactoren. Hij kan tot 3 A leveren aan aangesloten M.2-apparaten. Kenmerken Ondersteunt single-lane PCIe 2.0-interface (piekoverdrachtssnelheid van 500 MB/s) Ondersteunt apparaten die de M.2 M Key Edge-connector gebruiken Ondersteunt apparaten met de 2230- of 2242-vormfactor Kan tot 3 A leveren aan aangesloten M.2 apparaten Stroom- en activiteits-LED's Inbegrepen 1x Raspberry Pi 5 M.2 HAT+ 1x Lintkabel 1x GPIO-stapelheader 4x Afstandhouders 8x Schroeven Downloads Datasheet Schematics Assembly instructions
€ 13,95€ 6,95
Leden identiek


