Bestsellers
-

Elektor Digital Elektronica Zakboek (E-BOOK)
Dit boek is een naslagwerk met praktijkgeoriënteerde formules en tabellen – en geen leerboek met uitvoerige uitleg. De schrijver heeft ook voor gecompliceerde vraagstukken handzame verklaringen, benaderingsformules en rekenvoorbeelden ontwikkeld zonder daarbij zijn toevlucht tot simplificaties te nemen. De logische indeling in 10 hoofdstukken vergemakkelijkt het opzoeken en vinden van de gewenste thema’s. In elk hoofdstuk treft u steeds de vereiste wis- en natuurkundige formules aan alsmede de belangrijkste tabellen. • Gelijkstroomkringen (inclusief de beginselen van de elektrotechniek) • Wisselstroomkringen • Dioden (berekeningen, toepassingen en gelijkrichtschakelingen) • Bipolaire transistoren • Veldeffecttransistoren (met schemavoorbeelden en berekeningen) • Speciale componenten (zoals PTC, NTC, VDR) • Operationele versterkers en hun basisschakelingen • Vermogenselektronica • Meettechniek (nauwkeurigheid, correcties, analoge en digitale meetapparaten) • Digitale technieken en binaire signaalwaarden De verzameling formules omvat alle belangrijke details voor ingenieurs en technici in de elektrotechniek en elektronica die zich met onderzoek, ontwikkeling en service bezig houden. Daarnaast is het echter ook bedoeld als naslagwerk voor studenten en docenten in het technisch (beroeps)onderwijs – en zeker ook voor de serieuze hobbyist.
€ 29,95
Leden: € 26,96
-

Elektor Digital The BeagleY-AI Handbook (E-book)
A Practical Guide to AI, Python, and Hardware Projects Welcome to your BeagleY-AI journey! This compact, powerful, and affordable single-board computer is perfect for developers and hobbyists. With its dedicated 4 TOPS AI co-processor and a 1.4 GHz Quad-core Cortex-A53 CPU, the BeagleY-AI is equipped to handle both AI applications and real-time I/O tasks. Powered by the Texas Instruments AM67A processor, it offers DSPs, a 3D graphics unit, and video accelerators. Inside this handbook, you‘ll find over 50 hands-on projects that cover a wide range of topics—from basic circuits with LEDs and sensors to an AI-driven project. Each project is written in Python 3 and includes detailed explanations and full program listings to guide you. Whether you‘re a beginner or more advanced, you can follow these projects as they are or modify them to fit your own creative ideas. Here’s a glimpse of some exciting projects included in this handbook: Morse Code Exerciser with LED or BuzzerType a message and watch it come to life as an LED or buzzer translates your text into Morse code. Ultrasonic Distance MeasurementUse an ultrasonic sensor to measure distances and display the result in real time. Environmental Data Display & VisualizationCollect temperature, pressure, and humidity readings from the BME280 sensor, and display or plot them on a graphical interface. SPI – Voltmeter with ADCLearn how to measure voltage using an external ADC and display the results on your BeagleY-AI. GPS Coordinates DisplayTrack your location with a GPS module and view geographic coordinates on your screen. BeagleY-AI and Raspberry Pi 4 CommunicationDiscover how to make your BeagleY-AI and Raspberry Pi communicate over a serial link and exchange data. AI-Driven Object Detection with TensorFlow LiteSet up and run an object detection model using TensorFlow Lite on the BeagleY-AI platform, with complete hardware and software details provided.
€ 34,95
Leden: € 31,46
-

Elektor Publishing Arduino UNO Q and AI
Learn to Build Intelligent Embedded Systems Build smarter embedded systems with Arduino UNO Q. This book gives you the tools, knowledge, and confidence to turn ideas into intelligent, working solutions using the Arduino UNO Q platform. Discover how to build intelligent embedded systems with the Arduino UNO Q and AI. Unlock the full potential of the Arduino UNO Q, a next-generation platform that combines the real-time power of the STM32U585 microcontroller with the flexibility of a Qualcomm Dragonwing QRB2210 microprocessor. Learn how to rapidly prototype real-world applications using the Arduino IDE for low-level embedded control and Python in Arduino App Lab for high-level development. Build confidence through hands-on projects that guide you step by step from basic board features to complete working systems. Explore ready-to-use, AI based Arduino App Lab examples and see how they can jump-start your development and reduce time to deployment. Step into the world of Edge AI with a clear, practical introduction to Edge Impulse Studio—no prior AI experience required. Follow a complete, real-world workflow to create a Keyword Spotting AI application, covering data collection, model training, optimization, and on-device inference using the Edge Impulse Studio. Bridge the gap between embedded systems and machine learning and learn how to bring intelligence directly onto your hardware. Perfect for embedded engineers, educators, students, and makers looking to stay ahead in AI-enabled product development.
€ 34,95
Leden: € 31,46
-

Elektor Digital BBC micro:bit (E-book)
35 Touch Develop & MicroPython Projects The BBC micro:bit is a credit sized computer based on a highly popular and high performance ARM processor. The device is designed by a group of 29 partners for use in computer education in the UK and will be given free of charge to every secondary school student in the UK. The device is based on the Cortex-M0 processor and it measures 4 x 5 cm. It includes several important sensors and modules such as an accelerometer, magnetometer, 25 LEDs, 2 programmable push-button switches, Bluetooth connectivity, micro USB socket, 5 ring type connectors, and a 23-pin edge connector. The device can be powered from its micro USB port by connecting it to a PC, or two external AAA type batteries can be used. This book is about the use of the BBC micro:bit computer in practical projects. The BBC micro:bit computer can be programmed using several different programming languages, such as Microsoft Block Editor, Microsoft Touch Develop, MicroPython, and JavaScript. The book makes a brief introduction to the Touch Develop programming language and the MicroPython programming language. It then gives 35 example working and tested projects using these language. Readers who learn to program in Touch Develop and MicroPython should find it very easy to program using the Block Editor or any other languages. The following are given for each project: Title of the project Description of the project Aim of the project Touch Develop and MicroPython program listings Complete program listings are given for each project. In addition, working principles of the projects are described briefly in each section. Readers are encouraged to go through the projects in the order given in the book.
€ 24,95
Leden: € 22,46
-

Elektor Publishing Experimenting with Red Pitaya STEMlab Gen 2
Practical Projects and Programs With Experimenting with Red Pitaya STEMlab Gen 2, Red Pitaya goes beyond a versatile board. It becomes a powerful laboratory instrument for precision measurement, analysis, and control. From the fundamentals of electronic project development, monitoring, control, and design to testing, this book walks you step-by-step through everything you need to know to harness the full potential of Red Pitaya hardware and software. The book presents real-time, FPGA-based projects that are developed on a PC using the Vivado environment, then transferred to the Red Pitaya for execution and testing. You will learn about enhanced performance, expanded I/O capabilities, improved FPGA features, and advanced connectivity options that open up new frontiers for precision measurement, monitoring, and control in your embedded applications. Inside the book you will discover: A deep dive into Red Pitaya architecture and hardware design Electronic experiments using Red Pitaya for measurement and monitoring Hands-on projects using the Python programming language Practical guidance for FPGA programming using Red Pitaya Red Pitaya FPGA projects using the Verilog HDL under Vivado IDE Practical design of electronic projects including measurement and testing Step-by-step examples that bridge theory and real-world implementation Whether you are designing your own electronic circuits, developing signal analysis tools, or creating real-time control or monitoring systems, this book provides you the knowledge and confidence you need to fully learn and customize the Red Pitaya platform.
€ 39,95€ 32,95Beste prijs
-

OWON OWON OW18B Bluetooth Multimeter
Features Data-logger & Multimeter & Thermometer 3 (5/6) digits True RMS test supported BLE 4.0 wireless transmission, more stable, less power consumption Chart and Diagram mode, to analyze your data Supports NCV Voice Broadcast simplifies testing Flashlight function Built-in offline recording function Supports Android, iOS Included Test leads K-type thermocouple 9 V Battery Bolt driver Crocodile clip Quick guide
€ 39,63
-

OWON OWON SPE6103 DC Power Supply (300 W)
The OWON SPE6103 is a 1-channel DC power supply (300 W) in a small body with features like over voltage and over current protection. It has a high resolution of 10 mV/1 mA. The 2.8' LCD displays the following information (constant voltage output, constant current output, cumulative running time, actual output power, channel output status, actual voltage output, actual current output).Features Small body for easy carry High resolution: 10 mV/1 mA List waveform editing output, editable 10 groups of timing output function Low ripple/noise Over voltage / over current protection Output voltage and current curve monitoring function Intelligent temperature control fan cooling 2.8-inch TFT LCD display USB communication interface, support SCPI Specifications Model SPE6102 SPE6103 Rated Output (0-40°C) Voltage 0-60 V 0-60 V Current 10 A 10 A Output Power 200 W 300 W USB Output 5 V/1 A (SPE Series) or suppout QC2.0, QC3.0, BC1.2, Apple, Huawei, Samsung fast charging protocols (optional) Load Regulation Voltage ?30 mV Current ?20 mA Power Regulation Voltage ?30 mV Current ?20 mA Setting Resolution Voltage 10 mV Current 1 mA Readback Resolution Voltage 10 mV Current 1 mA Value Resolution (within 12 months) (25 ±5°C) Voltage ?0.1% ±30 mV ?0.1% ±30 mV Current ?0.05% ±10 mA Readback Value Resolution (25 ±5°C) Voltage ?0.1% ±30 mV ?0.1% ±30 mV Current Ripple/Noise Voltage (Vp-p) ?50mVp-p ?50mVp-p Voltage (rms) ?5mVrms ?5mVrms Current (rms) ?30mAp-p Output temperature coefficient (0-40°C) Voltage 100ppm/°C Current 200ppm/°C Readback temperature coefficient Voltage 100ppm/°C Current 200ppm/°C Response Time (50-100% rated load) ?1.0ms Storage 4 groups of data Working Temperature 0-40°C Included 1x OWON SPE6102 1x Power Cord 1x Quick Guide 1x USB Cable 1x Fuse Downloads User Manual Programming Manual Software
€ 125,00
-

Elektor Digital Compendium Elektrotechniek (PDF)
Bent u altijd al op zoek geweest naar een handig naslagwerk op het gebied van elektrotechniek en elektronica? Een boek waarin alles te vinden is wat in de dagelijkse praktijk voor hobby, studie of werk nodig is? Dan hoeft u niet langer verder te zoeken. U heeft namelijk gevonden wat u zoekt: Compendium Elektrotechniek (en elektronica). Met dit boek haalt u een grote diversiteit aan praktische kennis in huis. Alles wat u ooit beheerst heeft en waarvan u weet dat het ergens te vinden moet zijn, is nu terug te vinden in één boekwerk!Compendium Elektrotechniek is samengesteld door studenten en docenten van de Universiteit Twente. In het boek komen zowel theorie als praktijk aan bod. In het theoretische deel komen wiskunde, informatica, fysica, meettechniek, signaal- en systeemtheorie en elektronica aan de orde. Het praktische deel is onderverdeeld in de hoofdstukken componenten, audio/video en voedingen. Het is een verzameling informatie die regelmatig van pas komt voor iedereen die met elektrotechniek te maken heeft. Van pinouts van stekkers en IC's tot kleurcodes van weerstanden en schema's van spanningsregelaars.
€ 34,95
Leden: € 31,46
-

Uni-Trend UNI-T UDP3305S-E DC-voeding (328 W)
The UDP3305S-E is a high-performance programmable linear DC power supply. It has a clear LCD user interface, excellent performance indicators, a variety of analysis functions and communication interfaces. It can meet the diversified test needs of users. It aims to provide cost-effective DC programmable power supply equipment for teaching, scientific research, industry and other fields. LCD interactive interface Using a 4.3-inch high-definition display screen, it provides users with a man-machine interface with rich functions and simple operation, which can display the current set output voltage/current, actual output voltage/current and protection output voltage/current value of the power supply in real time. The functional interface is simple and comprehensive, easy to operate. One-key setting for series and parallel The series-parallel connection between CH1 and CH2 of the main channel can be realized without external connection, which simplifies the connection and makes the test easier. List/Delayer function With list and delay setting functions, it can set up to 2048 sets of data according to test requirements, and the number of cycles can reach 99999. It is used with waveform templates, which is very convenient for cycle testing and aging testing. Rich remote control interface Standard RS232 communication interface, Ethernet interface, Digital I/O and master and slave USB interfaces, can be controlled by remote connection to Ethernet, or through RS232 and USB, with the host computer software to achieve software control. Specificaties Type Linear DC power supply Channels 4 Total power 328 W Output voltage CH1/CH2: 0~30 VCH3: 0~6 VCH4: 5 V Output current CH1/CH2: 0~5 ACH3: 0~3 ACH4: 2 A Resolution 10 mV, 1 mA Setting accuracy 0.3% +20 mV<0.2% +5 mA Connectivity USB Device, RS-232, LAN, USB host, Digital I/O Inbegrepen 1x UDP3305S-E DC Power Supply 1x Power cord 1x USB cable Downloads Datasheet User manual Programming manual Software V1.0 Firmware V1.10
€ 396,54
-

Elektor Digital C# Programming for Windows and Android (E-book)
This e-book (pdf), a software-only follow up to the best-selling Elektor Visual Studio C# range of books, is aimed at Engineers, Scientists and Enthusiasts who want to learn about the C# language and development environment. It covers steps from installation, the .NET framework and object oriented programming, through to more advanced concepts including database applications, threading and multi-tasking, internet/network communications and writing DLLs. The DirectX chapters also include video capture. The e-book concludes with several chapters on writing Android applications in C# using the Xamarin add-on. This e-book is based on the Visual Studio 2015 development environment and latest C# additions including WPF applications, LINQ queries, Charts and new commands such as await and async. The latest Visual Studio debugging features (PerfTips, Diagnostic Tool window and IntellTrace) are covered. Finally, the Android chapters include GPS, E-mail and SMS applications. Additionally, the e-book provides free on-line access to extensive, well-documented examples — in a try for yourself style — together with links to the author’s videos, guiding you through the necessary steps to get the expected results.
€ 39,95
Leden: € 35,96
-

Elektor Digital The State of Hollow State Audio (E-book)
The State of Hollow State Audio in the Second Decade of the 21st Century Vacuum-tube (or valve, depending upon which side of the pond you live on) technology spawned the Age of Electronics early in the 20th Century. Until the advent of solid-state electronics near mid-century, hollow-state devices were the only choice. But following the invention of the transistor (after their process fell to reasonable levels), within a couple of decades, the death of vacuum tubes was widely heralded. Yet here we are some five decades later, and hollow-state equipment is enjoying something of a comeback, especially in the music and high-end audio industries. Many issues surround hollow-state audio: Does it produce—as some claim—better sound? If so, is there science to back up these claims? How do hollow-state circuits work? How do you design hollow-state audio circuits? If hollow-state equipment fails, how do you go about troubleshooting and repairing it? Can we recreate some of the classic hollow-state audio devices for modern listening rooms and recording studios? How can we intelligently modify hollow-state amplifiers to our taste? These and other topics are covered in The State of Hollow State Audio.
€ 32,95
Leden: € 29,66
-
Elektor Januari/Februari 2025 (NL)
Elektor GREEN en GOLD leden kunnen deze uitgave hier downloaden. Nog geen lid? Klik hier om een lidmaatschap af te sluiten. DHZ-accusysteem voor zonne-energiebouw uw eigen energieopslag voor zonnepanelen Simulator voor zonnepanelentest en optimaliseer MPP-trackers en omvormers De STM32 Edge-AI-ContestOntdek de nieuwe STM32N6 en ding mee naar € 5000! Vergroten van de bandgapdaarom is er zoveel interesse in SiC en GaN Powerbank voor noteboekgeef uw oude laptop een tweede leven Medische robotshet overwinnen van technische en regelgevende barrières Vorstbescherming voor fruitbomenmet temperatuurlogger Het analoge dingde Arduino onder de analoge computers? Zuinige relaisdriverspaart 90% spoelstroom Verbetering van de ET5410A+ DC-belastingblijf koel en stil electronica 2024een terugblik Elektromagnetische compatibiliteitEMC in een notendop! Alle begin......filtert actief Reduceer vermogensverlies met seriecondensatorenslim gebruik van capacitieve reactantie De betaalbare MCP4725 12-bit digitaal/analoog-omzetterEEPROM-functie zorgt voor veilig inschakelgedrag FNIRSI LCR-ST1 smart LCR-meetpincet Raspberry Pi-gebaseerd test- en meetlabals eerste: de ADC Elektronische belastingweerstandmet onderdelen die u waarschijnlijk hebt liggen 2025: een AI-odysseeenkele projecten voor het nieuwe jaar Project-update: AmpVolt v2.0100 ampère en meer! Project 2.0correcties, updates en brieven van lezers Ethische transparantie ontsluierdinzichten uit het Ethics in Electronics 2024 onderzoek Audio DSP FX Processor Boarddeel 2: toepassingen maken
€ 14,95
-
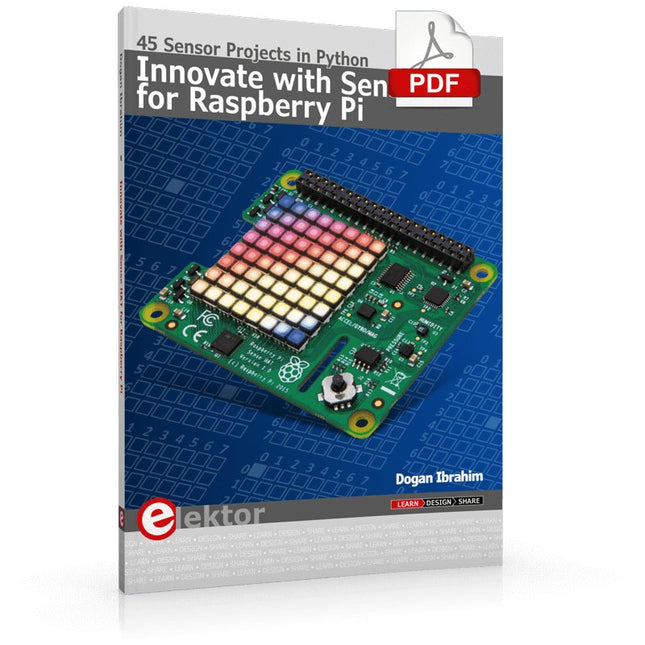
Elektor Digital Innovate with Sense HAT for Raspberry Pi (E-book)
Ready to explore the world around you? By attaching the Sense HAT to your Raspberry Pi, you can quickly and easily develop a variety of creative applications, useful experiments, and exciting games. The Sense HAT contains several helpful environmental sensors: temperature, humidity, pressure, accelerometer, magnetometer, and gyroscope. Additionally, an 8x8 LED matrix is provided with RGB LEDs, which can be used to display multi-color scrolling or fixed information, such as the sensor data. Use the small onboard joystick for games or applications that require user input. In Innovate with Sense HAT for Raspberry Pi, Dr. Dogan Ibrahim explains how to use the Sense HAT in Raspberry Pi Zero W-based projects. Using simple terms, he details how to incorporate the Sense HAT board in interesting visual and sensor-based projects. You can complete all the projects with other Raspberry Pi models without any modifications. Exploring with Sense HAT for Raspberry Pi includes projects featuring external hardware components in addition to the Sense HAT board. You will learn to connect the Sense HAT board to the Raspberry Pi using jumper wires so that some of the GPIO ports are free to be interfaced to external components, such as to buzzers, relays, LEDs, LCDs, motors, and other sensors. The book includes full program listings and detailed project descriptions. Complete circuit diagrams of the projects using external components are given where necessary. All the projects were developed using the latest version of the Python 3 programming language. You can easily download projects from the book’s web page. Let’s start exploring with Sense HAT.
€ 29,95
Leden: € 26,96
-

Raspberry Pi Foundation FPC Display Cable for Raspberry Pi 5 (500 mm)
Raspberry Pi 5 provides two four-lane MIPI connectors, each of which can support either a camera or a display. These connectors use the same 22-way, 0.5 mm-pitch “mini” FPC format as the Compute Module Development Kit, and require adapter cables to connect to the 15-way, 1 mm-pitch “standard” format connectors on current Raspbery Pi camera and display products.These mini-to-standard adapter cables for cameras and displays (note that a camera cable should not be used with a display, and vice versa) are available in 200 mm, 300 mm and 500 mm lengths.
€ 3,95€ 1,58Beste prijs
-

iFixit iFixit Essential Electronics Toolkit
De iFixit Essential Electronics Toolkit is precies wat u nodig heeft voor de meest essentiële elektronische reparaties – zoals het vervangen van schermen en batterijen – én voor de meeste doe-het-zelfklussen in en om het huis. Ga direct aan de slag met elektronica reparaties dankzij alle bits en precisiegereedschappen die u nodig heeft om uw meest urgente schermbreuken en batterijvervangingen aan te pakken. Of breid eenvoudig uw doe-het-zelfgereedschap voor thuis uit met alles wat u nodig heeft voor het onderhouden van deurknoppen, huishoudelijke apparaten, brillen en nog veel meer. Kit bevat Magnetized Driver Handle Angled Precision Tweezers Spudger Jimmy iFixit Opening Tool iFixit Opening Picks set of 6 Suction Handle Easy-to-Open Magnetized Case Lid with Built-in Sorting Tray Sixteen 4mm Precision Screwdriver Bits Phillips - 000, 00, 0, 1 Pentalobe - P2, P5 Flathead - 1 mm, 2.5 mm, 4 mm Torx - T4, T5 Torx Security - TR6, TR8, TR10 Tri-Point - Y000 SIM Eject Bit Specificaties Bit Metal: 6150 Steel Driver Material: Polymer Case Material: ABS Foam: EVA
€ 34,95
-

Elektor Digital 37 Natuurkunde Projecten met Arduino (E-book)
Voor thuis en op school Dit boekje is gericht op leerlingen en natuurkunde docenten in het voortgezet onderwijs. Met voorbeelden op verschillende gebieden van de fysica, geeft het aan hoe een populair microprocessor platform als Arduino toegepast kan worden in het natuurkunde practicum. We passen Arduino onder andere toe als nauwkeurig meetinstrument, zodat metingen uitgewerkt kunnen worden in een spread sheet. Hoewel enige handigheid niet overbodig is, kunnen de beschreven experimenten kunnen ook uitstekend thuis worden uitgevoerd. In dat opzicht wil dit boek met name bij de jeugd de interesse wekken voor de toepassing van microprocessoren. In de hobbysfeer is dat niet alleen een zinvolle tijdsbesteding, maar bovenal interessant en leuk. Veiligheid staat uiteraard voorop bij het doen van experimenten. Energie, licht en warmte zijn onuitputtelijke bronnen, maar ze kunnen ook gevaar opleveren. Voor dit boek geldt dan ook het motto: Eerst denken, dan doen.
€ 19,95
Leden: € 17,96
-

iFixit iFixit Manta Driver Kit
This kit includes iFixit's widest assortment of bits, complete with every driver head you’ll need to tackle any repair or DIY project. It includes standard bits like Phillips and Flathead in a full range of sizes to handle everything from precision electronics repair to home DIY projects. And it wouldn’t be an iFixit bit set if it didn’t include all the exotic bits from Pentalobes for Apple iPhone and MacBook repair to Gamebits for your vintage Nintendo consoles. All of the next-gen bit sets have been re-designed in order to maximize convenience and usability. The bit set lid is held in place with magnets to increase product lifespan (no more broken hinges or clasps) and also mounts to the back of the bit set case to keep it out of the way while you do your work. If you need help keeping your screws and parts organized, you can use the lid’s integrated sorting tray. The 4 mm bits have been adjusted and have now a longer neck for a deeper and more precise reach. Toolkit bevat Easy-to-Open Magnetized Case Lid with Built-in Sorting Tray 4 mm Aluminum Bit Driver 1/4' Aluminum Bit Driver 4 mm Screwdriver Bits Phillips - 000, 00, 0 Flathead - 1, 1.5, 2, 2.5, 3, 3.5 mm Torx - T2, T3, T4, T5 Torx Security - TR6, TR7, TR8 Pentalobe - P2, P5, P6 JIS - 000, 00, 0, 1 Hex - 0.7, 0.9, 1.3, 1.5 mm Hex Security - 2, 2.5, 3, 3.5 mm Tri-point - Y000, Y00, Y0, Y1 Nut driver - 2.5, 3, 3.5, 4, 4.5, 5, 5.5 mm Gamebit - 3.8, 4.5 mm Spanner - 4, 6 Triangle - 2, 2.2, 2.6, 3 mm Oval Bit iPhone Standoff Bit Sim Eject Bit Magnetic Pickup Bit 1/4' Screwdriver Bits Phillips - 1, 2, 3 Flathead - 4, 5, 6, 7, 8 mm Hex Security - 4, 5, 6, 7, 8 mm Hex Security SAE - 1/8, 9/64, 5/32, 3/16, 7/32, 1/4 Pozidriv - PZ0, PZ1, PZ2, PZ3 Torq-set - 6, 8, 10 Spanner - 8, 10, 12 Square - 0, 1, 2, 3 Spline - M5, M6, M8 Torx Security - TR9, TR10, TR15, TR20, TR25, TR27, TR30, TR35, TR40 Tri-wing 1, 2, 3, 4 Clutch 1, 2, 3 Schrader Valve Hook Drive 1/4' to 4 mm Adapter 1/4' Driver to 1/4' Socket 1/4' Driver to 3/8' Socket 1/4' Socket to 1/4' Driver Specificaties Bit Metal: 6150 Steel Driver Material: Anodized Aluminum Case Material: ABS Foam: EVA
€ 64,95
-

Miniware Miniware MDP-P906 Digital Power Supply (300 W)
De MDP-P906 heeft een ingebouwde ventilator en een maximaal uitgangsvermogen van 300 W, wat toereikend is voor een breed scala aan testbehoeften en toepassingen. Via 2,4 GHz draadloze communicatie kan hij worden aangesloten op de MDP-M01 Smart Digital Monitor module om daarmee een flexibele combinatie van meerdere kanalen van 300 W per kanaal te kunnen realiseren. De MDP-P906 heeft een basis, stabiliteit en betrouwbaarheid die te vergelijken is met een professionele voeding. Hij kan puur stroom leveren én krachtige functies hieraan toevoegen, zoals programmeerbare uitgang, getimede uitgang, getimede regeling, automatische compensatie, boost modus, enz. Dit maakt hem tot een kosteneffectieve, slimme en op maat programmeerbare lineaire DC-voeding. De MDP-P906 heeft een zorgvuldig CNC-gefreesde aluminium behuizing, met verfijnde afwerking, eigentijds, bescheiden en prachtig uiterlijk. Hij wijkt hiermee volledig af van het standaard uiterlijk van een traditionele desktop voeding. Door een stackable modulair ontwerp en de draadloze communicatie kan de MDP-P906 onafhankelijk of onderling gekoppeld worden gebruikt, zowel in de normale werkruimte als bij onderhoud op locatie. De MDP-P906 is een perfecte oplossing voor elektrotechnici, met name servicemonteurs, om bij verschillende situaties en toepassingen de stroom te leveren. Ingebouwde stille ventilator, instant cooling, voor een stabiele en efficiënte output! Slimme lineaire compensatie, constante spanning & constante stroom Positieve en negatieve output, series boost, parallelle stroomverdeling Toepassingen Universele tests en onderwijsexperimenten in R&D laboratoria Onderhoud van digitale producten Eigendomsverificatie en foutdiagnose van apparaten en circuits Noodstroomvoorziening voor modelvliegtuigen en voertuigen Voedingen testen van RF en microgolfcircuits of -modules Kwaliteitscontrole en kwaliteitsinspectie Zuivere voeding voor zeer nauwkeurige digitaal-analoge hybride circuits en Hi-Fi audioapparaten Specificaties Input DC 4.2-30 V / 14 A (Max)QC 3.0/PD2.0, 20 V / 5 A (Max) Uitgang 0-30 V / 0-10 A, 300 W (Max) Conversie efficiëntie 95% Output resolutie 10 mV / 2 mA, tot 1 mV / 1 mA via Display Control module Output nauwkeurigheid 0,03%+5 mV0,05%+2 mV Adjustment rate Load adjustment rate <±0,01%Power adjustment rate <±0,01% Ripple en noise <250 uVrms, 3 mVpp; 2 mArms Transient response <4 uS Beveiligingen Te hoge voedingsspanning, onderspanning, omgekeerd aansluiten, te hoge uitgangsstroom, retourstroom en oververhitting Overig Automatisch afsluiten en naar micro-power modeOndersteuning van USB firmware upgrade Afmetingen 112 x 66 x 20 mm Gewicht 181 g Inbegrepen 1x MDP-P906 digitale voeding 2x uitgangskabel 1x gebruikershandleiding Downloads User Manual v1.1 Firmware v1.32
€ 171,95
-

Elektor Digital Home Automation Projects with Arduino (E-book)
Using the RFID Starter Kit An Arduino board has now become ‘the’ basic component in the maker community. No longer is an introduction to the world of microcontrollers the preserve of the expert. When it comes to expanding the capabilities of the basic Arduino board however, the developer is still largely on his own. If you really want to build some innovative projects it’s often necessary to get down to component level. This can present many beginners with major problems. That is exactly where this book begins. This book explains how a wide variety of practical projects can be built using items supplied in a single kit together with the Arduino board. This kit, called the 'RFID Starter Kit for Arduino' (SKU 17240) is not just limited to RFID applications but contains more than 30 components, devices and modules covering all areas of modern electronics. In addition to more simple components such as LEDs and resistors there are also complex and sophisticated modules that employ the latest technology such as: A humidity sensor A multicolor LED A large LED matrix with 64 points of light A 4-character 7-segment LED display An infra red remote-controller unit A complete LC-display module A servo A stepper motor and controller module A complete RFID reader module and security tag On top of that you will get to build precise digital thermometers, hygrometers, exposure meters and various alarm systems. There are also practical devices and applications such as a fully automatic rain sensor, a sound-controlled remote control system, a multifunctional weather station and so much more. All of the projects described can be built using the components supplied in the Elektor kit.
€ 29,95
Leden: € 26,96
-

Elektor Digital Embedded Operating System (E-book)
History and Future in the Internet of Things This book thoroughly reviews the history of the development of embedded Operating Systems, covers the technical characteristics, historic facts, as well as background business stories of mainstream embedded Operating Systems, and analyzes the technical evolution, market development, and new opportunities of embedded Operating Systems in the age of the Internet of Things. From the perspective of time, the book examines the evolution of critical technical aspects, including real-time and Power Management of embedded Operating Systems and Linux, Internet of Things security, communication, and cloud computing. The book looks into applications of embedded Operating Systems with important markets of mobile phones, communication equipment, automobile, and wearable devices, and also discusses business model and the issue of intellectual property of embedded Operating Systems. In addition, the book walks through the status quo, technical features, product evaluation and background of the Internet of Things Operating Systems in the second half of the book.
€ 29,95
Leden: € 26,96
-
Elektor Digital Elektor Januari/Februari 2025 (PDF) NL
Elektor GREEN en GOLD leden kunnen deze uitgave hier downloaden. Nog geen lid? Klik hier om een lidmaatschap af te sluiten. DHZ-accusysteem voor zonne-energiebouw uw eigen energieopslag voor zonnepanelen Simulator voor zonnepanelentest en optimaliseer MPP-trackers en omvormers De STM32 Edge-AI-ContestOntdek de nieuwe STM32N6 en ding mee naar € 5000! Vergroten van de bandgapdaarom is er zoveel interesse in SiC en GaN Powerbank voor noteboekgeef uw oude laptop een tweede leven Medische robotshet overwinnen van technische en regelgevende barrières Vorstbescherming voor fruitbomenmet temperatuurlogger Het analoge dingde Arduino onder de analoge computers? Zuinige relaisdriverspaart 90% spoelstroom Verbetering van de ET5410A+ DC-belastingblijf koel en stil electronica 2024een terugblik Elektromagnetische compatibiliteitEMC in een notendop! Alle begin......filtert actief Reduceer vermogensverlies met seriecondensatorenslim gebruik van capacitieve reactantie De betaalbare MCP4725 12-bit digitaal/analoog-omzetterEEPROM-functie zorgt voor veilig inschakelgedrag FNIRSI LCR-ST1 smart LCR-meetpincet Raspberry Pi-gebaseerd test- en meetlabals eerste: de ADC Elektronische belastingweerstandmet onderdelen die u waarschijnlijk hebt liggen 2025: een AI-odysseeenkele projecten voor het nieuwe jaar Project-update: AmpVolt v2.0100 ampère en meer! Project 2.0correcties, updates en brieven van lezers Ethische transparantie ontsluierdinzichten uit het Ethics in Electronics 2024 onderzoek Audio DSP FX Processor Boarddeel 2: toepassingen maken
€ 9,95
-
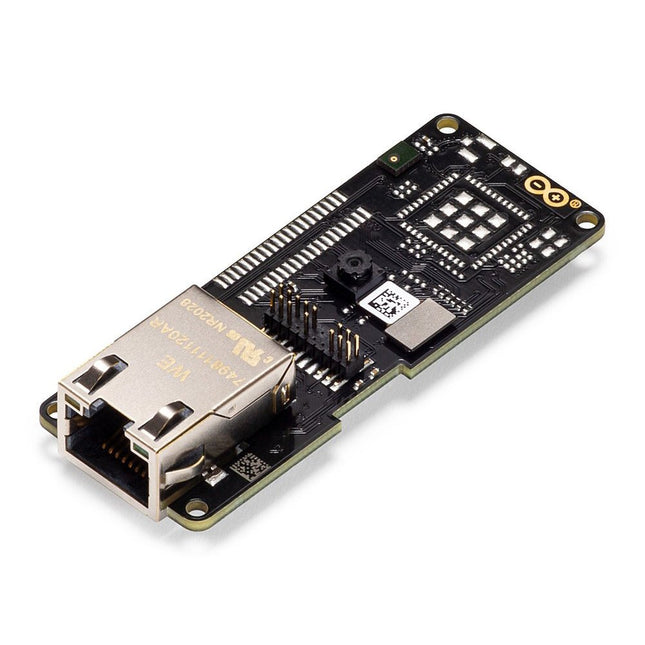
Arduino Arduino Portenta Vision Shield (Ethernet)
Features 324x324 pixels camerasensor: gebruik een van de kernen in Portenta om beeldherkenningsalgoritmes uit te voeren met de OpenMV for Arduino editor 100 Mbps Ethernet connector: verbind uw Portenta H7 met het bekabelde Internet 2 onboard microfoons voor richtingsgevoelige geluidsdetectie: vang en analyseer geluid in real-time JTAG connector: voer low-level debugging uit van uw Portenta bord of speciale firmware updates met behulp van een externe programmer SD-Card aansluiting: sla uw vastgelegde gegevens op de kaart op, of lees configuratiebestanden Het Vision Shield is ontworpen om bovenop de Arduino Portenta familie te passen. De Portenta boards zijn voorzien van multicore 32-bit ARM® Cortex™ processoren die draaien op honderden megahertz, met megabytes aan programmageheugen en RAM. Portenta boards worden geleverd met WiFi en Bluetooth.Embedded computer vision gemakkelijk gemaaktArduino heeft samengewerkt met OpenMV om u een gratis licentie voor de OpenMV IDE aan te bieden, een eenvoudige manier om computervisie te gebruiken met MicroPython als programmeerparadigma. Download de OpenMV voor Arduino Editor van onze professionele tutorials site en blader door de voorbeelden die we voor u hebben voorbereid in de OpenMV IDE. Bedrijven over de hele wereld bouwen al hun commerciële producten op basis van deze eenvoudig-maar-krachtige benadering voor het detecteren, filteren en classificeren van afbeeldingen, QR-codes, en anderen. Debugging met professioneel gereedschapSluit uw Portenta H7 aan op een professionele debugger via de JTAG connector. Gebruik professionele software tools zoals die van Lauterbach of Segger bovenop uw board om uw code stap voor stap te debuggen. Het Vision Shield maakt de benodigde pinnen vrij voor het aansluiten van uw externe JTAG. Camera Himax HM-01B0 cameramodule Resolutie 320 x 320 actieve pixel resolutie met ondersteuning voor QVGA beeldsensor Hoge gevoeligheid 3.6? BrightSense™ pixel technologie Microfoon 2 x MP34DT05 Lengte 66 mm Breedte 25 mm Gewicht 11 gr Voor meer informatie, bekijk de tutorials die door Arduino hier.
€ 69,95€ 19,95Beste prijs
-

Sensepeek Sensepeek 6014 SQ200 (200 MHz handsfree Oscilloscope Probe)
The SQ series of handsfree probes from Sensepeek have a lower point of gravity making them even more stable compared with the original SP series of handsfree probes. All probes in the SQ series are also insulated and can be used handheld as any traditional probe but their full potential is used when measuring handsfree. Features The SQ series of handsfree probes from Sensepeek have a lower point of gravity making them even more stable compared with the original SP series of handsfree probes. All probes in the SQ series are also insulated and can be used handheld as any traditional probe but their full potential is used when measuring handsfree. The SQ series of oscilloscope probes also includes more ground options, have probe tip protection, longer cable and support for oscilloscopes with automatic scaling (10:1). All the loved features of handsfree measurement, exchangeable fine pitch spring tipped test needle, color-coded cable holders and the minimalistic design is maintained to make traditional sized and handheld probes obsolete. Both length and weight of the SQ probes are perfectly balanced to be used with PCBite PCB holders and base plate which is a must for handsfree function. Included 1x SQ200 200 MHz probe with spring tipped test needle 1x SQ probe holder for handsfree measurement 1x Testhook with detachable cables (5 cm & 10 cm) for convenient ground connection 1x Alligator cable for convenient ground connection 1x Standard ground spring, for handheld measurements at rated bandwidth 1x Unique ground spring, for total handsfree measurements at rated bandwidth 1x Set of color coded cable holders (4 colors) 1x Probe tip protection 1x Extra test needle Downloads User Guide SQXX0 Rev1.2
€ 82,52
-
Elektor Circuit Special 2025 (NL)
Elektor GREEN en GOLD leden kunnen deze uitgave hier downloaden. Nog geen lid? Klik hier om een lidmaatschap af te sluiten. USB-meetadaptertest stroom en signaalkwaliteit van USB-poorten 4...20 mA stroom-uitgang voor Arduino Unobetrouwbare, EMI-ongevoelige current loop-interface Automatische stofzuigerschakelaarhoud uw werkplek schoon DDS-generator met ATtiny Opamp-tester v2nieuwe print – nu ook voor SMD’s 550-mW audio ‘Lamp-Amp’voor die warme buizenklank Zekeringbewakerhoud zekeringen in de gaten met een knipper-LED Hoogwaardige RIAA-voorversterkerhaal het beste uit uw vinylplaten! Kalibratie voor draaitafelsArduino-gebaseerde 100/120Hz-stroboscoop Elektor Classics: Video-versterker Dimmer met IR-afstandsbedieningcomfortabel en elegant staande halogeen- of LED-lampen regelen Het gebruik van switch…case bij strings in C++/Arduino IDE Magneetzoekermet een eenvoudige Hall-effect-sensor Raspberry Pi: slimme aan/uit-knopeen oplossing voor de Raspberry Pi tot aan model 4 Professionele tipsvan makers voor makers Praktische projecten met de 555-timerDC-motorbesturing en snelle reactie-uitdaging Eenvoudige ‘aan-verklikker’spaar energie met een simpele schakeling Powerpacks parallelschakelendrie dagen ononderbroken stroom VFO tot 15 MHzimplementatie met Raspberry Pi Pico Vioolstemmer met ATtiny202 Elektor Classics: Video-ingangsversterker voor zwart/wit-TV Capaciteitsmeter20 pF tot 600 nF Quasi-analoog uurwerk Mk IItwee LED-ringen – voor uren en minuten Niets is onmogelijk(met hulp van het Arduino-ecosysteem) Neon dobbelsteen Elektor Classics: RTTY-afstemhulp Inspirerende hardware-ontwerpen voor uw ESP’s Elektor Classics: 3 A voeding RGB-LED’s met geïntegreerde stuurkringlicht met precisie: ICLED’s zetten de standaard Experiment: een mixed-signal Theremin?moderne time-of-flight sensoren plus de tijdloze analoge XR2206 ESP32 audio-transceiver (deel 1)SD-kaart WAV-speler demo Elektor infographicschakelingen en schakelingontwerp 2025 Kleine audiomixereenvoudig, veelzijdig en schaalbaar Slimme timer voor trapverlichtingbespaar op uw energierekening! Maak uw rolluiken slimmerVelux-hardware besturen met een ESP32 en MQTT Solid-state voetenwarmercomfortabel en energiezuinig Is de M5Stamp Fly-quadcopter de nieuwe Tello? Vergroot het WiFi-bereik van de ESP32-C3 SuperMinieenvoudige en effectieve antennemodificatie ZD-8968 hetelucht-soldeerstationbudgetvriendelijk werkpaard of gebakken lucht? Parkeersensor-testervind defecten in het PDC-systeem van een auto
€ 15,95


