Producten
-
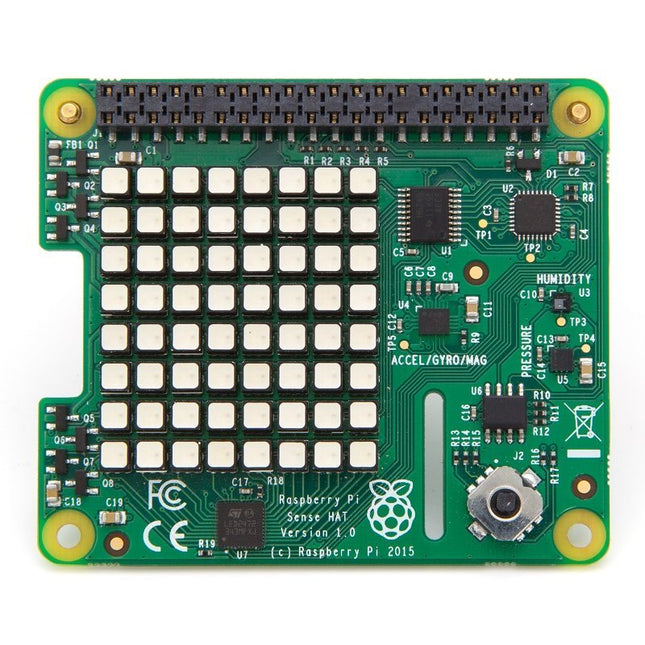
Raspberry Pi Foundation Raspberry Pi Sense HAT
The official Sense HAT from the Raspberry Pi Foundation is an add-on board for Raspberry Pi (4, 3, 2, B+ and A+). The Sense HAT has the following sensors: 8x8 RGB LED matrix display Accelerometer Gyroscope Magnetometer Air pressure sensor Temperature Humidity sensor Five-button joystick
-

Raspberry Pi Foundation Raspberry Pi SSD (256 GB)
De Raspberry Pi SSD ontgrendelt uitstekende prestaties voor I/O-intensieve toepassingen op Raspberry Pi 5 en andere apparaten, inclusief supersnel opstarten bij het opstarten vanaf SSD. Het is een betrouwbare, responsieve en krachtige PCIe Gen 3-compatibele SSD die snelle gegevensoverdracht mogelijk maakt en ook beschikbaar is met een capaciteit van 512 GB. Kenmerken 40k IOPS (4 kB willekeurige leesbewerkingen) 70k IOPS (4 kB willekeurige schrijfbewerkingen) Downloads Datasheet
-

Raspberry Pi Foundation Raspberry Pi SSD (512 GB)
De Raspberry Pi SSD ontgrendelt uitstekende prestaties voor I/O-intensieve toepassingen op Raspberry Pi 5 en andere apparaten, inclusief supersnel opstarten bij het opstarten vanaf SSD. Het is een betrouwbare, responsieve en krachtige PCIe Gen 3-compatibele SSD die snelle gegevensoverdracht mogelijk maakt en ook beschikbaar is met een capaciteit van 256 GB. Kenmerken 50k IOPS (4 kB willekeurige leesbewerkingen) 90k IOPS (4 kB willekeurige schrijfbewerkingen) Downloads Datasheet
-
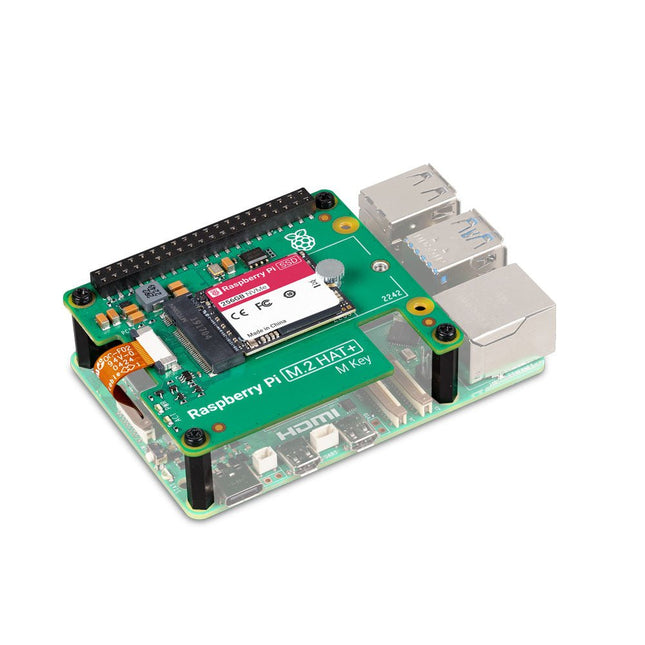
Raspberry Pi Foundation Raspberry Pi SSD Kit voor Raspberry Pi 5 (256 GB)
De Raspberry Pi SSD Kit bevat een Raspberry Pi M.2 HAT+ met een Raspberry Pi NVMe SSD. Het ontgrendelt uitstekende prestaties voor I/O-intensieve toepassingen op Raspberry Pi 5, inclusief supersnel opstarten bij het opstarten vanaf SSD. De Raspberry Pi SSD Kit is ook verkrijgbaar met een capaciteit van 512 GB. Kenmerken 40k IOPS (4 kB willekeurige leesbewerkingen) 70k IOPS (4 kB willekeurige schrijfbewerkingen) Voldoet aan de Raspberry Pi HAT+ specificatie Inbegrepen 256 GB NVMe SSD M.2 HAT+ voor Raspberry Pi 5 16 mm GPIO stacking header Bevestigingsmateriaalset (afstandhouders, schroeven) Downloads Datasheet
-
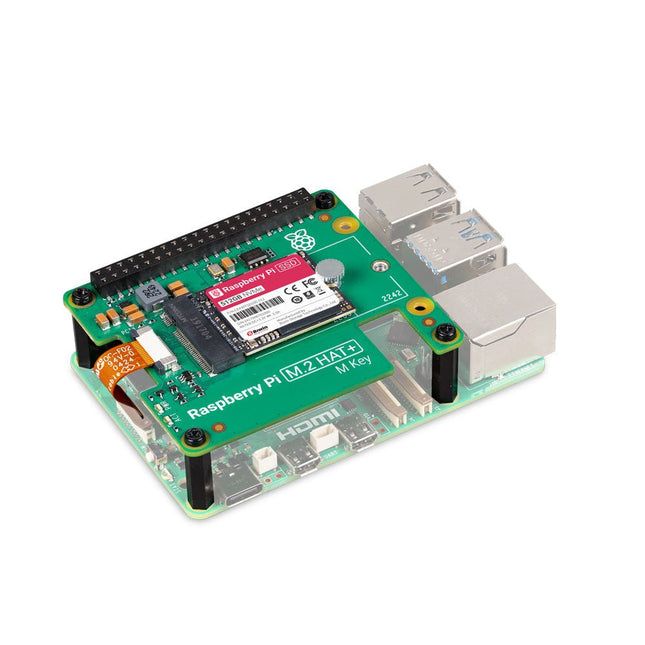
Raspberry Pi Foundation Raspberry Pi SSD Kit voor Raspberry Pi 5 (512 GB)
De Raspberry Pi SSD Kit bevat een Raspberry Pi M.2 HAT+ met een Raspberry Pi NVMe SSD. Het ontgrendelt uitstekende prestaties voor I/O-intensieve toepassingen op Raspberry Pi 5, inclusief supersnel opstarten bij het opstarten vanaf SSD. De Raspberry Pi SSD Kit is ook verkrijgbaar met een capaciteit van 256 GB. Kenmerken 50k IOPS (4 kB willekeurige leesbewerkingen) 90k IOPS (4 kB willekeurige schrijfbewerkingen) Voldoet aan de Raspberry Pi HAT+ specificatie Inbegrepen 512 GB NVMe SSD M.2 HAT+ voor Raspberry Pi 5 16 mm GPIO stacking header Bevestigingsmateriaalset (afstandhouders, schroeven) Downloads Datasheet
-
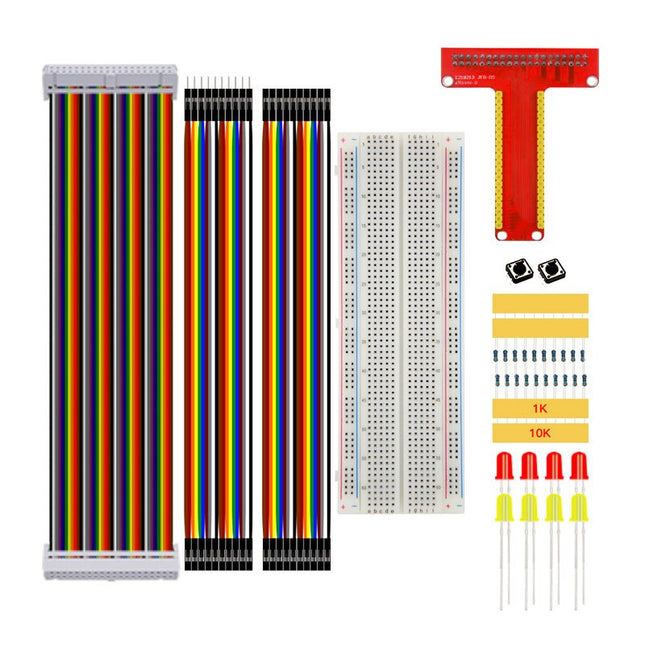
Kuongshun Raspberry Pi T-Type Kit
Features Suitable for Raspberry Pi + GPIO Extension Board Exquisite appearance DIY operation Specifications Size of GPIO Extension Board: 7.5 x 6 cm (3 x 2.4') Size of Breadboard: 16.5 x 5.5 x 1 cm (6.5 x 2.2 x 0.4') Included 1x GPIO Extension Board 1x Breadboard 1x 40P Pin Connect Line 8x 1K Resistor 8x 10K Resistor 4x LED (yellow) 4x LED (red) 4x Key 10x 25 mm Jumper Wires A 10x 25 mm Jumper Wires B
€ 14,95€ 9,95
Leden identiek
-
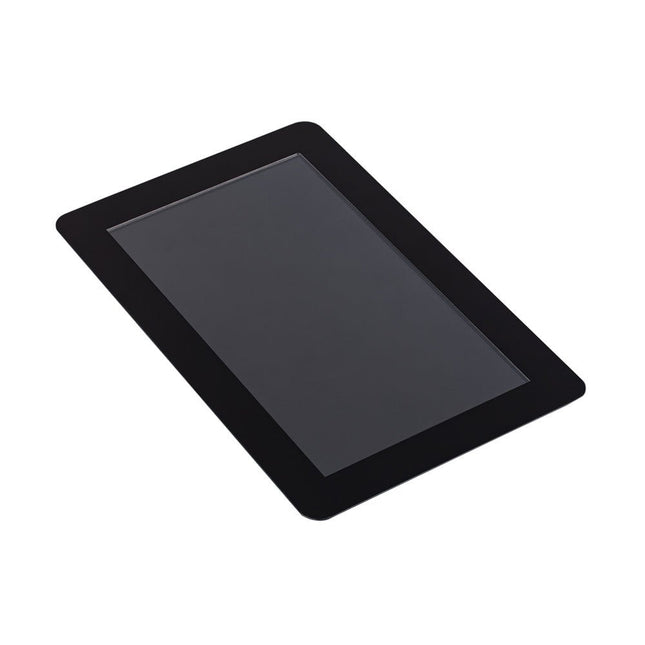
Raspberry Pi Foundation Raspberry Pi Touch Display 2
De Raspberry Pi Touch Display 2 is een 7-inch touchscreen ontworpen voor Raspberry Pi, perfect voor interactieve projecten zoals tablets, entertainmentsystemen en informatiedashboards. Raspberry Pi OS bevat touchscreen drivers die vijf-vinger touch en een on-screen toetsenbord ondersteunen, waardoor volledige functionaliteit zonder een fysiek toetsenbord of muis mogelijk is. Het aansluiten van het 720 x 1280 scherm op je Raspberry Pi vereist slechts twee aansluitingen: voeding via de GPIO poort en een lintkabel naar de DSI poort, compatibel met alle Raspberry Pi modellen behalve de Raspberry Pi Zero lijn. Specificaties Display 7 inch TFT (720 x 1280 pixels) Actief gebied 88 x 155 mm Aanraakpaneel Echt multi-touch capacitief aanraakscherm, dat aanraking met vijf vingers ondersteunt Oppervlaktebehandeling Antireflectie Kleurconfiguratie RGB-streep Type achtergrondverlichting LED B/L Inbegrepen 1x Raspberry Pi Touch Display 2 1x 22-pins tot 15-pins FFC voor Raspberry Pi 5 1x 15-pins naar 15-pins FFC voor Raspberry Pi 4 en ouder 1x GPIO-connectorkabel 8x M2.5-schroeven Downloads Datasheet
-

Raspberry Pi Foundation Raspberry Pi USB 3.0 Hub
De Raspberry Pi USB 3 Hub breidt de connectiviteit van uw apparaat uit door een enkele USB-A-poort om te zetten in vier USB 3.0-poorten. Met een optionele externe USB-C-voedingsingang kan hij randapparatuur met hoog vermogen ondersteunen, terwijl randapparatuur met een lager vermogen zonder extra voeding werkt. De USB 3 Hub is volledig getest op naadloze compatibiliteit met alle Raspberry Pi-producten. Kenmerken Enkele upstream-verbinding: USB 3.0 Type-A-connector met een kabel van 8 cm Vier downstream-poorten: USB 3.0 Type-A-poorten voor verbindingen met meerdere apparaten Hoge gegevensoverdracht: Ondersteunt snelheden tot 5 Gbps Compatibiliteit: Werkt met USB 3.0 Type-A hostpoorten en is achterwaarts compatibel met USB 2.0-poorten Downloads Datasheet
-
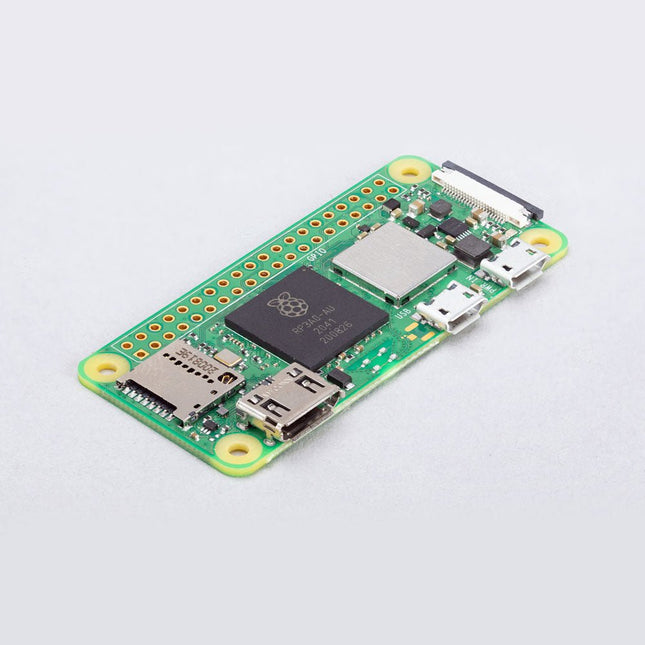
Raspberry Pi Foundation Raspberry Pi Zero 2 W
Raspberry Pi Zero 2 W is de opvolger van de baanbrekende Raspberry Pi Zero W. Het bord bevat een quad-core 64-bit Arm Cortex-A53 CPU, geklokt op 1 GHz. Het hart is een Raspberry Pi RP3A0 system-in-package (SiP), waarin een Broadcom BCM2710A1 chip is geïntegreerd met 512 MB LPDDR2 SDRAM. De verbeterde processor biedt Raspberry Pi Zero 2 W 40% meer single-threaded prestaties, en vijf keer meer multi-threaded prestaties, dan de originele single-core Raspberry Pi Zero. Kenmerken 64-bit quad core-processor VideoCore IV GPU 512 MB LPDDR2 DRAM 802.11b/g/n draadloos LAN Bluetooth 4.2 / Bluetooth Low Energy (BLE) Slot voor MicroSD-kaart Mini HDMI- en USB 2.0 OTG-poorten Micro-USB-voeding HAT-compatibele 40-pins header Composiet video- en reset-pinnen via soldeer testpunten CSI-cameraconnector Specificaties SoC Broadcom BCM2710A1 CPU 64-bit ARM Cortex-A53 (4x 1 GHz) GPU Broadcom VideoCore VI RAM 512 MB LPDDR2 Wireless LAN 2,4 GHz IEEE 802.11b/g/n Bluetooth Bluetooth 4.2, BLE USB 1x micro USB (voor data)1x micro USB (voor voeding) GPIO HAT-compatibele 40-pins GPIO-header Video & audio 1080P HD-video en stereo-audio via mini-HDMI-connector SD-kaart microSD (voor besturingssysteem en opslag) Voeding 5 VDC / 2,5 A (geleverd via micro-USB-connector) Afmetingen 65 x 30 x 5 mm Raspberry Pi Zero 2 W is footprint-compatibel met eerdere Zero-modellen.
-
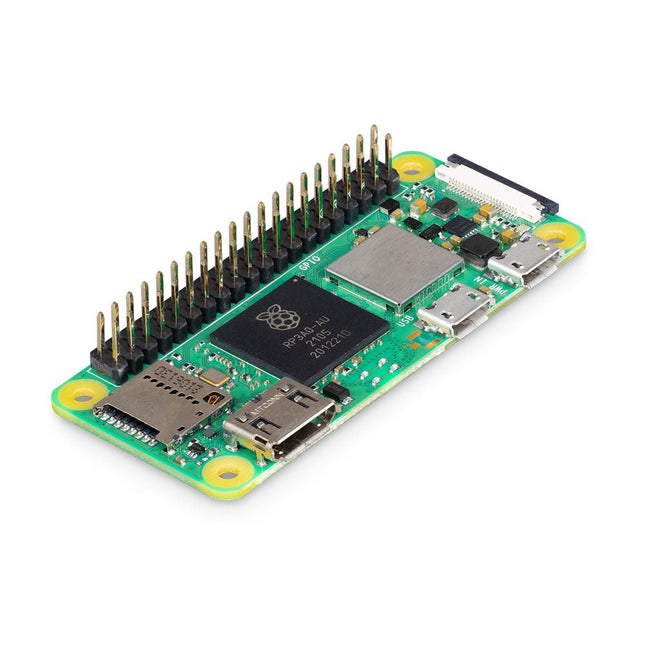
Raspberry Pi Foundation Raspberry Pi Zero 2 WH (met Header)
Raspberry Pi Zero 2 WH is de opvolger van de baanbrekende Raspberry Pi Zero W(H). Het bord bevat een quad-core 64-bit Arm Cortex-A53 CPU, geklokt op 1 GHz. Het hart is een Raspberry Pi RP3A0 system-in-package (SiP), waarin een Broadcom BCM2710A1 chip is geïntegreerd met 512 MB LPDDR2 SDRAM. De verbeterde processor biedt Raspberry Pi Zero 2 WH 40% meer single-threaded prestaties, en vijf keer meer multi-threaded prestaties, dan de originele single-core Raspberry Pi Zero. Kenmerken 64-bit quad core-processor VideoCore IV GPU 512 MB LPDDR2 DRAM 802.11b/g/n draadloos LAN Bluetooth 4.2 / Bluetooth Low Energy (BLE) Slot voor MicroSD-kaart Mini HDMI- en USB 2.0 OTG-poorten Micro-USB-voeding Met gemonteerde 40-pins header Composiet video- en reset-pinnen via soldeer testpunten CSI-cameraconnector Specificaties SoC Broadcom BCM2710A1 CPU 64-bit ARM Cortex-A53 (4x 1 GHz) GPU Broadcom VideoCore VI RAM 512 MB LPDDR2 Wireless LAN 2,4 GHz IEEE 802.11b/g/n Bluetooth Bluetooth 4.2, BLE USB 1x micro USB (voor data)1x micro USB (voor voeding) GPIO HAT-compatibele 40-pins GPIO-header Video & audio 1080P HD-video en stereo-audio via mini-HDMI-connector SD-kaart microSD (voor besturingssysteem en opslag) Voeding 5 VDC / 2,5 A (geleverd via micro-USB-connector) Afmetingen 65 x 30 x 5 mm Raspberry Pi Zero 2 WH is footprint-compatibel met eerdere Zero-modellen.
-
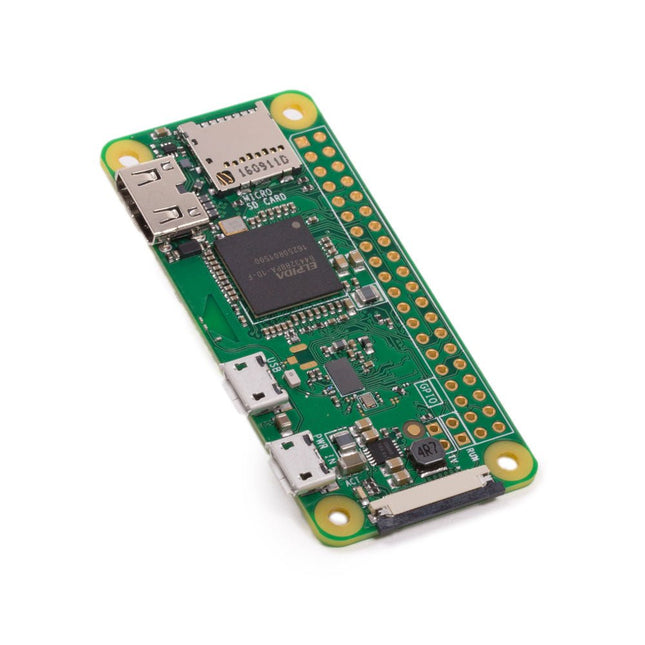
Raspberry Pi Foundation Raspberry Pi Zero W
De Raspberry Pi Zero W is de nieuwste telg van de Raspberry Pi Zero-familie. De Raspberry Pi Zero W heeft alle functionaliteit van de originele Raspberry Pi Zero, maar wordt geleverd met toegevoegde connectiviteit bestaande uit: 802.11 b/g/n WLAN Bluetooth 4.1 Bluetooth Low Energy (BLE) Overige kenmerken 1 GHz, single-core CPU 512 MB RAM Mini HDMI en USB On-The-Go poorten Micro-USB voeding HAT-compatibele 40-pins header Composiet video en reset headers CSI-camera-aansluiting Downloads Mechanische tekening Schema's
-

Elecrow RC070S 7' IPS capacitieve HD Touch Display (1024x600)
Dit mini IPS 7' HD scherm ondersteunt een resolutie van 1024x600. IPS schermen helpen kleuren consistent te houden bij een brede kijkhoek. De 2 verwijderbare luidsprekers zorgen voor een verbeterde audiovisuele ervaring.Kenmerken Via vier schroefgaten in de hoeken kun je dit kleine scherm monteren op de doe-het-zelf IoT-projecten waar je aan werkt. Dit Raspberry Pi scherm wordt geleverd met 2 standaards, is eenvoudig te installeren en te verwijderen, en ideaal voor gebruik onderweg. Door dit capacitieve USB touchscreen via de USB touch poort te voeden wordt de aanraakfunctie geactiveerd en hoeft er geen driver te worden geïnstalleerd, gewoon plug and play! Beeldsignalen worden verstuurd via een HDMI-compatibele poort, voeding & touch via de micro-USB poort, zonder drivers. Dus geen aparte bekabeling nodig voor de Raspberry Pi 4, maar eenvoudig met behulp van 2 eenvoudige adapters rechtstreeks op de Raspberry Pi 4 aan te sluiten. Te gebruiken met de Raspberry Pi 4/3/2, laptop, tv, videogameconsole zoals Nintendo Switch / Xbox / PS4 of met een beveiligingscamera. 170 graden brede kijkhoek. 5-punts capacitief HD touchscreen. Specificaties Schermgrootte 7-inch (154 x 86 mm) Resolutie 1024 x 600 Weergavetype IPS Aanraking Capacitief touchscreen Frame rate 60 fps Helderheid 260 cd/m² Luidsprekers Ondersteund Interface HD & USB Werktemperatuur ?20 tot +60°C Afmetingen 164 x 99 mm Gewicht 235 g Inbegrepen 1x 7-inch scherm 1x USB naar micro-USB connector 1x HD naar micro-HD connector 1x USB naar micro-USB kabel 1x HD-naar-HD kabel 4x M2,5 schroeven 4x Kleine koperen pilaren 2x Pro Stand 2x M3 schroeven 2x Luidsprekers 1x Gebruikershandleiding DownloadsGebruikershandleiding
-
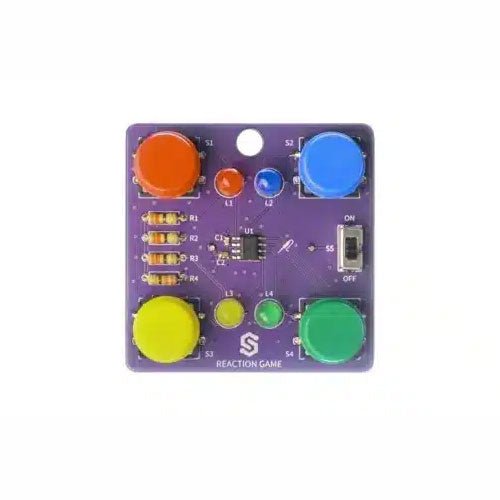
Soldered Reaction Game Solder Kit
If you are looking for a simple way to learn soldering, or just want to make a small gadget that you can carry, this set is a great opportunity. Reaction game is an educational kit which teaches you how to solder, and in the end, you get to have your own small game. The goal of the game is to press the button next to the LED as soon as it turns on. With every correct answer, the game gets a bit harder – the time you have to press the button shortens. How many correct answers can you get? It’s based on ATtiny404 microcontroller, programmed in Arduino. At its back, you’ll find CR2032 battery which makes the kit portable. There’s keychain holder as well. Soldering process is easy enough based on the mark on the PCB. Included 1x PCB 1x ATtiny404 microcontroller 4x LEDs 4x Pushbuttons 1x Switch 4x Resistors (330 ohm) 1x CR2032 battery holder 1x Battery CR2032 1x Keychain holder
€ 9,95
Leden € 8,96
-
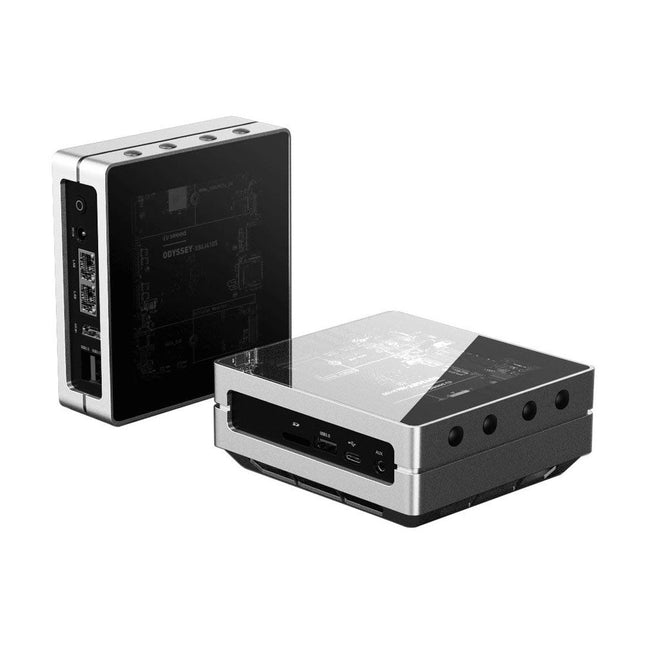
Seeed Studio reComputer behuizing voor Raspberry Pi, BeagleBone en Jetson Nano
De reComputer behuizing is speciaal ontworpen voor het reComputer-systeem, compatibel met alle populaire SBC's (Raspberry Pi, BeagleBone en Jetson Nano), met een verwijderbare acrylafdekking aan de bovenkant en met een stapelbare structuur om eindeloze mogelijkheden uit te breiden. Kenmerken Het is compatibel met de meest populaire SBC's, waaronder Raspberry Pi, BeagleBone en Jetson Nano. Verwijderbare toplaag Acryl Stapelbare kofferstructuur voor uitbreidingen Inbegrepen 1x Acryl hoes 1x Aluminium frame 1x Basis voor warmteafvoer 8x Zijpaneel 8x Impasse 12x Schroeven 1x Schroevendraaier 1x Knop 1x Montagehandleiding Downloads Documentation
-

Seeed Studio reComputer J1020 v2 – Edge AI-apparaat met NVIDIA Jetson Nano (4 GB)
De reComputer J1020 v2 is een compact edge AI-apparaat, aangedreven door de NVIDIA Jetson Nano 4 GB, en levert 0,5 TFLOP's aan AI-prestaties. Het beschikt over een robuuste aluminium behuizing met een passief koellichaam en wordt vooraf geïnstalleerd met JetPack 4.6.1. Het apparaat bevat 16 GB ingebouwde eMMC-opslag en biedt 2x SCI, 4x USB 3.0, M.2 Key M, HDMI en DP. Toepassingen Computervisie Machineleren Autonome mobiele robot (AMR) Specificaties Jetson Nano 4 GB System-on-Module AI-prestaties Jetson Nano 4 GB (0,5 TOPS) GPU NVIDIA Maxwel-architectuur met 128 NVIDIA CUDA cores CPU Quad-core ARM Cortex-A57 MPCore-processor Geheugen 4 GB 64-bit LPDDR4 25,6 GB/s Video-encoder 1x 4K30 | 2x 1080p60 | 4x 1080p30 | 4x 720p60 | 9x 720p30 (H.265 en H.264) Videodecoder 1x 4K60 | 2x 4K30 | 4x 1080p60 | 8x 1080p30 | 9x 720p60 (H.265 en H.264) Carrier Board Opslag 1x M.2 Key M PCIe Netwerk Ethernet 1x RJ-45 Gigabit Ethernet (10/100/1000M) I/O USB 4x USB 3.0 Type-A1x Micro-USB-poort voor apparaatmodus CSI-camera 2x CSI (2-baans 15-pins) Display 1x HDMI Type A; 1x DP Ventilator 1x 4-pins ventilatorconnector (5 V PWM) CAN 1x CAN Multifunctionele poort 1x 40-pins uitbreidingsheader 1x 12-pins besturing en UART-header Voeding DC 12 V/2 A Mechanisch Afmetingen 130 x 120 x 50 mm (met behuizing) Installatie Desktop, wandmontage Bedrijfstemperatuur −10°C~60°C Inbegrepen reComputer J1020 v2 (systeem geïnstalleerd) 12 V/2 A voedingsadapter (met 5 verwisselbare adapterstekkers) Downloads reComputer J1020 v2 datasheet reComputer J1020 v2 3D file Seeed NVIDIA Jetson Product Catalog NVIDIA Jetson Device and Carrier Boards Comparison
€ 369,00€ 184,50
Leden identiek
-

Seeed Studio reComputer J3010 – Edge AI-apparaat met NVIDIA Jetson Orin Nano (4 GB)
De reComputer J3010 is een compact en krachtig edge AI-apparaat, aangedreven door de NVIDIA Jetson Orin Nano, en levert indrukwekkende 20 TOPS AI-prestaties – tot 40 keer sneller dan de Jetson Nano. Het is vooraf geïnstalleerd met Jetpack 5.1.1 en beschikt over een SSD van 128 GB, 4x USB 3.2-poorten, HDMI, Gigabit Ethernet en een veelzijdig draagbord met M.2 Key E voor WiFi, M.2 Key M voor SSD, RTC, CAN en een 40-pins GPIO-header. Toepassingen AI-videoanalyse Machinevisie Robotica Specificaties Jetson Orin Nano System-on-Module AI-prestaties reComputer J3010, Orin Nano 4 GB (20 TOPS) GPU GPU met 512 core NVIDIA Ampere-architectuur en 16 Tensor-cores (Orin Nano 4 GB) CPU 6-core Arm Cortex-A78AE v8.2 64-bit CPU 1,5 MB L2 + 4 MB L3 Geheugen 4 GB 64-bit LPDDR5 34 GB/s (Orin Nano 4 GB) Video-encoder 1080p30 ondersteund door 1-2 CPU cores Videodecoder 1x 4K60 (H.265) | 2x 4K30 (H.265) | 5x 1080p60 (H.265) | 11x 1080p30 (H.265) Carrier Board Opslag M.2 Key M PCIe (M.2 NVMe 2280 SSD 128 GB inbegrepen) Netwerk Ethernet 1x RJ-45 Gigabit Ethernet (10/100/1000M) M.2 Key E 1x M.2 Key E (vooraf geïnstalleerde 1x Wi-Fi/Bluetooth combo-module) I/O USB 4x USB 3.2 Type-A (10 Gbps)1x USB 2.0 Type-C (Apparaatmodus) CSI-camera 2x CSI (2-baans 15-pins) Display 1x HDMI 2.1 Ventilator 1x 4-pins ventilatorconnector (5 V PWM) CAN 1x CAN Multifunctionele poort 1x 40-pins uitbreidingsheader 1x 12-pins besturing en UART-header RTC RTC 2-pins, ondersteunt CR1220 (niet meegeleverd) Voeding 9-19 V DC Mechanisch Afmetingen 130 x 120 x 58,5 mm (met behuizing) Installatie Bureaublad, wandmontage Bedrijfstemperatuur −10°C~60°C Inbegrepen 1x reComputer J3010 (systeem geïnstalleerd) 1x Voedingsadapter (12 V / 5 A) Downloads reComputer J301x Datasheet NVIDIA Jetson Devices and carrier boards comparisions reComputer J401 schematic design file reComputer J3010 3D file
€ 699,00€ 349,00
Leden identiek
-

Elektor Digital Red Pitaya for Test and Measurement (E-book)
The Red Pitaya (STEMlab) is a credit card-sized, open-source test and measurement board that can be used to replace most measurement instruments used in electronics laboratories. With a single click, the board can transform into a web-based oscilloscope, spectrum analyser, signal generator, LCR meter, Bode plotter, and microcontroller. The Red Pitaya (STEMlab) can replace the many pieces of expensive measurement equipment found at professional research organisations and teaching laboratories. The device, that based on Linux, includes an FPGA, digital signal processing (DSP), dual core ARM Cortex processor, signal acquisition and generation circuitry, micro USB socket, microSD card slot, RJ45 socket for Ethernet connection, and USB socket – all powered from an external mains adaptor. This book is an introduction to electronics. It aims to teach the principles and applications of basic electronics by carrying out real experiments using the Red Pitaya (STEMlab). The book includes many chapters on basic electronics and teaches the theory and use of electronic components including resistors, capacitors, inductors, diodes, transistors, and operational amplifiers in electronic circuits. Many fun and interesting Red Pitaya (STEMlab) experiments are included in the book. The book also makes an introduction to visual programming environment. The book is written for college level and first year university students studying electrical or electronic engineering.
€ 29,95
Leden € 23,96
-
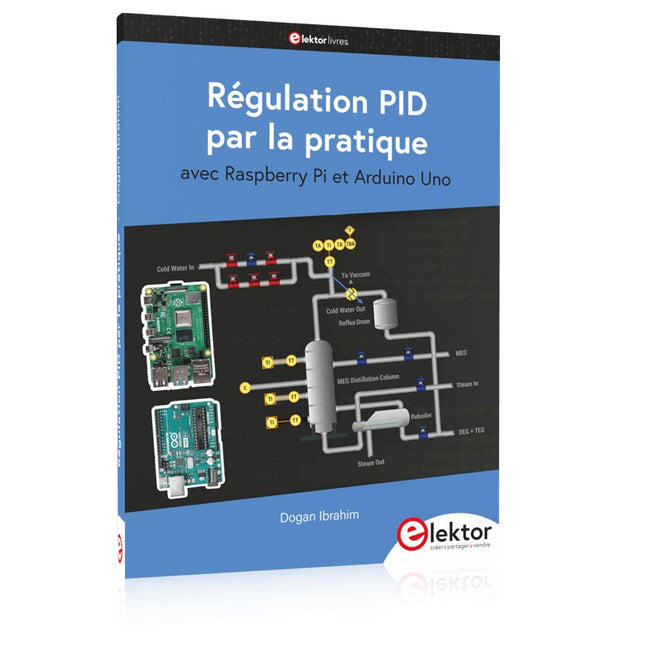
Elektor Publishing Régulation PID par la pratique avec Raspberry Pi et Arduino Uno
Arduino Uno est une plaque de développement de microcontrôleur, avec superposition de code source (matériel, EDI et bibliothèques). Arduino est l'une des plus grandes communautés de programmeurs, d'ingénieurs et d'électroniciens, de passionnés et d'étudiants universitaires. Merci pour vos bibliothèques, le programme devient adapté à votre jeune enfant et la rapidité. Les bibliothèques entièrement testées et fonctionnelles facilitent le test des programmes. Le Raspberry Pi 4, une version récente du système nano-ordonné, est utilisé pour les appareils multimédias, ainsi que pour les applications industrielles, robotiques, domestiques et commerciales. Grâce à la connectivité Wi-Fi et Bluetooth, votre Raspberry Pi 4 est parfait pour la commande et la surveillance à distance via Internet. Ce livre avec une œuvre de Raspberry Pi 4 et de l'Arduino Uno dans des applications de régulation avec l'algorithme PID. Après avoir examiné la théorie des systèmes de régulation et des systèmes intégrés, l'évaluation des fonctions du projet et les tests de pilotage des systèmes de régulation PID en temps réel. Le timing et la structure des paramètres PID et le timing et la structure des systèmes détaillés et détaillés (schémas fonctionnels, schémas de circuits, algorithmes de régulation PID, liste complète des cartes). Ces projets s'appuient constamment sur la théorie et les applications des régulateurs PID. C'est un simple modificateur pour d'autres applications. Les projets pour le Raspberry Pi 4 sont adaptables selon les différents modèles de la famille Raspberry Pi. Le livre couvre les sujets suivants : Systèmes de régulation et systèmes ouverts et fermés Capteurs analogiques et numériques Fonctions de transfert et de système en continu Enregistrements temporels des systèmes du 1er et du 2ème ordre Systèmes discrets (nombres) Les régulateurs PID sont des systèmes à température continue Numéros PID des régulateurs Régulation de température selon Raspberry Pi et Arduino Uno Régulation de température PID à l'aide de Raspberry Pi et Arduino Uno Pilotage continu de moteurs utilisant Raspberry Pi et Arduino Uno Régulation PID pour surveiller le niveau du Raspberry Pi et de l'Arduino Uno Régulation PID pour piloter une LED avec Raspberry Pi et Arduino Uno
€ 39,95
Leden € 35,96
-
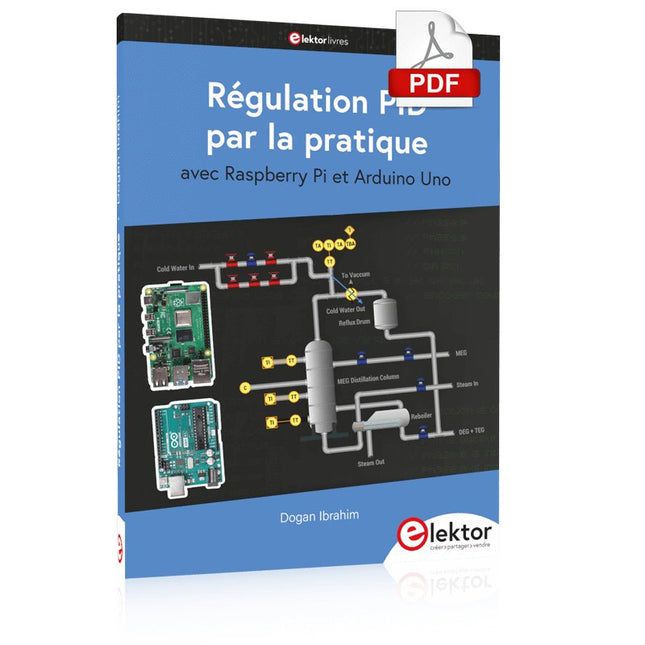
Elektor Digital Régulation PID par la pratique avec Raspberry Pi et Arduino Uno (E-book)
Arduino Uno est une plaque de développement de microcontrôleur, avec superposition de code source (matériel, EDI et bibliothèques). Arduino est l'une des plus grandes communautés de programmeurs, d'ingénieurs et d'électroniciens, de passionnés et d'étudiants universitaires. Merci pour vos bibliothèques, le programme devient adapté à votre jeune enfant et la rapidité. Les bibliothèques entièrement testées et fonctionnelles facilitent le test des programmes. Le Raspberry Pi 4, une version récente du système nano-ordonné, est utilisé pour les appareils multimédias, ainsi que pour les applications industrielles, robotiques, domestiques et commerciales. Grâce à la connectivité Wi-Fi et Bluetooth, votre Raspberry Pi 4 est parfait pour la commande et la surveillance à distance via Internet. Ce livre avec une œuvre de Raspberry Pi 4 et de l'Arduino Uno dans des applications de régulation avec l'algorithme PID. Après avoir examiné la théorie des systèmes de régulation et des systèmes intégrés, l'évaluation des fonctions du projet et les tests de pilotage des systèmes de régulation PID en temps réel. Le timing et la structure des paramètres PID et le timing et la structure des systèmes détaillés et détaillés (schémas fonctionnels, schémas de circuits, algorithmes de régulation PID, liste complète des cartes). Ces projets s'appuient constamment sur la théorie et les applications des régulateurs PID. C'est un simple modificateur pour d'autres applications. Les projets pour le Raspberry Pi 4 sont adaptables selon les différents modèles de la famille Raspberry Pi. Le livre couvre les sujets suivants : Systèmes de régulation et systèmes ouverts et fermés Capteurs analogiques et numériques Fonctions de transfert et de système en continu Enregistrements temporels des systèmes du 1er et du 2ème ordre Systèmes discrets (nombres) Les régulateurs PID sont des systèmes à température continue Numéros PID des régulateurs Régulation de température selon Raspberry Pi et Arduino Uno Régulation de température PID à l'aide de Raspberry Pi et Arduino Uno Pilotage continu de moteurs utilisant Raspberry Pi et Arduino Uno Régulation PID pour surveiller le niveau du Raspberry Pi et de l'Arduino Uno Régulation PID pour piloter une LED avec Raspberry Pi et Arduino Uno
€ 32,95
Leden € 26,36
-

Elektor Publishing Renewable Energy at Home
A Hands-on Guide to Crafting Your Own Power Plant The book you are about to read provides a step-by-step guide for building a renewable energy power plant at home. Our goal was to make the book as practical as possible. The material is intended for immediate application with a small amount of theory. Yet, the theory is important as a foundation that saves time and effort by disabusing the readers of potential misconceptions. Specifically, upon having a firm understanding of photovoltaic physics, you will not be inclined to fruitlessly search for 90% efficient solar panels! We want our readers to be the “doers”. If the book gets covered in grime and some pages become torn while you are building your power plant – this is the best compliment to us. The book covers solar and wind energy. Also, a curious power source based on manure is discussed as well, giving the doers an opportunity to further develop the manure fuel cell. It is important to note that there are many companies offering installation of complete solar solutions. Upon installing the panels, the system is not owned by the customer. Therefore, there is no freedom for experimentation and optimization. Also, none can beat the cost of a DIY solution as well as the ultimate satisfaction. All that is written here is a result of us building a renewable energy solution in Southern California. As the book was completed, the energy began flowing!
€ 29,95
Leden € 26,96
-

Elektor Digital Renewable Energy at Home (E-book)
A Hands-on Guide to Crafting Your Own Power Plant The book you are about to read provides a step-by-step guide for building a renewable energy power plant at home. Our goal was to make the book as practical as possible. The material is intended for immediate application with a small amount of theory. Yet, the theory is important as a foundation that saves time and effort by disabusing the readers of potential misconceptions. Specifically, upon having a firm understanding of photovoltaic physics, you will not be inclined to fruitlessly search for 90% efficient solar panels! We want our readers to be the “doers”. If the book gets covered in grime and some pages become torn while you are building your power plant – this is the best compliment to us. The book covers solar and wind energy. Also, a curious power source based on manure is discussed as well, giving the doers an opportunity to further develop the manure fuel cell. It is important to note that there are many companies offering installation of complete solar solutions. Upon installing the panels, the system is not owned by the customer. Therefore, there is no freedom for experimentation and optimization. Also, none can beat the cost of a DIY solution as well as the ultimate satisfaction. All that is written here is a result of us building a renewable energy solution in Southern California. As the book was completed, the energy began flowing!
€ 24,95
Leden € 19,96
-

Aoyue Replacement Filter Set for Aoyue 8486 Fume Extractor
Deze complete vervangende filterset voor de Aoyue 8486 rookafzuiger bevat een HEPA (High Efficiency Particulate Air) filter, een katoenen lucht-(sub)filter en een actief koolstof luchtfilter.
€ 39,95
Leden € 35,96
-

Evil Mad Science Replacement Servo Motor for AxiDraw
The only expendable component of the AxiDraw is the small, blue pen-lift servo motor. They do wear out over time but are straightforward to replace. For heavy duty applications, you may wish to keep a spare on hand. This replacement servo motor has been calibrated to the correct range, has the extended servo horn attached, and is ready to install. Includes a few cable ties to keep things neat. Compatible with: AxiDraw V3 AxiDraw V3/A3 AxiDraw SE/A3 AxiDraw V3 XLX Custom assembled AxiDraw models
-
Elektor Digital Retro Radio (NL) | E-book
Retro Radio is een praktijkboek voor beginners en uitermate geschikt voor iedereen die wel eens een radio zou willen bouwen en meer wil weten over de radiotechniek. Na een inleiding in de beginselen van de techniek en de radio-ontvangst op de korte golf komen een aantal eenvoudige radio-ontwerpen aan bod. Het gaat om radio’s voor de middengolf en korte golf, waarbij de KG radio’s geschikt zijn voor de ontvangst van Single Side Band signalen. Het “retro” karakter dankt het boek aan het feit dat de gepubliceerde schakelingen klassiekers zijn uit de analoge radiotechniek. Ze zijn geïnspireerd door schakelingen uit de jaren ’50 en de begintijd van de radiotechniek. De auteur grijpt terug op de radio in zijn meest elementaire vorm. Al het “overbodige” is uit de schakelingen weggelaten. Er wordt gewerkt met spoelen, afstemcondensatoren, keramische filters en spoelfilters. Alle schakelingen zijn gebouwd met gewone transistors en een veldeffecttransistor. Elektronische chips worden niet gebruikt. Overigens is aan de nieuwste ontwikkelingen niet helemaal voorbij gegaan. Er is ook een SDR ontwerp opgenomen. Een greep uit de schema’s: een kristalradio, verschillende middengolf ontvangers (ook met een radiobuis), een “oer” schema geïnspireerd door de begintijd van de radio, twee korte golf ontvangers met SSB (2-12 MHz en 6-17 MHz) en een ontvanger voor de 80 meter band. Verder is in dit boek bijzonder veel aandacht besteed aan de praktische constructie van de radio’s en zijn er verschillende eenvoudige meetapparaten beschreven die dienst kunnen doen bij het ontwerpen en testen van radio’s (meetzender, absorptiemeter, transistortester e.d.).
€ 24,95
Leden € 19,96


