Producten
-
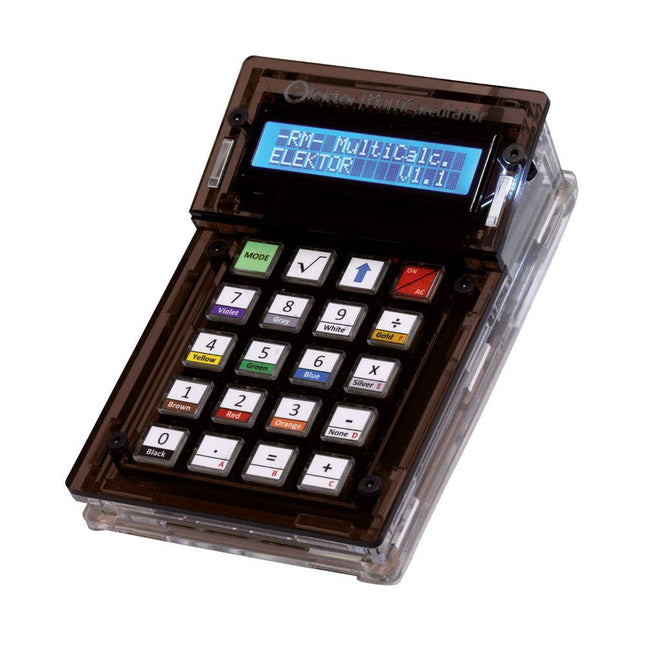
Elektor Labs Elektor Arduino MultiCalculator
De Elektor MultiCalculator Kit is een op Arduino-gebaseerde multifunctionele rekenmachine die verder gaat dan basisberekeningen. Hij biedt 22 functies, waaronder licht- en temperatuurmeting, differentiële temperatuuranalyse en NEC IR-afstandsbedieningsdecodering. De Elektor MultiCalculator is een handig hulpmiddel voor gebruik in je projecten of voor educatieve doeleinden. De kit heeft een Pro Mini module als rekeneenheid. De printplaat is eenvoudig te monteren met behulp van through-hole componenten. De behuizing bestaat uit 11 acrylpanelen en montagemateriaal voor eenvoudige montage. Bovendien is het apparaat uitgerust met een 16x2 alfanumeriek LCD-scherm, 20 knoppen en temperatuursensoren. De Elektor MultiCalculator is programmeerbaar met de Arduino IDE via een 6-weg PCB-header. De beschikbare software is tweetalig (Engels en Nederlands). De calculator kan worden geprogrammeerd met een programmeeradapter en wordt gevoed via USB-C. Bedrijfsmodi Rekenmachine 4-ringsweerstandscode 5-ringsweerstandscode Conversie van decimaal naar hexadecimaal en tekens (ASCII) Conversie van hexadecimaal naar decimaal en tekens (ASCII) Conversie van decimaal naar binair en tekens (ASCII) Conversie van binair naar decimaal en hexadecimaal Berekening van Hz, nF, capacitieve reactantie (XC) Berekening van Hz, µH, inductieve reactantie (XL) Weerstandberekening van twee parallel geschakelde weerstanden Weerstandberekening van twee in serie geschakelde weerstanden Berekening van onbekende parallelle weerstand Temperatuurmeting Verschiltemperatuurmeting T1&T2 en Delta (δ) Lichtmeting Stopwatch met rondetijdfunctie Artikelteller NEC IR-decodering van de afstandsbediening AWG-conversie (American Wire Gauge) Dobbelstenen gooien Personaliseer het opstartbericht Temperatuurkalibratie Specificaties Menutalen: Engels, Nederlands Afmetingen: 92 x 138 x 40 mm Bouwtijd: ongeveer 5 uur Inbegrepen PCB's en componenten met doorlopende gaten Voorgesneden acrylplaten met alle mechanische onderdelen Pro Mini-microcontrollermodule (ATmega328/5 V/16 MHz) Programmeeradapter Waterdichte temperatuursensoren USB-C kabel Downloads Software
€ 49,95
Leden: € 44,96
-

Elektor Labs Elektor Arduino Nano MCCAB Training Board
Het Elektor Arduino Nano MCCAB Training Board bevat alle componenten (incl. Arduino Nano) die nodig zijn voor de oefeningen, zoals LED’s, schakelaars, drukknoppen, buzzer enz. Ook externe sensoren, motoren of modules kunnen worden gecheckt of bestuurd met dit microcontroller-trainingssysteem. Specificaties (Arduino Nano Training Board MCCAB) Voeding Via de USB-aansluiting van de aangesloten pc of een externe voeding (niet inbegrepen) Spanning +5 Vcc Ingangsspanning Alle ingangen 0 V tot +5 V VX1 en VX2 +8 V tot +12 V (alleen bij gebruik van een externe voeding) Hardware LCD 2x16 karakters Potentiometer P1 & P2 JP3: Selectie van de werkspanning van P1 & P2 Verdelers SV4: Verdeler voor de werkspanningenSV5, SV6: Verdelers voor de in-/uitgangen van de microcontroller Schakelaars en knoppen RESET knop op de Arduino Nano module; 6x drukknop schakelaars K1 ... K6; 6x Schuifschakelaars S1 ... S6; JP2: Jumper van de schakelaars met de ingangen van de microcontroller Buzzer Piezo buzzer ‘Buzzer1’ met jumper op JP6 Indicator LED’s 11 x LED: Status indicator voor de ingangen/uitgangen LED L op de Arduino Nano module, aangesloten op GPIO D13 JP6; Aansluiting van LED's LD10 ... LD20 met GPIO's D2 ... D12 Seriële interfacesSPI & I²C JP4: Selectie van het signaal op pin X van de SPI-connector SV12 SV9 naar SV12: SPI-interface (3,3 V/5 V) of I²C-interface Uitgangen voor externe apparaten SV1, SV7: Geschakelde uitgang (maximaal +24 V/160 mA, extern aangesloten) SV2: 2x13 pinnen voor aansluiting van externe modules 3x3 LED matrix(9 rode LED's) SV3: Kolommen van de 3x3 LED matrix (uitgangen D6 ... D8) JP1: Verbinding van de rijen met de GPIO's D3 ... D5 Software MCCABLib library Controle van hardware componenten (schakelaars, knoppen, LED's, 3x3 LED matrix, buzzer) op het MCCAB Training Board Werktemperatuur Tot +40 °C Afmetingen 100 x 100 x 20 mm Specificaties (Arduino Nano) Microcontroller ATmega328P Architectuur AVR Spanning 5 V Flash memory 32 KB, waarvan 2 KB gebruikt door de bootloader SRAM 2 KB Kloksnelheid 16 MHz Analoge IN Pinnen 8 EEPROM 1 KB DC stroom per I/O-pin 40 mA op één I/O-pin, totaal maximaal 200 mA op alle pinnen samen Ingangsspanning 7-12 V Digitale I/O-pinnen 22 (waarvan 6 PWM) PWM Uitgangen 6 Stroomverbruik 19 mA Afmetingen 18 x 45 mm Gewicht 7 g Inbegrepen 1x Elektor Arduino Nano Training Board MCCAB 1x Arduino Nano
€ 79,95
Leden: € 71,96
-
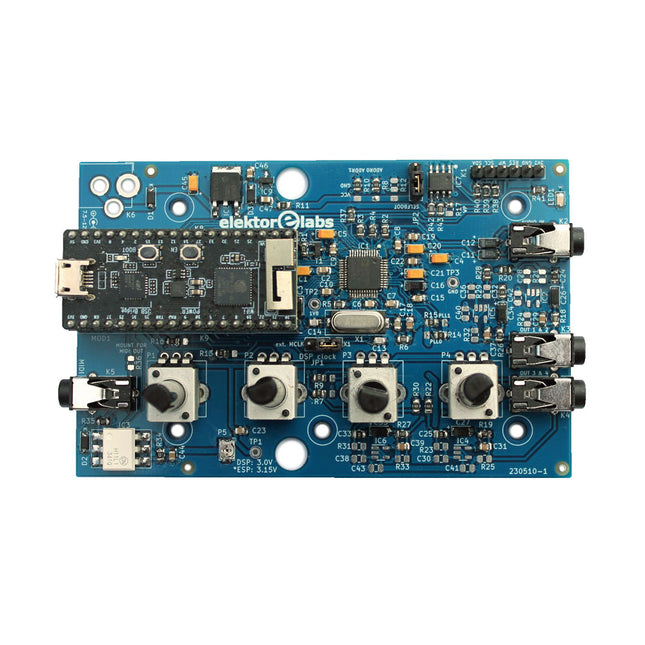
Elektor Labs Elektor Audio DSP FX Processor (Nieuwe Revisie)
De Elektor Audio DSP FX Processor combineert een ESP32-microcontroller en een ADAU1701 Audio DSP van Analog Devices. Naast een door de gebruiker programmeerbare DSP-kern heeft de ADAU1701 hoogwaardige analoog-naar-digitaal en digitaal-naar-analoog converters ingebouwd en is hij voorzien van een I²S-poort. Dit maakt hem geschikt als hoogwaardige audio-interface voor de ESP32. Programma's voor de ESP32 kunnen worden gemaakt met Arduino, Platform IO, CMake of door de Espressif IDF op een andere manier te gebruiken. Programma's voor de ADAU7101 audio DSP's worden gemaakt met de gratis visuele programmeertool SigmaStudio door voorgedefinieerde algoritmablokken op een canvas te slepen. Toepassingen Bluetooth/Wi-Fi audio sink (bijv. luidspreker) & bron Gitaareffectpedaal (stompbox) Muzieksynthesizer Geluids-/functiegenerator Programmeerbaar cross-overfilter voor luidsprekers Geavanceerde audio-effectprocessor (reverb, chorus, pitch shifting, enz.) Audioapparaat met internetverbinding DSP-experimentplatform Draadloze MIDI MIDI naar CV-converter en nog veel meer... Specificaties ADAU1701 28-/56-bit, 50-MIPS digitale audioprocessor die bemonsteringsfrequenties tot 192 kHz ondersteunt ESP32 32-bit dual-core microcontroller met Wi-Fi 802.11b/g/n en Bluetooth 4.2 BR/EDR en BLE 2x 24-bit audio-ingangen (2 V RMS, 20 kΩ) 4x 24-bit audio-uitgangen (0,9 V RMS, 600 Ω) 4x Regelpotentiometer MIDI in- en uitgang I²C-uitbreidingspoort Multi-mode werking Voeding: 5 V DC USB of 7,5-12 V DC (cilinderaansluiting, middelste pin is GND) Stroomverbruik (gemiddeld): 200 mA Inbegrepen 1x ESP32 Audio DSP FX Processor board (gemonteerd) 1x ESP32-PICO-KIT 2x Truien 2x 18-pins headers (female) 4x 10 KB potentiometers Downloads Documentation GitHub
€ 99,95€ 84,95
Beste prijs
-

Elektor Digital Elektor Circuit Special 2023 (PDF)
Elektor GREEN en GOLD leden kunnen deze uitgave hier downloaden.Nog geen lid? Klik hier om een lidmaatschap af te sluiten. Mini-zonnevoedingzon in, 3,3 V uit Solid-state stereo-audioschakelaarklikvrij en zonder bewegende onderdelen Grote RGB-digitmet through-hole WS2812 LED’s Microfoon-voorversterker met 48V-fantoomvoedingvoor podcasting en pro-audio Blokgolfgeneratoren met regelbare duty cycle en frequentiesimpele schakelingen met CMOS- en TTL-IC’s Eenvoudige dynamiekcompressorsofte aansturing, warm geluid Simpel elektronisch slot Actieve gelijkrichtervoor 2...40 V bij maximaal 3 A met tegenstroomonderdrukking Actieve boxen in- en uitschakelen Ongebalanceerd/gebalanceerd-convertermet RF-filter en DC-bescherming 2023: een AI-odysseewaar komt het vandaan en waar gaat het naar toe? Snelheidsregelaar voor ventilatormet handmatige en thermostaatmodus Laatste nieuwtjes van Arduino Project Hubnieuwe projecten uit de community Overbelastingsmonitorbewaakt netsnoeren Transistorloos knipperlicht in het donkeroscillator met alleen tweedraads onderdelen Morsecode-generatorvoor gebruik als baken of leermiddel! Programmeerbare video-DACvoor elk formaat tot RGB888 Kleintje klavierzonder bewegende onderdelen Dubbel-dobbel zonder microprocessordubbele dobbelsteen op een enkele print – plus enkele ontwerptrucs Elektronische vogelverschrikker Amusante, inspirerende en verbazingwekkende schakelingen LC/LP/HA-thermometernauwkeurige metingen en een binair display THD-generatorvervorming, maar dan opzettelijk Overtemperatuur-indicator met thyristorelektronische onderdelen ongebruikelijk gebruikt Een PTC-flipflop Sociale vogeleen tsjilpende Elektor Klassieker Neonlamp plus microcontroller Temperatuurgestabiliseerde IC-stroombronneutraliseer de temperatuurdrift van deze driebeners Regelbare tweede-orde hogetonen-boostergehoorsteuntje voor ouderen Edwin komt naar huisherinneringen na 53 jaar Eénarmige bandieteen eenvoudige, leuke, nostalgische en leerzame Elektor-klassieker! Eenvoudige digitaal gestuurde variabele weerstand Lekdetectorbeveiligt en alarmeert bij lekkages Eco-timer met automatische uitschakelingverbruikt niets in uitgeschakelde toestand! ChatGPT en Arduino Zenermetermeet de Z-spanning van Z-diodes ? 100 V Servotester ESP32 Windows-controller met gratis software Analoge en mixed-signal IC’s van Microchipzuinige signaalverwerking Interfacenormenfilter en overspanningsbeveiliging voor de I²C-bus Li-Ion accumonitorrestlading-indicator geeft visuele feedback PS/2-muis als draai-encoder (en meer...) Simpele schemerschakelaarvoor bestaande lampen of installaties Controller voor waterpompbereid je voor op hoogwater Kerstbal met FM-zonneradiomeer heb je voor de kerst niet nodig Trillingssensor met relaistik of schud om in te schakelen Doorgangstestergevoelig en niet storend In- en uitschakelen met een drukknop Regeling voor mini-boor (2023)een ontwerp uit 1980 herzien Digitale trillingssensorzet trillingen om in nauwkeurig getimede pulsen Ompoolbeveiliging met kleine spanningsval Goedkope frequentiestandaard Kleine DCF77-simulatornauwkeurige fake-tijdstandaard De Lilygo T-PicoC3combineert RP2040 en ESP32-C3 met een full-color TFT-display Hexadoku
€ 9,95
-

Elektor Digital Elektor Circuit Special 2024 PDF (FR)
Le téléchargement intégral de ce numéro est disponible pour nos membres GOLD et GREEN sur le site Elektor Magazine ! Pas encore membre ? Cliquez ici. charge électronique pour les tests à haute intensitéde la nécessité à l'innovation suppresseur de voixcircuit pour un karaoké instantané sélecteur audio A/B avec réglage de gaincommuter de l'entrée micro à l'entrée ligne optimiser la rechrage du LIR2032prenez soin de vos piles bouton la détection tactile en toute simplicitéun guide de fabrication pour n'importe quel microcontrôleur interrupteur universel à télécommandeune nouvelle vie pour les vieilles télécommandes une boite à meuh avec un microcontrôleurproduire des sons amusants à l'aide d'un microcontrôleur interface de batterie externe USB alimenter les appareils à faible consommation avec des batteries externesune Solution pour les maintenir actives mini-ampli audio de classe A avec sortie en courantpiloter les haut-parleurs en courant au lieu de tension module pseudo-symétriqueCMRR élevé avec des liaisons audio asymétriques chargeur automatique d'accu Ni-MHrechargez toutes vos batteries simultanément ! protection pour alimentation électrique basée sur un thyristor lecteur d'empreintes digitalesdispositif utile d'identification convertisseur de puissance DC-DC 3Aaméliorer vos sources de tension fixes innovations de la plateforme Arduino Project Hubnouveaux projets de la communauté contrôle à distance du chauffe-eaudétection de tension et de courant pour les lignes à courant alternatif atténuateurs pour signaux audio (1)sélection par cavaliers cure de jouvence pour votre vieux chargeur (1)ne le jetez pas, modernisez-le ! une carte pour « The Blue »circuit imprimé pour le potentiomètre motorisé d'Alps référence 50 Hz à partir d'une tension secteur 60 Hzconversion de 50 Hz à 60 Hz isolateurs numériquesréalisation facile de l’isolation galvanique amplificateur mono Hi-Fi compact de 12 Wpetit mais puissant générateur de rampe LM386 générateur triphaséavec Raspberry Pi Pico ouverture de porte pour les personnes ayant des talents musicaux classique d’Elektor : synthétiseur Surfgénérateur d’ambiance océanique relaxante (de Chhhh à Zzzz) cure de jouvence pour votre vieux chargeur (2)ne le jetez pas, modernisez-le ! surveillance du courant d'une lampe avec Raspberry Pi Pico télégraphie infrarouge Fnirsi SWM-10appareil portable de soudage par point intelligent pour réparer vos packs d’accumulateur Codec audio stéréo pour ESP32 et Ciela mesure audio : pas de panique techniques de soudure à l’étain faites-le correctement dès maintenant ! atténuateurs pour signaux audio (2) sélection par relais alimentation USB-CDrawing Power from USB-C Power Adapters trois circuits avec deux et trois puces 4017 comptez sur les 4017 composants actifs - la diode un minuteur pour des délais ultra-Longs réglez-le et oubliez-le ! Jack In & Jack Out maillon d’E/S pour chaînes audio alimenter un ESP32 à partir d'une seule cellule Li-ion Hexadoku
€ 10,95
-

Elektor Digital Elektor Circuit Special 2024 (PDF)
Elektor GREEN en GOLD leden kunnen deze uitgave hier downloaden. Nog geen lid? Klik hier om een lidmaatschap af te sluiten. Digitale belasting voor grote stromenvan noodzaak tot innovatie Stemmenroverinstant karaoke-schakeling Audio A/B-keuzeschakelaar met versterkingsregelingschakelt tussen microfoon- en lijningangen Beter laden voor de LIR2032wees lief voor uw knoopcellen Simpele aanraaksensorenmaak ze zelf – voor elke microcontroller Universele infraroodschakelaartweede leven voor oude afstandsbedieningen Microcontroller-gestuurde loeidoosspeelse geluiden met een microcontroller USB-accu-interface Low-power apparaten voeden met een powerbankanti-afschakel-schakeling Kleine klasse-A audioversterker met stroomuitgangstuur luidsprekers aan met stroom in plaats van spanning Pseudo-symmetrische modulehoge CMRR met asymmetrische audioverbindingen Automatische NiMH-laderlaad al uw accu’s in één keer! Thyristorgebaseerde voedingsbeveiliging Schakelaar met vingerafdruk-sensornuttige identiteitscontrole DC/DC-converter voor 3 Aeen upgrade voor vaste-spanningsbronnen Bewaking voor een boilerspannings- en stroomdetectie voor AC-kabels Verzwakkers voor audiosignalen (1)instelbaar met jumpers Poets uw acculader op (1)niet weggooien maar ombouwen! Een print voor ‘de Blauwe’print voor Alps-motorpotmeter met terugkoppeling 50Hz-referentie uit 60Hz-netspanningzo gebruikt u 50Hz-elektronica in 60Hz-landen Digitale isolatoreneenvoudige realisatie van galvanische isolatie Compacte 12W-hifi-monoversterkerklein maar krachtig Zaagtandgenerator met LM386 Driefasen-generatormet Raspberry Pi Pico Deuropener voor muzikaal getalenteerden Elektor-klassieker: Surf Synthesizerzeewatersportachtergrondgeluidgenerator (zwsaggg) Poets uw acculader op (2)niet weggooien maar ombouwen! Lampstroom-monitormet Raspberry Pi Pico Infrarood-telegrafie Fnirsi SWM-10repareer zelf uw accupacks met dit intelligent draagbaar puntlasapparaat Stereo audio-codec voor ESP32 en co.geen angst voor audio-meettechnologie Soldeertechniekendoe het meteen goed! Verzwakkers voor audiosignalen (2)geschakeld met relais USB-C voedingstroom uit USB-C voedingsadapters Drie schakelingen met twee en drie teller-IC’s4017’s werken samen Actieve componenten – de diode Timer voor extreem lange tijdeninstellen en vergeten! Jack in en jack uiteen handige insert-optie voor audioschakelingen ESP32 met één Li-ion-cel Hexadoku
€ 9,95
-
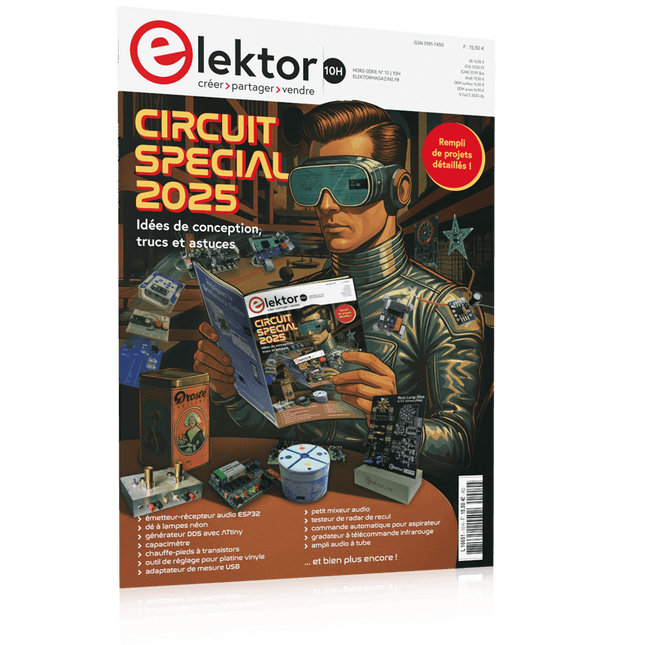
Elektor Circuit Special 2025 (FR)
Le téléchargement intégral de ce numéro est disponible pour nos membres GOLD et GREEN sur le site Elektor Magazine ! Pas encore membre ? Cliquez ici. adaptateur de mesure USBTest du courant et des signaux des ports USB sortie boucle de courant 4-20 mA pour Arduino UnoUne interface de boucle de courant fiable et insensible aux interférences électromagnétiques commande automatique pour aspirateurGardez votre établi propre générateur DDS avec ATtiny testeur d'ampli-op V2Nouveau circuit imprimé – désormais compatible avec les CMS amplificateur audio à tube 550 mWson chaleureux des tubes à vide surveillance des fusiblesavec une LED clignotante préamplificateur RIAA HQExploitez tout le potentiel sonore de vos disques vinyles ! Outil de réglage pour platines vinylesGénérateur de lumière stroboscopique 100–120 Hz basé sur Arduino Elektor Classics : ampli vidéo gradateur à télécommande infrarougeContrôlez votre éclairage avec confort et précision comment utiliser switch…case avec des chaînes de caractères en C++/EDI Arduino détecteur d’aimantsAvec un simple capteur à effet Hall bouton de mise sous tension intelligent pour Raspberry PiUne solution pour Raspberry Pi jusqu’au modèle 4 astuces clés pour makersDes conseils pros pour vos projets projets pratiques avec le timer 555Commande de moteur CC et jeux de rapidité moniteur de charge CA simpleÉconomisez de l'énergie grâce à un appareil simple batteries externes en parallèleTrois jours d’autonomie VFO jusqu’à 15 MHzRéalisation avec un Raspberry Pi Pico accordeur de violon avec ATtiny202 Elektor Classics : ampli vidéo pour TV N&B capacimètre20 pF à 600 nF horloge quasi analogique Mk IIDeux anneaux LED pour les heures et les minutes concevez sans limites(grâce à l’écosystème complet d’Arduino) dé à lampes néon Elektor Classics : indicateur d'accord RTTY solutions matérielles inspirantes pour vos projets ESP Elektor Classics : alimentation 3 A LED RGB avec circuit de commande intégréLumière de précision : les ICLED établissent de nouvelles normes expérience : un Thérémine analogico-numérique ?Combiner des capteurs numériques modernes avec l’intemporel générateur analogique XR2206 carte émetteur-récepteur audio ESP32 (1)Démo : lecture de fichiers WAV depuis une carte SD infographies : Circuits et conception de circuits 2025 petit mixeur audioUne conception polyvalente et modulable minuteur intelligent pour éclairage d’escalierÉconomisez encore plus sur votre facture d’énergie ! modernisez vos voletsContrôlez les systèmes Velux avec un ESP32 et MQTT chauffe-pieds à transistorsConfort économe en énergie le quadricoptère M5Stamp Fly est-il le prochain drone Tello ? (Revue) optimiser la portée Wi-Fi de l’ESP32-C3 SuperMiniUne modification d’antenne simple et efficace station de soudage à air chaud ZD-8968Un outil de travail économique ou uniquement de l'air chaud ? testeur de radar de reculDétecter les pannes du système d’aide au stationnement d’un véhicule
€ 15,50
-
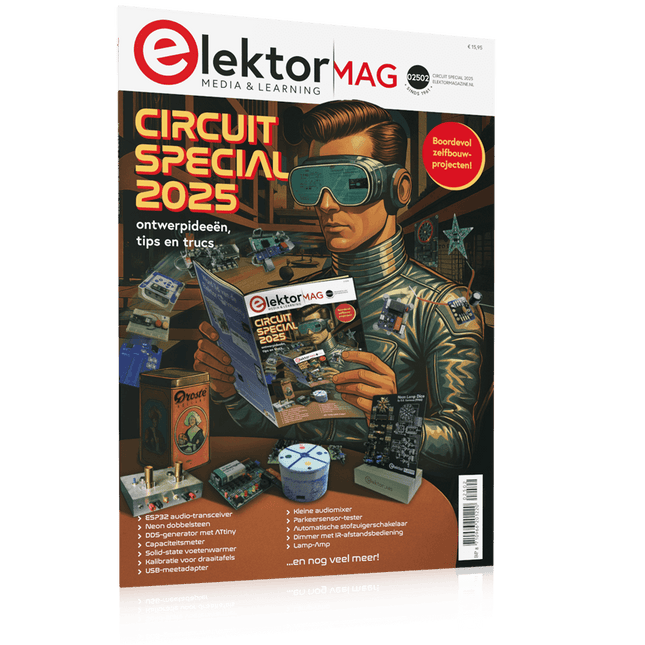
Elektor Circuit Special 2025 (NL)
Elektor GREEN en GOLD leden kunnen deze uitgave hier downloaden. Nog geen lid? Klik hier om een lidmaatschap af te sluiten. USB-meetadaptertest stroom en signaalkwaliteit van USB-poorten 4...20 mA stroom-uitgang voor Arduino Unobetrouwbare, EMI-ongevoelige current loop-interface Automatische stofzuigerschakelaarhoud uw werkplek schoon DDS-generator met ATtiny Opamp-tester v2nieuwe print – nu ook voor SMD’s 550-mW audio ‘Lamp-Amp’voor die warme buizenklank Zekeringbewakerhoud zekeringen in de gaten met een knipper-LED Hoogwaardige RIAA-voorversterkerhaal het beste uit uw vinylplaten! Kalibratie voor draaitafelsArduino-gebaseerde 100/120Hz-stroboscoop Elektor Classics: Video-versterker Dimmer met IR-afstandsbedieningcomfortabel en elegant staande halogeen- of LED-lampen regelen Het gebruik van switch…case bij strings in C++/Arduino IDE Magneetzoekermet een eenvoudige Hall-effect-sensor Raspberry Pi: slimme aan/uit-knopeen oplossing voor de Raspberry Pi tot aan model 4 Professionele tipsvan makers voor makers Praktische projecten met de 555-timerDC-motorbesturing en snelle reactie-uitdaging Eenvoudige ‘aan-verklikker’spaar energie met een simpele schakeling Powerpacks parallelschakelendrie dagen ononderbroken stroom VFO tot 15 MHzimplementatie met Raspberry Pi Pico Vioolstemmer met ATtiny202 Elektor Classics: Video-ingangsversterker voor zwart/wit-TV Capaciteitsmeter20 pF tot 600 nF Quasi-analoog uurwerk Mk IItwee LED-ringen – voor uren en minuten Niets is onmogelijk(met hulp van het Arduino-ecosysteem) Neon dobbelsteen Elektor Classics: RTTY-afstemhulp Inspirerende hardware-ontwerpen voor uw ESP’s Elektor Classics: 3 A voeding RGB-LED’s met geïntegreerde stuurkringlicht met precisie: ICLED’s zetten de standaard Experiment: een mixed-signal Theremin?moderne time-of-flight sensoren plus de tijdloze analoge XR2206 ESP32 audio-transceiver (deel 1)SD-kaart WAV-speler demo Elektor infographicschakelingen en schakelingontwerp 2025 Kleine audiomixereenvoudig, veelzijdig en schaalbaar Slimme timer voor trapverlichtingbespaar op uw energierekening! Maak uw rolluiken slimmerVelux-hardware besturen met een ESP32 en MQTT Solid-state voetenwarmercomfortabel en energiezuinig Is de M5Stamp Fly-quadcopter de nieuwe Tello? Vergroot het WiFi-bereik van de ESP32-C3 SuperMinieenvoudige en effectieve antennemodificatie ZD-8968 hetelucht-soldeerstationbudgetvriendelijk werkpaard of gebakken lucht? Parkeersensor-testervind defecten in het PDC-systeem van een auto
€ 15,95
-

Elektor Digital Elektor Circuit Special 2025 (PDF) FR
Le téléchargement intégral de ce numéro est disponible pour nos membres GOLD et GREEN sur le site Elektor Magazine ! Pas encore membre ? Cliquez ici. adaptateur de mesure USBTest du courant et des signaux des ports USB sortie boucle de courant 4-20 mA pour Arduino UnoUne interface de boucle de courant fiable et insensible aux interférences électromagnétiques commande automatique pour aspirateurGardez votre établi propre générateur DDS avec ATtiny testeur d'ampli-op V2Nouveau circuit imprimé – désormais compatible avec les CMS amplificateur audio à tube 550 mWson chaleureux des tubes à vide surveillance des fusiblesavec une LED clignotante préamplificateur RIAA HQExploitez tout le potentiel sonore de vos disques vinyles ! Outil de réglage pour platines vinylesGénérateur de lumière stroboscopique 100–120 Hz basé sur Arduino Elektor Classics : ampli vidéo gradateur à télécommande infrarougeContrôlez votre éclairage avec confort et précision comment utiliser switch…case avec des chaînes de caractères en C++/EDI Arduino détecteur d’aimantsAvec un simple capteur à effet Hall bouton de mise sous tension intelligent pour Raspberry PiUne solution pour Raspberry Pi jusqu’au modèle 4 astuces clés pour makersDes conseils pros pour vos projets projets pratiques avec le timer 555Commande de moteur CC et jeux de rapidité moniteur de charge CA simpleÉconomisez de l'énergie grâce à un appareil simple batteries externes en parallèleTrois jours d’autonomie VFO jusqu’à 15 MHzRéalisation avec un Raspberry Pi Pico accordeur de violon avec ATtiny202 Elektor Classics : ampli vidéo pour TV N&B capacimètre20 pF à 600 nF horloge quasi analogique Mk IIDeux anneaux LED pour les heures et les minutes concevez sans limites(grâce à l’écosystème complet d’Arduino) dé à lampes néon Elektor Classics : indicateur d'accord RTTY solutions matérielles inspirantes pour vos projets ESP Elektor Classics : alimentation 3 A LED RGB avec circuit de commande intégréLumière de précision : les ICLED établissent de nouvelles normes expérience : un Thérémine analogico-numérique ?Combiner des capteurs numériques modernes avec l’intemporel générateur analogique XR2206 carte émetteur-récepteur audio ESP32 (1)Démo : lecture de fichiers WAV depuis une carte SD infographies : Circuits et conception de circuits 2025 petit mixeur audioUne conception polyvalente et modulable minuteur intelligent pour éclairage d’escalierÉconomisez encore plus sur votre facture d’énergie ! modernisez vos voletsContrôlez les systèmes Velux avec un ESP32 et MQTT chauffe-pieds à transistorsConfort économe en énergie le quadricoptère M5Stamp Fly est-il le prochain drone Tello ? (Revue) optimiser la portée Wi-Fi de l’ESP32-C3 SuperMiniUne modification d’antenne simple et efficace station de soudage à air chaud ZD-8968Un outil de travail économique ou uniquement de l'air chaud ? testeur de radar de reculDétecter les pannes du système d’aide au stationnement d’un véhicule
€ 10,95
-

Elektor Digital Elektor Circuit Special 2025 (PDF) NL
Elektor GREEN en GOLD leden kunnen deze uitgave hier downloaden. Nog geen lid? Klik hier om een lidmaatschap af te sluiten. USB-meetadaptertest stroom en signaalkwaliteit van USB-poorten 4...20 mA stroom-uitgang voor Arduino Unobetrouwbare, EMI-ongevoelige current loop-interface Automatische stofzuigerschakelaarhoud uw werkplek schoon DDS-generator met ATtiny Opamp-tester v2nieuwe print – nu ook voor SMD’s 550-mW audio ‘Lamp-Amp’voor die warme buizenklank Zekeringbewakerhoud zekeringen in de gaten met een knipper-LED Hoogwaardige RIAA-voorversterkerhaal het beste uit uw vinylplaten! Kalibratie voor draaitafelsArduino-gebaseerde 100/120Hz-stroboscoop Elektor Classics: Video-versterker Dimmer met IR-afstandsbedieningcomfortabel en elegant staande halogeen- of LED-lampen regelen Het gebruik van switch…case bij strings in C++/Arduino IDE Magneetzoekermet een eenvoudige Hall-effect-sensor Raspberry Pi: slimme aan/uit-knopeen oplossing voor de Raspberry Pi tot aan model 4 Professionele tipsvan makers voor makers Praktische projecten met de 555-timerDC-motorbesturing en snelle reactie-uitdaging Eenvoudige ‘aan-verklikker’spaar energie met een simpele schakeling Powerpacks parallelschakelendrie dagen ononderbroken stroom VFO tot 15 MHzimplementatie met Raspberry Pi Pico Vioolstemmer met ATtiny202 Elektor Classics: Video-ingangsversterker voor zwart/wit-TV Capaciteitsmeter20 pF tot 600 nF Quasi-analoog uurwerk Mk IItwee LED-ringen – voor uren en minuten Niets is onmogelijk(met hulp van het Arduino-ecosysteem) Neon dobbelsteen Elektor Classics: RTTY-afstemhulp Inspirerende hardware-ontwerpen voor uw ESP’s Elektor Classics: 3 A voeding RGB-LED’s met geïntegreerde stuurkringlicht met precisie: ICLED’s zetten de standaard Experiment: een mixed-signal Theremin?moderne time-of-flight sensoren plus de tijdloze analoge XR2206 ESP32 audio-transceiver (deel 1)SD-kaart WAV-speler demo Elektor infographicschakelingen en schakelingontwerp 2025 Kleine audiomixereenvoudig, veelzijdig en schaalbaar Slimme timer voor trapverlichtingbespaar op uw energierekening! Maak uw rolluiken slimmerVelux-hardware besturen met een ESP32 en MQTT Solid-state voetenwarmercomfortabel en energiezuinig Is de M5Stamp Fly-quadcopter de nieuwe Tello? Vergroot het WiFi-bereik van de ESP32-C3 SuperMinieenvoudige en effectieve antennemodificatie ZD-8968 hetelucht-soldeerstationbudgetvriendelijk werkpaard of gebakken lucht? Parkeersensor-testervind defecten in het PDC-systeem van een auto
€ 9,95
-

Elektor Edge Impulse Guest Edition 2025 (FR)
Le téléchargement intégral de ce numéro est disponible pour nos membres GOLD et GREEN sur le site Elektor Magazine ! Pas encore membre ? Cliquez ici. qu’est-ce que l’edge AI ?L’IA, intégrée à l’appareil découvrez Edge Impulse StudioConcevez et déployez facilement des modèles d’IA en périphérie détection de mots-clés avec Edge ImpulseCollecter, entraîner et déployer contrôle d’appareils par commande vocale avec le Nordic Thingy:53 Termes clés pour comprendre l’edge AI et le machine learning cours accéléré : démarrez avec Edge ImpulseApprenez à collecter, entraîner et déployer un modèle ML avec l’Arduino Nano 33 BLE Sense un nouveau chapitre pour ArduinoD’une carte pour amateurs à une plateforme d’edge computing premiers pas avec la détection d’objets sur des appareils edge détection de défauts sur circuits imprimésVision par ordinateur avec Raspberry Pi adapter l’IA aux appareils les plus compacts optimiser l’efficacité énergétique des appareils edge AI alimentés sur batterie grille-pain intelligentL’IA qui reconnaît le toast parfait Thundercomm Rubik Pi 3Raspberry Pi et l’edge AI, enfin réunis Leadership, ML embarqué et révolution de l’IA en périphérie modèles vision-langage en périphérieCascade de modèles pour une meilleure fiabilité découvrez Edge ImpulseQuestions de la communauté Elektor mise à jour du projet n°5 : Compteur d’énergie ESP32Utiliser l’Edge AI pour identifier les charges domestiques reconnaissance de mouvements avec détection d’anomaliesUn tutoriel détaillé système de ventilation intelligent : fusion des données sonores et environnementalesUtilisation d’un microcontrôleur double-cœur et du ML pour l’automatisation des fenêtres et persiennes intégrer la commande vocale aux écouteurs et aux casques l'IA en périphérie : au cœur des appareils de demain
€ 16,50
-

Elektor Edge Impulse Guest Edition 2025 (NL)
Elektor GREEN en GOLD leden kunnen deze uitgave hier downloaden. Nog geen lid? Klik hier om een lidmaatschap af te sluiten. Wat is Edge-AI nu eigenlijk?Intelligentie naar het apparaat brengen Maak kennis met Edge Impulse StudioEenvoudig Edge-AI modellen bouwen en implementeren Keyword spotting met Edge ImpulseVerzamelen, trainen en implementeren Slimme apparaten bedienen via spraakbesturing met de Nordic Thingy:53 Sleutelbegrippen voor het begrijpen van Edge AI en Machine Learning Snelcursus: Aan de slag met Edge ImpulseLeer een ML-model te verzamelen, trainen en implementeren met de Arduino Nano 33 BLE Sense Een nieuw hoofdstuk voor ArduinoVan hobbyboard tot Edge computing-krachtpatser Aan de slag met objectdetectie op edge-apparaten Detectie van defecten op printplatenComputer Vision met de Raspberry Pi AI op maat maken voor de kleinste apparaten Optimalisatie van het energieverbruik in batterijgevoede Edge-AI apparaten AI ToasterWanneer Edge-AI en ontbijt samenkomen Thundercomm Rubik Pi 3Raspberry Pi ervaring in combinatie met Edge AI Leiderschap, Embedded ML en de Edge-revolutie Vision language models voor EdgeModel-cascadering voor betere betrouwbaarheid Maak kennis met Edge ImpulseVragen van de Elektor-community Projectupdate #5: Energiemeter op basis van ESP32Edge-AI gebruiken voor herkenning van huishoudelijke verbruikers Bewegingsherkenning met anomalie-detectieEen uitgebreide training Slim ventilatiesysteem: integratie van geluids- en omgevingsgegevensEen machine learning toepassing met dubbele MCU voor geautomatiseerde bediening van ramen en lamellen Spraakbesturing voor oordopjes en headsets Edge-AI: de volgende generatie apparaten mogelijk maken
€ 15,95
-

Elektor Digital Elektor Edge Impulse Guest Edition 2025 (PDF) FR
Le téléchargement intégral de ce numéro est disponible pour nos membres GOLD et GREEN sur le site Elektor Magazine ! Pas encore membre ? Cliquez ici. qu’est-ce que l’edge AI ?L’IA, intégrée à l’appareil découvrez Edge Impulse StudioConcevez et déployez facilement des modèles d’IA en périphérie détection de mots-clés avec Edge ImpulseCollecter, entraîner et déployer contrôle d’appareils par commande vocale avec le Nordic Thingy:53 Termes clés pour comprendre l’edge AI et le machine learning cours accéléré : démarrez avec Edge ImpulseApprenez à collecter, entraîner et déployer un modèle ML avec l’Arduino Nano 33 BLE Sense un nouveau chapitre pour ArduinoD’une carte pour amateurs à une plateforme d’edge computing premiers pas avec la détection d’objets sur des appareils edge détection de défauts sur circuits imprimésVision par ordinateur avec Raspberry Pi adapter l’IA aux appareils les plus compacts optimiser l’efficacité énergétique des appareils edge AI alimentés sur batterie grille-pain intelligentL’IA qui reconnaît le toast parfait Thundercomm Rubik Pi 3Raspberry Pi et l’edge AI, enfin réunis Leadership, ML embarqué et révolution de l’IA en périphérie modèles vision-langage en périphérieCascade de modèles pour une meilleure fiabilité découvrez Edge ImpulseQuestions de la communauté Elektor mise à jour du projet n°5 : Compteur d’énergie ESP32Utiliser l’Edge AI pour identifier les charges domestiques reconnaissance de mouvements avec détection d’anomaliesUn tutoriel détaillé système de ventilation intelligent : fusion des données sonores et environnementalesUtilisation d’un microcontrôleur double-cœur et du ML pour l’automatisation des fenêtres et persiennes intégrer la commande vocale aux écouteurs et aux casques l'IA en périphérie : au cœur des appareils de demain
€ 10,95
-

Elektor Digital Elektor Edge Impulse Guest Edition 2025 (PDF) NL
Elektor GREEN en GOLD leden kunnen deze uitgave hier downloaden. Nog geen lid? Klik hier om een lidmaatschap af te sluiten. Wat is Edge-AI nu eigenlijk?Intelligentie naar het apparaat brengen Maak kennis met Edge Impulse StudioEenvoudig Edge-AI modellen bouwen en implementeren Keyword spotting met Edge ImpulseVerzamelen, trainen en implementeren Slimme apparaten bedienen via spraakbesturing met de Nordic Thingy:53 Sleutelbegrippen voor het begrijpen van Edge AI en Machine Learning Snelcursus: Aan de slag met Edge ImpulseLeer een ML-model te verzamelen, trainen en implementeren met de Arduino Nano 33 BLE Sense Een nieuw hoofdstuk voor ArduinoVan hobbyboard tot Edge computing-krachtpatser Aan de slag met objectdetectie op edge-apparaten Detectie van defecten op printplatenComputer Vision met de Raspberry Pi AI op maat maken voor de kleinste apparaten Optimalisatie van het energieverbruik in batterijgevoede Edge-AI apparaten AI ToasterWanneer Edge-AI en ontbijt samenkomen Thundercomm Rubik Pi 3Raspberry Pi ervaring in combinatie met Edge AI Leiderschap, Embedded ML en de Edge-revolutie Vision language models voor EdgeModel-cascadering voor betere betrouwbaarheid Maak kennis met Edge ImpulseVragen van de Elektor-community Projectupdate #5: Energiemeter op basis van ESP32Edge-AI gebruiken voor herkenning van huishoudelijke verbruikers Bewegingsherkenning met anomalie-detectieEen uitgebreide training Slim ventilatiesysteem: integratie van geluids- en omgevingsgegevensEen machine learning toepassing met dubbele MCU voor geautomatiseerde bediening van ramen en lamellen Spraakbesturing voor oordopjes en headsets Edge-AI: de volgende generatie apparaten mogelijk maken
€ 9,95
-
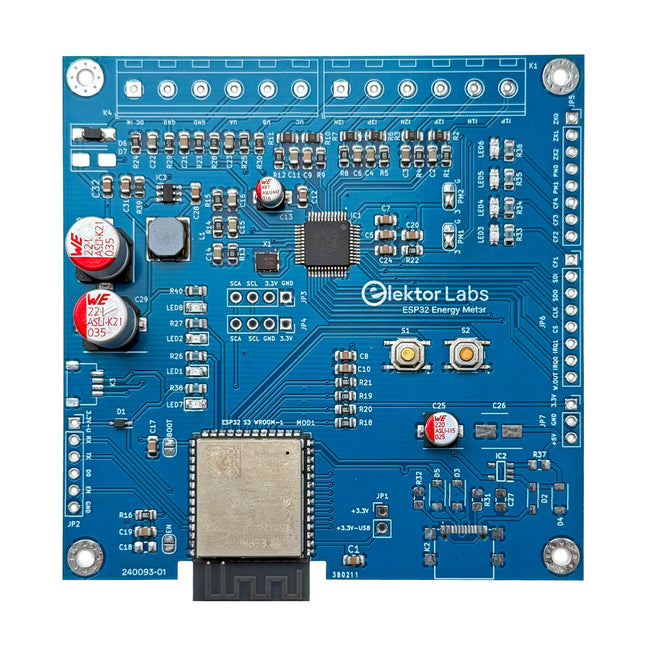
Elektor Labs Elektor ESP32 Energiemeter
De Elektor ESP32 Energiemeter is een apparaat dat is ontworpen voor real-time energiemonitoring en smart home-integratie. Aangedreven door de ESP32-S3-microcontroller, biedt hij robuuste prestaties met modulaire en schaalbare functies. Het apparaat maakt gebruik van een 110/230 VAC naar 12 VAC step-down transformator voor spanningsbemonstering, waardoor galvanische isolatie en veiligheid worden gegarandeerd. De compacte PCB-indeling omvat schroefklemmen voor veilige verbindingen, een Qwiic-connector voor extra sensoren en een programmeerheader voor directe ESP32-S3-configuratie. De energiemeter is compatibel met eenfasige en driefasige systemen, waardoor hij aanpasbaar is voor verschillende toepassingen. De energiemeter is eenvoudig in te stellen en kan worden geïntegreerd met Home Assistant, waardoor realtime monitoring, historische analyses en automatiseringsmogelijkheden worden geboden. Het biedt nauwkeurige metingen van spanning, stroom en vermogen, waardoor het een waardevol hulpmiddel is voor het energiebeheer in huizen en bedrijven. Kenmerken Uitgebreide energiemonitoring: Krijg gedetailleerd inzicht in uw energieverbruik voor slimmer beheer. Aanpasbare software: Pas de functionaliteit aan uw behoeften aan door aangepaste sensoren te programmeren en te integreren. Klaar voor Smart Home: Compatibel met ESPHome, Home Assistant en MQTT voor volledige Smart Home-integratie. Veilig & flexibel ontwerp: Werkt met een 110/230 VAC naar 12 VAC step-down transformator en beschikt over een voorgemonteerde SMD-kaart. Snelle start: Inclusief één Current Transformer-sensor en toegang tot gratis installatiebronnen. Specificaties Microcontroller ESP32-S3-WROOM-1-N8R2 IC voor energiemeting ATM90E32AS Statusindicatoren 4x LED's voor indicatie van energieverbruik2x Programmeerbare LED's voor aangepaste statusmeldingen Gebruikersinvoer 2x drukknoppen voor gebruikersbediening Uitvoer weergeven I²C OLED-display voor realtime visualisatie van het energieverbruik Ingangsspanning 12~16 VAC (via een step-down-transformator van 110/230 VAC naar 12 VAC) Clampstroomsensor YHDC SCT013-000 (100 A/50 mA) inbegrepen Smart Home-integratie ESPHome, Home Assistant en MQTTvoor naadloze connectiviteit Connectiviteit Header voor programmeren, Qwiic voor sensoruitbreiding Toepassingen Ondersteunt eenfasige en driefasige energiemonitoringsystemen Afmetingen 79,5 x 79,5 mm Inbegrepen 1x Gedeeltelijk gemonteerd bord (SMD-componenten zijn voorgemonteerd) 2x Schroefklemmenblokconnectoren (niet gemonteerd) 1x YHDC SCT013-000 stroomtransformator Vereist Voedingstransformator niet inbegrepen Downloads Datasheet (ESP32-S3-WROOM-1) Datasheet (ATM90E32AS) Datasheet (SCT013-000) Frequently Asked Questions (FAQ) Van prototype tot eindproduct Wat begon als een innovatief project om een betrouwbare en gebruiksvriendelijke energiemeter te creëren met behulp van de ESP32-S3-microcontroller, is uitgegroeid tot een robuust product. Aanvankelijk ontwikkeld als een open-source-project, had de ESP32 Energiemeter tot doel nauwkeurige energiemonitoring, slimme huisintegratie en meer te bieden. Door nauwgezette hardware- en firmware-ontwikkeling is de energiemeter nu een compacte, veelzijdige oplossing voor energiebeheer.
€ 79,95€ 64,95
Beste prijs
-

Elektor Digital Elektor Gastredactie door Espressif 2023 (PDF)
Elektor GREEN en GOLD leden kunnen deze uitgave hier downloaden. Nog geen lid? Klik hier om een lidmaatschap af te sluiten. IoT-innovatie in galop Een E-Ink WiFi kleuren-fotolijst ESP-Launchpad tutorialvan nul tot flashen in een paar minuten ESP32 en ChatGPTop weg naar een zelf-programmerend systeem… Walkie-talkie met ESP-NOWniet echt WiFi, niet echt Bluetooth, maar... Van idee tot schakeling met de ESP32-S3zo bouw je een prototype met Espressif-chips AIoT chip-innovatieeen vraaggesprek met Teo Swee-Ann, CEO van Espressif Simuleer ESP32 met Wokwide digitale tweeling van je project Test van de ESP32-S3-BOX-3een uitgebreid AIoT-ontwikkelplatform voor je elektronica-werkplekoverwegingen en tips van Espressif-technici Het ESP RainMaker-verhaalhoe we “jouw” IoT-cloud bouwden Bouw van de Elektor Cloc 2.0een Elektor-product uitgepakt door Espressif De ESP32-P4 ontketendde volgende microcontroller-era Rust + embeddedeen krachtig ontwikkelduo Wie zijn de onvervaarde embedded Rust-ontwikkelaars?zo cultiveert Espressif embedded Rust voor de ESP32 de SoC-serie van Espressif Een PLC met oplossingen van Espressifmet de mogelijkheden en functionaliteit van het ISOBUS-protocol Het ESP32-S3 VGA-boardvolg Bitluni tijdens het ontwerpproces Acoustic fingerprinting met de ESP32songherkenning met het open-source project Olaf Ronde kerstboom 2023een high-tech manier om de feestdagen te vieren Een eenvoudiger en handiger leveneen amateurproject op basis van de ESP8266-module van Espressif IoT-apps bouwen zonder software-expertisemet het Blynk IoT-platform en Espressif-hardware Bouw een slimme gebruikersinterface op ESP32 Snelle en gemakkelijke IoT-ontwikkeling met M5Stack Prototype van een ESP32-gebaseerde energiemeter Een distributeur met meerwaarde voor IoT en meer Achter de schermen: vraaggesprek met Arduino over de Nano ESP32Alessandro Ranellucci en Martino Facchin over de samenwerking met Espressif achter de schermen van Espressif Stroomlijnen van MCU-ontwikkeling met ESP-IDF Privilege Separation Een open-source spraakherkenningsserver......en de ESP BOX Het denkende ooggezichtsherkenning en meer met de ESP32-S3-EYE Knoopcel-schakelaar met ESP32-C2prestatiegericht ontwerpen Matter stuwt het slimme huis voorwaartsontsluit het potentieel van Smart Home IoT Tech the Future: Waarheen met Smarthome IoT?
€ 9,95
-

Elektor Digital Elektor Green-lidmaatschap
Elektronica leren, ontwikkelen en begrijpen – met Elektor Projecten, vakkennis, toegang tot het archief en exclusieve kortingen – alles in één lidmaatschap. Wilt u elektronica leren, uw eigen schakelingen ontwikkelen en moderne technologieën beter begrijpen? Elektor Magazine behoort al 65 jaar tot de toonaangevende informatiebronnen voor elektronica-ingenieurs, ontwikkelaars, start-ups en bedrijven. Met een Elektor Green-lidmaatschap verzekert u zich van: ✅ Het internationale elektronica-vakblad Elektor (als digitale uitgave) ✅ Toegang tot het Elektor-archief met 65 jaar elektronica-knowhow ✅ Zelfbouwprojecten, geteste schakelingen, in-depth reviews en tutorials ✅ Exclusieve ledenkortingen op Elektor.nl Waarom Elektor? Al 65 jaar staat Elektor voor gedegen elektronica-kennis, praktijkgerichte projecten en innovatieve technologieën. Van microcontrollers en embedded systemen tot Raspberry Pi, Arduino en ESP32, en van IoT, AI en meettechniek tot audio, RF en robotica: Elektor bestrijkt de belangrijkste platforms en toepassingsgebieden van moderne elektronica. Of u nu beginner, maker of professional bent – met Elektor tilt u uw vaardigheden naar een hoger niveau. Voor wie is het lidmaatschap bedoeld? Beginners – Stap de wereld van de elektronica binnen met begrijpelijke basisprincipes en eerste projecten Makers – Ontdek nieuwe projecten, ideeën en inspiratie voor uw eigen ontwikkelingen Professionals & ingenieurs – Blijf op de hoogte van de nieuwste technologieën en verdiep uw vakkennis Uw voordelen in één oogopslag Tijdschrift (digitaal) – Ontvang elke uitgave digitaal rechtstreeks in uw mailbox 65 jaar kennis van elektronica – Krijg op elk moment toegang tot het uitgebreide Elektor-archief Praktijk & projecten – Breng uw eigen ideeën tot leven met handleidingen, schakelingen en tutorials Exclusieve kortingen – Bespaar bij elke aankoop op Elektor.nl Ontgrendel nu alle Elektor-voordelen! Free-lidmaatschap Green-lidmaatschap ❌ 8x Elektor Magazine (Digitale editie) als PDF ✅ 8x Elektor Magazine (Digitale editie) als PDF ❌ 12 maanden toegang tot het Elektor-archief ✅ 12 maanden toegang tot het Elektor-archief ❌ Toegang tot meer dan 5.000 Gerber-bestanden ✅ Toegang tot meer dan 5.000 Gerber-bestanden ❌ 10% ledenkorting op Elektor.nl ✅ 10% ledenkorting op Elektor.nl ✅ Lees Elektor wekelijks elke vrijdagochtend ✅ Lees Elektor wekelijks elke vrijdagochtend ℹ️ Leest u Elektor liever in gedrukte vorm? Hier vindt u alles over het Elektor Gold-lidmaatschap (print).
€ 99,95 - € 169,95
-

Elektor Digital Elektor Januari/Februari 2020 (PDF)
Touch-GUI voor ESP32 en Raspberry & cografische gebruikersinterface met de LittlevGL-bibliotheek “Niet zomaar een project”vraaggesprek met Gábor Kiss-Vámosi, ontwikkelaar van LittlevGL Capaci-metermet tweecijferig LED-display in dekatron-stijl Hoe... een mechanisch contact of schakelaar ontdendereneen schakelaar is open of gesloten – toch? Developer's Zonetips & trucs, vakkunstigheden en andere nuttige informatie Uitbreidbaar milieumonitorsysteempubliceert gegevens op IoT-platforms Multitasking met de ESP32Multitasking met de ESP32 taakgeoriënteerd programmeren met FreeRTOS en de Arduino IDE Interactiefcorrecties & updates || vragen & antwoorden Autoverlichting tunenlegaal, illegaal – maakt wél uit! Review Toolcraft digitaal soldeerstation Arduino Pro IDEeen eerste indruk Twee warmtebeeldcamera’s vergeleken Uit het leven gegrepende inrichting van een lab en werkplaats Monsanto MAN1 LED-displayvreemde onderdelen Theetimereen experiment met energy harvesting Eenfase 1 kW AC-motorsturingdrie bedrijfsmodi: perioderegeling, fase-afsnijding en fase-aansnijding Snel 3,5'-touchscreen voor de Raspberry Pipresteert beter voor hetzelfde geld Oost West Lab Besteen blik in het allerheiligste, waar onbevoegden geen toegang hebben... Eerste stappen met RISC-Vhet LoFive-board onder de loep LoRa-Tracker: een uitdaging voor het labproblemen en oplossingen bij de ontwikkeling van elektronica Met de vos in het IoT (2)aanmelden in het Sigfox-netwerk Alle begin......hoeft niet zo moeilijk te zijn Analoge elektronica ontwerpencase-study #1 – deel 1: MEMS-microfoon... test-een-twee-drie Wie het kleine niet eertuit de ideeënbus van Elektor In het kort: teksten voor microcontrollersspaar geheugen met compressie In de schijnwerpers: de autonome autooverzicht van de stand van de techniek Leidende start-ups en innovatoren over “Innovation 4.0” in München Lego Electronic anno 1968elektronisch speelgoed fascineert na 50 jaar nog steeds Beyond ElectronicsThe MX3D Bridge Senses the City Hexadoku
€ 9,95
-

Elektor Digital Elektor Januari/Februari 2021 (PDF)
ZELFBOUW LIPO- SUPERCHARGER-BUNDELLiPo-lader, -booster en -beveiliging van GreatScott en Elektor MTHECAM – DE MINI-THERMOCAMERAeenvoudige warmtebeeldcamera voor het lokaliseren van hot- en coldspots REVIEW: WELLER-SOLDEERSTATION WE 1010 ELECTRONICA FAST FORWARD 2020 – DE WINNAARS I2S TESTSIGNAALGENERATOR MET AVR-MICROCONTROLLER32-bit 1-kHz digitale sinus, fs 192 kHz, niveau instelbaar van 0 tot –110 dB DOMOTICA MET DE RASPBERRY PIRPi luistert op 433,92 MHz SCHAKELINGEN ONLINE SIMULEREN UIT HET LEVEN GEGREPENde dunne grens tussen orde en chaos ALLE BEGIN......hoeft niet zo moeilijk te zijn OOST WEST LAB BESTeen blik in het allerheiligste, waar interessante projecten worden geboren VERBIND UW THERMOSTAAT MET ESPHOMEeen poging om domotica op de juiste manier te doen DEVELOPER’S ZONEtips & trucs, vakkunstigheden en andere nuttige informatie WIE HET KLEINE NIET EERTuit de ideeënbus van Elektor RASPBERRY PI FULL STACKRPi en RF24 als hart van een sensornetwerk MULTITASKING MET DE ESP32 (6)event groups MEERKANAALS POWER ANALYZERtot 3 kanalen, met grafisch en alfanumeriek display ANALOGE ELEKTRONICA ONTWERPENcase-study #2 – deel 3: passieve filters REVIEW: DRAADLOZE MEETMODULE JOY-IT VAX-1030 NIEUWE LCR-METER 50 HZ – 2 MHZ (DEEL 2)bediening, kalibratie en programmeren van de firmware ERROR ANALYSIStips en trucs: spanningsregelaars, PCB-ontwerp en meer HET OPEN HARDWARE OBSERVATORYcommunitygebaseerde beoordeling van open source-hardware JAVA OP DE RASPBERRY PIeen vraaggesprek met Frank Delporte DATA-ANALYSE EN KUNSTMATIGE INTELLIGENTIE IN PYTHONechte gegevens interpreteren met NumPy, pandas en scikit-learn INTERACTIEFcorrecties & updates || brieven van lezers ONZE COMMUNITY IN CIJFERS KENNISMAKING MET DE PARALLAX PROPELLER 2 (DEEL 1)inleiding HEXADOKU
€ 9,95
-

Elektor Digital Elektor Januari/Februari 2022 (PDF)
MOTOREN AANSTUREN MET H-BRUGGENeen inleiding tot gelijkstroom-, stappen- en borstelloze motoren HET ELEKTOR LAB-TEAMonze aanpak, onze tools – en meer... RASPBERRY PI ALS KVM-AFSTANDSBEDIENINGsoftwaretest Pi-KVM IQAUDIO CODEC ZEROgeluidskaart voor de Raspberry Pi-familie WAT WE KUNNEN LEREN VAN HET PIKVM-PROJECTeen vraaggesprek met Maxim Devaev AUTONOOM RIJDEN MET 2D-LIDARESP32 Pico interpreteert gegevens van de lidar-module DE RASPBERRY PI ZERO 2 W GAAT QUAD-CORE NOTITIES BIJ VAN HET WORLD ETHICAL ELECTRONICS FORUM 2021 MOTORBESTURINGhoe de complexiteit van motorbesturing wordt gereduceerd GROTE ELEKTROMOTORENbasisprincipes en nuttige informatie AAN DE SLAG MET DE ESP32-C3 RISC-V MCU BESCHERM UZELF EN ANDEREN!DHZ-hoofdschakelaar voor uw werkbank GUI'S MAKEN MET PYTHON (DEEL 2)Spionnennaamkiezer PRODUCTRONICA FAST FORWARD 2021: DE WINNAARSspannende technologieën en creatieve engineeringoplossingen VEELZIJDIGE SERVOTESTERcontroleer het gedrag, ook zonder datasheet MODBUS VIA WLANdeel 2: software voor de Modbus TCP WLAN-module KENNISMAKING MET NEURONEN IN NEURALE NETWERKENdeel 3: neuronen in de praktijk IN EEN OPEN SOURCE-PROCESSORvoorbeeldhoofdstuk: vergelijking van Lattice- en Xilinx-FPGA’s ALLE BEGIN......is nog niet klaar met de spoel PROJECT 2.0correcties, updates en brieven van lezers KLEUR NAAR GELUIDeen kleursensor via I2C uitlezen BATTLAB-ONEmeet en optimaliseer de gebruiksduur van IoT-accu’s EENVOUDIGE AARDLEKTESTERisolatietest voor lichtnetinstallaties ARMOEDE EN ELEKTRONICAhet streven naar duurzame ontwikkeling HEXADOKUpuzzelen voor elektronici
€ 9,95
-

Elektor Digital Elektor Januari/Februari 2023 (PDF)
Elektor GREEN en GOLD leden kunnen deze uitgave hier downloaden.Nog geen lid? Klik hier om een lidmaatschap af te sluiten. Voor ogen en oren Video-output met microcontrollers (1)Composiet Video electronica 2022nieuws van 's werelds grootste elektronicabeurs ESP32-camerazo simpel – heeft niet eens WiFi ATX-voeding voor Raspberry Pi 32 ? KoptelefoonversterkerEenvoudige maar hoogwaardige 3-chip oplossing SDR-radioklokkenvijf tijdsignalen, zes displays Alle begin......zet een streep onder de diode Uit het leven gegrepenover de kwaliteit der dingen Reverse-engineering van een Bluetooth Low Energy LED-badgeeen BLE-apparaat besturen met een Python-script MakePython ESP32 Development KitAlles in een doosje THD-meting met een oscilloscoop en FFTgemakkelijke berekening van de vervormingsfactor Allesziende machinesde technologie achter moderne industrële visionsystemen Infographics De evolutie van spraak- en audiogestuurde elektronische apparaten WEEF 2022 terugblik FFWD elektronica 2022 terugblikde vernieuwers hebben niet nagelaten indruk te maken The Tubeeen ongebruikelijke buizenversterker Biomateriaal in elektronica: klaar of niet De Opera Cake antenne switch voor HackRF OneSluit tot acht antennes aan op uw SDR Engineering met de Arduino, en meerEen interview met auteur Ashwin Pajankar LiDAR-precisiemetermeet tot 12 meter Audiosignalen en de ESP32De ESP-ADF-omgeving in de praktijk Elektor Fortissimo-100 einversterker-kit Lichtgestuurde geluidseffectenSpanningsgestuurd 24 dB/oct synthesizerfilter (VCF) met LDR's De kilo-watter van Elektuurmeer volume gaat niet! Oost West Lab Besteen volumetrisch display in Canada Project 2.0Correcties, Updates en Brieven van lezers Hexadoku
€ 9,95
-

Elektor Digital Elektor Januari/Februari 2024 (PDF)
Elektor GREEN en GOLD leden kunnen deze uitgave hier downloaden. Nog geen lid? Klik hier om een lidmaatschap af te sluiten. Project-update: ESP32-gebaseerde energiemeterwe gaan verder met het prototype Optimalisatie van balkon PV-centralesoverwegingen, interessante feiten en berekeningen ESP32 met OpenDTU voor balkoncentralesgegevens van kleine omvormers via MCU’s uitlezen Regelbare lineaire labvoeding0...50 V / 0...2 A + dubbele symmetrische voeding Energieopslag – vandaag en morgeneen vraaggesprek met Simon Engelke 2024: een AI-odysseehet houdt nog lang niet op Bluetooth LE op de STM32meetwaarden op afstand uitlezen Mensvriendelijk slim keuken-voorraadsysteem MAUI: programmeren voor PC, tablet en smartphonehet nieuwe framework in theorie en praktijk ChatMagLevkunstmatig intelligente levitatie Eenvoudige PV-regelaarbouw je eerste, volledig functionele PV-energiebeheersysteem Koude-kathode-buizenvreemde onderdelen Uit het leven gegrepennostalgie Alle begin......bekijkt de FET CAN-bus voor de Arduino UNO R4: een tutorialtwee UNO R4’s nemen de bus! Elektor infographicvoeding en energie Vergelijking van vermogensdichtheid en vermogensefficiëntie Aluminium elektrolytische condensatorenstoringspotentieel in audiotechnologie USB testen en metenmet de Fnirsi FNB58 De Pixel Pump pick&place-tooleenvoudiger handmatige assemblage van SMT-printen Oost West Lab Bestnog niet zo lang geleden, in een land heel ver van hier... “In de wereld van ethiek in elektronica kunnen zelfs kleine stappen een aanzienlijke invloed hebben.” Ethiek in elektronicade OECD Guidelines en het Lieferkettensorgfaltspflichtengesetz Chadèche: slimme NiMH-(ont)laderlezersproject in het kort Project 2.0correcties, updates en brieven van lezers
€ 9,95
-
Elektor Januari/Februari 2025 (NL)
Elektor GREEN en GOLD leden kunnen deze uitgave hier downloaden. Nog geen lid? Klik hier om een lidmaatschap af te sluiten. DHZ-accusysteem voor zonne-energiebouw uw eigen energieopslag voor zonnepanelen Simulator voor zonnepanelentest en optimaliseer MPP-trackers en omvormers De STM32 Edge-AI-ContestOntdek de nieuwe STM32N6 en ding mee naar € 5000! Vergroten van de bandgapdaarom is er zoveel interesse in SiC en GaN Powerbank voor noteboekgeef uw oude laptop een tweede leven Medische robotshet overwinnen van technische en regelgevende barrières Vorstbescherming voor fruitbomenmet temperatuurlogger Het analoge dingde Arduino onder de analoge computers? Zuinige relaisdriverspaart 90% spoelstroom Verbetering van de ET5410A+ DC-belastingblijf koel en stil electronica 2024een terugblik Elektromagnetische compatibiliteitEMC in een notendop! Alle begin......filtert actief Reduceer vermogensverlies met seriecondensatorenslim gebruik van capacitieve reactantie De betaalbare MCP4725 12-bit digitaal/analoog-omzetterEEPROM-functie zorgt voor veilig inschakelgedrag FNIRSI LCR-ST1 smart LCR-meetpincet Raspberry Pi-gebaseerd test- en meetlabals eerste: de ADC Elektronische belastingweerstandmet onderdelen die u waarschijnlijk hebt liggen 2025: een AI-odysseeenkele projecten voor het nieuwe jaar Project-update: AmpVolt v2.0100 ampère en meer! Project 2.0correcties, updates en brieven van lezers Ethische transparantie ontsluierdinzichten uit het Ethics in Electronics 2024 onderzoek Audio DSP FX Processor Boarddeel 2: toepassingen maken
€ 14,95
-
Elektor Digital Elektor Januari/Februari 2025 (PDF) NL
Elektor GREEN en GOLD leden kunnen deze uitgave hier downloaden. Nog geen lid? Klik hier om een lidmaatschap af te sluiten. DHZ-accusysteem voor zonne-energiebouw uw eigen energieopslag voor zonnepanelen Simulator voor zonnepanelentest en optimaliseer MPP-trackers en omvormers De STM32 Edge-AI-ContestOntdek de nieuwe STM32N6 en ding mee naar € 5000! Vergroten van de bandgapdaarom is er zoveel interesse in SiC en GaN Powerbank voor noteboekgeef uw oude laptop een tweede leven Medische robotshet overwinnen van technische en regelgevende barrières Vorstbescherming voor fruitbomenmet temperatuurlogger Het analoge dingde Arduino onder de analoge computers? Zuinige relaisdriverspaart 90% spoelstroom Verbetering van de ET5410A+ DC-belastingblijf koel en stil electronica 2024een terugblik Elektromagnetische compatibiliteitEMC in een notendop! Alle begin......filtert actief Reduceer vermogensverlies met seriecondensatorenslim gebruik van capacitieve reactantie De betaalbare MCP4725 12-bit digitaal/analoog-omzetterEEPROM-functie zorgt voor veilig inschakelgedrag FNIRSI LCR-ST1 smart LCR-meetpincet Raspberry Pi-gebaseerd test- en meetlabals eerste: de ADC Elektronische belastingweerstandmet onderdelen die u waarschijnlijk hebt liggen 2025: een AI-odysseeenkele projecten voor het nieuwe jaar Project-update: AmpVolt v2.0100 ampère en meer! Project 2.0correcties, updates en brieven van lezers Ethische transparantie ontsluierdinzichten uit het Ethics in Electronics 2024 onderzoek Audio DSP FX Processor Boarddeel 2: toepassingen maken
€ 9,95


