
Branded
-

Elektor Digital Meettechniek in de praktijk (E-book)
Meten is voor een praktiserend elektronicus even vanzelfsprekend als ademhalen. Of het nu om het ontwikkelen van nieuwe schakelingen gaat, de controle van elektronische apparaten tijdens de productiefase of om het foutzoeken in defecte apparatuur: meetapparaten zijn het belangrijkste gereedschap en worden voortdurend gebruikt. 'Weet wat je meet', luidt een bekende uitspraak. En zo is het maar net: om zichzelf geen rad voor ogen te draaien moet de elektronicus weten wat hij doet, moet hij de nauwkeurigheid van zijn meetapparatuur en vooral de voor- en nadelen van de toegepaste meetmethode kennen. En hier steekt dit boek de lezer de helpende hand toe: uitgaand van theoretische beschouwingen en definities van de belangrijkste begrippen van de meettechniek begeleidt het de lezer bij de reis van eenvoudige wijzerinstrumenten via multimeter en oscilloscoop tot en met FFT-analyzers en gespecialiseerde meetapparaten zoals audio-analyzers, geluidsdrukmeters, apparaat- en installatietesters.
€ 29,95
Leden: € 26,96
-
Elektor Digital CAN et CAN FD (E-book)
Tout sur les protocoles et leur mise en œuvre avec Arduino Initialement destiné aux véhicules routiers, le réseau CAN (« Controller Area Network ») et son successeur le réseau CAN FD (« Flexible Data ») ont vu leurs champs d’application s’élargir à de nouveaux domaines. L’industrie propose de nombreux modules microcontrôleurs dotés d’une interface CAN et/ou CAN FD. L’environnement de développement Arduino a démocratisé la programmation de ces modules et il existe des bibliothèques qui implémentent un pilote CAN et/ou un pilote CAN FD. La première partie dresse un rapide historique des réseaux CAN et CAN FD et expose la problématique des lignes de transmission en abordant succinctement leur théorie et présentant des résultats de simulation Spice. La deuxième partie est consacrée au réseau CAN, en détaillant successivement la fonction logique du réseau, les transcepteurs, les contrôleurs, la topologie la plus classique (le bus) et d’autres moins courantes, les répéteurs et les passerelles. Les aspects particuliers du protocole, tels que le bit stuffing, l’arbitrage, les trames d’erreur, la détection des erreurs sont exposés. La discussion de la fiabilité du protocole est illustrée par des exemples mettant en évidence ses faiblesses. La troisième partie présente le protocole CAN FD, ses deux variantes CAN FD ISO et CAN FD non ISO, leurs fiabilités, leurs faiblesses, mises en évidence par des exemples. Différents transcepteurs et contrôleurs CAN FD sont décrits. La quatrième partie est dédiée aux applications : comment utiliser les services d’un pilote, concevoir une messagerie, utiliser un analyseur logique. Deux exemples d’application terminent cette partie. Ce livre s’adresse aux amateurs et aux ingénieurs non spécialistes pour comprendre les possibilités qu’offre un réseau CAN et comment on le met en œuvre. Un enseignant trouvera des informations pour approfondir ses connaissances et pour concevoir des travaux pratiques. Une connaissance des microcontrôleurs, de leur programmation, de l’électronique numérique aidera à la lecture des schémas. La connaissance du langage C++ et du langage de simulation électronique Spice facilitera la compréhension des programmes qui sont décrits dans le livre. Tous les codes source sont disponibles sur le dépôt GitHub de l’auteur. Téléchargements GitHub
€ 34,95
Leden: € 31,46
-

Elektor Digital Microcontroller Basics with PIC (E-book)
In this book the author presents all essential aspects of microcontroller programming, without overloading the reader with unnecessary or quasi-relevant bits of information. Having read the book, you should be able to understand as well as program, 8-bit microcontrollers. The introduction to microcontroller programming is worked out using microcontrollers from the PIC series. Not exactly state-of-the-art with just 8 bits, the PIC micro has the advantage of being easy to comprehend. It is offered in a DIP enclosure, widely available and not overly complex. The entire datasheet of the PIC micro is shorter by decades than the description of the architecture outlining the processor section of an advanced microcontroller. Simplicity has its advantages here. Having mastered the fundamental operation of a microcontroller, you can easily enter into the realms of advanced softcores later. Having placed assembly code as the executive programming language in the foreground in the first part of the book, the author reaches a deeper level with ‘C’ in the second part. Cheerfully alongside the official subject matter, the book presents tips & tricks, interesting measurement technology, practical aspects of microcontroller programming, as well as hands-on options for easier working, debugging and faultfinding.
€ 32,95
Leden: € 29,66
-

Elektor Digital Analogue Video (E-book)
This book is intended for electronics enthusiasts and professionals alike, who want a much deeper understanding of the incredible technology conquests over the pre-digital decades that created video. It details evolution of analogue video electronics and technology from the first electro-mechanical television, through advancements in Cathode Ray Tubes, transistor circuits and signal processing, up to the latest analogue, colour-rich TV, entertainment devices and calibration equipment. Key technological advances that enabled monochrome video and, eventually, colour are explained. The importance, compromises and techniques of maintaining crucial backward legacy compatibilities are described. The generation, signal processing and playback of analogue video signals in numerous capture, display, recording and playback devices together with operating principles and practices are examined. Technical and, often, political merits and deficiencies of key national and international video standards are highlighted. Several formats are shown to win and ultimately to co-exist. This book begins at fairly basic levels; concepts are introduced with human physiological perceptions of light and colour explained. This leads to the subject matter of luminance and chrominance; their equations and the circuits to process. There is full, detailed analysis of waveform shapes and timings inside video equipment and relevant popular connections e.g. S-video. Several analogue video projects which you can build yourself are also included in this book; with schematics, circuit board layouts and calibration steps to help you obtain the best results. The book makes use of many colour pages where the subject matter demands it (e.g. test cards). If you really want a deeper understanding of analogue video then this book is for you!
€ 24,95
Leden: € 22,46
-

Elektor Digital Experimenting with Red Pitaya STEMlab Gen 2 (E-book)
Practical Projects and Programs With Experimenting with Red Pitaya STEMlab Gen 2, Red Pitaya goes beyond a versatile board. It becomes a powerful laboratory instrument for precision measurement, analysis, and control. From the fundamentals of electronic project development, monitoring, control, and design to testing, this book walks you step-by-step through everything you need to know to harness the full potential of Red Pitaya hardware and software. The book presents real-time, FPGA-based projects that are developed on a PC using the Vivado environment, then transferred to the Red Pitaya for execution and testing. You will learn about enhanced performance, expanded I/O capabilities, improved FPGA features, and advanced connectivity options that open up new frontiers for precision measurement, monitoring, and control in your embedded applications. Inside the book you will discover: A deep dive into Red Pitaya architecture and hardware design Electronic experiments using Red Pitaya for measurement and monitoring Hands-on projects using the Python programming language Practical guidance for FPGA programming using Red Pitaya Red Pitaya FPGA projects using the Verilog HDL under Vivado IDE Practical design of electronic projects including measurement and testing Step-by-step examples that bridge theory and real-world implementation Whether you are designing your own electronic circuits, developing signal analysis tools, or creating real-time control or monitoring systems, this book provides you the knowledge and confidence you need to fully learn and customize the Red Pitaya platform.
€ 32,95
Leden: € 29,66
-

Elektor Digital Initiation au langage CircuitPython et à la puce nRF52840 (E-book)
Le langage de programmation Python est apprécié par les pédagogues parce que sa syntaxe le rend facile à comprendre. Il s'est également imposé chez les informaticiens expérimentés. La société Adafruit a développé une version spéciale de Python pour l'embarquer sur les microcontrôleurs à 32 bits : CircuitPython. Ce livre permettra au lecteur de s'initier à la programmation en CircuitPython sur deux cartes : Feather BlueFruit Sense (également appelée Feather nRF52840 Sense) et CLUE nRF52840 Express. Chacune est animée par le SoC nRF52840 de NORDIC avec une architecture à 32 bits. Pour ce voyage dans le monde de la programmation embarquée, l'auteur sort du chemin classique, à savoir un cours complet sur la programmation orientée objet appliquée à ce langage. Il préfère emmener le lecteur directement sur le terrain avec des projets qui mettent en oeuvre les cartes et différents périphériques. Plus d'une quarantaine d'exemples et de montages permettent de découvrir la richesse de CircuitPython. Toutefois l'auteur s'est imposé une limite pour ne pas décourager les novices : le code de chaque projet ne dépasse jamais la centaine de lignes. Pour ce qui est du matériel, là aussi la simplicité domine : aucun programmateur, un simple PC suffit ; aucun soudage grâce au câblage sur platine d'essai. Les cartes d'extension FeatherWing à enficher sur la Feather nRF52840 Sense permettent de démultiplier ses fonctions : matrice de LED, enregistreur de données, écran à encre électronique, écran OLED, écran TFT, commande de moteurs, audio, relais… Toutes les étapes (assemblage des différents composants, installation des bibliothèques requises, programmation, tests…) sont expliquées en détail. Le code des différents exemples et projets est disponible sur Github. Le résultat de chaque projet est même présenté sur de courtes vidéos disponibles sur YouTube. À la fin de sa lecture, le nouveau Pythonien pourra facilement approfondir les notions abordées et donner vie à ses propres projets grâce aux outils qu'il aura essayés. Ce livre s'adresse aux lycéens et étudiants ainsi qu'à toute la communauté des makers. Chaîne YouTube de l'auteur YouTube (Michaël Bottin)
€ 34,95
Leden: € 31,46
-

Elektor Digital Getting Started With Java Using Eclipse (E-book)
Mastering the Language and the Development Platform Many people would like to learn Java but getting started is not easy since programming with Java requires at least two things: mastering the programming language and the development environment. With the help of many examples, this book shows how the language is structured. In addition, it employs the Eclipse development environment as an example of a powerful tool to teach developing Java programs. In Basics, the first part of the book, you acquire your Java and Eclipse basic knowledge. This part lays the programming foundations, gives you an overview of Java technology, and shows you what is special about object-oriented programming. In the second part called Java Language, everything revolves around the subtleties of the Java language and this is where the first small Java applications are created, aided by a fine blend of the knowledge part and practical exercises. Java Technology is both the name and the focus of the third part which also introduces you to the rules to observe when programming, what class libraries are and what advantages they have. In addition, you will learn how to test programs, what algorithms are, and how to program them. The fourth part, Java Projects, enables you to apply all the previous elements in an application with a graphical user interface. The project shows how to develop a larger application piece by piece with the Eclipse development environment. The Appendix concludes with a section on frequent errors that can occur when working with Eclipse, and a Glossary.
€ 34,95
Leden: € 31,46
-

Elektor Digital H0W2: Get Started with the SensorTile.box (E-book)
STmicroelectronics’ wireless IoT & wearable sensor development kit ‘SensorTile.box’ is a portable multi-sensor circuit board housed in a plastic box and developed by STMicroelectronics. It is equipped with a high-performance 32-bit ARM Cortex-M4 processor with DSP and FPU, and various sensor modules, such as accelerometer, gyroscope, temperature sensor, humidity sensor, atmospheric pressure sensor, microphone, and so on. SensorTile.box is ready to use with wireless IoT and Bluetooth connectivity that can easily be used with an iOS or Android compatible smartphone, regardless of the level of expertise of the users. SensorTile.box is shipped with a long-life battery and all the user has to do is connect the battery to the circuit to start using the box. The SensorTile.box can be operated in three modes: Basic mode, Expert mode, and Pro mode. Basic mode is the easiest way of using the box since it is pre-loaded with demo apps and all the user has to do is choose the required apps and display or plot the measured data on a smartphone using an app called STE BLE Sensor. In Expert mode users can develop simple apps using a graphical wizard provided with the STE BLE Sensor. Pro mode is the most complex mode allowing users to develop programs and upload them to the SensorTile.box. This book is an introduction to the SensorTile.box and includes the following: Brief specifications of the SensorTile.box; description of how to install the STE BLE Sensor app on an iOS or Android compatible smartphone required to communicate with the box. Operation of the SensorTile.box in Basic mode is described in detail by going through all of the pre-loaded demo apps, explaining how to run these apps through a smartphone. An introduction to the Expert mode with many example apps developed and explained in detail enabling users to develop their own apps in this mode. Again, the STE BLE Sensor app is used on the smartphone to communicate with the SensorTile.box and to run the developed apps. The book then describes in detail how to upload the sensor data to the cloud. This is an important topic since it allows the sensor measurements to be accessed from anywhere with an Internet connection, at any time. Finally, Pro mode is described in detail where more experienced people can use the SensorTile.box to develop, debug, and test their own apps using the STM32 open development environment (STM32 ODE). The Chapter explains how to upload the developed firmware to the SensorTile.box using several methods. Additionally, the installation and use of the Unicleo-GUI package is described with reference to the SensorTile.box. This PC software package enables all of the SensorTile.box sensor measurements to be displayed or plotted in real time on the PC.
€ 29,95
Leden: € 26,96
-

Elektor Digital Retronics (E-book)
Quite unintentionally a one-page story on an old Heathkit tube tester in the December 2004 edition of Elektor magazine spawned dozens of ‘Retronics’ tales appearing with a monthly cadence, and attracting a steady flow of reader feedback and contributions to the series. Since launching his Retronics columns, Elektor Editor Jan Buiting has never been short of copy to print, or vintage equipment to marvel at. This book is a compilation of about 80 Retronics installments published between 2004 and 2012. The stories cover vintage test equipment, prehistoric computers, long forgotten components, and Elektor blockbuster projects, all aiming to make engineers smile, sit up, object, drool, or experience a whiff of nostalgia. To reflect that our memories are constantly playing tricks on us, and honoring that “one man’s rubbish is another man’s gem”, the tales in the book purposely have no chronological order, and no bias in favor of transistor or tube, microprocessor or discrete part, audio or RF, DIY or professional, dry or narrative style. Although vastly diff erent in subject matter, all tales in the book are told with personal gusto because Retronics is about sentiment in electronics engineering, construction and repair, be it to reminisce about a 1960s Tektronix scope with a cleaning lady as a feature, or a 1928 PanSanitor box for dubious medical use. Owners of this book are advised to not exceed one Retronics tale per working day, preferably consumed in the evening hours under lamp light, in a comfortable chair, with a piece of vintage electronic equipment close and powered up.
€ 24,95
Leden: € 22,46
-

Elektor Digital RFID (E-book)
RFID technology has conquered many areas in which barcodes, magnetic strips and contact smartcards were used previously. Everyday applications, such as electronic ticketing, access cards, debit cards and electronic identity documents would not be possible without this technology. MIFARE is the most widely used RFID technology, and this book provides a practical and comprehensive introduction to it. Among other things, the initial chapters cover physical fundamentals, relevant standards, RFID antenna design, security considerations and cryptography. The complete design of a reader’s hardware and software is described in detail. The reader’s firmware and the associated PC software support programming using any .NET language. The specially developed PC program, “Smart Card Magic.NET”, is a simple development environment that supports sending commands to a card at the click of a mouse, as well as the ability to create C# scripts. Alternatively, one may follow all of the examples using Visual Studio 2010 Express Edition. Finally, the major smart card reader API standards are introduced. The focus is on programming contactless smartcards using standard PC/SC readers using C/C++, Java and C#.
€ 34,95
Leden: € 31,46
-

Elektor Publishing Learning Digital Electronics
With 20+ Practical Projects in Logic and Circuit Design This book is a practical guide to digital electronics, covering the essential components of modern digital systems: number systems, logic gates, Boolean algebra, combinational and sequential logic, and more. Through more than 20 structured projects, you’ll design and build digital systems using real-world components such as logic gates, multiplexers, decoders, flip-flops, counters, and shift registers. The projects range from basic LED logic circuits to digital locks, display systems, traffic light controllers, and timing-based designs. Selected projects introduce the use of tools such as CircuitVerse for circuit simulation, while several designs make use of 74HC-series logic devices, commonly used in digital hardware prototyping. Inside, you’ll find: Clear coverage of number systems and binary arithmetic Logic gate fundamentals and universal gate implementations Step-by-step projects using flip-flops, counters, and registers Real-world design with 74HC-series logic chips Techniques for designing combinational and sequential systems This book takes a design-first, application-driven approach to digital electronics—built around working circuits, tested logic, and hands-on experimentation.
€ 29,95
Leden: € 26,96
-

Elektor Digital E-Book: Designing Tube Amplifiers EN ANGLAIS
This book focuses more on practical aspects than on theory, and it has an contemplative nature, as though the author were viewing amplifiers from above. Knowledge elements are integrated and placed in the context of a broad overview. Even now tube amplifiers still sound great perhaps better than ever before. In part that is because we now have access to modern components such as toroidal output transformers, extremely high-quality resistors and capacitors, and many sorts of wire with good acoustic properties. Modern audio sources, such as CD players, and the latest top-end loudspeakers also enable us to appreciate how well tube amplifiers reproduce music even better than before. This new book from Menno van der Veen looks at tube amplifiers from more than just a theoretical perspective. It focuses primarily on the design phase, where decisions must be taken with regard to the purpose and requirements of the amplifier, and it addresses the following questions: How do these aspects relate to subjective and objective criteria? Which circuits sound the best, and why? If you want to develop and market an amplifier, what problems should you expect? What are the significance and meaning of measurements? Are they still meaningful, or have they lost their relevance? Thanks to the enormous processing power of computers, we can now measure more details than ever before. How can these new methods be applied to tube amplifiers? Previously it was sufficient to measure the frequency range, power and distortion of an amplifier in order to characterize the amplifier. Are these measurements still sufficient, or should we start measuring according to how we hear, using real music signals instead of waveforms from signal generators? The author sketches a future where amplifier measurements that conform to our sense of hearing enable us to arrive at new insights. This book focuses more on practical aspects than on theory, and it has an contemplative nature, as though the author were viewing amplifiers from above. Knowledge elements are integrated and placed in the context of a broad overview.
€ 29,95
Leden: € 26,96
-

Elektor Digital 311 circuits (E-book)
Cet ouvrage est un trésor : il réunit 311 schémas d'électronique analogique, logique ou numérique, des programmes, des liens vers des sites internet, des tableaux de caractéristiques de composants et des dessins de circuit imprimé. Il est le onzième volume de la collection « 300 circuits » (301... 311 circuits). Ses deux tables des matières alphabétique et thématique vous permettent de trouver rapidement et facilement parmi les 311 articles proposés ceux qui répondront à vos besoins. Ces articles viennent des numéros doubles récents de la revue Elektor, publiés chaque année en été, et appelés numéros Hors-Gabarit, par allusion à leur contenu exceptionnellement riche. Ils forment un véritable catalogue d'idées, de trouvailles et d'astuces. C'est une source d'inspiration inépuisable, et à partir de laquelle chacun élaborera ses propres variantes qu'il combinera ensuite à sa guise avec d'autres circuits. Tous les domaines familiers et usuels de l'électronique sont abordés : alimentations, régulateurs et chargeurs audio & vidéo communication hautes fréquences informatique jeux & modélisme maison & automobile mesure & test processeur & contrôleur robots et leurs accessoires Certaines de ces réalisations sont présentées sous une forme succincte, d'autres sont élaborées avec schéma détaillé, dessin de circuit imprimé, liste de composants complète et circuit imprimé, ces fameux circuits imprimés qui ont fait une partie de la réputation d'Elektor. Un concentré de tout le savoir-faire du laboratoire d'Elektor pour un prix modique. On y trouve beaucoup plus que ce qu'on y cherche.
€ 29,95
Leden: € 26,96
-

Elektor Digital The BeagleY-AI Handbook (E-book)
A Practical Guide to AI, Python, and Hardware Projects Welcome to your BeagleY-AI journey! This compact, powerful, and affordable single-board computer is perfect for developers and hobbyists. With its dedicated 4 TOPS AI co-processor and a 1.4 GHz Quad-core Cortex-A53 CPU, the BeagleY-AI is equipped to handle both AI applications and real-time I/O tasks. Powered by the Texas Instruments AM67A processor, it offers DSPs, a 3D graphics unit, and video accelerators. Inside this handbook, you‘ll find over 50 hands-on projects that cover a wide range of topics—from basic circuits with LEDs and sensors to an AI-driven project. Each project is written in Python 3 and includes detailed explanations and full program listings to guide you. Whether you‘re a beginner or more advanced, you can follow these projects as they are or modify them to fit your own creative ideas. Here’s a glimpse of some exciting projects included in this handbook: Morse Code Exerciser with LED or BuzzerType a message and watch it come to life as an LED or buzzer translates your text into Morse code. Ultrasonic Distance MeasurementUse an ultrasonic sensor to measure distances and display the result in real time. Environmental Data Display & VisualizationCollect temperature, pressure, and humidity readings from the BME280 sensor, and display or plot them on a graphical interface. SPI – Voltmeter with ADCLearn how to measure voltage using an external ADC and display the results on your BeagleY-AI. GPS Coordinates DisplayTrack your location with a GPS module and view geographic coordinates on your screen. BeagleY-AI and Raspberry Pi 4 CommunicationDiscover how to make your BeagleY-AI and Raspberry Pi communicate over a serial link and exchange data. AI-Driven Object Detection with TensorFlow LiteSet up and run an object detection model using TensorFlow Lite on the BeagleY-AI platform, with complete hardware and software details provided.
€ 34,95
Leden: € 31,46
-

Elektor Digital Elektronica Zakboek (E-BOOK)
Dit boek is een naslagwerk met praktijkgeoriënteerde formules en tabellen – en geen leerboek met uitvoerige uitleg. De schrijver heeft ook voor gecompliceerde vraagstukken handzame verklaringen, benaderingsformules en rekenvoorbeelden ontwikkeld zonder daarbij zijn toevlucht tot simplificaties te nemen. De logische indeling in 10 hoofdstukken vergemakkelijkt het opzoeken en vinden van de gewenste thema’s. In elk hoofdstuk treft u steeds de vereiste wis- en natuurkundige formules aan alsmede de belangrijkste tabellen. • Gelijkstroomkringen (inclusief de beginselen van de elektrotechniek) • Wisselstroomkringen • Dioden (berekeningen, toepassingen en gelijkrichtschakelingen) • Bipolaire transistoren • Veldeffecttransistoren (met schemavoorbeelden en berekeningen) • Speciale componenten (zoals PTC, NTC, VDR) • Operationele versterkers en hun basisschakelingen • Vermogenselektronica • Meettechniek (nauwkeurigheid, correcties, analoge en digitale meetapparaten) • Digitale technieken en binaire signaalwaarden De verzameling formules omvat alle belangrijke details voor ingenieurs en technici in de elektrotechniek en elektronica die zich met onderzoek, ontwikkeling en service bezig houden. Daarnaast is het echter ook bedoeld als naslagwerk voor studenten en docenten in het technisch (beroeps)onderwijs – en zeker ook voor de serieuze hobbyist.
€ 29,95
Leden: € 26,96
-

Elektor Publishing Arduino UNO Q and AI
Learn to Build Intelligent Embedded Systems Build smarter embedded systems with Arduino UNO Q. This book gives you the tools, knowledge, and confidence to turn ideas into intelligent, working solutions using the Arduino UNO Q platform. Discover how to build intelligent embedded systems with the Arduino UNO Q and AI. Unlock the full potential of the Arduino UNO Q, a next-generation platform that combines the real-time power of the STM32U585 microcontroller with the flexibility of a Qualcomm Dragonwing QRB2210 microprocessor. Learn how to rapidly prototype real-world applications using the Arduino IDE for low-level embedded control and Python in Arduino App Lab for high-level development. Build confidence through hands-on projects that guide you step by step from basic board features to complete working systems. Explore ready-to-use, AI based Arduino App Lab examples and see how they can jump-start your development and reduce time to deployment. Step into the world of Edge AI with a clear, practical introduction to Edge Impulse Studio—no prior AI experience required. Follow a complete, real-world workflow to create a Keyword Spotting AI application, covering data collection, model training, optimization, and on-device inference using the Edge Impulse Studio. Bridge the gap between embedded systems and machine learning and learn how to bring intelligence directly onto your hardware. Perfect for embedded engineers, educators, students, and makers looking to stay ahead in AI-enabled product development.
€ 34,95
Leden: € 31,46
-

Elektor Digital BBC micro:bit (E-book)
35 Touch Develop & MicroPython Projects The BBC micro:bit is a credit sized computer based on a highly popular and high performance ARM processor. The device is designed by a group of 29 partners for use in computer education in the UK and will be given free of charge to every secondary school student in the UK. The device is based on the Cortex-M0 processor and it measures 4 x 5 cm. It includes several important sensors and modules such as an accelerometer, magnetometer, 25 LEDs, 2 programmable push-button switches, Bluetooth connectivity, micro USB socket, 5 ring type connectors, and a 23-pin edge connector. The device can be powered from its micro USB port by connecting it to a PC, or two external AAA type batteries can be used. This book is about the use of the BBC micro:bit computer in practical projects. The BBC micro:bit computer can be programmed using several different programming languages, such as Microsoft Block Editor, Microsoft Touch Develop, MicroPython, and JavaScript. The book makes a brief introduction to the Touch Develop programming language and the MicroPython programming language. It then gives 35 example working and tested projects using these language. Readers who learn to program in Touch Develop and MicroPython should find it very easy to program using the Block Editor or any other languages. The following are given for each project: Title of the project Description of the project Aim of the project Touch Develop and MicroPython program listings Complete program listings are given for each project. In addition, working principles of the projects are described briefly in each section. Readers are encouraged to go through the projects in the order given in the book.
€ 24,95
Leden: € 22,46
-

Elektor Publishing Experimenting with Red Pitaya STEMlab Gen 2
Practical Projects and Programs With Experimenting with Red Pitaya STEMlab Gen 2, Red Pitaya goes beyond a versatile board. It becomes a powerful laboratory instrument for precision measurement, analysis, and control. From the fundamentals of electronic project development, monitoring, control, and design to testing, this book walks you step-by-step through everything you need to know to harness the full potential of Red Pitaya hardware and software. The book presents real-time, FPGA-based projects that are developed on a PC using the Vivado environment, then transferred to the Red Pitaya for execution and testing. You will learn about enhanced performance, expanded I/O capabilities, improved FPGA features, and advanced connectivity options that open up new frontiers for precision measurement, monitoring, and control in your embedded applications. Inside the book you will discover: A deep dive into Red Pitaya architecture and hardware design Electronic experiments using Red Pitaya for measurement and monitoring Hands-on projects using the Python programming language Practical guidance for FPGA programming using Red Pitaya Red Pitaya FPGA projects using the Verilog HDL under Vivado IDE Practical design of electronic projects including measurement and testing Step-by-step examples that bridge theory and real-world implementation Whether you are designing your own electronic circuits, developing signal analysis tools, or creating real-time control or monitoring systems, this book provides you the knowledge and confidence you need to fully learn and customize the Red Pitaya platform.
€ 39,95€ 32,95Beste prijs
-

Elektor Digital Compendium Elektrotechniek (PDF)
Bent u altijd al op zoek geweest naar een handig naslagwerk op het gebied van elektrotechniek en elektronica? Een boek waarin alles te vinden is wat in de dagelijkse praktijk voor hobby, studie of werk nodig is? Dan hoeft u niet langer verder te zoeken. U heeft namelijk gevonden wat u zoekt: Compendium Elektrotechniek (en elektronica). Met dit boek haalt u een grote diversiteit aan praktische kennis in huis. Alles wat u ooit beheerst heeft en waarvan u weet dat het ergens te vinden moet zijn, is nu terug te vinden in één boekwerk!Compendium Elektrotechniek is samengesteld door studenten en docenten van de Universiteit Twente. In het boek komen zowel theorie als praktijk aan bod. In het theoretische deel komen wiskunde, informatica, fysica, meettechniek, signaal- en systeemtheorie en elektronica aan de orde. Het praktische deel is onderverdeeld in de hoofdstukken componenten, audio/video en voedingen. Het is een verzameling informatie die regelmatig van pas komt voor iedereen die met elektrotechniek te maken heeft. Van pinouts van stekkers en IC's tot kleurcodes van weerstanden en schema's van spanningsregelaars.
€ 34,95
Leden: € 31,46
-
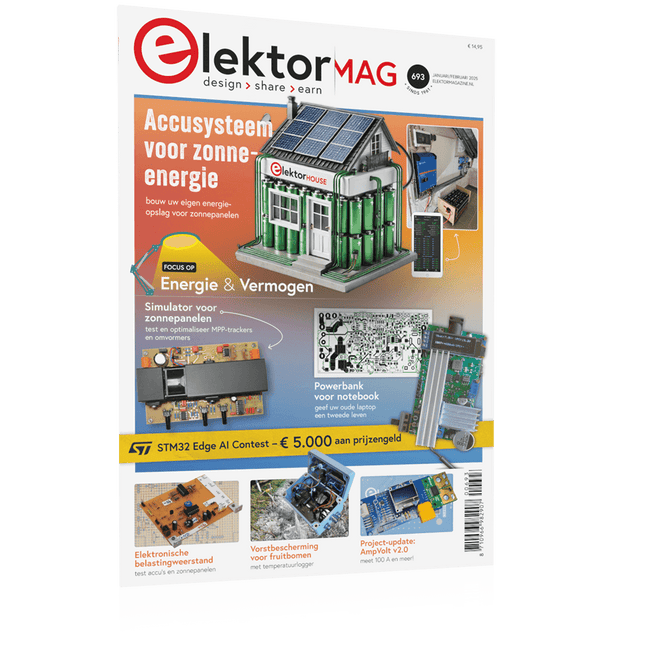
Elektor Januari/Februari 2025 (NL)
Elektor GREEN en GOLD leden kunnen deze uitgave hier downloaden. Nog geen lid? Klik hier om een lidmaatschap af te sluiten. DHZ-accusysteem voor zonne-energiebouw uw eigen energieopslag voor zonnepanelen Simulator voor zonnepanelentest en optimaliseer MPP-trackers en omvormers De STM32 Edge-AI-ContestOntdek de nieuwe STM32N6 en ding mee naar € 5000! Vergroten van de bandgapdaarom is er zoveel interesse in SiC en GaN Powerbank voor noteboekgeef uw oude laptop een tweede leven Medische robotshet overwinnen van technische en regelgevende barrières Vorstbescherming voor fruitbomenmet temperatuurlogger Het analoge dingde Arduino onder de analoge computers? Zuinige relaisdriverspaart 90% spoelstroom Verbetering van de ET5410A+ DC-belastingblijf koel en stil electronica 2024een terugblik Elektromagnetische compatibiliteitEMC in een notendop! Alle begin......filtert actief Reduceer vermogensverlies met seriecondensatorenslim gebruik van capacitieve reactantie De betaalbare MCP4725 12-bit digitaal/analoog-omzetterEEPROM-functie zorgt voor veilig inschakelgedrag FNIRSI LCR-ST1 smart LCR-meetpincet Raspberry Pi-gebaseerd test- en meetlabals eerste: de ADC Elektronische belastingweerstandmet onderdelen die u waarschijnlijk hebt liggen 2025: een AI-odysseeenkele projecten voor het nieuwe jaar Project-update: AmpVolt v2.0100 ampère en meer! Project 2.0correcties, updates en brieven van lezers Ethische transparantie ontsluierdinzichten uit het Ethics in Electronics 2024 onderzoek Audio DSP FX Processor Boarddeel 2: toepassingen maken
€ 14,95
-

Elektor Digital The State of Hollow State Audio (E-book)
The State of Hollow State Audio in the Second Decade of the 21st Century Vacuum-tube (or valve, depending upon which side of the pond you live on) technology spawned the Age of Electronics early in the 20th Century. Until the advent of solid-state electronics near mid-century, hollow-state devices were the only choice. But following the invention of the transistor (after their process fell to reasonable levels), within a couple of decades, the death of vacuum tubes was widely heralded. Yet here we are some five decades later, and hollow-state equipment is enjoying something of a comeback, especially in the music and high-end audio industries. Many issues surround hollow-state audio: Does it produce—as some claim—better sound? If so, is there science to back up these claims? How do hollow-state circuits work? How do you design hollow-state audio circuits? If hollow-state equipment fails, how do you go about troubleshooting and repairing it? Can we recreate some of the classic hollow-state audio devices for modern listening rooms and recording studios? How can we intelligently modify hollow-state amplifiers to our taste? These and other topics are covered in The State of Hollow State Audio.
€ 32,95
Leden: € 29,66
-

Elektor Digital C# Programming for Windows and Android (E-book)
This e-book (pdf), a software-only follow up to the best-selling Elektor Visual Studio C# range of books, is aimed at Engineers, Scientists and Enthusiasts who want to learn about the C# language and development environment. It covers steps from installation, the .NET framework and object oriented programming, through to more advanced concepts including database applications, threading and multi-tasking, internet/network communications and writing DLLs. The DirectX chapters also include video capture. The e-book concludes with several chapters on writing Android applications in C# using the Xamarin add-on. This e-book is based on the Visual Studio 2015 development environment and latest C# additions including WPF applications, LINQ queries, Charts and new commands such as await and async. The latest Visual Studio debugging features (PerfTips, Diagnostic Tool window and IntellTrace) are covered. Finally, the Android chapters include GPS, E-mail and SMS applications. Additionally, the e-book provides free on-line access to extensive, well-documented examples — in a try for yourself style — together with links to the author’s videos, guiding you through the necessary steps to get the expected results.
€ 39,95
Leden: € 35,96
-
Elektor Digital Innovate with Sense HAT for Raspberry Pi (E-book)
Ready to explore the world around you? By attaching the Sense HAT to your Raspberry Pi, you can quickly and easily develop a variety of creative applications, useful experiments, and exciting games. The Sense HAT contains several helpful environmental sensors: temperature, humidity, pressure, accelerometer, magnetometer, and gyroscope. Additionally, an 8x8 LED matrix is provided with RGB LEDs, which can be used to display multi-color scrolling or fixed information, such as the sensor data. Use the small onboard joystick for games or applications that require user input. In Innovate with Sense HAT for Raspberry Pi, Dr. Dogan Ibrahim explains how to use the Sense HAT in Raspberry Pi Zero W-based projects. Using simple terms, he details how to incorporate the Sense HAT board in interesting visual and sensor-based projects. You can complete all the projects with other Raspberry Pi models without any modifications. Exploring with Sense HAT for Raspberry Pi includes projects featuring external hardware components in addition to the Sense HAT board. You will learn to connect the Sense HAT board to the Raspberry Pi using jumper wires so that some of the GPIO ports are free to be interfaced to external components, such as to buzzers, relays, LEDs, LCDs, motors, and other sensors. The book includes full program listings and detailed project descriptions. Complete circuit diagrams of the projects using external components are given where necessary. All the projects were developed using the latest version of the Python 3 programming language. You can easily download projects from the book’s web page. Let’s start exploring with Sense HAT.
€ 29,95
Leden: € 26,96
-

Elektor Digital 37 Natuurkunde Projecten met Arduino (E-book)
Voor thuis en op school Dit boekje is gericht op leerlingen en natuurkunde docenten in het voortgezet onderwijs. Met voorbeelden op verschillende gebieden van de fysica, geeft het aan hoe een populair microprocessor platform als Arduino toegepast kan worden in het natuurkunde practicum. We passen Arduino onder andere toe als nauwkeurig meetinstrument, zodat metingen uitgewerkt kunnen worden in een spread sheet. Hoewel enige handigheid niet overbodig is, kunnen de beschreven experimenten kunnen ook uitstekend thuis worden uitgevoerd. In dat opzicht wil dit boek met name bij de jeugd de interesse wekken voor de toepassing van microprocessoren. In de hobbysfeer is dat niet alleen een zinvolle tijdsbesteding, maar bovenal interessant en leuk. Veiligheid staat uiteraard voorop bij het doen van experimenten. Energie, licht en warmte zijn onuitputtelijke bronnen, maar ze kunnen ook gevaar opleveren. Voor dit boek geldt dan ook het motto: Eerst denken, dan doen.
€ 19,95
Leden: € 17,96


