Mastering Surface Mount Technology takes you on a crash course in techniques, tips and know-how to successfully introduce surface mount technology in your workflow. Even if you are on a budget you too can jumpstart your designs with advanced fine pitch parts.
Besides explaining methodology and equipment, attention is given to SMT parts technologies and soldering methods. In a step by step way, several projects introduce you to handling surface mount parts and the required skills to successfully build SMT assemblies. Many practical tips and tricks are disclosed that bring surface mount technology into everyone's reach without breaking the bank.
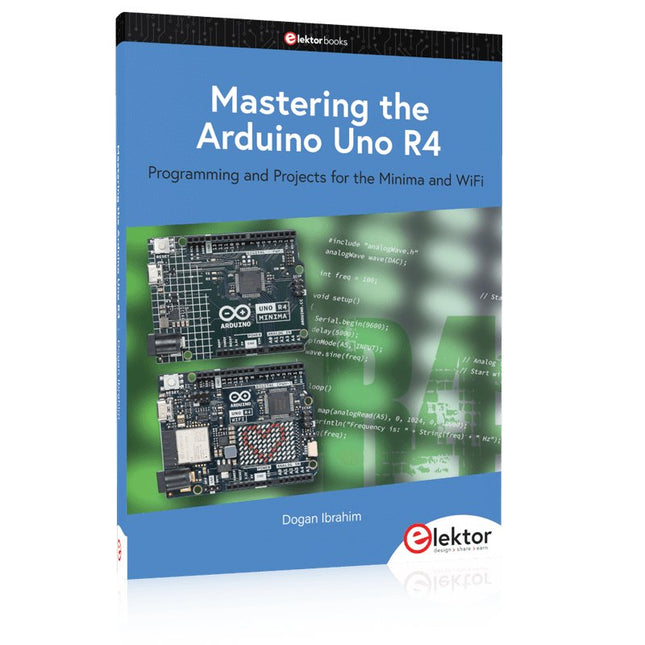
Programming and Projects for the Minima and WiFi
Based on the low-cost 8-bit ATmega328P processor, the Arduino Uno R3 board is likely to score as the most popular Arduino family member, and this workhorse has been with us for many years. Eleven years later, the long-overdue successor, the Arduino Uno R4, was released. It is built around a 48 MHz, 32-bit Arm Cortex-M4 microcontroller and provides significantly expanded SRAM and Flash memory. Additionally, a higher-precision ADC and a new DAC are added to the design. The Uno R4 board also supports the CAN Bus with an interface.
Two versions of the board are available: Uno R4 Minima, and Uno R4 WiFi. This book is about using these new boards to develop many different and interesting projects with just a handful of parts and external modules. All projects described in the book have been fully tested on the Uno R4 Minima or the Uno R4 WiFi board, as appropriate.
The project topics include the reading, control, and driving of many components and modules in the kit as well as on the relevant Uno R4 board, including
LEDs
7-segment displays (using timer interrupts)
LCDs
Sensors
RFID Reader
4x4 Keypad
Real-time clock (RTC)
Joystick
8×8 LED matrix
Motors
DAC (Digital-to-analog converter)
LED matrix
WiFi connectivity
Serial UART
CAN bus
Infrared controller and receiver
Simulators
… all in creative and educational ways with the project operation and associated software explained in great detail.
Mastering the I²C Bus takes you on an exploratory journey of the I²C Bus and its applications. Besides the Bus protocol, plenty of attention is given to the practical applications and designing a stable system. The most common I²C compatible chip classes are covered in detail.
Two experimentation boards are available that allow for rapid prototype development. These boards are completed by a USB to I²C probe and a software framework to control I²C devices from your computer. All samples programs can be downloaded from the 'Attachments/Downloads' section on this page.
Projects built on Board 1:
USB to I²C Interface, PCA 9534 Protected Input, PCA 9534 Protected Output, PCA 9553 PWM LED Controller, 24xxx EEPROM Module, LM75 Temperature Sensor, PCA8563 Real-time Clock with Battery Backup, LCD and Keyboard Module, Bus Power Supply.
Projects built on Board 2:
Protected Input, Protected Output, LM75 Temperature Sensor, PCF8574 I/O Board, SAA1064 LED Display, PCA9544 Bus Expander, MCP40D17 Potentiometer, PCF8591 AD/DA, ADC121 A/D Converter, MCP4725 D/A Converter, 24xxx EEPROM Module.
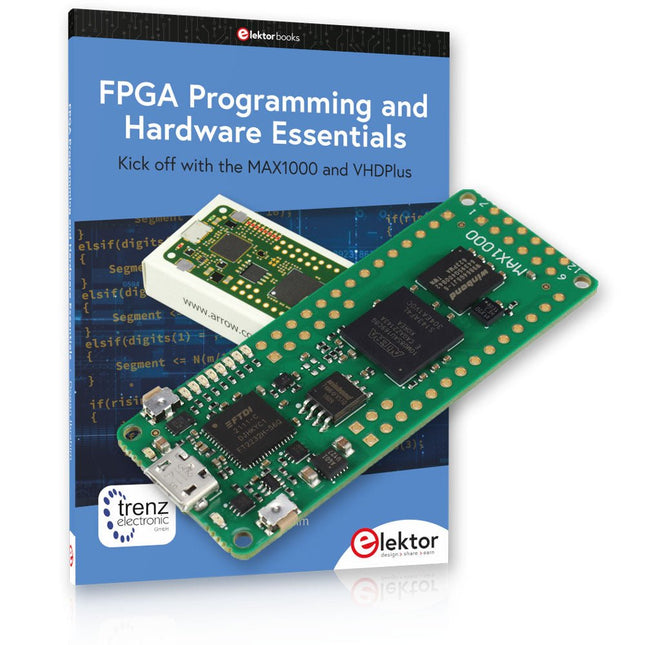
Begin met FPGA-programmering met het MAX1000-bord en VHDPlus
Bent u klaar om FPGA-programmeren onder de knie te krijgen? Met deze bundel duikt u in de wereld van Field-Programmable Gate Arrays (FPGA's) – een configureerbaar geïntegreerd circuit dat na productie kan worden geprogrammeerd. Breng uw ideeën nu tot leven, van eenvoudige projecten tot complete microcontrollersystemen!
De MAX1000 is een compact en krachtig FPGA-ontwikkelbord boordevol functies zoals geheugen, gebruikers-LED's, drukknoppen en flexibele I/O-poorten. Het is het ideale startpunt voor iedereen die meer wil weten over FPGA's en Hardware Definition Languages (HDL's).
Met het bijgevoegde boek "FPGA Programming and Hardware Essentials" gaat u aan de slag met de programmeertaal VHDPlus – een eenvoudigere versie van VHDL. Je werkt aan praktische projecten met behulp van de MAX1000, waardoor je de vaardigheden en het vertrouwen krijgt om je creativiteit de vrije loop te laten.
Projecten in het boek
Arduino-aangedreven BCD naar 7-segment displaydecoder
Gebruik een Arduino Uno R4 om BCD-gegevens aan de decoder te leveren, tel van 0 tot 9 met een vertraging van één seconde
Gemultiplexte 4-cijferige gebeurtenisteller
Maak een gebeurtenissenteller die het totale aantal weergeeft op een display van vier cijfers, dat bij elke druk op de knop wordt verhoogd
PWM-golfvorm met vaste werkcyclus
Genereer een PWM-golfvorm op 1 kHz met een vaste werkcyclus van 50%
Ultrasone afstandsmeting
Meet afstanden met behulp van een ultrasone sensor en geef de resultaten weer op een 4-cijferige LED met 7 segmenten
Elektronisch slot
Bouw een eenvoudig elektronisch slot met behulp van logische combinatiepoorten met drukknoppen en een LED-uitgang
Temperatuursensor
Bewaak de omgevingstemperatuur met een TMP36-sensor en geef de meetwaarden weer op een LED met 7 segmenten
MAX1000 FPGA Development Board
De MAX1000 is een aanpasbaar IoT/Maker Board, klaar voor evaluatie, ontwikkeling en/of gebruik in een product. Het is gebouwd rond de Intel MAX10 FPGA, het eerste niet-vluchtige programmeerbare logische apparaat (PLD's) met één chip in de sector dat de optimale set systeemcomponenten integreert.
Gebruikers kunnen nu profiteren van de kracht van enorme herconfigureerbaarheid in combinatie met een krachtig FPGA-systeem met laag vermogen. MAX10-apparaten bieden intern opgeslagen dubbele beelden met zelfconfiguratie, uitgebreide ontwerpbeschermingsfuncties, geïntegreerde ADC's en hardware om de Nios II 32-bit microcontroller IP te implementeren en zijn de ideale oplossing voor systeembeheer, protocolbridging, communicatiecontrolevlakken, industriële, automobiel- en consumententoepassingen.
De MAX1000 is uitgerust met een Arrow USB Programmer2, SDRAM, flashgeheugen, accelerometersensor en PMOD/Arduino MKR-connectoren, waardoor het een volledig functionele plug-and-play-oplossing is zonder extra kosten.
Specificaties
MAX 10
8kLE
- Flash
Dubbele binnenkant
-ADC
8x 12-bits
- Temperatuurbereik
0~85°C
- Aanbod
USB/pinnen
SDRAM
8 MB
MEMS met 3 assen
LIS3DH
USB-programmer
aan boord
MEMS-oscillator
12 MHz
Schakelaar/LED
2x / 8x
Inhoud van de bundel
Boek: FPGA Programming and Hardware Essentials (normale prijs: € 40)
MAX1000 FPGA Development Board (normale prijs: € 45)
Downloads
Software
Meten is voor een praktiserend elektronicus even vanzelfsprekend als ademhalen. Of het nu om het ontwikkelen van nieuwe schakelingen gaat, de controle van elektronische apparaten tijdens de productiefase of om het foutzoeken in defecte apparatuur: meetapparaten zijn het belangrijkste gereedschap en worden voortdurend gebruikt. 'Weet wat je meet', luidt een bekende uitspraak. En zo is het maar net: om zichzelf geen rad voor ogen te draaien moet de elektronicus weten wat hij doet, moet hij de nauwkeurigheid van zijn meetapparatuur en vooral de voor- en nadelen van de toegepaste meetmethode kennen. En hier steekt dit boek de lezer de helpende hand toe: uitgaand van theoretische beschouwingen en definities van de belangrijkste begrippen van de meettechniek begeleidt het de lezer bij de reis van eenvoudige wijzerinstrumenten via multimeter en oscilloscoop tot en met FFT-analyzers en gespecialiseerde meetapparaten zoals audio-analyzers, geluidsdrukmeters, apparaat- en installatietesters.
Hebt u altijd al uw elektronicaproject willen aansturen vanuiteen kleurrijke app op een Android smartphone of tablet? Dat is mogelijk met het in dit boek beschreven Android I/O-board. Met de bijbehorende software-library kunt u in Android Studio eenvoudig zelf een app programmeren die dit mogelijk maakt.Het Android I/O-board (los verkrijgbaar, wordt niet met boek meegeleverd!) bezit 22 pennen die u vanuit een app kunt aansturen als digitale I/O, ADC, PWM, touch-sensing en counter. Het Android I/O-board kan met de Android smartphone communiceren via Bluetooth, WiFi of USB. Het board is ook als datalogger te gebruiken. Kortom, dit is een veelzijdig board dat in ieder project past.Dit boek beschrijft stap voor stap hoe u uw project tot een succes kunt maken. Het boek behandelt gestructureerd de volgende onderwerpen:• Een snelle handleiding hoe u uw Android I/O-board up and running krijgt.• Een uitleg van alle mogelijkheden van het Android I/Oboard, met uitgebreide voorbeelden bij de verschillende opties.• Een stap-voor-stap handleiding hoe u een app kunt programmeren in Android Studio.• Een beschrijving van de firmware op het Android I/O-board en hoe u dit zelf met MPLAB-X kunt aanpassen.• Voorbeeld-projecten om inspiratie op te doen hoe u uw eigen project kunt aansturen met het Android I/O-board.Alle software in dit boek is als gratis download beschikbaar.
Microcontrollers have become an indispensable part of modern electronics. They make things possible that vastly exceed what could be done previously. Innumerable applications show that almost nothing is impossible.
There’s thus every reason to learn more about them, but that raises the question of where to find a good introduction to this fascinating technology. The answer is easy: this Microcontroller Basics book, combined with the 89S8252 Flash Board project published by Elektor Electronics.
However, this book offers more than just a basic introduction. It clearly explains the technology using various microcontroller circuits and programs written in several different programming languages. Three microcontrollers from the 8051 family are used in the sample applications, ranging from the simple 89C2051 to the AN2131, which is designed to support USB applications. The programming tools include assemblers, Basic-52 and BASCOM-51, and several C compilers. Every reader can thus find the programming environment most suitable to his or her needs.
In the course of the book, the reader gradually develops increased competence in converting his or her ideas into microcontroller circuitry. All of the sample programs can be downloaded from the Elektor Electronics website or the author’s website. That has the added advantage that the latest versions are always available.
In this book the author presents all essential aspects of microcontroller programming, without overloading the reader with unnecessary or quasi-relevant bits of information. Having read the book, you should be able to understand as well as program, 8-bit microcontrollers.
The introduction to microcontroller programming is worked out using microcontrollers from the PIC series. Not exactly state-of-the-art with just 8 bits, the PIC micro has the advantage of being easy to comprehend. It is offered in a DIP enclosure, widely available and not overly complex. The entire datasheet of the PIC micro is shorter by decades than the description of the architecture outlining the processor section of an advanced microcontroller. Simplicity has its advantages here. Having mastered the fundamental operation of a microcontroller, you can easily enter into the realms of advanced softcores later.
Having placed assembly code as the executive programming language in the foreground in the first part of the book, the author reaches a deeper level with ‘C’ in the second part. Cheerfully alongside the official subject matter, the book presents tips & tricks, interesting measurement technology, practical aspects of microcontroller programming, as well as hands-on options for easier working, debugging and faultfinding.
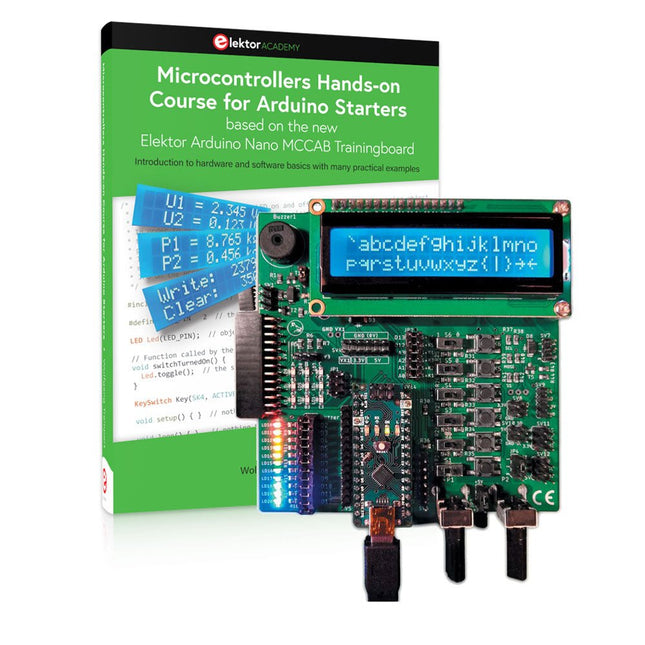
Bouw uw eigen projecten met het Elektor Arduino Nano MCCAB Training Board
De microcontroller is waarschijnlijk het meest fascinerende onderwerp van de moderne elektronica. Door de veelheid aan functies die hij op zijn chip combineert is het een universeel multi-tool voor ontwikkelaars om hun projecten mee te bouwen. Vrijwel elk dagelijks gebruikt apparaat wordt tegenwoordig bestuurd door een microcontroller. Voor een elektronica-leek is het realiseren van de eigen ideeën met een microcontroller echter tot nu toe een utopie gebleven vanwege de complexiteit ervan. Het Arduino-concept heeft het gebruik van microcontrollers sterk vereenvoudigd, zodat zelfs onervaren starters nu hun eigen elektronica ideeën kunnen realiseren met een microcontroller.
Book & Hardware in de bundel: 'Leren door te doen'
Het boek, dat ook in de bundel zit, leert ons hoe je zelfs zonder veel ervaring met elektronica en programmeertalen je eigen projecten met een microcontroller kunt bouwen. Het is een echte hands-on cursus microcontrollers voor starters. Want na een beschrijving van het inwendige van de microcontroller en een introductie in de programmeertaal C, ligt de focus van de cursus op praktische oefeningen. De lezer bouwt de nodige kennis op met 'leren door te doen': in het uitgebreide praktische gedeelte van het boek, met 12 projecten en 46 oefeningen, wordt het geleerde in het voorste deel van het boek met veel voorbeelden onderbouwd. Elke oefening wordt gevolgd door een uitgewerkt voorbeeld met uitleg en toelichting, wat de lezer helpt om de vraagstukken op te lossen en met de eigen oplossing te vergelijken.
Arduino IDE
De Arduino IDE is een software ontwikkelomgeving die gratis op de eigen pc kan worden gedownload, en die alle software bevat die nodig is voor uw eigen microcontroller-projecten. U schrijft de programma's ('apps') met de editor van de IDE in de programmeertaal C. En U vertaalt ze naar bits en bytes die de microcontroller begrijpt met behulp van de ingebouwde compiler van de Arduino IDE. En kunt ze vervolgens via een USB-kabel laden naar het geheugen van de microcontroller op het Elektor Arduino MCAB Nano Training Board.
Externe sensoren, motoren of schakelingen checken of besturen
Naast een Arduino Nano microcontroller module bevat het Elektor Arduino Nano MCCAB Training Board ook alle componenten die nodig zijn voor de oefeningen, zoals LED’s, schakelaars, drukknoppen, buzzer enz. Ook externe sensoren, motoren of modules kunnen worden gecheckt of bestuurd met dit microcontroller-trainingssysteem.
Specificaties (Arduino Nano Training Board MCCAB)
Voeding
Via de USB-aansluiting van de aangesloten pc of een externe voeding (niet inbegrepen)
Spanning
+5 Vcc
Ingangsspanning
Alle ingangen
0 V tot +5 V
VX1 en VX2
+8 V tot +12 V (alleen bij gebruik van een externe voeding)
Hardware
LCD
2x16 karakters
Potentiometer P1 & P2
JP3: Selectie van de werkspanning van P1 & P2
Verdelers
SV4: Verdeler voor de werkspanningenSV5, SV6: Verdelers voor de in-/uitgangen van de microcontroller
Schakelaars en knoppen
RESET knop op de Arduino Nano module; 6x drukknop schakelaars K1 ... K6; 6x Schuifschakelaars S1 ... S6; JP2: Jumper van de schakelaars met de ingangen van de microcontroller
Buzzer
Piezo buzzer ‘Buzzer1’ met jumper op JP6
Indicator LED’s
11 x LED: Status indicator voor de ingangen/uitgangen LED L op de Arduino Nano module, aangesloten op GPIO D13 JP6; Aansluiting van LED's LD10 ... LD20 met GPIO's D2 ... D12
Seriële interfacesSPI & I²C
JP4: Selectie van het signaal op pin X van de SPI-connector SV12 SV9 naar SV12: SPI-interface (3,3 V/5 V) of I²C-interface
Uitgangen voor externe apparaten
SV1, SV7: Geschakelde uitgang (maximaal +24 V/160 mA, extern aangesloten) SV2: 2x13 pinnen voor aansluiting van externe modules
3x3 LED matrix(9 rode LED's)
SV3: Kolommen van de 3x3 LED matrix (uitgangen D6 ... D8) JP1: Verbinding van de rijen met de GPIO's D3 ... D5
Software
MCCABLib library
Controle van hardware componenten (schakelaars, knoppen, LED's, 3x3 LED matrix, buzzer) op het MCCAB Training Board
Werktemperatuur
Tot +40 °C
Afmetingen
100 x 100 x 20 mm
Specificaties (Arduino Nano)
Microcontroller
ATmega328P
Architectuur
AVR
Spanning
5 V
Flash memory
32 KB, waarvan 2 KB gebruikt door de bootloader
SRAM
2 KB
Kloksnelheid
16 MHz
Analoge IN Pinnen
8
EEPROM
1 KB
DC stroom per I/O-pin
40 mA op één I/O-pin, totaal maximaal 200 mA op alle pinnen samen
Ingangsspanning
7-12 V
Digitale I/O-pinnen
22 (waarvan 6 PWM)
PWM Uitgangen
6
Stroomverbruik
19 mA
Afmetingen
18 x 45 mm
Gewicht
7 g
Inbegrepen
Elektor Arduino Nano MCCAB Training Board
Arduino Nano
Boek: Microcontrollers Hands-on Course for Arduino Starters
In dit boek gebruiken we JAL (Just Another Language) om de PIC-microcontroller te programmeren in 60 oefeningen. JAL is makkelijk in gebruik en is een goede basis om programmeren in andere talen snel te leren. Na het lezen en toepassen van de voorbeelden in dit boek kan iedereen die zich hierin serieus heeft verdiept met behulp van JAL zelf de microcontroller aansturen. Je leert onder meer het programmeren van timers, analoog/digitaal omzetters, comparators, pulsbreedte regeling voor motoren en geluid, LED- en LCD-scherm aansturing, USB-connectie en communicatiemogelijkheden met computers of andere microcontrollers.
Ook weet je aan het eind van het boek wat je moet doen om nu nog onbekende mogelijkheden te gaan toepassen. Met deze kennis kan iedereen van beginner tot meer gevorderde zijn creativiteit vorm geven in projecten met microcontrollers.
Wil je verder met leren programmeren dan legt dit boek ook een zeer goede basis. Wie goed met JAL overweg kan en zich de gestructureerde wijze van denken heeft aangeleerd, zal de stap naar andere programmeertalen zoals Python, C++ enz. kunnen maken. Ook het programmeren van minicomputers zoals de Raspberry Pi en Arduino zijn mogelijkheden.
Om te starten is geen kennis van elektronica nodig. Wie niets weet van elektronica, krijgt overal in het boek de noodzakelijke kennis aangereikt. Alle belangrijke en benodigde informatie staat in de tekst.
If you have the right tools, designing a microprocessor shouldn’t be complicated. The Verilog hardware description language (HDL) is one such tool. It can enable you to depict, simulate, and synthesize an electronic design, and thus increase your productivity by reducing the overall workload associated with a given project.Monte Dalrymple’s Microprocessor Design Using Verilog HDL is a practical guide to processor design in the real world. It presents the Verilog HDL in a straightforward fashion and serves as a detailed introduction to reducing the computer architecture and as an instruction set to practice. You’re led through the microprocessor design process from start to finish, and essential topics ranging from writing in Verilog to debugging and testing are laid bare.The book details the following, and more:
Verilog HDL Review: data types, bit widths/labeling, operations, statements, and design hierarchy
Verilog Coding Style: files vs. modules, indentation, and design organization
Design Work: instruction set architecture, external bus interface, and machine cycle
Microarchitecture: design spreadsheet and essential worksheets (e.g., Operation, Instruction Code, and Next State)
Writing in Verilog: choosing encoding, assigning states in a state machine, and files (e.g., defines.v, hierarchy.v, machine.v)
Debugging, Verification, and Testing: debugging requirements, verification requirements, testing requirements, and the test bench
Post Simulation: enhancements and reduction to practice
Monte Dalrymple received a BSEE (with highest honors) and an MSEE from the University of California at Berkeley, where he was elected to Phi Beta Kappa. Monte started his career at Zilog, where he designed a number of successful products, including the Serial Communication Controller (SCC) family and the Universal Serial Controller (USC) family. He was also the architect and lead designer of the Z380 microprocessor. Monte started his own company, Systemyde International Corp., in 1995, and has been doing contract design work ever since. He designed all five generations of Rabbit microprocessors, a Z180 clone that is flying on the Juno mission to Jupiter, and a Z8000 clone that flies in a commercial avionics air data computer. Monte holds 16 patents as well as both amateur and commercial radio licenses. Monte wrote 10 articles for Circuit Cellar magazine between 1996 and 2010. He recently completed a side project to replace the CPU in an HP-41C calculator with a modern FPGA-based version.
Projects with Thonny-IDE, uPyCraft-IDE, and ESP32
The 'Python' programming language has enjoyed an enormous upswing in recent years. Not least, various single-board systems such as the Raspberry Pi have contributed to its popularity. But Python has also found widespread use in other fields, such as artificial intelligence (AI) or machine learning (ML). It is obvious, therefore, to use Python or the 'MicroPython' variant for use in SoCs (Systems on Chip) as well.
Powerful controllers such as the ESP32 from Espressif Systems offer excellent performance as well as Wi-Fi and Bluetooth functionality at an affordable price. With these features, the Maker scene has been taken by storm. Compared to other controllers, the ESP32 has a significantly larger flash and SRAM memory, as well as a much higher CPU speed. Due to these characteristics, the chip is not only suitable for classic C applications, but also for programming with MicroPython.
This book introduces the application of modern one-chip systems. In addition to the technical background, the focus is on MicroPython itself. After the introduction to the language, the programming skills learned are immediately put into practice. The individual projects are suitable for use in the laboratory as well as for everyday applications. So, in addition to the actual learning effect, the focus is also on the joy of building complete and useful devices. By using laboratory breadboards, circuits of all kinds can be realized with little effort, turning the testing and debugging of the 100% homebrew projects into an instructive pleasure.
The various applications, such as weather stations, digital voltmeters, ultrasound range finders, RFID card readers or function generators, make the projects presented ideally suited for practical courses or subject and study work in the natural sciences, or in science and technology classes.
Kenmerken
Bandwidth: DC-800 KHz
Maximum measurable current: 100 Apk (70.7 Arms)
Max. conductor diameter: 13 mm
Auto & Manual "Zero" function
Directly powered by USB port
Standard BNC interface, compatible with any oscilloscope
Specificaties
Bandwidth
DC-800 KHz
Rise time
<= 583 ns
Ranges
10 A / 100 A
Output sensitivity
0.1 V/A (10 A) 0.01 V/A (100 A)
DC accuracy
3% ±50 mA (10 A) 4% ±50 mA (100 A, 500 mA - 40 Apk) 15% (100 A, 40 Apk -100 Apk)
Signal delay
< 150 ns (10 A) < 200ns (100 A)
Current measurement range
50 mA - 10 Apk (10 A) 1 A - 100 Apk (100 A)
Max. Voltage
CAT III 300 V CAT II 600 V
Power supply
DC 5 V
Downloads
Quick Guide
Datasheet
Manual
De MDP-M01 is een display control module uitgerust met een 2,8-inch TFT-scherm. Het scherm kan 90 graden worden gedraaid, wat voor gebruikers handig is om gegevens en golfvormen goed te kunnen bekijken. De MDP-M01 is geschikt voor het online monitoren en beheren van MDP-P906 mini digitale voedingsmodules en andere modules van het MDP-systeem via 2,4 GHz draadloze communicatie, en kan tot 6 submodules tegelijkertijd beheren.
Specificaties
Schermgrootte
2,8' TFT
Schermresolutie
240 x 320 cm
Voeding
Micro USB voedingsingang, of voeding uit een submodule via speciale voedingskabel
Voedingsspanning
DC 5 V / 0,3 A
Andere functies
Kan tot 6 submodules beherenUpgrade firmware via Micro USB
Afmetingen
107 x 66 x 13,6 mm
Gewicht
133 g
Inbegrepen
1x MDP-M01 Smart Digital Monitor
1x kabeltje (2.5 mm jack naar Micro USB)
Downloads
User Manual v3.4
Firmware v1.32
De MDP-P906 heeft een ingebouwde ventilator en een maximaal uitgangsvermogen van 300 W, wat toereikend is voor een breed scala aan testbehoeften en toepassingen. Via 2,4 GHz draadloze communicatie kan hij worden aangesloten op de MDP-M01 Smart Digital Monitor module om daarmee een flexibele combinatie van meerdere kanalen van 300 W per kanaal te kunnen realiseren. De MDP-P906 heeft een basis, stabiliteit en betrouwbaarheid die te vergelijken is met een professionele voeding. Hij kan puur stroom leveren én krachtige functies hieraan toevoegen, zoals programmeerbare uitgang, getimede uitgang, getimede regeling, automatische compensatie, boost modus, enz. Dit maakt hem tot een kosteneffectieve, slimme en op maat programmeerbare lineaire DC-voeding. De MDP-P906 heeft een zorgvuldig CNC-gefreesde aluminium behuizing, met verfijnde afwerking, eigentijds, bescheiden en prachtig uiterlijk. Hij wijkt hiermee volledig af van het standaard uiterlijk van een traditionele desktop voeding. Door een stackable modulair ontwerp en de draadloze communicatie kan de MDP-P906 onafhankelijk of onderling gekoppeld worden gebruikt, zowel in de normale werkruimte als bij onderhoud op locatie. De MDP-P906 is een perfecte oplossing voor elektrotechnici, met name servicemonteurs, om bij verschillende situaties en toepassingen de stroom te leveren. Ingebouwde stille ventilator, instant cooling, voor een stabiele en efficiënte output! Slimme lineaire compensatie, constante spanning & constante stroom Positieve en negatieve output, series boost, parallelle stroomverdeling Toepassingen Universele tests en onderwijsexperimenten in R&D laboratoria Onderhoud van digitale producten Eigendomsverificatie en foutdiagnose van apparaten en circuits Noodstroomvoorziening voor modelvliegtuigen en voertuigen Voedingen testen van RF en microgolfcircuits of -modules Kwaliteitscontrole en kwaliteitsinspectie Zuivere voeding voor zeer nauwkeurige digitaal-analoge hybride circuits en Hi-Fi audioapparaten Specificaties Input DC 4.2-30 V / 14 A (Max)QC 3.0/PD2.0, 20 V / 5 A (Max) Uitgang 0-30 V / 0-10 A, 300 W (Max) Conversie efficiëntie 95% Output resolutie 10 mV / 2 mA, tot 1 mV / 1 mA via Display Control module Output nauwkeurigheid 0,03%+5 mV0,05%+2 mV Adjustment rate Load adjustment rate <±0,01%Power adjustment rate <±0,01% Ripple en noise <250 uVrms, 3 mVpp; 2 mArms Transient response <4 uS Beveiligingen Te hoge voedingsspanning, onderspanning, omgekeerd aansluiten, te hoge uitgangsstroom, retourstroom en oververhitting Overig Automatisch afsluiten en naar micro-power modeOndersteuning van USB firmware upgrade Afmetingen 112 x 66 x 20 mm Gewicht 181 g Inbegrepen 1x MDP-P906 digitale voeding 2x uitgangskabel 1x gebruikershandleiding Downloads User Manual v1.1 Firmware v1.32
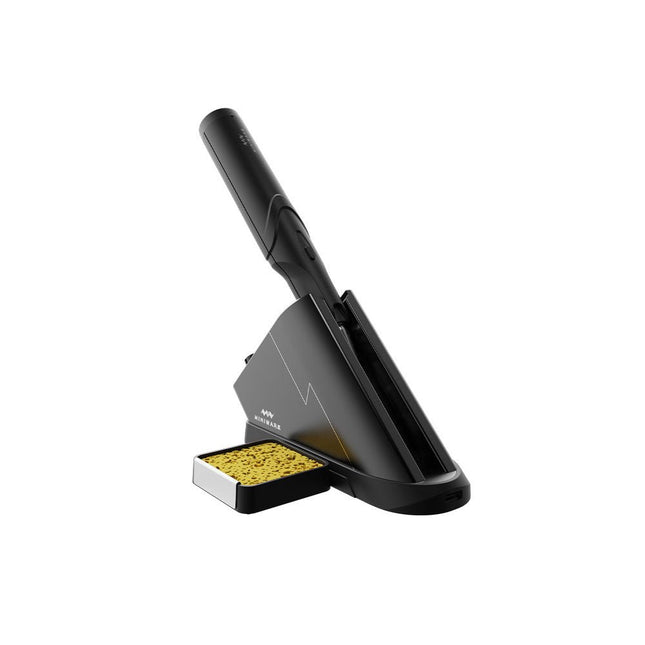
Het Miniware draadloze soldeerstation TS1C (met ingebouwd OLED-scherm en Bluetooth) is een intelligent soldeer tool dat in minder dan 20 seconden opwarmt tot 400°C. Dankzij de ingebouwde accu ligt de draadloze soldeerbout prettig in de hand en is hij gemakkelijk in gebruik.
Kenmerken
Nieuwe energieopslag technologie met hoogrenderende supercondensator, 10.000-level laad- en ontlaadtijden
Separaat ontwerp + true wireless, geniet daardoor van het draadloos solderen
BLE4.2 Bluetooth technologie voor het op afstand bedienen en instellen
Standaard PD2 20 V met 45 W max opgenomen vermogen, en tot 36 W soldeervermogen, kan continu meer dan 180 soldeerverbindingen (0805) solderen met één enkele volledige lading
Voorverwarming in het control station, om de verwarmingsefficiëntie te verbeteren
Drie uitbreidingssleuven voor accessoires
Control station
Standard PD2 20 V met 45 W max opgenomen vermogen, overstroom beveiliging
OLED-scherm met 128x64 pixels, weergave van de status van de soldeerbout in realtime
Voorverwarming in het control station, om de verwarmingsefficiëntie te verbeteren
Afstandsbediening en instelling: temperatuurregeling, menu instelling, weergave van informatie en status van het apparaat, enzovoort.
Functioneert als soldeerstandaard en laadstation
Drie uitbreidingssleuven voor meerdere aanvullende accessoires, zoals een sponssleuf
Soldeerbout
Ingebouwde 750F supercondensator voor energieopslag met hoog rendement, kan worden opgeladen via het control station (of in noodgevallen via de USB type-C-interface)
36 W maximaal verwarmingsvermogen, kan continu meer dan 180 soldeerverbindingen (0805) solderen met één enkele volledige lading
Compatibel met Miniware 3,5 mm audio-interface soldeerpunten (TS80/80P soldeerstift serie)
Boost modus (de knop op de pen ingedrukt houden)
Inbegrepen
TS1C Soldeerbout
TS1C Control Station
Soldeerstift (TS-B02)
Siliconen kabel
Sponsgleuf incl. spons
Handleiding
Build Smart Applications with Raspberry Pi, Arduino, and ESP32
Discover how easy and exciting mobile app development can be with MIT App Inventor. This hands-on guide takes you from basic concepts to building real-world mobile applications using a simple visual programming approach—no prior coding experience required. You will create IoT and AI-powered apps for Android devices and explore how App Inventor can also be used with iPhones and iPads.
Connect your applications to platforms such as Arduino UNO R4 WiFi, ESP32, Raspberry Pi Pico (2)W and Raspberry Pi 5, enabling you to build smart, connected systems.
Inside the book, you will learn how to:
Build interactive apps using buttons, images, sound, and multimedia
Create text-to-speech and speech-recognition applications
Develop camera-based and location-aware (GPS) apps
Design useful tools such as calculators and educational apps
Work with smartphone sensors like accelerometers and light sensors
Build AI-powered applications, including voice assistants and image-generation features
Send and receive messages, and create communication-based apps
Connect mobile apps to hardware using Wi-Fi and Bluetooth
Control real devices such as LEDs, motors, and sensors
Designed for beginners, students, and hobbyists, this book focuses on learning by doing. By the end, you will have the skills and confidence to create your own innovative applications that interact with both the digital and physical worlds.
Start building and turning your ideas into reality.
50+ Android Apps with Raspberry Pi, ESP32 and Arduino
This book is about developing apps for Android compatible mobile devices using the MIT App Inventor online development environment. MIT App Inventor projects can be in either standalone mode or use an external processor. In standalone mode, the developed application runs only on the mobile device (e.g. Android). In external processor-based applications, the mobile device communicates with an external microcontroller-based processor, such as Raspberry Pi, Arduino, ESP8266, ESP32, etc.
In this book, many tested and fully working projects are given both in standalone mode and using an external processor. Full design steps, block programs, circuit diagrams, QR codes and full program listings are given for all projects.
The projects developed in this book include:
Using the text-to-speech component
Intonating a received SMS message
Sending SMS messages
Making telephone calls using a contacts list
Using the GPS and Pin-pointing our location on a map
Speech recognition and speech translation to another language
Controlling multiple relays by speech commands
Projects for the Raspberry Pi, ESP32 and Arduino using Bluetooth and Wi-Fi
MIT APP Inventor and Node-RED projects for the Raspberry Pi
The book is unique in that it is currently the only book that teaches how to develop projects using Wi-Fi and Node-RED with MIT App Inventor. The book is aimed at students, hobbyists, and anyone interested in developing apps for mobile devices.
All projects presented in this book have been developed using the MIT App Inventor visual programming language. There is no need to write any text-based programs. All projects are compatible with Android-based mobile devices. Full program listings for all projects as well as detailed program descriptions are given in the book. Users should be able to use the projects as they are presented, modifying them to suit their own needs.
Valve Amplifiers are regarded by many to be the ne plus ultra when it comes to processing audio signals. The combination of classical technology and modern components has resulted in a revival of the valve amplifier. The use of toraidal-core output transformers, developed by the author over the past 15 years, has contributed to this revival. The most remarkable features of these transformers are their extremely wide frequency ranges and their very low levels of linear and nonlinear distortion.
This book explains the whys and wherefores of toroidal output transformers at various technical levels, starting with elementary concepts and culminating in complete mathematical descriptions. In all of this, the interactions of the output valves, transformer and loudspeaker form the central theme.
Next come the practical aspects. The schematic diagram of a valve amplifier often appears to be very simple at first glance, but anyone who has built a modern valve amplifier knows that a lot of critical details are hidden behind this apparent simplicity. These are discussed extensively, in connection with designs for amplifiers with output powers ranging from 10 to 100 watts. Finally, the author gives some attention to a number of special valve amplifiers, and to the theory and practice of negative feedback.
In summary, this book offers innovative solutions for achieving perfect audio quality. Do-it-yourself builders, as well as persons who want to gain a deeper technical understanding of the complex world of audio transformers, valve amplifiers and audio signal processing, will find this book a rich and useful source of information.
met ringkern-uitgangstranformatoren Buizenversterkers vormen voor velen het neusje van de zalm, wanneer het gaat om de versterking van audiosignalen. De combinatie van klassieke techniek met moderne componenten heeft geleid tot een ware revival van de buizenversterker. De toepassing van de in de afgelopen 15 jaar door de auteur ontwikkelde 'ringkern-uitgangstransformatoren' heeft daar mede toe bijgedragen. Opvallend aan deze transformatoren zijn vooral het extreem grote frequentie bereik en de geringe lineaire en niet-lineaire vervormingen. Het hoe en waarom van de transformator wordt op verschillende niveaus uitgelegd, beginnend bij inleidende begripsvorming en eindigende bij complete wiskundige beschrijvingen, waarbij ook de samenwerking van de transformator met de buizen en de luidspreker centraal staat. Naast de beschrijving van schematuur en zelfbouw van eenvoudig na te bouwen moderne high-end buizenversterkers met een uitgangsvermogen van 10 tot 100 Watt, worden bijzondere buizenversterkers met ringkerntransformatoren besproken: innovatieve oplossingen voor perfecte audiokwaliteit. Zowel de zelfbouwer als degene die kennis en inzicht wil verwerven in de complexe materie van transformatoren, buizenversterkers en audiosignaalverwerking zal dit boek met plezier ter hand nemen.
This book is about DC electric motors and their use in Arduino and Raspberry Pi Zero W based projects. The book includes many tested and working projects where each project has the following sub-headings:
Title of the project
Description of the project
Block diagram
Circuit diagram
Project assembly
Complete program listing of the project
Full description of the program
The projects in the book cover the standard DC motors, stepper motors, servo motors, and mobile robots. The book is aimed at students, hobbyists, and anyone else interested in developing microcontroller based projects using the Arduino Uno or the Raspberry Pi Zero W.
One of the nice features of this book is that it gives complete projects for remote control of a mobile robot from a mobile phone, using the Arduino Uno as well as the Raspberry Pi Zero W development boards. These projects are developed using Wi-Fi as well as the Bluetooth connectivity with the mobile phone. Readers should be able to move a robot forward, reverse, turn left, or turn right by sending simple commands from a mobile phone. Full program listings of all the projects as well as the detailed program descriptions are given in the book. Users should be able to use the projects as they are presented, or modify them to suit to their own needs.
Architecture, Programming and Applications
The MSP430 is a popular family of microcontrollers from Texas Instruments. In this book we will work with the smallest type, which is the powerful MSP430G2553. We will look at the capabilities of this microcontroller in detail, as it is well-suited for self-made projects because it is available in a P-DIP20 package.
We will take a closer look at the microcontroller and then build, step by step, some interesting applications, including a 'Hello World' blinking LED and a nice clock application, which can calculate the day of the week based on the date.
You also will learn how to create code for the MSP microcontroller in assembler. In addition to that, we will work with the MSP-Arduino IDE, which makes it quite easy to create fast applications without special in-depth knowledge of the microcontrollers.
All the code used in the book is available for download from the Elektor website.