Producten
-

iFixit iFixit Manta Driver Kit
This kit includes iFixit's widest assortment of bits, complete with every driver head you’ll need to tackle any repair or DIY project. It includes standard bits like Phillips and Flathead in a full range of sizes to handle everything from precision electronics repair to home DIY projects. And it wouldn’t be an iFixit bit set if it didn’t include all the exotic bits from Pentalobes for Apple iPhone and MacBook repair to Gamebits for your vintage Nintendo consoles. All of the next-gen bit sets have been re-designed in order to maximize convenience and usability. The bit set lid is held in place with magnets to increase product lifespan (no more broken hinges or clasps) and also mounts to the back of the bit set case to keep it out of the way while you do your work. If you need help keeping your screws and parts organized, you can use the lid’s integrated sorting tray. The 4 mm bits have been adjusted and have now a longer neck for a deeper and more precise reach. Toolkit bevat Easy-to-Open Magnetized Case Lid with Built-in Sorting Tray 4 mm Aluminum Bit Driver 1/4' Aluminum Bit Driver 4 mm Screwdriver Bits Phillips - 000, 00, 0 Flathead - 1, 1.5, 2, 2.5, 3, 3.5 mm Torx - T2, T3, T4, T5 Torx Security - TR6, TR7, TR8 Pentalobe - P2, P5, P6 JIS - 000, 00, 0, 1 Hex - 0.7, 0.9, 1.3, 1.5 mm Hex Security - 2, 2.5, 3, 3.5 mm Tri-point - Y000, Y00, Y0, Y1 Nut driver - 2.5, 3, 3.5, 4, 4.5, 5, 5.5 mm Gamebit - 3.8, 4.5 mm Spanner - 4, 6 Triangle - 2, 2.2, 2.6, 3 mm Oval Bit iPhone Standoff Bit Sim Eject Bit Magnetic Pickup Bit 1/4' Screwdriver Bits Phillips - 1, 2, 3 Flathead - 4, 5, 6, 7, 8 mm Hex Security - 4, 5, 6, 7, 8 mm Hex Security SAE - 1/8, 9/64, 5/32, 3/16, 7/32, 1/4 Pozidriv - PZ0, PZ1, PZ2, PZ3 Torq-set - 6, 8, 10 Spanner - 8, 10, 12 Square - 0, 1, 2, 3 Spline - M5, M6, M8 Torx Security - TR9, TR10, TR15, TR20, TR25, TR27, TR30, TR35, TR40 Tri-wing 1, 2, 3, 4 Clutch 1, 2, 3 Schrader Valve Hook Drive 1/4' to 4 mm Adapter 1/4' Driver to 1/4' Socket 1/4' Driver to 3/8' Socket 1/4' Socket to 1/4' Driver Specificaties Bit Metal: 6150 Steel Driver Material: Anodized Aluminum Case Material: ABS Foam: EVA
€ 64,95
-

iFixit iFixit Pro Tech Toolkit
De Pro Tech Toolkit is het enige dat elke doe-het-zelver, fixer, hacker, hobbyist en professional nodig heeft om elke klus te klaren. Elk gereedschap in de Pro Tech Toolkit is opnieuw ontworpen om beter te zijn. Van de 64 Bit Driver Kit tot de iFixit Opening Picks, elk gereedschap is speciaal ontworpen en geselecteerd om uw reparatiemogelijkheden te maximaliseren. De kern van deze kit is de iFixit 64 Bit Driver Kit, ontworpen met uitgebreid onderzoek naar welke soorten bevestigingsmiddelen momenteel worden gebruikt in de consumentenelektronica-industrie en welke oudere bevestigingsmiddelen nog steeds in trek zijn bij consumenten. Van de Apple Watch met zijn nieuwe piepkleine Tri-Point schroeven tot oude Nintendo-spelconsoles met gamebit-bevestigingen, de 64 bit-kit dekt ze allemaal met CNC-bewerkte bits van de hoogste kwaliteit. Zelfs de stevige behuizing is zorgvuldig ontworpen, heeft geen scharnieren of grendels die kunnen breken en is voorzien van een sorteerbakje in het magnetisch bevestigde deksel. Kwalitatieve toolkit voor alle elektronica-reparaties De perfecte toolkit voor zowel professionals als knutselaars Bevat alle tools voor het openen van en werken aan consumentenelektronica Volledig opnieuw samengesteld met alle tools die je nodig hebt, maar geen een teveel. Inbegrepen Bithouder met 64 bits – alle bits die je nodig hebt Antistatische polsband – beschermt elektronica tegen statische spanningen Kleine zuignap – voor het vasthouden van objecten zonder handvaten 3x iFixit Opening Tool – wrikgereedschap van zacht plastic 6x iFixit Opening Picks – smalle tool voor het openen van apparaten Omgedraaid pincet met nylon tip – voor het vasthouden en bekijken van je werk ESD-veilige gebogen pincet – met ribbels voor een betere grip ESD-veilige stompe pincet - met ribbels voor een betere grip 2x plastic spudger – stevige antistatische tool voor van alles en nog wat Metalen spudger – voor het stevigere schraap- en wrikwerk Jimmy – Handige tool om elektronica mee open te ‘Jimmy-en’ Magnetische pad – houdt kleine schroefjes en metalen onderdelen vast bij reparaties Opberg-etui – duurzaam en compact
€ 69,95
-

Elektor Digital Initiation à l’électronique et programmation de montages pour débutants (E-book)
L'électronique est passionnée. C'est un plaisir amusant et instructif. Elle permet d'acquérir de nouvelles compétences, souvent utiles, à la maison et même au travail. Une expérience électronique avec ces circuits appropriés. Il donne vie à ses projets. Avant que le jour n'arrive, vous avez hâte de le voir ! Il est nécessaire de rassembler les articles pour la publication des articles du magazine d'électronique Elektor. Il sera le compagnon de vos progrès dans le monde de l'électronique. Plus que commencer par l'électronique analogique. Vous pourrez découvrir les compositions et les circuits ainsi que les simples pour comprendre les fonctions, les interactions et les problèmes éventuels. La meilleure façon de progresser, c'est de faire des expériences réelles, car la théorie ne suffit pas. Un guide en direct pour un excellent guide de montages pratiques, notamment pour les débutants. Et pour en savoir plus, acquérir la meilleure expérience et connaissance. La deuxième partie de la vie du monde du numérique électronique. En savoir plus sur l’utilisation des microcontrôles. Les effets des composants sont discrets grâce aux circuits intégrés des principaux composants des microcontrôleurs. La programmation à long terme de BASCOM, basée sur les pré-requis à la mise en œuvre d'Arduino, BBC micro:bit et d'autres, facilite la prise en compte de l'apprentissage. Voici une description détaillée des nombreuses applications des microcontrôleurs, abordables pour les néophytes. Ici, programmation et soudage font bon ménage !
€ 32,95
Leden: € 29,66
-

Elektor Digital Initiation au langage CircuitPython et à la puce nRF52840 (E-book)
Le langage de programmation Python est apprécié par les pédagogues parce que sa syntaxe le rend facile à comprendre. Il s'est également imposé chez les informaticiens expérimentés. La société Adafruit a développé une version spéciale de Python pour l'embarquer sur les microcontrôleurs à 32 bits : CircuitPython. Ce livre permettra au lecteur de s'initier à la programmation en CircuitPython sur deux cartes : Feather BlueFruit Sense (également appelée Feather nRF52840 Sense) et CLUE nRF52840 Express. Chacune est animée par le SoC nRF52840 de NORDIC avec une architecture à 32 bits. Pour ce voyage dans le monde de la programmation embarquée, l'auteur sort du chemin classique, à savoir un cours complet sur la programmation orientée objet appliquée à ce langage. Il préfère emmener le lecteur directement sur le terrain avec des projets qui mettent en oeuvre les cartes et différents périphériques. Plus d'une quarantaine d'exemples et de montages permettent de découvrir la richesse de CircuitPython. Toutefois l'auteur s'est imposé une limite pour ne pas décourager les novices : le code de chaque projet ne dépasse jamais la centaine de lignes. Pour ce qui est du matériel, là aussi la simplicité domine : aucun programmateur, un simple PC suffit ; aucun soudage grâce au câblage sur platine d'essai. Les cartes d'extension FeatherWing à enficher sur la Feather nRF52840 Sense permettent de démultiplier ses fonctions : matrice de LED, enregistreur de données, écran à encre électronique, écran OLED, écran TFT, commande de moteurs, audio, relais… Toutes les étapes (assemblage des différents composants, installation des bibliothèques requises, programmation, tests…) sont expliquées en détail. Le code des différents exemples et projets est disponible sur Github. Le résultat de chaque projet est même présenté sur de courtes vidéos disponibles sur YouTube. À la fin de sa lecture, le nouveau Pythonien pourra facilement approfondir les notions abordées et donner vie à ses propres projets grâce aux outils qu'il aura essayés. Ce livre s'adresse aux lycéens et étudiants ainsi qu'à toute la communauté des makers. Chaîne YouTube de l'auteur YouTube (Michaël Bottin)
€ 34,95
Leden: € 31,46
-
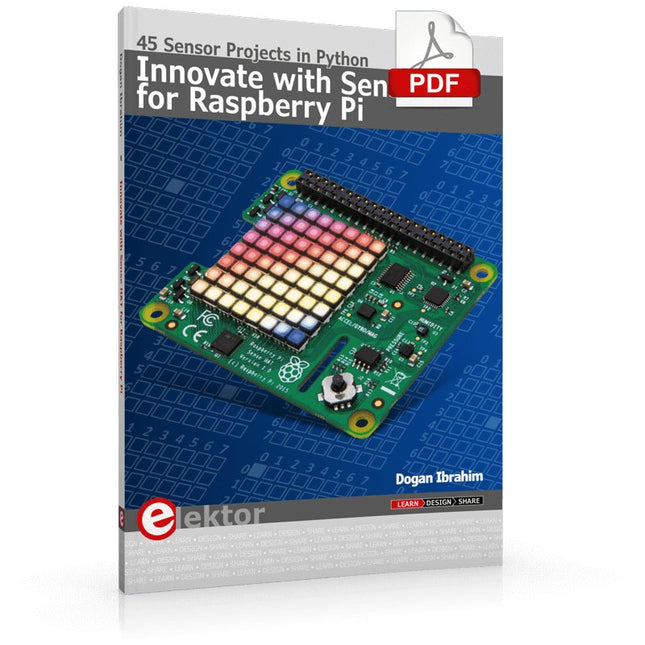
Elektor Digital Innovate with Sense HAT for Raspberry Pi (E-book)
Ready to explore the world around you? By attaching the Sense HAT to your Raspberry Pi, you can quickly and easily develop a variety of creative applications, useful experiments, and exciting games. The Sense HAT contains several helpful environmental sensors: temperature, humidity, pressure, accelerometer, magnetometer, and gyroscope. Additionally, an 8x8 LED matrix is provided with RGB LEDs, which can be used to display multi-color scrolling or fixed information, such as the sensor data. Use the small onboard joystick for games or applications that require user input. In Innovate with Sense HAT for Raspberry Pi, Dr. Dogan Ibrahim explains how to use the Sense HAT in Raspberry Pi Zero W-based projects. Using simple terms, he details how to incorporate the Sense HAT board in interesting visual and sensor-based projects. You can complete all the projects with other Raspberry Pi models without any modifications. Exploring with Sense HAT for Raspberry Pi includes projects featuring external hardware components in addition to the Sense HAT board. You will learn to connect the Sense HAT board to the Raspberry Pi using jumper wires so that some of the GPIO ports are free to be interfaced to external components, such as to buzzers, relays, LEDs, LCDs, motors, and other sensors. The book includes full program listings and detailed project descriptions. Complete circuit diagrams of the projects using external components are given where necessary. All the projects were developed using the latest version of the Python 3 programming language. You can easily download projects from the book’s web page. Let’s start exploring with Sense HAT.
€ 29,95
Leden: € 26,96
-

Elektor Digital Inside an Open-Source Processor (E-book)
An Introduction to RISC-V RISC-V is an Instruction Set Architecture (ISA) that is both free and open. This means that the RISC-V ISA itself does not require a licensing fee, although individual implementations may do so. The RISC-V ISA is curated by a non-profit foundation with no commercial interest in products or services that use it, and it is possible for anyone to submit contributions to the RISC-V specifications. The RISC-V ISA is suitable for applications ranging from embedded microcontrollers to supercomputers. This book will first describe the 32-bit RISC-V ISA, including both the base instruction set as well as the majority of the currently-defined extensions. The book will then describe, in detail, an open-source implementation of the ISA that is intended for embedded control applications. This implementation includes the base instruction set as well as a number of standard extensions. After the description of the CPU design is complete the design is expanded to include memory and some simple I/O. The resulting microcontroller will then be implemented in an affordable FPGA development board (available from Elektor) along with a simple software application so that the reader can investigate the finished design.
€ 32,95
Leden: € 29,66
-

Elektor Digital Internet of Things (E-book)
The Internet of Things (IoT) is a new concept in intelligent automation and intelligent monitoring using the Internet as the communications medium. The “Things” in IoT usually refer to devices that have unique identifiers and are connected to the Internet to exchange information with each other. Such devices usually have sensors and/or actuators that can be used to collect data about their environments and to monitor and control their environments. The collected data can be processed locally or it can be sent to centralized servers or to the cloud for remote storage and processing. For example, a small device at the size of a matchbox can be used to collect data about the temperature, relative humidity and the atmospheric pressure. This data can be sent and stored in the cloud. Anyone with a mobile device can then access and monitor this data at any time and from anywhere on Earth provided there is Internet connectivity. In addition, users can for example, adjust the central heating remotely using their mobile devices and accessing the cloud. This book is written for students, for practising engineers and for hobbyists who want to learn more about the building blocks of an IoT system and also learn how to setup an IoT system using these blocks. Chapter 1 is an introduction to the IoT systems. In Chapter 2, the basic concepts and possible IoT architectures are discussed. The important parts of any IoT system are the sensors and actuators and they are described briefly in Chapter 3. The devices in an IoT system usually communicate with each other and the important aspect of IoT communication is covered in Chapter 4. Chapter 5 proceeds with the features of some of the commonly used development kits. One of these, the Clicker 2 for PIC18FJ manufactured by mikroElektronika, can be used as a processor in IoT systems and its features are described in detail in Chapter 6. A popular microcontroller C language, mikroC Pro for PIC gets introduced in Chapter 7. Chapter 8 covers the use of a click board with the Clicker 2 for PIC18FJ development kit. Similarly, the use of a sensor click board is described as a project in Chapter 9, and an actuator board in Chapter 10. Chapters 11 and 12 cover Bluetooth and Wi-Fi technologies in microcontroller based systems, and the remaining chapters of the book demo the creation of a simple Wi-Fi based IoT system with cloud-based data storage. This book has been written with the assumption that the reader has taken a course on digital logic design and has been exposed to writing programs using at least one high-level programming language. Knowledge of the C programming language will be very useful. Also, familiarity with at least one member of the PIC series of microcontrollers (e.g. PIC16 or PIC18) will be an advantage. The knowledge of assembly language programming is not required because all the projects in the book are based on using the C language. If you are a total beginner in programming you can still access the e-book, but first you are advised to study introductory books on microcontrollers.
€ 34,95
Leden: € 31,46
-

Elektor Digital Introductie tot de Elektro-akoestiek (E-book)
Dit boek is bedoeld voor diegenen die zich bezig houden met geluidsversterking en geluidsdistributie. Het gaat in op de akoestische eigenschappen van open, halfopen en omsloten ruimten. Belangrijk is hoe luidsprekers aangepast kunnen worden op allerlei omgevingen. Meestal moet men een keuze maken uit het aanbod van luidsprekers en microfoons. De vraag is dan welke luidspreker en microfoon de juiste keuze zijn. En hoe deze moeten worden opgesteld waarbij spraak- en muziekverstaanbaarheid en de maximaal haalbare versterking in de live-situatie de belangrijkste criteria zijn. Dit boek geeft antwoord op die vragen.Verder wordt de lezer meegenomen naar het ontwerpen van luidsprekers op basis van de T/S parameters. Met eenvoudige software is het mogelijk akoestische en mechanische elementen van een luidspreker met de eventuele behuizing te vertalen naar de elektrische analogieën, zodat de luidspreker op de PC gesimuleerd kan worden. Aan de hand van rekenvoorbeelden worden bovenstaande simulaties ondersteund. Tot slot zijn in de referentielijst een aantal internetlinks opgenomen waaruit zeer waardevolle gegevens gehaald kunnen worden.De auteur, Peter Swarte, is natuurkundig ingenieur en was werkzaam bij Philips. Momenteel is hij_eigenaar van consultancy bureau P.A.S. Electro Acoustics en is hij actief lid van zowel het NAG (Nederlands Akoestisch Genootschap) als de AES (Audio Engineering Society).
€ 29,95
Leden: € 26,96
-

Elektor Digital Introduction to Control Engineering (E-book)
This book is aimed at practising engineers, students and hobbyists. It is intended as a source of reference for hardware and software associated with instrumentation and control engineering. Examples are presented from a range of industries and applications. Throughout the book, circuit diagrams and software listings are described, typical of many measurement and control applications. The hardware and software designs may be used as a basis for application by the reader. The book contains examples of PIC, PLC, PAC and PC programming. All code samples are available to download free of charge from the support website. After an introductory section on control theory and modelling, the text focus is upon software for control system simulation and implementation, with appropriate reference to interfacing, electronic hardware and computing platforms. Introduction to Control Engineering is a sourcebook of solutions for control system applications!
€ 24,95
Leden: € 22,46
-

Elektor Publishing Introduction to Electronic Filters
Learn RC and RL Filters with Hands-On Circuits and Simulation Introduction to Electronic Filters is your comprehensive guide to understanding, designing, and applying first-order electronic filters using resistors, capacitors, and inductors. Whether you are a student, maker, or educator, this book demystifies the theory behind RC and RL filters and bridges the gap between concepts and real-world applications through simulation and experimentation. From the basics of frequency response and phase shift to hands-on breadboard builds and Python-based simulations, this book offers a deeply practical learning experience. You will learn to analyse filters using Bode plots and phasors, and explore applications in audio tone shaping, sensor signal conditioning, noise reduction, and power supply filtering. As you progress, you’ll build, measure, simulate, and tune filters using modern tools like CircuitLab, Python, and the Analog Discovery 3. Each chapter includes thoughtfully crafted activities that reinforce learning by doing – designing filters for specific tasks, simulating dynamic behaviour, and observing how theory translates into performance. Inside you’ll find: A clear introduction to the fundamentals of electronic filters Detailed explanations of RC and RL filters, cutoff frequency, and phase Guided activities using both simulation and hardware tools Real-life applications in audio, sensors, power supplies, and more A beginner-friendly primer on Python and algebra for electronics Whether you’re working through simulations or experimenting with real components on your workbench, this book will help you develop a solid understanding of electronic filters and their role in practical circuits.
€ 39,95
Leden: € 35,96
-

Elektor Digital Introduction to Electronic Filters (E-book)
Learn RC and RL Filters with Hands-On Circuits and Simulation Introduction to Electronic Filters is your comprehensive guide to understanding, designing, and applying first-order electronic filters using resistors, capacitors, and inductors. Whether you are a student, maker, or educator, this book demystifies the theory behind RC and RL filters and bridges the gap between concepts and real-world applications through simulation and experimentation. From the basics of frequency response and phase shift to hands-on breadboard builds and Python-based simulations, this book offers a deeply practical learning experience. You will learn to analyse filters using Bode plots and phasors, and explore applications in audio tone shaping, sensor signal conditioning, noise reduction, and power supply filtering. As you progress, you’ll build, measure, simulate, and tune filters using modern tools like CircuitLab, Python, and the Analog Discovery 3. Each chapter includes thoughtfully crafted activities that reinforce learning by doing – designing filters for specific tasks, simulating dynamic behaviour, and observing how theory translates into performance. Inside you’ll find: A clear introduction to the fundamentals of electronic filters Detailed explanations of RC and RL filters, cutoff frequency, and phase Guided activities using both simulation and hardware tools Real-life applications in audio, sensors, power supplies, and more A beginner-friendly primer on Python and algebra for electronics Whether you’re working through simulations or experimenting with real components on your workbench, this book will help you develop a solid understanding of electronic filters and their role in practical circuits.
€ 32,95
Leden: € 29,66
-

Elektor Digital IoT GET-U-GOING (E-book)
In 35 Projects with the Raspberry Pi and Arduino The Internet of Things (IoT) is a trend with a strong technological impulse. At home, we want to do everything on our tablets, from browsing Facebook to watching TV, from operating lights to keeping an eye on the temperature. In 35 fun projects, this book will show you how to build your own Internet of Things system. We'll cover the hardware (primarily the Raspberry Pi and Arduino) and the software that makes control via Internet possible. We employ Wi-Fi and radio links so no requirement any longer to install cabling crisscross through your home. Assuming the projects in the book are finished, you have a complete Internet of Things system that allows you to control and view of everything in your home. For example, if there's something in the mail box or the car is securely in the garage. Also, you can switch on the lights and the alarm from your couch. The crisp explanations allow the projects to be customized with ease, for example, to turn on your coffee machine or TV remotely. The index gives easy access to creative projects that can serve as an example, enabling you to do all the connecting to the IoT independently. All project software can be downloaded free of charge from the Elektor website. In this unique book, Raspberry Pi, Arduino and HTML webpages with stylesheets and JavaScript come together in clearly-described, easy-to-build projects. This special book is an essential part of your collection!
€ 34,95
Leden: € 31,46
-
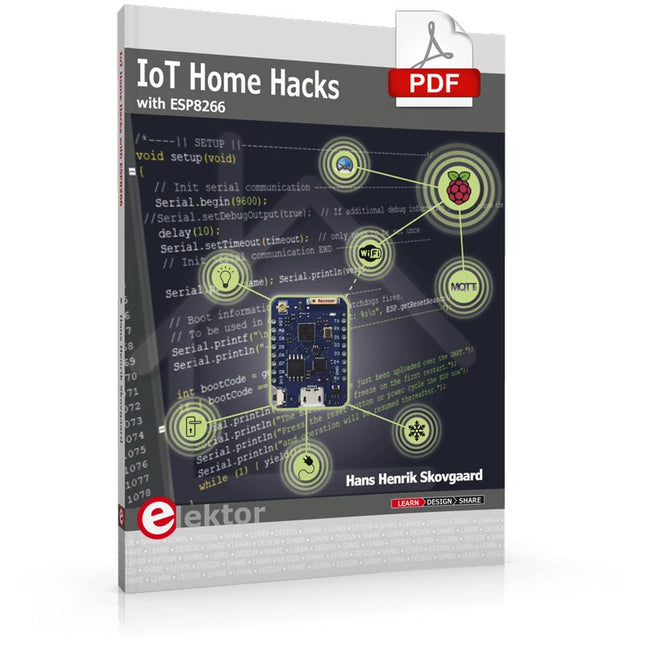
Elektor Digital IoT Home Hacks with ESP8266 (E-book)
There are many so-called 'Arduino compatible' platforms on the market. The ESP8266 – in the form of the WeMos D1 Mini Pro – is one that really stands out. This device includes WiFi Internet access and the option of a flash file system using up to 16 MB of external flash memory. Furthermore, there are ample in/output pins (though only one analogue input), PWM, I²C, and one-wire. Needless to say, you are easily able to construct many small IoT devices! This book contains the following builds: A colourful smart home accessory refrigerator controller 230 V power monitor door lock monitor and some further spin-off devices. All builds are documented together with relevant background information for further study. For your convenience, there is a small PCB for most of the designs; you can also use a perf board. You don’t need to be an expert but the minimum recommended essentials include basic experience with a PC, software, and hardware, including the ability to surf the Internet and assemble PCBs. And of course: A handle was kept on development costs. All custom software for the IoT devices and PCB layouts are available for free download from at Elektor.com.
€ 34,95
Leden: € 31,46
-

JOY-iT JOY-iT PS1440-C-Pro Programmeerbare Laborvoeding met RS485 (1440 W)
Met de JOY-iT PS1440-C-Pro krijgt u een programmeerbare laboratoriumvoeding die gelijkspanningen levert van 0,01 tot 60 V en gelijkstromen van 0,01 tot 24 A aan de spanningsuitgang. Met het intuïtieve bedieningspaneel kunt u tot 9 verschillende gelijkspanningsinstellingen programmeren, opslaan en oproepen. U kunt ook individuele beveiligings- en begrenzingsfuncties configureren, zoals overspanningsbeveiliging. Alle instellingen kunnen eenvoudig worden aangepast via het toetsenbord en/of de draaiknop en worden duidelijk weergegeven op het kleurendisplay met hoge resolutie van 2,4 inch. Voor verbeterde connectiviteit is de PS1440-C-Pro voorzien van een RS485-interface voor robuuste communicatie over lange afstanden. Dit maakt hem ideaal voor complexe opstellingen waar signaalstabiliteit, ruisimmuniteit en betrouwbare gegevensoverdracht cruciaal zijn. De meegeleverde connector zorgt voor een veilige verbinding, wat de algehele betrouwbaarheid en prestaties van uw laboratoriumapparatuur verbetert. Kenmerken Compleet apparaat klaar voor onmiddellijk gebruik RS485-interface Accu oplaadfunctie Waarden kunnen gemakkelijk worden ingevoerd via het toetsenbord Overstroom- en overspanningsbeveiliging instelbaar Geïntegreerde RTC, NTC-temperatuursensor Inclusief gedetailleerde documentatie in het Engels, Duits en Frans Specificaties Ingangsspanning 230 V Uitgangsspanning 0-60 V Uitgangsstroom 0-24 A Uitgangsvermogen 0-1440 W Nauwkeurigheid ingangsspanning ±1% + 5 cijfers Nauwkeurigheid uitgangsspanning ±0,3% + 3 cijfers Nauwkeurigheid uitgangsstroom ±0,5% + 5 cijfers Accuspanning ±0,5% + 3 cijfers Meetresolutie ingangsspanning 0,01 V Meetresolutie van uitgangsspanning 0,01 V Resolutie stroommeting 0,01 V Meetresolutie accuspanning 0,01 V Reactietijd in constante spanningsmodus 2 ms @ 0,1-5 A Belastingregeling in constante spanningsmodus ±0,1% + 2 cijfers Belastingregeling in constante stroommodus ±0,1% + 3 cijfers Meetbereik elektrische lading 0-9999,99 Ah Meetbereik energie 0-9999,99 Wh Statistische fouten in elektrische lading en energie ±2% Uitgangsrimpel 100 mV Vpp @ 12 V 150 mV Vpp @ 24 V Detectiebereik temperatuursensor ?10~+100°C Nauwkeurigheid temperatuurdetectie sensor ±3°C Werkmodus Trapsgewijze werking Instelling schermhelderheid Niveau 0-5, 6 niveaus in totaal Toegestane werktemperatuur −10~40°C Afmetingen 170 x 93 x 340 mm Inbegrepen JOY-iT PS1440-C Voeding 2-pins connector voor RS485-interface Netsnoer Manual Downloads Datasheet MODBUS Protocol PC Software Driver for Windows
€ 499,00
Leden: € 449,10
-

JOY-iT Joy-Pi Advanced Ontwikkelplatform (incl. Raspberry Pi 4, 8 GB)
Slechts tijdelijk is de Joy-Pi Advanced verkrijgbaar in een voordelige bundel met een Raspberry Pi 4 (8 GB)! De Joy-Pi Advanced is een compact en krachtig instrument waarmee je snel en eenvoudig je projecten kunt realiseren. Of je nu veel of weinig ervaring hebt, met de Joy-Pi Advanced kun je je creativiteit de vrije loop laten. Dankzij de compatibiliteit met een groot aantal platformen, waaronder Raspberry Pi, Raspberry Pi Pico, Arduino Nano, BBC micro:bit en NodeMCU ESP32, kun je eenvoudig en snel toegang krijgen tot het platform van je voorkeur. Daarnaast heeft de Joy-Pi Advanced meer dan 30 stations, lessen en modules, waardoor je een onbeperkt aantal manieren hebt om je projecten uit te voeren. Met het zelfontwikkelde leercentrum kun je niet alleen je vaardigheden verbeteren, maar ook nieuwe projecten maken. Het leercentrum biedt een schat aan informatie en tutorials die je stap voor stap door je projecten begeleiden. Joy-Pi Advanced wordt in het bijzonder gekenmerkt door zijn intelligente schakeleenheden, die een uitgebreid gebruik van de beschikbare pinnen mogelijk maken. In totaal zijn er drie schakeleenheden geïntegreerd, elk voorzien van 12 individuele schakelaars die zorgen voor een nauwkeurige aansturing van de aangesloten sensoren en modules. Dit systeem lost het bekende probleem van het beperkte aantal pinnen op dat optreedt bij conventionele microcontrollers. Met de schakeleenheden kun je een groot aantal sensoren en modules parallel aansturen door ze afzonderlijk aan en uit te schakelen. Dit simuleert meervoudige pintoewijzing, waardoor je het volledige vermogen van je projecten kunt benutten zonder afbreuk te doen aan de functionaliteit. Door onze innovatieve adapter boards en het micro:bit slot te combineren, bereiken we naadloze compatibiliteit met een breed scala aan microcontrollers zoals Raspberry Pi Pico, NodeMCU ESP32, micro:mit en Arduino Nano. De speciaal ontwikkelde adapterkaarten zijn zo ontworpen dat ze perfect passen bij de betreffende microcontroller. Door de microcontroller op het juiste adapterboard aan te sluiten en deze vervolgens in het micro:bit slot te steken, wordt de Joy-Pi Advanced snel en eenvoudig compatibel met de verschillende microcontrollers. Dit zorgt voor een naadloze integratie van het platform van je voorkeur en de mogelijkheid om de sterke punten van de verschillende microcontrollers te combineren in je projecten. Op deze manier kun je je volledig richten op je creatieve projecten zonder dat je je zorgen hoeft te maken over de compatibiliteit van verschillende microcontrollers. De Joy-Pi Advanced vereenvoudigt het ontwikkelproces en geeft je de mogelijkheid om je projecten flexibel en individueel te ontwerpen. Kenmerken Sterk geïntegreerd ontwikkelplatform & leercentrum Snel, eenvoudig & draadloos combineren van verschillende sensoren & actuatoren Installatieoptie voor Raspberry Pi 4 Compatibel met verschillende microcontrollers Zelfontwikkeld, didactisch leerplatform voor Raspberry Pi & Windows Specificaties Compatibel met Raspberry Pi 4, Arduino Nano, NodeMCU ESP32, BBC micro:bit, Raspberry Pi Pico Geïnstalleerde sensoren, actuatoren & componenten 39 Leerplatform Meer dan 40 items in de kennisdatabase, 10 projecten, 10 lessen, 14 visies Displays 7-segment display, 16x2 display, 1,8' TFT-display, 0,96" OLED-display, 8x8 RGB-matrix Sensoren DS18B20, schoksensor, hallsensor, barometer, geluidssensor, gyroscoop, PIR-sensor, Lichtbarrière, NTC, Lichtsensor, 6x aanraaksensor, kleurensensor, ultrasone afstandssensor, DHT11 temperatuur- & vochtigheidssensor Controle Joystick, 5x schakelaars, potentiometer, draaiencoder, 4x4 knoppenmatrix, relais, PWM-ventilator Motoren Servo-interface, Stappenmotorinterface, Trilmotor Meet- en conversiemodules Analoog-digitaalomzetter, niveauomzetter, voltmeter, variabele spanningsbron Andere onderdelen RTC real-time klok, zoemer, EEPROM-geheugen, infrarood ontvanger, breadboard, RFID-lezer Adapterkaarten Adapter voor NodeMCU ESP32, Arduino Nano & Raspberry Pi Pico, Board connectors voor Raspberry Pi & externe boards Elektronische onderdelen Infrarood afstandsbediening, RFID-chip, RFID-kaart, 6x krokodillenklemmen, microSD-kaartlezer, servomotor, stappenmotor, 32 GB microSD-kaart Onderdelen 40x weerstanden, 3x groene LED's, 3x gele LED's, 3x rode LED's, 1x transistor, 5x knoppen, 1x potentiometer, 2x condensatoren Andere accessoires Schroevenassortiment, schroevendraaier, accessoire-opbergtas, voeding & voedingskabel, servo bevestiging Stroomvoorziening Ingebouwde voeding: 36 W, 12 V, 3 A Behuizingsconnector: Kleine apparaat stekker C8 Spanningsuitgangen 12 V, 5 V, 3,3 V, variabele spanningsuitgang (2-11 V) Databussen & signaaluitgangen I²C, SPI, Analoog naar digitaal converter Batterij (RTC) CR2032 Afmetingen 327 x 200 x 52 mm Inbegrepen Raspberry Pi 4 (8 GB RAM) Downloads Joy-Pi website Datasheet Manual
€ 519,00€ 419,00
Beste prijs
-

Elektor Bundles KiCad Like A Pro (Bundel)
Deze bundel bevat beide delen van "KiCad Like a Pro" (4e editie 2024). In Fundamentals and Projects (normale prijs: € 49,95) leert u hoe u KiCad kunt gebruiken via een praktische aanpak, waardoor u snel productief wordt en uw eigen borden kunt ontwerpen. Met Advanced Projects and Recipes (normale prijs: € 44,95) kunt u uw nieuwe KiCad-vaardigheden oefenen door uzelf uit te dagen met een reeks echte projecten. De nieuwste versie van KiCad, 's werelds beste gratis te gebruiken Printed Circuit Board-tool, zit boordevol functies die normaal gesproken alleen in dure commerciële CAD-tools te vinden zijn. Deze moderne, platformonafhankelijke applicatiesuite die is opgebouwd rond schema- en ontwerpeditors, met hulpapplicaties, is een stabiele en volwassen PCB-tool. KiCad 8 is perfect voor elektronica-ingenieurs en -makers. Hier zijn de belangrijkste verbeteringen en functies in KiCad 8, zowel van boven als van onder de motorkap: Moderne gebruikersinterface, volledig opnieuw ontworpen ten opzichte van eerdere versies Verbeterde en aanpasbare elektrische en ontwerpregelcontroles Thema-editor waarmee u KiCad op uw scherm kunt aanpassen Mogelijkheid om projecten te importeren van Eagle, CADSTART en meer Python-scripting-API Verbeterde geïntegreerde SPICE-circuitsimulator Schema's met meerdere bladen Filters definiëren selecteerbare elementen Verbeterde interactieve router helpt u om afzonderlijke sporen en differentiële paren met precisie te tekenen Nieuwe of verbeterde tools om sporen te tekenen, afstanden te meten, spoorlengtes af te stemmen, enz. Geavanceerd interactieve router Ingebouwde stuklijstgenerator Realistische ray-tracing capabele 3D viewer Aanpasbare teardrops Plug-in manager voor snelle installatie van thema's, bibliotheken en functionaliteiten zoals autorouters en BOM-generatoren Het eerste boek KiCad Like A Pro – Fundamentals and Projects leert u KiCad te gebruiken via een praktische aanpak. Het helpt u snel productief te worden en uw eigen boards te ontwerpen. Voorbeeldprojecten illustreren de basisfuncties van KiCad, zelfs als u geen voorkennis hebt van PCB-ontwerp. De auteur beschrijft de volledige workflow van schema-invoer tot de complexiteit van het finaliseren van de bestanden voor PCB-productie en biedt gedegen begeleiding bij het proces. Het tweede boek KiCad Like A Pro – Advanced Projects and Recipes helpt u uw nieuwe KiCad-vaardigheden te oefenen door u uit te dagen in een reeks echte projecten. De projecten worden ondersteund door een uitgebreide set recepten met gedetailleerde instructies over hoe u een verscheidenheid aan eenvoudige en complexe taken kunt uitvoeren. Ontwerp de PCB's voor een zonne-energievoorziening, een LED-matrixarray, een Arduino-aangedreven datalogger en een aangepast ESP32-bord. Begrijp de fijnere details van de interactieve router, hoe u KiCad-projectteams met Git kunt beheren, hoe u een autorouter op 2- en 4-laags PCB's kunt gebruiken en nog veel meer.
€ 104,95€ 89,95
Beste prijs
-

Elektor Digital KiCad Like A Pro (E-book Bundel)
Deze bundel bevat beide delen van "KiCad Like a Pro" (4e editie 2024). In Fundamentals and Projects (normale prijs: € 39,95) leert u hoe u KiCad kunt gebruiken via een praktische aanpak, waardoor u snel productief wordt en uw eigen borden kunt ontwerpen. Met Advanced Projects and Recipes (normale prijs: € 34,95) kunt u uw nieuwe KiCad-vaardigheden oefenen door uzelf uit te dagen met een reeks echte projecten. De nieuwste versie van KiCad, 's werelds beste gratis te gebruiken Printed Circuit Board-tool, zit boordevol functies die normaal gesproken alleen in dure commerciële CAD-tools te vinden zijn. Deze moderne, platformonafhankelijke applicatiesuite die is opgebouwd rond schema- en ontwerpeditors, met hulpapplicaties, is een stabiele en volwassen PCB-tool. KiCad 8 is perfect voor elektronica-ingenieurs en -makers. Hier zijn de belangrijkste verbeteringen en functies in KiCad 8, zowel van boven als van onder de motorkap: Moderne gebruikersinterface, volledig opnieuw ontworpen ten opzichte van eerdere versies Verbeterde en aanpasbare elektrische en ontwerpregelcontroles Thema-editor waarmee u KiCad op uw scherm kunt aanpassen Mogelijkheid om projecten te importeren van Eagle, CADSTART en meer Python-scripting-API Verbeterde geïntegreerde SPICE-circuitsimulator Schema's met meerdere bladen Filters definiëren selecteerbare elementen Verbeterde interactieve router helpt u om afzonderlijke sporen en differentiële paren met precisie te tekenen Nieuwe of verbeterde tools om sporen te tekenen, afstanden te meten, spoorlengtes af te stemmen, enz. Geavanceerd interactieve router Ingebouwde stuklijstgenerator Realistische ray-tracing capabele 3D viewer Aanpasbare teardrops Plug-in manager voor snelle installatie van thema's, bibliotheken en functionaliteiten zoals autorouters en BOM-generatoren Het eerste boek KiCad Like A Pro – Fundamentals and Projects leert u KiCad te gebruiken via een praktische aanpak. Het helpt u snel productief te worden en uw eigen boards te ontwerpen. Voorbeeldprojecten illustreren de basisfuncties van KiCad, zelfs als u geen voorkennis hebt van PCB-ontwerp. De auteur beschrijft de volledige workflow van schema-invoer tot de complexiteit van het finaliseren van de bestanden voor PCB-productie en biedt gedegen begeleiding bij het proces. Het tweede boek KiCad Like A Pro – Advanced Projects and Recipes helpt u uw nieuwe KiCad-vaardigheden te oefenen door u uit te dagen in een reeks echte projecten. De projecten worden ondersteund door een uitgebreide set recepten met gedetailleerde instructies over hoe u een verscheidenheid aan eenvoudige en complexe taken kunt uitvoeren. Ontwerp de PCB's voor een zonne-energievoorziening, een LED-matrixarray, een Arduino-aangedreven datalogger en een aangepast ESP32-bord. Begrijp de fijnere details van de interactieve router, hoe u KiCad-projectteams met Git kunt beheren, hoe u een autorouter op 2- en 4-laags PCB's kunt gebruiken en nog veel meer.
€ 84,95€ 69,95
Beste prijs
-
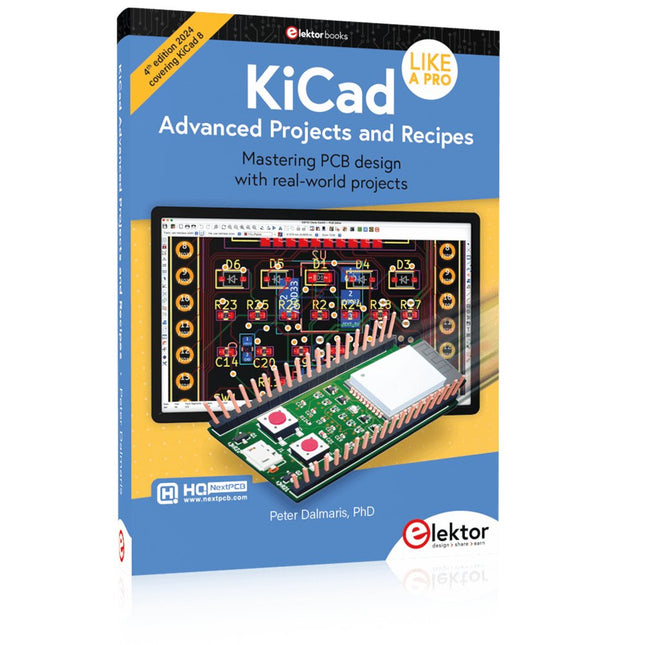
Elektor Publishing KiCad Like A Pro – Advanced Projects and Recipes
Mastering PCB design with real-world projects This book builts on KiCad Like a Pro – Fundamentals and Projects and aims to help you practice your new KiCad skills by challenging you in a series of real-world projects. The projects are supported by a comprehensive set of recipes with detailed instructions on how to achieve a variety of simple and complex tasks. Design the PCBs for a solar power supply, an LED matrix array, an Arduino-powered datalogger, and a custom ESP32 board. Understand the finer details of the interactive router, how to manage KiCad project teams with Git, how to use an autorouter on 2 and 4-layer PCBs, and much more. KiCad 8 is a modern, cross-platform application suite built around schematic and design editors. This stable and mature PCB tool is a perfect fit for electronic engineers and makers. With KiCad 8, you can create PCBs of any complexity and size without the constraints associated with the commercial packages. Here are the most significant improvements and features in KiCad 8, both over and under the hood: Modern user interface, completely redesigned from earlier versions Improved and customizable electrical and design rule checkers Theme editor allowing you to fully customize the look of KiCad on your screen Ability to import projects from Eagle, CADSTART, and more An improved and tightly integrated SPICE circuit simulator Autorouting with the Freerouting plugin Filters define which elements of a layout are selectable Enhanced interactive router helps you draw single tracks and differential pairs with precision New or enhanced tools to draw tracks, measure distances, tune track lengths, etc. Enhanced tool for creating filled zones A customizable coordinate system facilitates data exchange with other CAD applications Realistic ray-tracing capable 3D viewer Differential pair routing Rich repositories of symbol, footprint, and 3D shape libraries Python scripting API for programmatic customization and extensions Improved footprint wizard for fast custom footprints
€ 49,95
Leden: € 44,96
-

Elektor Digital KiCad Like A Pro – Advanced Projects and Recipes (E-book)
Mastering PCB design with real-world projects This book builts on KiCad Like a Pro – Fundamentals and Projects and aims to help you practice your new KiCad skills by challenging you in a series of real-world projects. The projects are supported by a comprehensive set of recipes with detailed instructions on how to achieve a variety of simple and complex tasks. Design the PCBs for a solar power supply, an LED matrix array, an Arduino-powered datalogger, and a custom ESP32 board. Understand the finer details of the interactive router, how to manage KiCad project teams with Git, how to use an autorouter on 2 and 4-layer PCBs, and much more. KiCad 8 is a modern, cross-platform application suite built around schematic and design editors. This stable and mature PCB tool is a perfect fit for electronic engineers and makers. With KiCad 8, you can create PCBs of any complexity and size without the constraints associated with the commercial packages. Here are the most significant improvements and features in KiCad 8, both over and under the hood: Modern user interface, completely redesigned from earlier versions Improved and customizable electrical and design rule checkers Theme editor allowing you to fully customize the look of KiCad on your screen Ability to import projects from Eagle, CADSTART, and more An improved and tightly integrated SPICE circuit simulator Autorouting with the Freerouting plugin Filters define which elements of a layout are selectable Enhanced interactive router helps you draw single tracks and differential pairs with precision New or enhanced tools to draw tracks, measure distances, tune track lengths, etc. Enhanced tool for creating filled zones A customizable coordinate system facilitates data exchange with other CAD applications Realistic ray-tracing capable 3D viewer Differential pair routing Rich repositories of symbol, footprint, and 3D shape libraries Python scripting API for programmatic customization and extensions Improved footprint wizard for fast custom footprints
€ 39,95
Leden: € 35,96
-
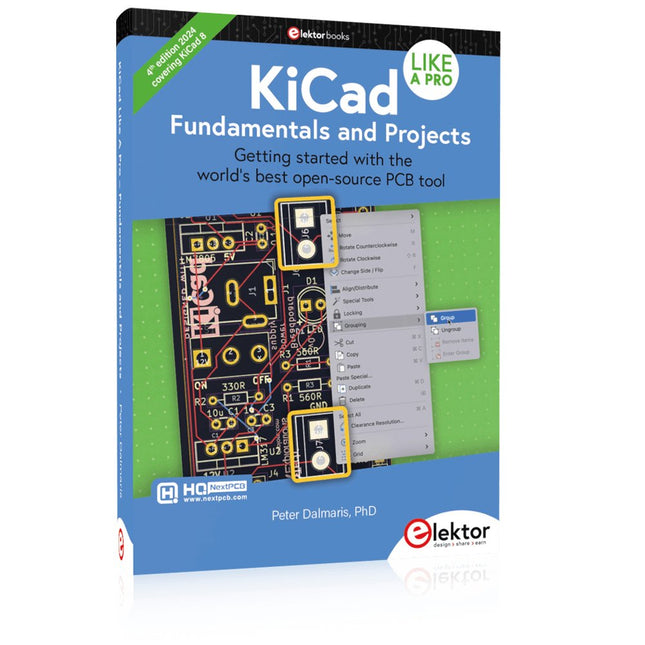
Elektor Publishing KiCad Like A Pro – Fundamentals and Projects
Getting started with the world’s best open-source PCB tool The latest iteration of KiCad, the world’s best free-to-use Printed Circuit Board tool, is packed with features usually found only in expensive commercial CAD tools. This modern, cross-platform application suite built around schematic and design editors, with auxiliary applications is a stable and mature PCB tool. KiCad 8 is a perfect fit for electronic engineers and makers. Here are the most significant improvements and features in KiCad 8, both over and under the hood: Modern user interface, completely redesigned from earlier versions Improved and customizable electrical and design rule checkers Theme editor allowing you to customize KiCad on your screen Ability to import projects from Eagle, CADSTART, and more Python scripting API Improved integrated SPICE circuit simulator Multi-sheet schematics Filters define selectable elements Enhanced interactive router helps you draw single tracks and differential pairs with precision New or enhanced tools to draw tracks, measure distances, tune track lengths, etc. Advanced interactive router Built-in bill of materials generator Realistic ray-tracing capable 3D viewer Customizable teardrops Plug-in manager for quick installation of themes, libraries and functionalities such as autorouters and BOM generators This book will teach you to use KiCad through a practical approach. It will help you become productive quickly and start designing your own boards. Example projects illustrate the basic features of KiCad, even if you have no prior knowledge of PCB design. The author describes the entire workflow from schematic entry to the intricacies of finalizing the files for PCB production and offers sound guidance on the process. Further full-fledged projects, of incremental difficulty, will be presented in a second book, together with a variety of advanced recipes.
€ 54,95
Leden: € 49,46
-

Elektor Digital KiCad Like A Pro – Fundamentals and Projects (E-book)
Getting started with the world’s best open-source PCB tool The latest iteration of KiCad, the world’s best free-to-use Printed Circuit Board tool, is packed with features usually found only in expensive commercial CAD tools. This modern, cross-platform application suite built around schematic and design editors, with auxiliary applications is a stable and mature PCB tool. KiCad 8 is a perfect fit for electronic engineers and makers. Here are the most significant improvements and features in KiCad 8, both over and under the hood: Modern user interface, completely redesigned from earlier versions Improved and customizable electrical and design rule checkers Theme editor allowing you to customize KiCad on your screen Ability to import projects from Eagle, CADSTART, and more Python scripting API Improved integrated SPICE circuit simulator Multi-sheet schematics Filters define selectable elements Enhanced interactive router helps you draw single tracks and differential pairs with precision New or enhanced tools to draw tracks, measure distances, tune track lengths, etc. Advanced interactive router Built-in bill of materials generator Realistic ray-tracing capable 3D viewer Customizable teardrops Plug-in manager for quick installation of themes, libraries and functionalities such as autorouters and BOM generators This book will teach you to use KiCad through a practical approach. It will help you become productive quickly and start designing your own boards. Example projects illustrate the basic features of KiCad, even if you have no prior knowledge of PCB design. The author describes the entire workflow from schematic entry to the intricacies of finalizing the files for PCB production and offers sound guidance on the process. Further full-fledged projects, of incremental difficulty, will be presented in a second book, together with a variety of advanced recipes.
€ 44,95
Leden: € 40,46
-

Elektor Digital Kickstart to Arduino Nano (E-book)
Get Cracking with the Arduino Nano V3, Nano Every, and Nano 33 IoT The seven chapters in this book serve as the first step for novices and microcontroller enthusiasts wishing to make a head start in Arduino programming. The first chapter introduces the Arduino platform, ecosystem, and existing varieties of Arduino Nano boards. It also teaches how to install various tools needed to get started with Arduino Programming. The second chapter kicks off with electronic circuit building and programming around your Arduino. The third chapter explores various buses and analog inputs. In the fourth chapter, you get acquainted with the concept of pulse width modulation (PWM) and working with unipolar stepper motors. In the fifth chapter, you are sure to learn about creating beautiful graphics and basic but useful animation with the aid of an external display. The sixth chapter introduces the readers to the concept of I/O devices such as sensors and the piezo buzzer, exploring their methods of interfacing and programming with the Arduino Nano. The last chapter explores another member of Arduino Nano family, Arduino Nano 33 IoT with its highly interesting capabilities. This chapter employs and deepens many concepts learned from previous chapters to create interesting applications for the vast world of the Internet of Things. The entire book follows a step-by-step approach to explain concepts and the operation of things. Each concept is invariably followed by a to-the-point circuit diagram and code examples. Next come detailed explanations of the syntax and the logic used. By closely following the concepts, you will become comfortable with circuit building, Arduino programming, the workings of the code examples, and the circuit diagrams presented. The book also has plenty of references to external resources wherever needed. An archive file (.zip) comprising the software examples and Fritzing-style circuit diagrams discussed in the book may be downloaded free of charge below.
€ 29,95
Leden: € 26,96
-

Elektor Digital Kickstart to Python 3 (E-book)
An Ultra-Rapid Programming Course This book serves as the very first step to for novices to learn Python programming. The book is divided into ten chapters. In the first chapter, readers are introduced to the basics of Python. It has the detailed instructions for installation on various platforms such as macOS, Windows, FreeBSD, and Linux. It also covers the other aspects of Python programming such as IDEs and Package Manager. The second chapter is where the readers get an opportunity to have a detailed hands-on with Python programming. It covers a group of built-in data structures popularly known as Python Collections. The third chapter covers the important concepts of strings, functions, and recursion. The fourth chapter focuses on the Object-Oriented Programming with Python. The fifth chapter discusses most commonly used custom data structures such as stack and queue. The sixth chapter spurs the creativity of the readers with Python’s Turtle graphics library. The seventh chapter explores animations and game development using the Pygame library. The eighth chapter covers handling data stored in a variety of file formats. The ninth chapter covers the area of Image processing with Wand library in Python. The tenth and the final chapter presents an array of assorted handy topics in Python. The entire book follows a step-by-step approach. The explanation of the topic is always followed by a detailed code example. The code examples are also explained in suitable detail and they are followed by the output in the form of text or screenshot wherever possible. Readers will become comfortable with Python programming language by closely following the concepts and the code examples in this book. The book also has references to external resources for readers to explore further. A download of the software code, and links to tutorial videos can be found on the Elektor website.
€ 29,95
Leden: € 26,96
-

Elektor Digital Kleine zenders voor zelfbouw (E-book)
Er zijn niet zoveel boeken te vinden over het ontwerpen en bouwen van zenders met een klein uitgangsvermogen. Dit boek beschrijft nauwkeurig de werking en bouw van maar liefst twintig audio- en videozender(tje)s. Daarmee biedt het aan de amateur-elektronicus, technicus, zendamateur en andere radio-enthousiasten het noodzakelijke materiaal om zich verder te bekwamen op dit gebied. Er wordt slechts weinig aandacht besteed aan de theorie, maar dat heeft een groot voordeel: ruim 300 pagina’s vol praktijk. De zenders, sommige eenvoudig, andere meer gecompliceerd, werden speciaal ontworpen voor het gebruik door amateurs. Ze werken tussen 150 kHz en 1300 MHz. De gebruikte techniek dateert vooral uit de jaren 90. Dit mag op het eerste gezicht een tekortkoming lijken, maar het is juist een extra argument voor publicatie. De technieken hebben zich inmiddels bewezen en er worden eenvoudige, goedkope en nog steeds goed verkrijgbare onderdelen gebruikt. Dit boek richt zich dus in de eerste plaats tot de potentiële gebruiker van HF-technieken, die er niet voor terugschrikt om dit soort schakelingen in elkaar te zetten. De schakelingen zijn probleemloos na te bouwen (nog een voordeel van zich bewezen technieken). Om dat te bereiken hebben de auteurs veel aandacht besteed aan: de testprocedures voor elke schakeling, de onderdelenlijst, instructies voor het vervaardigen van de spoelen en voor de afregeling. Bij de meeste schakelingen is bovendien een printontwerp afgedrukt. Naast zenders voor o.a. FM-stereo, AM, VHF-FM-amateur, R/C-TV, 40-m-CW-zender, 10-m-SSB, 2-m-NBFM, FM-video-link en amateur-TV vindt u in dit boek ook verwante schakelingen, zoals een down-converter voor 400, 900 en 1300 MHz en een HF-vermogensmeter.
€ 29,95
Leden: € 26,96


