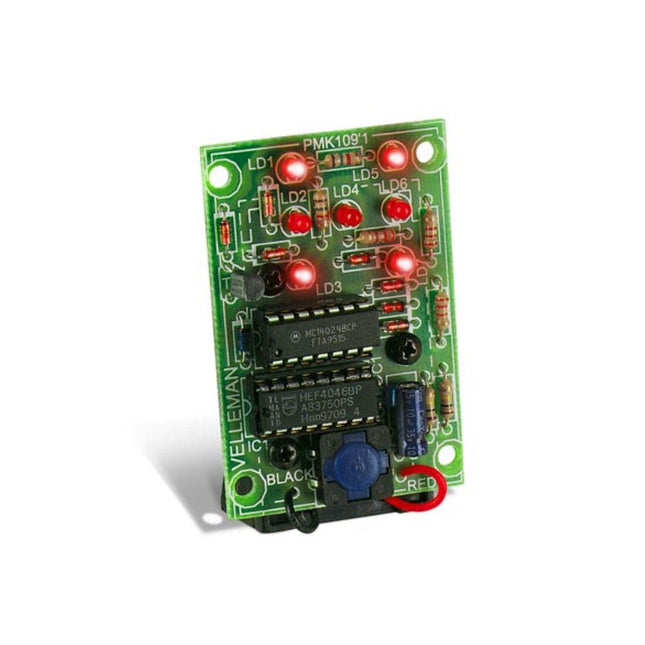
De Whadda 3D Kerstboom Kit is bedoeld voor hobbyisten en beginners die geïnteresseerd zijn in solderen en elektronica. Met dit bouwpakket bouw u een feestelijke LED-kerstboom.
Kenmerken
16 knipperende rode LED's
Er zijn extra groene en gele LED's meegeleverd om uw boom aan te passen
Kan worden opgehangen en door draden worden gevoerd
Werkt op 12 V DC (bijvoorbeeld in auto's)
Specificaties
Laag stroomverbruik
8 mA
Voeding
9 V-batterij (niet meegeleverd)
Afmetingen
102 x 88 x 80 mm
Gewicht
65 g
Downloads
Manual
Het Elektor Arduino Nano MCCAB Training Board bevat alle componenten (incl. Arduino Nano) die nodig zijn voor de oefeningen, zoals LED’s, schakelaars, drukknoppen, buzzer enz. Ook externe sensoren, motoren of modules kunnen worden gecheckt of bestuurd met dit microcontroller-trainingssysteem.
Specificaties (Arduino Nano Training Board MCCAB)
Voeding
Via de USB-aansluiting van de aangesloten pc of een externe voeding (niet inbegrepen)
Spanning
+5 Vcc
Ingangsspanning
Alle ingangen
0 V tot +5 V
VX1 en VX2
+8 V tot +12 V (alleen bij gebruik van een externe voeding)
Hardware
LCD
2x16 karakters
Potentiometer P1 & P2
JP3: Selectie van de werkspanning van P1 & P2
Verdelers
SV4: Verdeler voor de werkspanningenSV5, SV6: Verdelers voor de in-/uitgangen van de microcontroller
Schakelaars en knoppen
RESET knop op de Arduino Nano module; 6x drukknop schakelaars K1 ... K6; 6x Schuifschakelaars S1 ... S6; JP2: Jumper van de schakelaars met de ingangen van de microcontroller
Buzzer
Piezo buzzer ‘Buzzer1’ met jumper op JP6
Indicator LED’s
11 x LED: Status indicator voor de ingangen/uitgangen LED L op de Arduino Nano module, aangesloten op GPIO D13 JP6; Aansluiting van LED's LD10 ... LD20 met GPIO's D2 ... D12
Seriële interfacesSPI & I²C
JP4: Selectie van het signaal op pin X van de SPI-connector SV12 SV9 naar SV12: SPI-interface (3,3 V/5 V) of I²C-interface
Uitgangen voor externe apparaten
SV1, SV7: Geschakelde uitgang (maximaal +24 V/160 mA, extern aangesloten) SV2: 2x13 pinnen voor aansluiting van externe modules
3x3 LED matrix(9 rode LED's)
SV3: Kolommen van de 3x3 LED matrix (uitgangen D6 ... D8) JP1: Verbinding van de rijen met de GPIO's D3 ... D5
Software
MCCABLib library
Controle van hardware componenten (schakelaars, knoppen, LED's, 3x3 LED matrix, buzzer) op het MCCAB Training Board
Werktemperatuur
Tot +40 °C
Afmetingen
100 x 100 x 20 mm
Specificaties (Arduino Nano)
Microcontroller
ATmega328P
Architectuur
AVR
Spanning
5 V
Flash memory
32 KB, waarvan 2 KB gebruikt door de bootloader
SRAM
2 KB
Kloksnelheid
16 MHz
Analoge IN Pinnen
8
EEPROM
1 KB
DC stroom per I/O-pin
40 mA op één I/O-pin, totaal maximaal 200 mA op alle pinnen samen
Ingangsspanning
7-12 V
Digitale I/O-pinnen
22 (waarvan 6 PWM)
PWM Uitgangen
6
Stroomverbruik
19 mA
Afmetingen
18 x 45 mm
Gewicht
7 g
Inbegrepen
1x Elektor Arduino Nano Training Board MCCAB
1x Arduino Nano
Get Cracking with the Arduino Nano V3, Nano Every, and Nano 33 IoT
The seven chapters in this book serve as the first step for novices and microcontroller enthusiasts wishing to make a head start in Arduino programming. The first chapter introduces the Arduino platform, ecosystem, and existing varieties of Arduino Nano boards. It also teaches how to install various tools needed to get started with Arduino Programming. The second chapter kicks off with electronic circuit building and programming around your Arduino. The third chapter explores various buses and analog inputs. In the fourth chapter, you get acquainted with the concept of pulse width modulation (PWM) and working with unipolar stepper motors.
In the fifth chapter, you are sure to learn about creating beautiful graphics and basic but useful animation with the aid of an external display. The sixth chapter introduces the readers to the concept of I/O devices such as sensors and the piezo buzzer, exploring their methods of interfacing and programming with the Arduino Nano. The last chapter explores another member of Arduino Nano family, Arduino Nano 33 IoT with its highly interesting capabilities. This chapter employs and deepens many concepts learned from previous chapters to create interesting applications for the vast world of the Internet of Things.
The entire book follows a step-by-step approach to explain concepts and the operation of things. Each concept is invariably followed by a to-the-point circuit diagram and code examples. Next come detailed explanations of the syntax and the logic used. By closely following the concepts, you will become comfortable with circuit building, Arduino programming, the workings of the code examples, and the circuit diagrams presented. The book also has plenty of references to external resources wherever needed.
An archive file (.zip) comprising the software examples and Fritzing-style circuit diagrams discussed in the book may be downloaded free of charge below.
Technology is constantly changing. New microcontrollers become available every year. The one thing that has stayed the same is the C programming language used to program these microcontrollers. If you would like to learn this standard language to program microcontrollers, then this book is for you!
Arduino is the hardware platform used to teach the C programming language as Arduino boards are available worldwide and contain the popular AVR microcontrollers from Atmel.
Atmel Studio is used as the development environment for writing C programs for AVR microcontrollers. It is a full-featured integrated development environment (IDE) that uses the GCC C software tools for AVR microcontrollers and is free to download.
At a glance:
Start learning to program from the very first chapter
No programming experience is necessary
Learn by doing – type and run the example programs
A fun way to learn the C programming language
Ideal for electronic hobbyists, students and engineers wanting to learn the C programming language in an embedded environment on AVR microcontrollers
Use the free full-featured Atmel Studio IDE software for Windows
Write C programs for 8-bit AVR microcontrollers as found on the Arduino Uno and MEGA boards
Example code runs on Arduino Uno and Arduino MEGA 2560 boards and can be adapted to run on other AVR microcontrollers or boards
Use the AVR Dragon programmer/debugger in conjunction with Atmel Studio to debug C programs
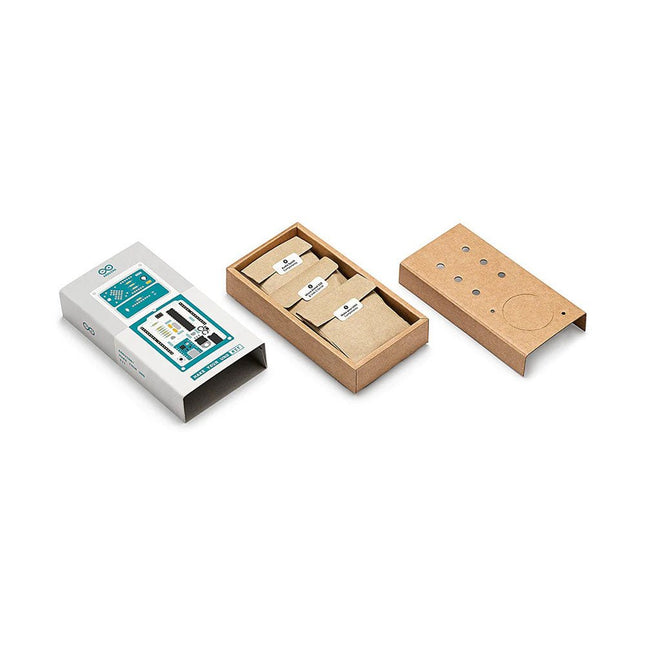
Doe basiskennis van elektronica op door zelf handmatig uw Arduino Uno in elkaar te zetten, raak vertrouwd met solderen door eigenhandig elk onderdeel te monteren, en laat vervolgens uw creativiteit de vrije loop met de enige kit waarmee u ook meteen een synthesizer kan bouwen! De Arduino Make-Your-Uno kit is echt de beste kit om te leren solderen. En als u klaar bent kunt u met deze bundel ook een synthesizer bouwen en muziek maken. Een kit met alle componenten om uw eigen Arduino Uno mét audio synthesizerkaart te bouwen. De Make-Your-Uno kit wordt geleverd met een complete set instructies, beschikbaar op een speciale website. Deze biedt videomateriaal, een interactieve 3D-viewer voor het volgen van gedetailleerde instructies, en hoe u uw board kunt programmeren zodra deze is afgebouwd. Deze kit bevat: Arduino Make-Your-Uno 1x Make-Your-Uno PCB 1x USB C serial adapter board 7x weerstanden 1k Ohm 2x weerstanden 10k Ohm 2x weerstanden 1M Ohm 1x diode (1N4007) 1x 16 MHz kristal 4x gele LED's 1x groene LED 1x drukknop 1x MOSFET 1x LDO (3,3 V) 1x LDO (5 V) 3x keramische condensatoren (22pF) 3x elektrolytische condensatoren (47uF) 7x polyester condensatoren (100nF) 1x socket voor ATMega 328p 2x I/O connectoren 1x connector header 6 pins 1x barrel jack connector 1x ATmega 328p microcontroller Arduino Audio Synth 1x Audio Synth PCB 1x weerstand 100k Ohm 1x weerstand 10 Ohm 1x audio versterker (LM386) 1x keramische condensator (47nF) 1x elektrolytische condensator (47uF) 1x elektrolytische condensator (220uF) 1x polyester condensator (100nF) 4x connectoren pin header 6x potentiometer 10k Ohm met kunststof knoppen Reserveonderdelen 2x elektrolytische condensatoren (47uF) 2x polyester condensatoren (100nF) 2x keramische condensatoren (22pF) 1x drukknop 1x gele LED 1x groene LED Mechanische onderdelen 5x afstandhouders 12 mm 11x afstandhouders 6 mm 5x schroefmoeren 2x schroeven 12 mm
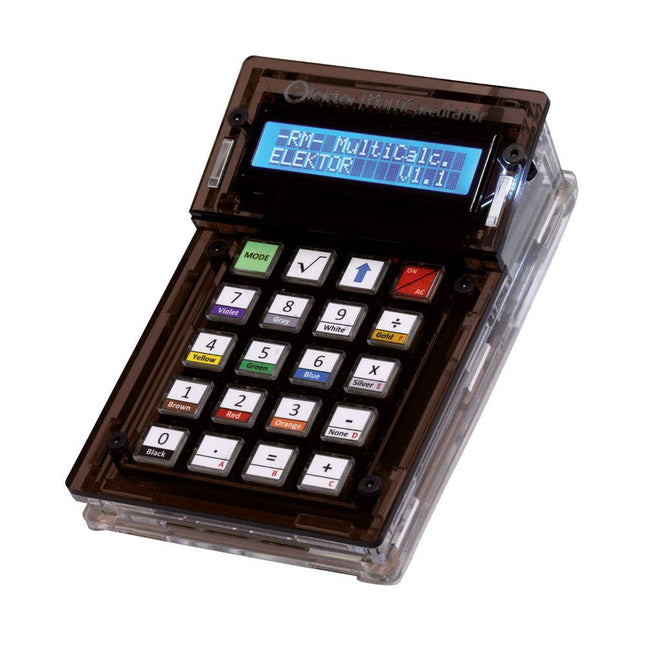
De Elektor MultiCalculator Kit is een op Arduino-gebaseerde multifunctionele rekenmachine die verder gaat dan basisberekeningen. Hij biedt 22 functies, waaronder licht- en temperatuurmeting, differentiële temperatuuranalyse en NEC IR-afstandsbedieningsdecodering. De Elektor MultiCalculator is een handig hulpmiddel voor gebruik in je projecten of voor educatieve doeleinden.
De kit heeft een Pro Mini module als rekeneenheid. De printplaat is eenvoudig te monteren met behulp van through-hole componenten. De behuizing bestaat uit 11 acrylpanelen en montagemateriaal voor eenvoudige montage. Bovendien is het apparaat uitgerust met een 16x2 alfanumeriek LCD-scherm, 20 knoppen en temperatuursensoren.
De Elektor MultiCalculator is programmeerbaar met de Arduino IDE via een 6-weg PCB-header. De beschikbare software is tweetalig (Engels en Nederlands). De calculator kan worden geprogrammeerd met een programmeeradapter en wordt gevoed via USB-C.
Bedrijfsmodi
Rekenmachine
4-ringsweerstandscode
5-ringsweerstandscode
Conversie van decimaal naar hexadecimaal en tekens (ASCII)
Conversie van hexadecimaal naar decimaal en tekens (ASCII)
Conversie van decimaal naar binair en tekens (ASCII)
Conversie van binair naar decimaal en hexadecimaal
Berekening van Hz, nF, capacitieve reactantie (XC)
Berekening van Hz, µH, inductieve reactantie (XL)
Weerstandberekening van twee parallel geschakelde weerstanden
Weerstandberekening van twee in serie geschakelde weerstanden
Berekening van onbekende parallelle weerstand
Temperatuurmeting
Verschiltemperatuurmeting T1&T2 en Delta (δ)
Lichtmeting
Stopwatch met rondetijdfunctie
Artikelteller
NEC IR-decodering van de afstandsbediening
AWG-conversie (American Wire Gauge)
Dobbelstenen gooien
Personaliseer het opstartbericht
Temperatuurkalibratie
Specificaties
Menutalen: Engels, Nederlands
Afmetingen: 92 x 138 x 40 mm
Bouwtijd: ongeveer 5 uur
Inbegrepen
PCB's en componenten met doorlopende gaten
Voorgesneden acrylplaten met alle mechanische onderdelen
Pro Mini-microcontrollermodule (ATmega328/5 V/16 MHz)
Programmeeradapter
Waterdichte temperatuursensoren
USB-C kabel
Downloads
Software
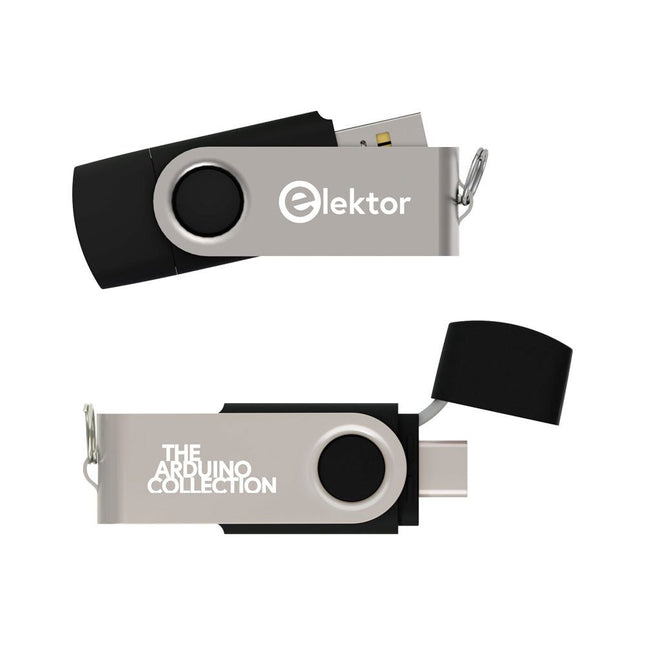
Deze USB-stick bevat een selectie van meer dan 300 artikelen over Arduino gepubliceerd in Elektor Magazine. De inhoud bestaat uit zowel achtergrondartikelen als projecten met de volgende onderwerpen:
Software & hardware ontwikkeling: Tutorials over de ontwikkeling van Arduino-software met behulp van Arduino IDE, Atmel Studio, Shields en essentiële programmeerconcepten.
Educatie: Een microcontroller Bootcamp biedt een gestructureerde aanpak voor het programmeren van embedded systemen.
Data acquisitie & meten: Projecten zoals een 16-bits datalogger, draaibank toerenteller en een AC netanalyser voor het vastleggen en analyseren van real-time signalen.
Draadloze communicatie: Leer hoe je draadloze netwerken implementeert, een Android interface maakt en effectief communiceert met microcontrollers.
Robotica en automatisering: Omvat de Arduino Nano Robot Controller, ondersteunende boards voor automatisering, en een verkenning van verschillende Arduino-shields om de functionaliteit te verbeteren.
Zelfbouw-projecten: Unieke projecten zoals laserprojectie, Numitron klok en thermometer, ELF ontvanger, Theremino, en touch LED interfaces laten creatieve toepassingen zien.
Of u nu een beginner bent of een ervaren maker, deze collectie is een waardevolle bron om te leren, te experimenteren en de grenzen van de Arduino-technologie te verleggen.
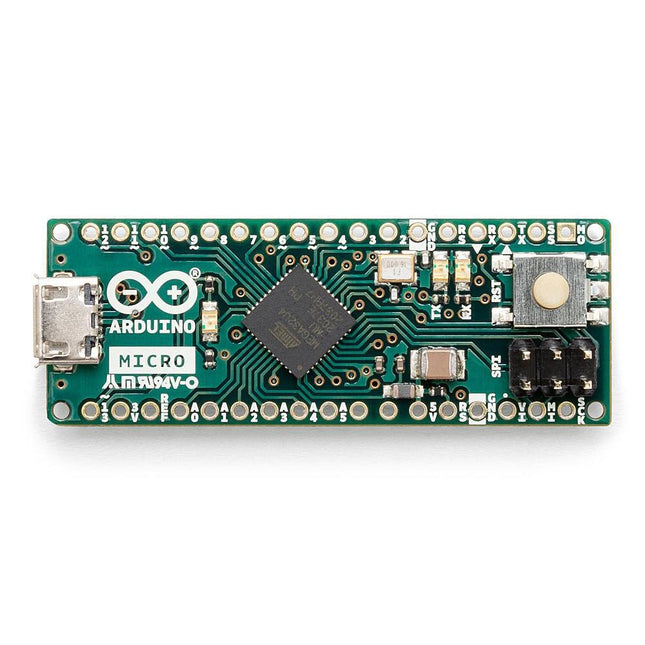
De Micro bevat alles wat nodig is om de microcontroller te ondersteunen; sluit hem eenvoudig aan op een computer met een micro USB-kabel om aan de slag te gaan. Het heeft een vormfactor die het mogelijk maakt om gemakkelijk op een breadboard te worden geplaatst. Het Micro-bord is vergelijkbaar met de Arduino Leonardo in die zin dat de ATmega32U4 ingebouwde USB-communicatie heeft, waardoor er geen secundaire processor nodig is. Hierdoor kan de Micro verschijnen aan een aangesloten computer als een muis en toetsenbord, in aanvulling op een virtuele (CDC) seriële / COM-poort. Microcontroller ATmega32U4 Bedrijfsspanning 5 V Inputspanning 7 V - 12 V Analoge ingangspinnen 12 PWM Pennen 7 DC I/O Pen 20 DC stroom per I/O Pin 20 mA DC stroom voor 3,3 V pin 50 mA Flash Geheugen 32 KB waarvan 4 KB gebruikt door de bootloader SRAM 2,5 KB EEPROM 1 KB Kloksnelheid 16 MHz LED_Builtin 13 Lengte 45 mm Breedte 18 mm Gewicht 13 g
Programming and Projects for the Minima and WiFi
Based on the low-cost 8-bit ATmega328P processor, the Arduino Uno R3 board is likely to score as the most popular Arduino family member, and this workhorse has been with us for many years. Eleven years later, the long-overdue successor, the Arduino Uno R4, was released. It is built around a 48 MHz, 32-bit Arm Cortex-M4 microcontroller and provides significantly expanded SRAM and Flash memory. Additionally, a higher-precision ADC and a new DAC are added to the design. The Uno R4 board also supports the CAN Bus with an interface.
Two versions of the board are available: Uno R4 Minima, and Uno R4 WiFi. This book is about using these new boards to develop many different and interesting projects with just a handful of parts and external modules. All projects described in the book have been fully tested on the Uno R4 Minima or the Uno R4 WiFi board, as appropriate.
The project topics include the reading, control, and driving of many components and modules in the kit as well as on the relevant Uno R4 board, including
LEDs
7-segment displays (using timer interrupts)
LCDs
Sensors
RFID Reader
4x4 Keypad
Real-time clock (RTC)
Joystick
8×8 LED matrix
Motors
DAC (Digital-to-analog converter)
LED matrix
WiFi connectivity
Serial UART
CAN bus
Infrared controller and receiver
Simulators
… all in creative and educational ways with the project operation and associated software explained in great detail.
An 8-in-1 test & measurement instrument for the electronics workbench
A well-equipped electronics lab is crammed with power supplies, measuring devices, test equipment and signal generators. Wouldn‘t it be better to have one compact device for almost all tasks? Based on the Arduino, a PC interface is to be developed that’s as versatile as possible for measurement and control. It simply hangs on a USB cable and – depending on the software – forms the measuring head of a digital voltmeter or PC oscilloscope, a signal generator, an adjustable voltage source, a frequency counter, an ohmmeter, a capacitance meter, a characteristic curve recorder, and much more.
The circuits and methods collected here are not only relevant for exactly these tasks in the "MSR" electronics lab, but many details can also be used within completely different contexts.
,
van Lobna Belarbi
Onmisbare Arduino-Boards, Kits & Tools van Elektor voor jouw Arduino-avontuur
Of je nu een beginner bent die de wereld van microcontrollers wil verkennen of een ervaren maker die zijn gereedschapskist wil uitbreiden — Elektor biedt...