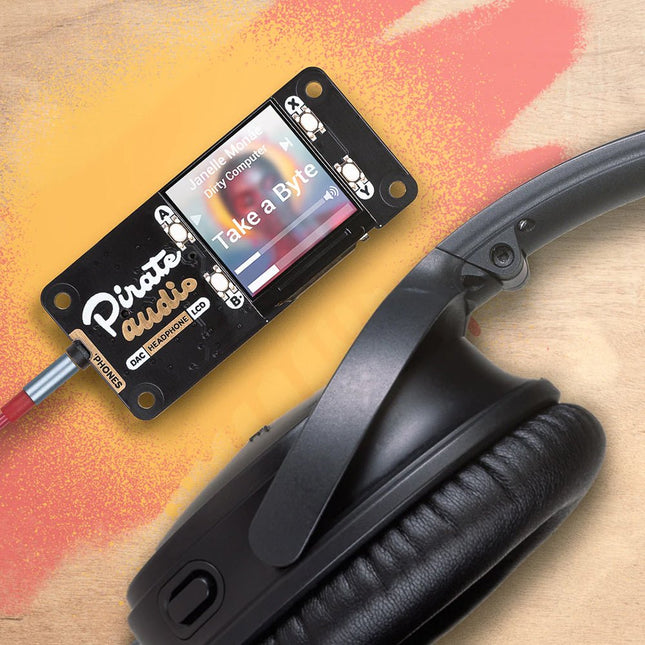
Je zou Pirate Audio Headphone Amp kunnen gebruiken om een nette, zakformaat speler te bouwen voor lokale audiobestanden (MP3, FLAC, etc) of voor het streamen van muziek van online diensten zoals Spotify. Om je op weg te helpen heeft Pimoroni plugins gebouwd voor Mopidy waarmee je prachtige album art kunt weergeven, je tracks kunt afspelen/pauzeren en het volume kunt regelen. De DAC en hoofdtelefoonversterker geven je heldere digitaal versterkte audio via je hoofdtelefoon met kabel. Pirate Audio is een reeks van alles-in-een audio boards voor Raspberry Pi, met hoge kwaliteit digitale audio, prachtig heldere IPS displays voor album art, tactiele knoppen voor playback controle, en een aangepaste Pirate Audio software en installer om het opzetten van dit allemaal een fluitje van een cent te maken.Functies
Versterkte digitale audio (24-bit / 192KHz) over I2S
PAM8908 hoofdtelefoonversterker chip
Low-gain / high-gain schakelaar (high-gain verhoogt met 12dB)
PCM5100A DAC-chip
3.5mm stereo aansluiting
1,3' IPS-kleurenscherm (240x240px) (ST7789 driver)
Vier tactiele knoppen
Mini HAT-formaat bord
Volledig gemonteerd
Compatibel met alle 40-pin header Raspberry Pi modellen
Afmetingen: 65x30.5x9.5mm
SoftwareDe Pirate Audio software en installer installeert de Python bibliotheek voor de LCD, configureert de I2S audio en SPI, en installeert vervolgens Mopidy en de aangepaste Pirate Audio plugins om album art en track info weer te geven, en om de knoppen te gebruiken voor playback control.Hier ziet u hoe u aan de slag kunt:
Stel een SD-kaart in met de laatste versie van Raspberry Pi OS.
Gebonden met Wi-Fi of een bekabeld netwerk.
Open een terminal en typ het volgende:git clone https://github.com/pimoroni/pirate-audiocd pirate-audio/mopidysudo ./install.sh
Reboot uw Pi
Downloads
PAM8908 Datasheet
PCM5100A-gegevensblad
Pirate Audio software
Deze USB-stick bevat een selectie van meer dan 300 artikelen over Arduino gepubliceerd in Elektor Magazine. De inhoud bestaat uit zowel achtergrondartikelen als projecten met de volgende onderwerpen:
Software & hardware ontwikkeling: Tutorials over de ontwikkeling van Arduino-software met behulp van Arduino IDE, Atmel Studio, Shields en essentiële programmeerconcepten.
Educatie: Een microcontroller Bootcamp biedt een gestructureerde aanpak voor het programmeren van embedded systemen.
Data acquisitie & meten: Projecten zoals een 16-bits datalogger, draaibank toerenteller en een AC netanalyser voor het vastleggen en analyseren van real-time signalen.
Draadloze communicatie: Leer hoe je draadloze netwerken implementeert, een Android interface maakt en effectief communiceert met microcontrollers.
Robotica en automatisering: Omvat de Arduino Nano Robot Controller, ondersteunende boards voor automatisering, en een verkenning van verschillende Arduino-shields om de functionaliteit te verbeteren.
Zelfbouw-projecten: Unieke projecten zoals laserprojectie, Numitron klok en thermometer, ELF ontvanger, Theremino, en touch LED interfaces laten creatieve toepassingen zien.
Of u nu een beginner bent of een ervaren maker, deze collectie is een waardevolle bron om te leren, te experimenteren en de grenzen van de Arduino-technologie te verleggen.
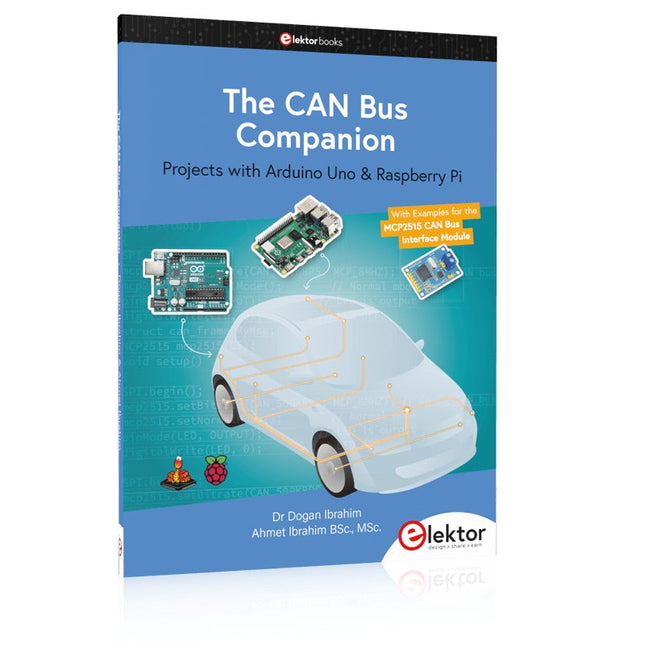
Projects with Arduino Uno & Raspberry Pi with Examples for the MCP2515 CAN Bus Interface Module
This book details the use of the Arduino Uno and the Raspberry Pi 4 in practical CAN bus based projects. Using either the Arduino Uno or the Raspberry Pi with off-the-shelf CAN bus interface modules considerably ease developing, debugging, and testing CAN bus based projects.
This book is written for students, practicing engineers, enthusiasts, and for everyone else wanting to learn more about the CAN bus and its applications. The book assumes that the reader has some knowledge of basic electronics. Knowledge of the C and Python programming languages and programming the Arduino Uno using its IDE and Raspberry Pi will be useful, especially if the reader intends to develop microcontroller-based projects using the CAN bus.
The book should be a useful source of reference material for anyone interested in finding answers to questions such as:
What bus systems are available for the automotive industry?
What are the principles of the CAN bus?
How can I create a physical CAN bus?
What types of frames (or data packets) are available in a CAN bus system?
How can errors be detected in a CAN bus system and how dependable is a CAN bus system?
What types of CAN bus controllers exist?
How do I use the MCP2515 CAN bus controller?
How do I create 2-node Arduino Uno-based CAN bus projects?
How do I create 3-node Arduino Uno-based CAN bus projects?
How do I set the acceptance masks and acceptance filters?
How do I analyze data on the CAN bus?
How do I create 2-node Raspberry Pi-based CAN bus projects?
How do I create 3-node Raspberry Pi-based CAN bus projects?
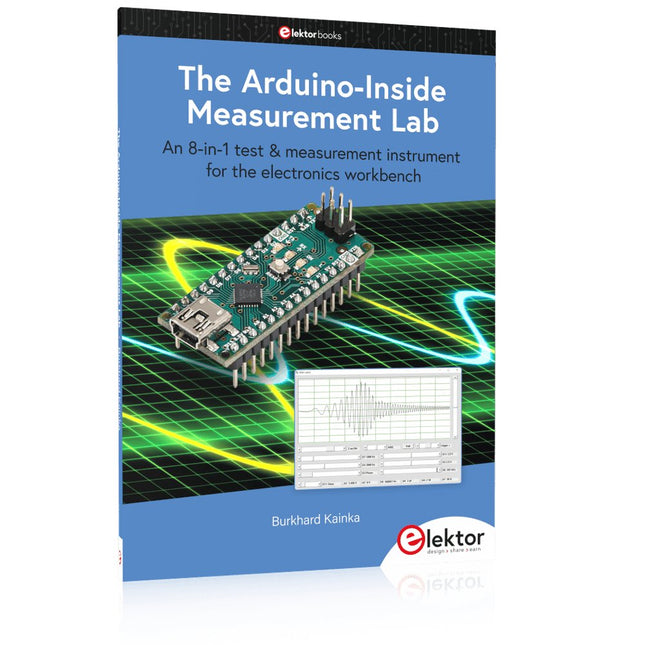
An 8-in-1 test & measurement instrument for the electronics workbench
A well-equipped electronics lab is crammed with power supplies, measuring devices, test equipment and signal generators. Wouldn‘t it be better to have one compact device for almost all tasks? Based on the Arduino, a PC interface is to be developed that’s as versatile as possible for measurement and control. It simply hangs on a USB cable and – depending on the software – forms the measuring head of a digital voltmeter or PC oscilloscope, a signal generator, an adjustable voltage source, a frequency counter, an ohmmeter, a capacitance meter, a characteristic curve recorder, and much more.
The circuits and methods collected here are not only relevant for exactly these tasks in the "MSR" electronics lab, but many details can also be used within completely different contexts.
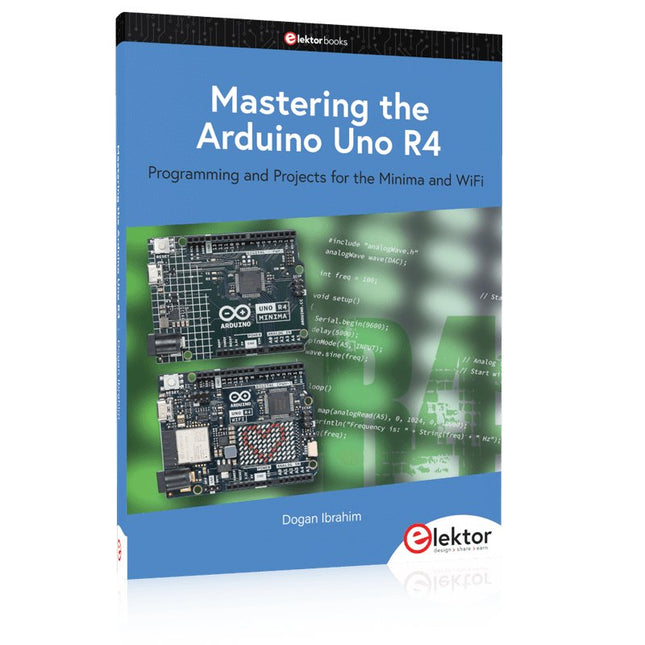
Programming and Projects for the Minima and WiFi
Based on the low-cost 8-bit ATmega328P processor, the Arduino Uno R3 board is likely to score as the most popular Arduino family member, and this workhorse has been with us for many years. Eleven years later, the long-overdue successor, the Arduino Uno R4, was released. It is built around a 48 MHz, 32-bit Arm Cortex-M4 microcontroller and provides significantly expanded SRAM and Flash memory. Additionally, a higher-precision ADC and a new DAC are added to the design. The Uno R4 board also supports the CAN Bus with an interface.
Two versions of the board are available: Uno R4 Minima, and Uno R4 WiFi. This book is about using these new boards to develop many different and interesting projects with just a handful of parts and external modules. All projects described in the book have been fully tested on the Uno R4 Minima or the Uno R4 WiFi board, as appropriate.
The project topics include the reading, control, and driving of many components and modules in the kit as well as on the relevant Uno R4 board, including
LEDs
7-segment displays (using timer interrupts)
LCDs
Sensors
RFID Reader
4x4 Keypad
Real-time clock (RTC)
Joystick
8×8 LED matrix
Motors
DAC (Digital-to-analog converter)
LED matrix
WiFi connectivity
Serial UART
CAN bus
Infrared controller and receiver
Simulators
… all in creative and educational ways with the project operation and associated software explained in great detail.
A Practical Guide to AI, Python, and Hardware Projects
Welcome to your BeagleY-AI journey! This compact, powerful, and affordable single-board computer is perfect for developers and hobbyists. With its dedicated 4 TOPS AI co-processor and a 1.4 GHz Quad-core Cortex-A53 CPU, the BeagleY-AI is equipped to handle both AI applications and real-time I/O tasks. Powered by the Texas Instruments AM67A processor, it offers DSPs, a 3D graphics unit, and video accelerators.
Inside this handbook, you‘ll find over 50 hands-on projects that cover a wide range of topics—from basic circuits with LEDs and sensors to an AI-driven project. Each project is written in Python 3 and includes detailed explanations and full program listings to guide you. Whether you‘re a beginner or more advanced, you can follow these projects as they are or modify them to fit your own creative ideas.
Here’s a glimpse of some exciting projects included in this handbook:
Morse Code Exerciser with LED or BuzzerType a message and watch it come to life as an LED or buzzer translates your text into Morse code.
Ultrasonic Distance MeasurementUse an ultrasonic sensor to measure distances and display the result in real time.
Environmental Data Display & VisualizationCollect temperature, pressure, and humidity readings from the BME280 sensor, and display or plot them on a graphical interface.
SPI – Voltmeter with ADCLearn how to measure voltage using an external ADC and display the results on your BeagleY-AI.
GPS Coordinates DisplayTrack your location with a GPS module and view geographic coordinates on your screen.
BeagleY-AI and Raspberry Pi 4 CommunicationDiscover how to make your BeagleY-AI and Raspberry Pi communicate over a serial link and exchange data.
AI-Driven Object Detection with TensorFlow LiteSet up and run an object detection model using TensorFlow Lite on the BeagleY-AI platform, with complete hardware and software details provided.
Over 45 Builds for the Legendary 555 Chip (and the 556, 558)
The 555 timer IC, originally introduced by the Signetics Corporation around 1971, is sure to rank high among the most popular analog integrated circuits ever produced. Originally called the IC Time Machine, this chip has been used in many timer-related projects by countless people over decades.
This book is all about designing projects based on the 555 timer IC. Over 45 fully tested and documented projects are presented. All projects have been fully tested by the author by constructing them individually on a breadboard. You are not expected to have any programming experiences for constructing or using the projects given in the book. However, it’s definitely useful to have some knowledge of basic electronics and the use of a breadboard for constructing and testing electronic circuits.
Some of the projects in the book are:
Alternately Flashing Two LEDs
Changing LED Flashing Rate
Touch Sensor On/Off Switch
Switch On/Off Delay
Light-Dependent Sound
Dark/Light Switch
Tone Burst Generator
Long Duration Timer
Chasing LEDs
LED Roulette Game
Traffic Lights
Continuity Tester
Electronic Lock
Switch Contact Debouncing
Toy Electronic Organ
Multiple Sensor Alarm System
Metronome
Voltage Multipliers
Electronic Dice
7-Segment Display Counter
Motor Control
7-Segment Display Dice
Electronic Siren
Various Other Projects
The projects given in the book can be modified or expanded by you for your very own applications. Electronic engineering students, people engaged in designing small electronic circuits, and electronic hobbyists should find the projects in the book instructive, fun, interesting, and useful.
ModbusRTU and ModbusTCP examples with the Arduino Uno and ESP8266
Introduction to PLC programming with OpenPLC, the first fully open source Programmable Logic Controller on the Raspberry Pi, and Modbus examples with Arduino Uno and ESP8266
PLC programming is very common in industry and home automation. This book describes how the Raspberry Pi 4 can be used as a Programmable Logic Controller. Before taking you into the programming, the author starts with the software installation on the Raspberry Pi and the PLC editor on the PC, followed by a description of the hardware.
You'll then find interesting examples in the different programming languages complying with the IEC 61131-3 standard. This manual also explains in detail how to use the PLC editor and how to load and execute the programs on the Raspberry Pi. All IEC languages are explained with examples, starting with LD (Ladder Diagram) over ST (Structured Control Language) to SFC (Special Function Chart). All examples can be downloaded from the author's website.
Networking gets thorough attention too. The Arduino Uno and the ESP8266 are programmed as ModbusRTU or ModbusTCP modules to get access to external peripherals, reading sensors and switching electrical loads. I/O circuits complying with the 24 V industry standard may also be of interest for the reader.
The book ends with an overview of commands for ST and LD. After reading the book, the reader will be able to create his own controllers with the Raspberry Pi.
Op deze USB-stick vindt u een selectie van meer dan 350 artikelen over RF, radio en communicatie, gepubliceerd in Elektor Magazine. De inhoud bestaat uit zowel achtergrondartikelen als projecten met de volgende onderwerpen:
Basisradiogerelateerde circuits, maar ook complexere circuits zoals filters, oscillatoren en versterkers.
Ontwerp, constructie en theorie van antennes voor het efficiënt verzenden en ontvangen van radiosignalen.
Ontwerp en analyse van RF-circuits, waaronder filters, mixers, PLL's en frequentiesynthesizers. Hulpmiddelen en technieken voor het voorspellen van de voortplantingspaden van radiogolven en het meten van de RF-signaalsterkte.
Technieken voor het verwerken van digitale signalen in RF-systemen, inclusief modulatie- en demodulatiemethoden.
Projecten op radio-ontvangers, AM, FM, SSB, CW, DRM, DAB, DAB+, Software Defined Radio en meer.
Projecten over Wi-Fi, Bluetooth, LoRaWAN en meer.
U kunt de artikelzoekfunctie gebruiken om specifieke inhoud in de volledige tekst te vinden. De resultaten worden altijd weergegeven als vooraf opgemaakte PDF-documenten. U kunt Adobe Reader gebruiken om door artikelen te bladeren, en u kunt de geïntegreerde zoekfuncties van Adobe Reader gebruiken om exemplaren van afzonderlijke woorden en uitdrukkingen te vinden.
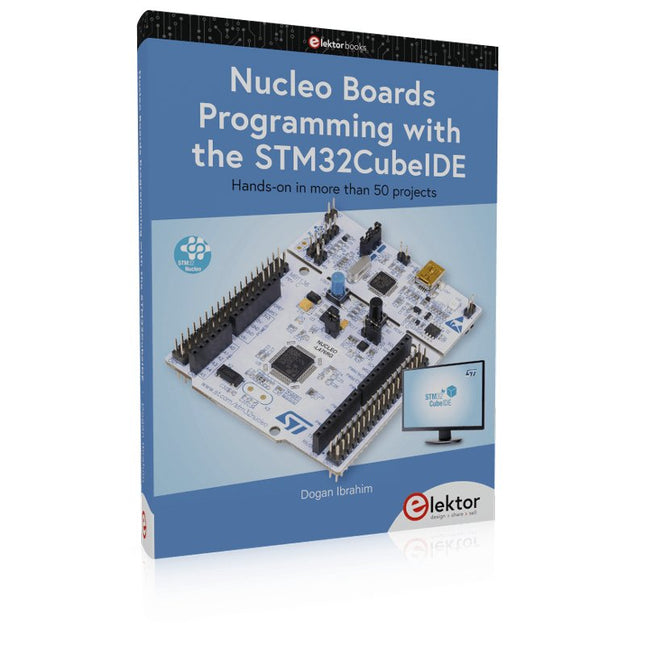
Hands-on in more than 50 projects
STM32 Nucleo family of processors are manufactured by STMicroelectronics. These are low-cost ARM microcontroller development boards. This book is about developing projects using the popular STM32CubeIDE software with the Nucleo-L476RG development board. In the early Chapters of the book the architecture of the Nucleo family is briefly described.
The book covers many projects using most features of the Nucleo-L476RG development board where the full software listings for the STM32CubeIDE are given for each project together with extensive descriptions. The projects range from simple flashing LEDs to more complex projects using modules, devices, and libraries such as GPIO, ADC, DAC, I²C, SPI, LCD, DMA, analogue inputs, power management, X-CUBE-MEMS1 library, DEBUGGING, and others. In addition, several projects are given using the popular Nucleo Expansion Boards. These Expansion Boards plug on top of the Nucleo development boards and provide sensors, relays, accelerometers, gyroscopes, Wi-Fi, and many others. Using an expansion board together with the X-CUBE-MEMS1 library simplifies the task of project development considerably.
All the projects in the book have been tested and are working. The following sub-headings are given for each project: Project Title, Description, Aim, Block Diagram, Circuit Diagram, and Program Listing for the STM32CubeIDE.
In this book you will learn about
STM32 microcontroller architecture;
the Nucleo-L476RG development board in projects using the STM32CubeIDE integrated software development tool;
external and internal interrupts and DMA;
DEBUG, a program developed using the STM32CubeIDE;
the MCU in Sleep, Stop, and in Standby modes;
Nucleo Expansion Boards with the Nucleo development boards.
What you need
a PC with Internet connection and a USB port;
STM32CubeIDE software (available at STMicroelectronics website free of charge)
the project source files, available from the book’s webpage hosted by Elektor;
Nucleo-L476RG development board;
simple electronic devices such as LEDs, temperature sensor, I²C and SPI chips, and a few more;
Nucleo Expansion Boards (optional).
Commands and Applications
With more than 20 million users worldwide, LTspice XVII is the industry’s definitive electronic simulation software. The pure power, speed and accuracy of its simulations and its robustness make it an irreplaceable tool. This book is both an exhaustive operating manual for the latest version and an invaluable collection of examples and procedures with nearly 700 illustrations, covering everything from initially getting to grips with LTspice XVII to its exact application and extensive use. It will probably answer every question that’s likely to arise during training.
All commands and definitions are detailed and classified by topic to make referencing the LTSpice XVII knowledge fast and easy.
An 8-in-1 test & measurement instrument for the electronics workbench
A well-equipped electronics lab is crammed with power supplies, measuring devices, test equipment and signal generators. Wouldn‘t it be better to have one compact device for almost all tasks? Based on the Arduino, a PC interface is to be developed that’s as versatile as possible for measurement and control. It simply hangs on a USB cable and – depending on the software – forms the measuring head of a digital voltmeter or PC oscilloscope, a signal generator, an adjustable voltage source, a frequency counter, an ohmmeter, a capacitance meter, a characteristic curve recorder, and much more.
The circuits and methods collected here are not only relevant for exactly these tasks in the "MSR" electronics lab, but many details can also be used within completely different contexts.