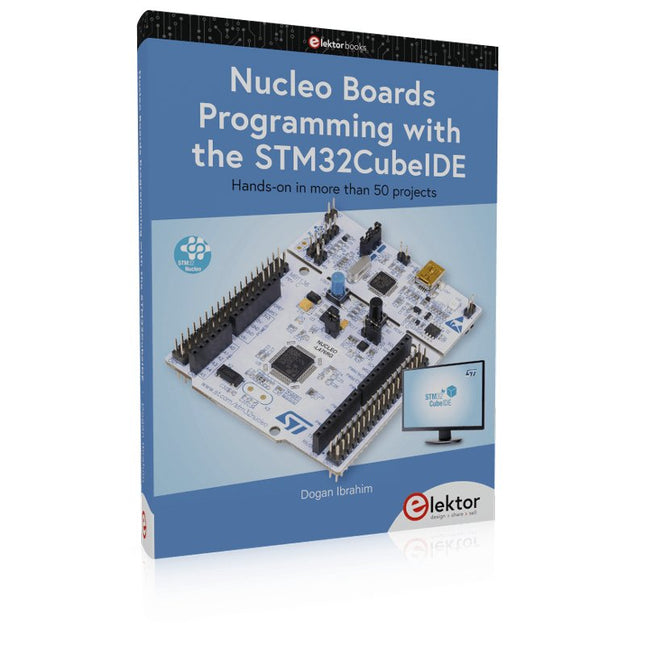
Hands-on in more than 50 projects
STM32 Nucleo family of processors are manufactured by STMicroelectronics. These are low-cost ARM microcontroller development boards. This book is about developing projects using the popular STM32CubeIDE software with the Nucleo-L476RG development board. In the early Chapters of the book the architecture of the Nucleo family is briefly described.
The book covers many projects using most features of the Nucleo-L476RG development board where the full software listings for the STM32CubeIDE are given for each project together with extensive descriptions. The projects range from simple flashing LEDs to more complex projects using modules, devices, and libraries such as GPIO, ADC, DAC, I²C, SPI, LCD, DMA, analogue inputs, power management, X-CUBE-MEMS1 library, DEBUGGING, and others. In addition, several projects are given using the popular Nucleo Expansion Boards. These Expansion Boards plug on top of the Nucleo development boards and provide sensors, relays, accelerometers, gyroscopes, Wi-Fi, and many others. Using an expansion board together with the X-CUBE-MEMS1 library simplifies the task of project development considerably.
All the projects in the book have been tested and are working. The following sub-headings are given for each project: Project Title, Description, Aim, Block Diagram, Circuit Diagram, and Program Listing for the STM32CubeIDE.
In this book you will learn about
STM32 microcontroller architecture;
the Nucleo-L476RG development board in projects using the STM32CubeIDE integrated software development tool;
external and internal interrupts and DMA;
DEBUG, a program developed using the STM32CubeIDE;
the MCU in Sleep, Stop, and in Standby modes;
Nucleo Expansion Boards with the Nucleo development boards.
What you need
a PC with Internet connection and a USB port;
STM32CubeIDE software (available at STMicroelectronics website free of charge)
the project source files, available from the book’s webpage hosted by Elektor;
Nucleo-L476RG development board;
simple electronic devices such as LEDs, temperature sensor, I²C and SPI chips, and a few more;
Nucleo Expansion Boards (optional).
The FRDM-MCXN947 is a compact and versatile development board designed for rapid prototyping with MCX N94 and N54 microcontrollers. It features industry-standard headers for easy access to the MCU's I/Os, integrated open-standard serial interfaces, external flash memory, and an onboard MCU-Link debugger.
Specificaties
Microcontroller
MCX-N947 Dual Arm Cortex-M33 cores @ 150 MHz each with optimized performance efficiency, up to 2 MB dual-bank flash with optional full ECC RAM, External flash
Accelerators: Neural Processing Unit, PowerQuad, Smart DMA, etc.
Memory Expansion
*DNP Micro SD card socket
Connectivity
Ethernet Phy and connector
HS USB-C connectors
SPI/I²C/UART connector (PMOD/mikroBUS, DNP)
WiFi connector (PMOD/mikroBUS, DNP)
CAN-FD transceiver
Debug
On-board MCU-Link debugger with CMSIS-DAP
JTAG/SWD connector
Sensor
P3T1755 I³C/I²C Temp Sensor, Touch Pad
Expansion Options
Arduino Header (with FRDM expansion rows)
FRDM Header
FlexIO/LCD Header
SmartDMA/Camera Header
Pmod *DNP
mikroBUS
User Interface
RGB user LED, plus Reset, ISP, Wakeup buttons
Inbegrepen
1x FRDM-MCXN947 Development Board
1x USB-C Cable
1x Quick Start Guide
Downloads
Datasheet
Block diagram
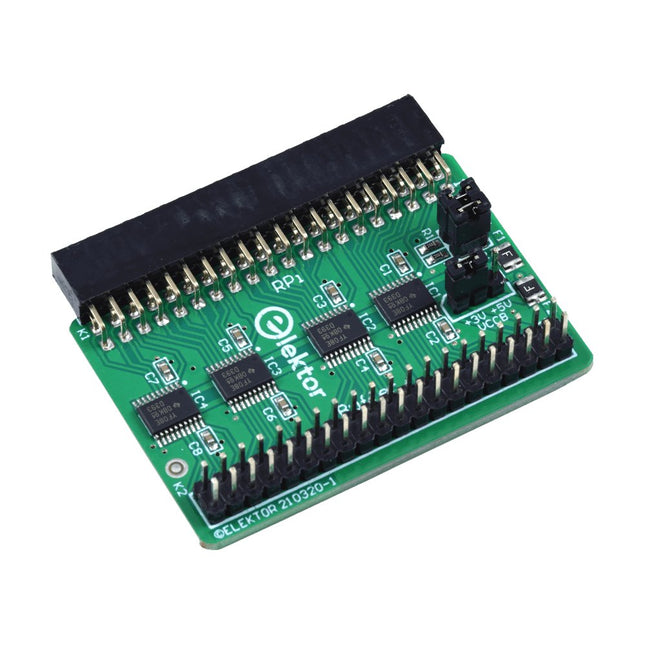
Wanneer u regelmatig experimenteert met de Raspberry Pi en verschillende externe hardware aansluit op de GPIO-poort via de header, heeft u mogelijk in het verleden schade veroorzaakt. Het Elektor Raspberry Pi Buffer Board is er om dit te voorkomen! Het board is compatibel met de Raspberry Pi Zero, Zero 2 (W), 3, 4, 5, 400 en 500.
Alle 26 GPIO's zijn gebufferd met bidirectionele spanningsomzetters om de Raspberry Pi te beschermen tijdens het experimenteren met nieuwe circuits. De printplaat is bedoeld om aan de achterkant van de Raspberry Pi 400/500 te worden geplaatst. De connector voor aansluiting op de Raspberry Pi is een haakse 40-polige connector (2x20). De printplaat is slechts iets breder. Een 40-polige flatcable met bijpassende 2x20 headers kan worden aangesloten op de buffer-uitgangsheader om bijvoorbeeld te experimenteren met een circuit op een breadboard of een printplaat.
Het circuit maakt gebruik van 4x TXS0108E IC's van Texas Instruments. De printplaat kan ook rechtop op een Raspberry Pi worden geplaatst.
Downloads
Schematics
Layout
STM32 Nucleo family of processors are manufactured by STMicroelectronics. These are low-cost ARM microcontroller development boards. This book is about developing projects using the popular Nucleo development board. In the early chapters of the book, the architecture of the Nucleo family is briefly described.
Software development tools that can be used with the Nucleo boards such as the Mbed, Keil MDK, TrueSTUDIO, and the System Workbench are described briefly in later Chapters.
The book covers many projects using most features of the STM32 Nucleo development boards where the full software listings for Mbed and System Workbench are given for every project. The projects range from simple flashing LEDs to more complex projects using modules and devices such as GPIO, ADC, DAC, I²C, LCD, analog inputs and others.
In addition, several projects are given using the Nucleo Expansion Boards, including popular expansion boards such as solid-state relay, MEMS and environmental sensors, DC motor driver, Wi-Fi, and stepper motor driver.
These Expansion Boards plug on top of the Nucleo development boards and simplify the task of project development considerably.
Features of this book
Learn the architecture of the STM32 microcontrollers
Learn how to use the Nucleo development board in projects using Mbed and System Workbench Toolchains
Learn how to use the Nucleo Expansion Boards with the Nucleo development boards
Update
The Mbed compiler has been replaced with two software packages: The Mbed Studio and Keil Studio Cloud. Both of these software packages are free of charge and are available on the Internet. If you need assistance using the Keil Studio Cloud, please download the Guide below.
Features Build in USB to Serial interface Build-in PCB antenna Powered by Pineseed BL602 SoC using Pinenut model: 12S stamp 2 MB Flash USB-C connection Suitable to breadboard BIY project On board three color LEDs output Dimensions: 25.4 x 44.0 mm Note: USB cable is not included.
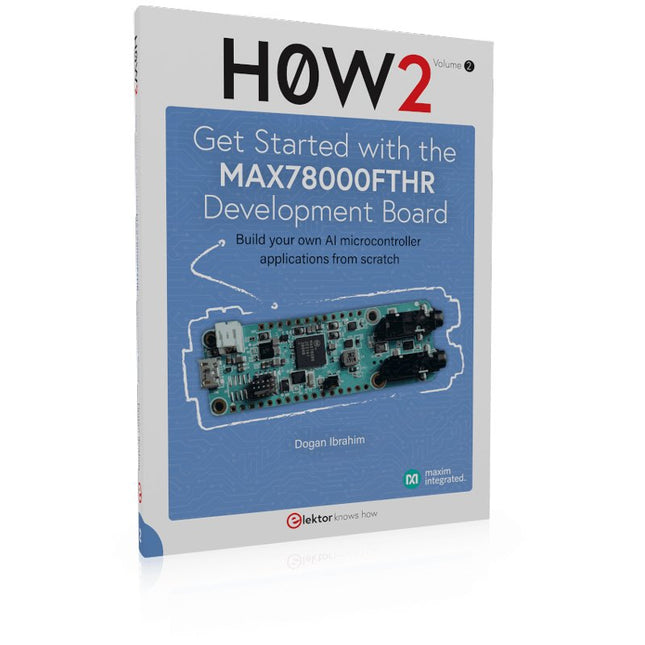
Build your own AI microcontroller applications from scratch
The MAX78000FTHR from Maxim Integrated is a small development board based on the MAX78000 MCU. The main usage of this board is in artificial intelligence applications (AI) which generally require large amounts of processing power and memory. It marries an Arm Cortex-M4 processor with a floating-point unit (FPU), convolutional neural network (CNN) accelerator, and RISC-V core into a single device. It is designed for ultra-low power consumption, making it ideal for many portable AI-based applications.
This book is project-based and aims to teach the basic features of the MAX78000FTHR. It demonstrates how it can be used in various classical and AI-based projects. Each project is described in detail and complete program listings are provided. Readers should be able to use the projects as they are, or modify them to suit their applications. This book covers the following features of the MAX78000FTHR microcontroller development board:
Onboard LEDs and buttons
External LEDs and buttons
Using analog-to-digital converters
I²C projects
SPI projects
UART projects
External interrupts and timer interrupts
Using the onboard microphone
Using the onboard camera
Convolutional Neural Network
Met dit board kan de Raspberry Pi Pico (aangesloten via een pin header) twee motoren tegelijk aandrijven met volledige vooruit, achteruit en stop regeling, waardoor het ideaal is voor Pico gestuurde buggy projecten. Als alternatief kan het board ook gebruikt worden om een stappenmotor aan te drijven. De printplaat is voorzien van het DRV8833 motor driver IC, dat ingebouwde beveiliging tegen kortsluiting, overstroom en oververhitting heeft. De printplaat heeft ook 4 externe aansluitingen op de GPIO pinnen en een 3 V en GND voeding van de Pico. Dit maakt extra IO mogelijkheden mogelijk voor je buggy bouwsels die door de Pico uitgelezen of bestuurd kunnen worden. Bovendien is er een aan/uit schakelaar en een power status LED, zodat je in een oogopslag kunt zien of de printplaat aan staat en je batterijen kunt sparen als je project niet in gebruik is. Om de motor driver kaart te gebruiken moet de Pico een gesoldeerde pin header hebben en stevig in de connector gestoken worden. De kaart heeft een gereguleerde voeding die via de 40-weg connector wordt geleid om de Pico te voeden, zodat je de Pico niet rechtstreeks hoeft te voeden. De motordriver print wordt gevoed via schroefklemmen of via een servo style connector. Kitronik heeft een micro-python module en voorbeeld code ontwikkeld om het gebruik van het Motor Driver board met de Pico te ondersteunen. Deze code is beschikbaar in de GitHub repository. Features Een compact board met veel mogelijkheden, ontworpen als hart van je Raspberry Pi Pico robot buggy projecten. Het board kan 2 motoren tegelijk aansturen met volledige voorwaartse, achterwaartse, en stop regeling. Het bevat de DRV8833 motor driver IC, die ingebouwde beveiliging tegen kortsluiting, overstroom en oververhitting heeft. Bovendien heeft de printplaat een aan/uit schakelaar en een LED voor de voedingsstatus. De voeding van de kaart gaat via een connector in klemmenblokstijl. De 3V en GND pennen zijn ook uitgesplitst, zodat externe apparaten van stroom kunnen worden voorzien. Codeer het met MicroPython via een editor zoals de Thonny editor. Afmetingen: 63 mm (L) x 35 mm (B) x 11,6 mm (H) Download Datasheet
Hands-on in more than 50 projects
STM32 Nucleo family of processors are manufactured by STMicroelectronics. These are low-cost ARM microcontroller development boards. This book is about developing projects using the popular STM32CubeIDE software with the Nucleo-L476RG development board. In the early Chapters of the book the architecture of the Nucleo family is briefly described.
The book covers many projects using most features of the Nucleo-L476RG development board where the full software listings for the STM32CubeIDE are given for each project together with extensive descriptions. The projects range from simple flashing LEDs to more complex projects using modules, devices, and libraries such as GPIO, ADC, DAC, I²C, SPI, LCD, DMA, analogue inputs, power management, X-CUBE-MEMS1 library, DEBUGGING, and others. In addition, several projects are given using the popular Nucleo Expansion Boards. These Expansion Boards plug on top of the Nucleo development boards and provide sensors, relays, accelerometers, gyroscopes, Wi-Fi, and many others. Using an expansion board together with the X-CUBE-MEMS1 library simplifies the task of project development considerably.
All the projects in the book have been tested and are working. The following sub-headings are given for each project: Project Title, Description, Aim, Block Diagram, Circuit Diagram, and Program Listing for the STM32CubeIDE.
In this book you will learn about
STM32 microcontroller architecture;
the Nucleo-L476RG development board in projects using the STM32CubeIDE integrated software development tool;
external and internal interrupts and DMA;
DEBUG, a program developed using the STM32CubeIDE;
the MCU in Sleep, Stop, and in Standby modes;
Nucleo Expansion Boards with the Nucleo development boards.
What you need
a PC with Internet connection and a USB port;
STM32CubeIDE software (available at STMicroelectronics website free of charge)
the project source files, available from the book’s webpage hosted by Elektor;
Nucleo-L476RG development board;
simple electronic devices such as LEDs, temperature sensor, I²C and SPI chips, and a few more;
Nucleo Expansion Boards (optional).
Het Elektor Arduino Nano MCCAB Training Board bevat alle componenten (incl. Arduino Nano) die nodig zijn voor de oefeningen, zoals LED’s, schakelaars, drukknoppen, buzzer enz. Ook externe sensoren, motoren of modules kunnen worden gecheckt of bestuurd met dit microcontroller-trainingssysteem.
Specificaties (Arduino Nano Training Board MCCAB)
Voeding
Via de USB-aansluiting van de aangesloten pc of een externe voeding (niet inbegrepen)
Spanning
+5 Vcc
Ingangsspanning
Alle ingangen
0 V tot +5 V
VX1 en VX2
+8 V tot +12 V (alleen bij gebruik van een externe voeding)
Hardware
LCD
2x16 karakters
Potentiometer P1 & P2
JP3: Selectie van de werkspanning van P1 & P2
Verdelers
SV4: Verdeler voor de werkspanningenSV5, SV6: Verdelers voor de in-/uitgangen van de microcontroller
Schakelaars en knoppen
RESET knop op de Arduino Nano module; 6x drukknop schakelaars K1 ... K6; 6x Schuifschakelaars S1 ... S6; JP2: Jumper van de schakelaars met de ingangen van de microcontroller
Buzzer
Piezo buzzer ‘Buzzer1’ met jumper op JP6
Indicator LED’s
11 x LED: Status indicator voor de ingangen/uitgangen LED L op de Arduino Nano module, aangesloten op GPIO D13 JP6; Aansluiting van LED's LD10 ... LD20 met GPIO's D2 ... D12
Seriële interfacesSPI & I²C
JP4: Selectie van het signaal op pin X van de SPI-connector SV12 SV9 naar SV12: SPI-interface (3,3 V/5 V) of I²C-interface
Uitgangen voor externe apparaten
SV1, SV7: Geschakelde uitgang (maximaal +24 V/160 mA, extern aangesloten) SV2: 2x13 pinnen voor aansluiting van externe modules
3x3 LED matrix(9 rode LED's)
SV3: Kolommen van de 3x3 LED matrix (uitgangen D6 ... D8) JP1: Verbinding van de rijen met de GPIO's D3 ... D5
Software
MCCABLib library
Controle van hardware componenten (schakelaars, knoppen, LED's, 3x3 LED matrix, buzzer) op het MCCAB Training Board
Werktemperatuur
Tot +40 °C
Afmetingen
100 x 100 x 20 mm
Specificaties (Arduino Nano)
Microcontroller
ATmega328P
Architectuur
AVR
Spanning
5 V
Flash memory
32 KB, waarvan 2 KB gebruikt door de bootloader
SRAM
2 KB
Kloksnelheid
16 MHz
Analoge IN Pinnen
8
EEPROM
1 KB
DC stroom per I/O-pin
40 mA op één I/O-pin, totaal maximaal 200 mA op alle pinnen samen
Ingangsspanning
7-12 V
Digitale I/O-pinnen
22 (waarvan 6 PWM)
PWM Uitgangen
6
Stroomverbruik
19 mA
Afmetingen
18 x 45 mm
Gewicht
7 g
Inbegrepen
1x Elektor Arduino Nano Training Board MCCAB
1x Arduino Nano
Waveshare DVK600 is an FPGA CPLD mother board that features expansion connectors for connecting FPGA CPLD core board and accessory boards. DVK600 provides an easy way to set up FPGA CPLD development system.
Features
FPGA CPLD core board connector: for easily connecting core boards which integrate an FPGA CPLD chip onboard
8I/Os_1 interface, for connecting accessory boards/modules
8I/Os_2 interface, for connecting accessory boards/modules
16I/Os_1 interface, for connecting accessory boards/modules
16I/Os_2 interface, for connecting accessory boards/modules
32I/Os_1 interface, for connecting accessory boards/modules
32I/Os_2 interface, for connecting accessory boards/modules
32I/Os_3 interface, for connecting accessory boards/modules
SDRAM interface
for connecting SDRAM accessory board
also works as FPGA CPLD pins expansion connectors
LCD interface, for connecting LCD22, LCD12864, LCD1602
ONE-WIRE interface: easily connects to ONE-WIRE devices (TO-92 package), such as temperature sensor (DS18B20), electronic registration number (DS2401), etc.
5 V DC jack
Joystick: five positions
Buzzer
Potentiometer: for LCD22 backlight adjustment, or LCD12864, LCD1602 contrast adjustment
Power switch
Buzzer jumper
ONE-WIRE jumper
Joystick jumper
Downloads
Schematics
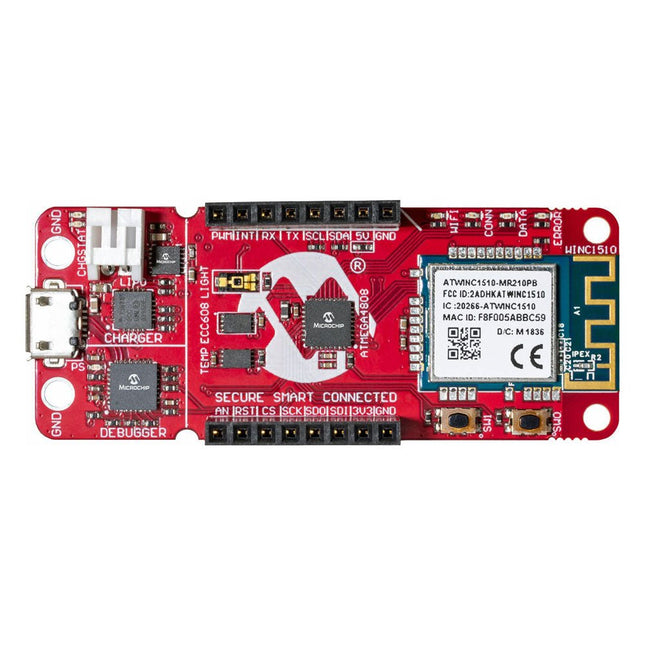
The AVR-IoT WA development board combines a powerful ATmega4808 AVR MCU, an ATECC608A CryptoAuthentication™ secure element IC and the fully certified ATWINC1510 Wi-Fi network controller – which provides the most simple and effective way to connect your embedded application to Amazon Web Services (AWS). The board also includes an on-board debugger, and requires no external hardware to program and debug the MCU.Out of the box, the MCU comes preloaded with a firmware image that enables you to quickly connect and send data to the AWS platform using the on-board temperature and light sensors. Once you are ready to build your own custom design, you can easily generate code using the free software libraries in Atmel START or MPLAB Code Configurator (MCC).The AVR-IoT WA board is supported by two award-winning Integrated Development Environments (IDEs) – Atmel Studio and Microchip MPLAB X IDE – giving you the freedom to innovate with your environment of choice.Features
ATmega4808 microcontroller
Four user LED’s
Two mechanical buttons
mikroBUS header footprint
TEMT6000 Light sensor
MCP9808 Temperature sensor
ATECC608A CryptoAuthentication™ device
WINC1510 WiFi Module
On-board Debugger
Auto-ID for board identification in Atmel Studio and Microchip MPLAB X
One green board power and status LED
Programming and debugging
Virtual COM port (CDC)
Two DGI GPIO lines
USB and battery powered
Integrated Li-Ion/LiPo battery charger