Zoekresultaten voor "home OR automation OR projects OR with OR arduino"
-

Elektor Digital Home Automation Projects with Arduino (E-book)
Using the RFID Starter Kit An Arduino board has now become ‘the’ basic component in the maker community. No longer is an introduction to the world of microcontrollers the preserve of the expert. When it comes to expanding the capabilities of the basic Arduino board however, the developer is still largely on his own. If you really want to build some innovative projects it’s often necessary to get down to component level. This can present many beginners with major problems. That is exactly where this book begins. This book explains how a wide variety of practical projects can be built using items supplied in a single kit together with the Arduino board. This kit, called the 'RFID Starter Kit for Arduino' (SKU 17240) is not just limited to RFID applications but contains more than 30 components, devices and modules covering all areas of modern electronics. In addition to more simple components such as LEDs and resistors there are also complex and sophisticated modules that employ the latest technology such as: A humidity sensor A multicolor LED A large LED matrix with 64 points of light A 4-character 7-segment LED display An infra red remote-controller unit A complete LC-display module A servo A stepper motor and controller module A complete RFID reader module and security tag On top of that you will get to build precise digital thermometers, hygrometers, exposure meters and various alarm systems. There are also practical devices and applications such as a fully automatic rain sensor, a sound-controlled remote control system, a multifunctional weather station and so much more. All of the projects described can be built using the components supplied in the Elektor kit.
€ 29,95
Leden € 23,96
-
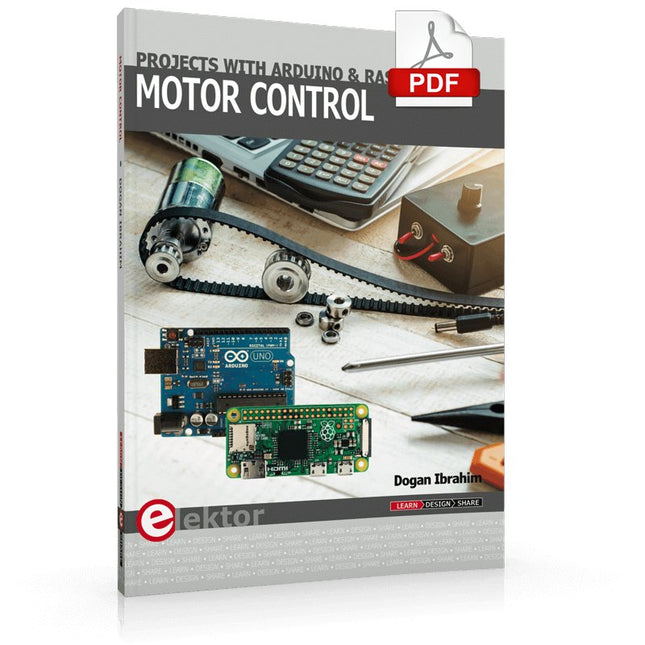
Elektor Digital Motor Control - Projects with Arduino & Raspberry Pi (E-book)
This book is about DC electric motors and their use in Arduino and Raspberry Pi Zero W based projects. The book includes many tested and working projects where each project has the following sub-headings: Title of the project Description of the project Block diagram Circuit diagram Project assembly Complete program listing of the project Full description of the program The projects in the book cover the standard DC motors, stepper motors, servo motors, and mobile robots. The book is aimed at students, hobbyists, and anyone else interested in developing microcontroller based projects using the Arduino Uno or the Raspberry Pi Zero W. One of the nice features of this book is that it gives complete projects for remote control of a mobile robot from a mobile phone, using the Arduino Uno as well as the Raspberry Pi Zero W development boards. These projects are developed using Wi-Fi as well as the Bluetooth connectivity with the mobile phone. Readers should be able to move a robot forward, reverse, turn left, or turn right by sending simple commands from a mobile phone. Full program listings of all the projects as well as the detailed program descriptions are given in the book. Users should be able to use the projects as they are presented, or modify them to suit to their own needs.
€ 29,95
Leden € 23,96
-
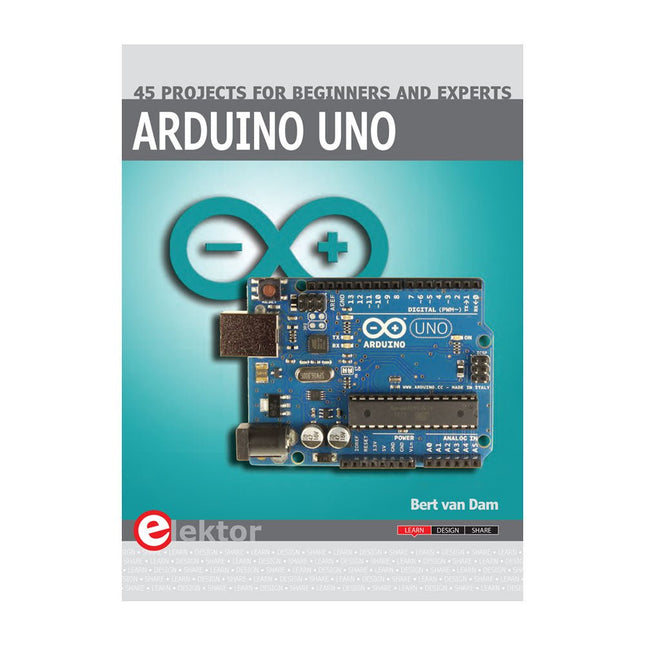
Elektor Publishing Arduino Uno – 45 Projects for Beginners and Experts
This book covers a series of exciting and fun projects for the Arduino, such as a silent alarm, people sensor, light sensor, motor control, internet and wireless control (using a radio link). Contrary to many free projects on the internet all projects in this book have been extensively tested and are guaranteed to work! You can use it as a projects book and build more than 45 projects for your own use. The clear explanations, schematics, and pictures of each project make this a fun activity. The pictures are taken of a working project, so you know for sure that they are correct. You can combine the projects in this book to make your own projects. To facilitate this, clear explanations are provided on how the project works and why it has been designed the way it has That way you will learn a lot about the project and the parts used, knowledge that you can use in your own projects. Apart from that, the book can be used as a reference guide. Using the index, you can easily locate projects that serve as examples for the C++ commands and Arduino functionality. Even after you’ve built all the projects in this book, it will still be a valuable reference guide to keep next to your PC.
€ 39,95
Leden € 35,96
-

Elektor Digital Arduino – Circuits & Projects Guide (E-book)
Two reasons can be identified for the immense success of the Arduino platform. First, the cheap, ready to go processor board greatly simplifies the introduction to hardware. The second success factor is the free and open-source programming suite that does not require an installation procedure. Simple entry-level examples ensure rapid successes. Complex selection procedures for parameters like the microprocessor version or interface settings are not required. The first sample programs can be uploaded to the Arduino board, and tested, in a matter of minutes. The Arduino user is supported by an array of software libraries. However, the daily increasing volume of libraries poses initial problems to the newcomer, and the way ahead may be uncertain after a few entry-level examples. In many cases, detailed descriptions are missing, and poorly described projects tend to confuse rather than elucidate. Clear guidance and a single motto are missing, usually owing to the projects having been created by several different persons—all with different aims in mind. This book represents a different approach. All projects are presented in a systematical manner, guiding into various theme areas. In the coverage of must-know theory great attention is given to practical directions users can absorb, including essential programming techniques like A/D conversion, timers and interrupts—all contained in the hands-on projects. In this way readers of the book create running lights, a wakeup light, fully functional voltmeters, precision digital thermometers, clocks of many varieties, reaction speed meters, or mouse controlled robotic arms. While actively working on these projects the reader gets to truly comprehend and master the basics of the underlying controller technology.
€ 29,95
Leden € 23,96
-

Elektor Digital Home Automation and Electronics for Starters (E-book)
Projecten met Arduino, ESPHome, Home Assistant en Raspberry Pi & Co. Dit e-book bevat verschillende voorbeeldprojecten, te beginnen met een inleiding tot elektronica. Het legt ook uit hoe je Home Assistant installeert op een Raspberry Pi, hoe je binnenklimaatsensoren gebruikt voor temperatuur en vochtigheid, hoe je het MQTT-protocol en andere interfaces implementeert, en hoe je ESPHome gebruikt om sensoren en actuatoren te integreren in Home Assistant. Talrijke video tutorials vullen het boek aan. The book begins with an introduction to electrical engineering. You will learn the basics of voltage, current, resistors, diodes and transistors. Arduino and microcontrollers A complete section is dedicated to the Arduino Uno. You will get to know the structure, write your first programs and work on practical examples. Home Assistant and automation You will learn how to set up Home Assistant on a Raspberry Pi and how to use automations, scenes and devices. In addition, Zigbee, MQTT and ESP-NOW – important technologies for home automation – will be discussed. ESP8266, ESP32 and ESP32-CAM The popular ESP microcontrollers are covered in detail. A theoretical introduction is followed by practical projects that show you how to get the most out of these devices. Sensors and actuators The book explains the functionality and application of numerous sensors such as temperature and humidity sensors, motion detectors and RFID readers. For actuators, stepper motors, e-ink displays, servo motors and much more are covered. There are practical application examples for all devices. ESPHome This chapter shows you how to integrate sensors and actuators into Home Assistant without any programming effort. You will be guided step by step through the setup with ESPHome. LEDs and lighting technology In this chapter, you will learn about different types of LEDs and how they can be used. The basics of lighting technology are also explained. Node-RED A whole chapter is dedicated to Node-RED. You will learn the basics of this powerful tool and be guided step by step through its setup and use. Integrated Circuits (ICs) In electronics, there are numerous ICs that make our lives easier. You will get to know the most important ones and apply your knowledge in practical projects. Professional programming Advanced topics such as the correct use of buttons, the use of interrupts and the use of an NTP server for time synchronisation are covered in detail in this chapter. Downloads GitHub
€ 49,95€ 39,95
Leden identiek
-
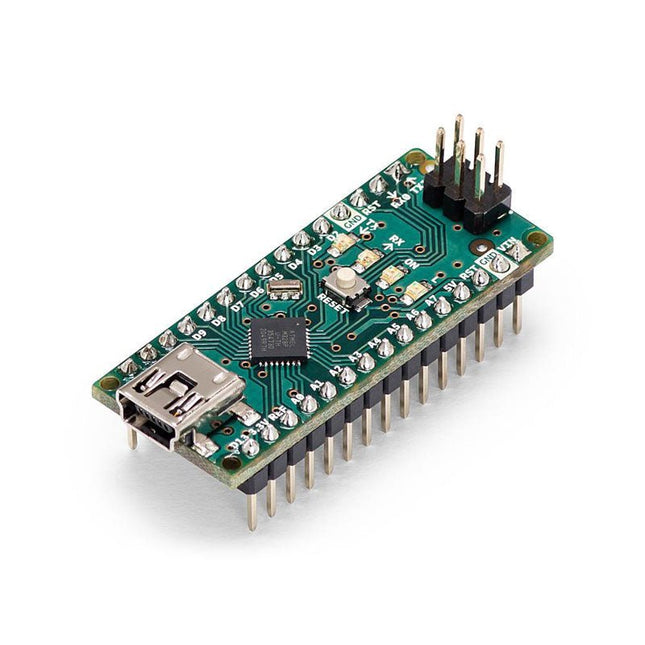
Arduino Arduino Nano
De Arduino Nano is een klein, compleet en breadboard-vriendelijk bordje gebaseerd op de ATmega328 (Arduino Nano 3.x). Het heeft min of meer dezelfde functionaliteit als de Arduino Duemilanove, maar in een andere verpakking. Het mist alleen een DC voedingsaansluiting en werkt met een Mini-B USB-kabel in plaats van een standaard kabel. Specificaties Microcontroller ATmega328 Bedrijfsspanning (logisch niveau) 5 V Ingangsspanning (aanbevolen) 7-12 V Inputspanning (limieten) 6-20 V Digitale I/O-pinnen 14 (waarvan 6 met PWM-uitgang) Analoge ingangspinnen 8 DC-Stroom per I/O-Pin 40 mA Flashgeheugen 16 KB (ATmega168) of 32 KB (ATmega328) waarvan 2 KB gebruikt door bootloader SRAM 1 KB (ATmega168) of 2 KB (ATmega328) EEPROM 512 bytes (ATmega168) of 1 KB (ATmega328) Kloksnelheid 16 MHz Afmetingen 18 x 45 mm Voeding De Arduino Nano kan via de Mini-B USB-verbinding, 6-20 V ongeregelde externe voeding (speld 30), of 5 V geregelde externe voeding (speld 27) worden aangedreven. De voedingsbron wordt automatisch geselecteerd op de hoogste spanningsbron. Geheugen De ATmega168 heeft 16 KB flash-geheugen voor het opslaan van code (waarvan 2 KB wordt gebruikt voor de bootloader), 1 KB SRAM en 512 bytes EEPROM De ATmega328 heeft 32 KB flash-geheugen voor de opslag van code, (waarvan ook 2 KB wordt gebruikt voor de bootloader), 2 KB SRAM en 1 KB EEPROM. Input en output Elk van de 14 digitale pinnen op de Nano kan worden gebruikt als ingang of uitgang, met behulp van pinMode(), digitalWrite(), en digitalRead() functies. Zij werken bij 5 V. Elke pin kan maximaal 40 mA leveren of ontvangen en heeft een interne pull-up weerstand (standaard uitgeschakeld) van 20-50 kOhms. Communicatie De Arduino Nano heeft een aantal faciliteiten om te communiceren met een computer, een andere Arduino, of andere microcontrollers. De ATmega168 en ATmega328 bieden UART TTL (5V) seriële communicatie, die beschikbaar is op de digitale pennen 0 (RX) en 1 (TX). Een FTDI FT232RL op de raad kanaliseert deze periodieke mededeling over USB en de FTDI drivers (inbegrepen met de Arduino-software) verstrekt een virtuele com-haven aan software op de computer. De Arduino-software omvat een seriële monitor waarmee eenvoudige tekstuele gegevens naar en van de Arduino-raad kunnen worden verzonden. De RX en TX LEDs op het bord zullen knipperen wanneer gegevens via de FTDI-chip en de USB-verbinding met de computer worden verzonden (maar niet voor seriële communicatie op pennen 0 en 1). Een SoftwareSerial bibliotheek maakt seriële communicatie op elk van de digitale pinnen van de Nano mogelijk. Programmeren De Arduino Nano kan geprogrammeerd worden met de Arduino software (download). De ATmega168 of ATmega328 op de Arduino Nano wordt geleverd met een bootloader waarmee u nieuwe code kunt uploaden zonder het gebruik van een externe hardware programmeur. Het communiceert met behulp van het originele STK500 protocol (referentie, C header files). U kunt ook de bootloader omzeilen en de microcontroller programmeren via de ICSP (In-Circuit Serial Programming) header met Arduino ISP of vergelijkbaar; zie deze instructies voor details. Automatisch (software) resetten Rather dan het vereisen van een fysieke druk van de het terugstellenknoop vóór een upload, wordt Arduino Nano ontworpen op een manier die het om door software toelaat worden teruggesteld die op een verbonden computer loopt. Eén van de hardwarestroom controlelijnen (DTR) van deFT232RL wordt verbonden met de het terugstellenlijn van de ATmega168 of ATmega328 via een 100 nF condensator. Wanneer deze lijn wordt bevestigd (laag genomen), daalt de resetlijn lang genoeg om de chip te resetten. De Arduino-software gebruikt dit vermogen om u toe te staan om code te uploaden door eenvoudig de uploadknoop in het Arduino-milieu te drukken. Dit betekent dat de bootloader een kortere time-out kan hebben, aangezien het verlagen van DTR goed gecoördineerd kan worden met het begin van de upload.
€ 22,95
Leden € 20,66
-

Elektor Digital Arduino Uno – 45 Projects for Beginners and Experts (E-book)
This book covers a series of exciting and fun projects for the Arduino, such as a silent alarm, people sensor, light sensor, motor control, internet and wireless control (using a radio link). Contrary to many free projects on the internet all projects in this book have been extensively tested and are guaranteed to work! You can use it as a projects book and build more than 45 projects for your own use. The clear explanations, schematics, and pictures of each project make this a fun activity. The pictures are taken of a working project, so you know for sure that they are correct. You can combine the projects in this book to make your own projects. To facilitate this, clear explanations are provided on how the project works and why it has been designed the way it has That way you will learn a lot about the project and the parts used, knowledge that you can use in your own projects. Apart from that, the book can be used as a reference guide. Using the index, you can easily locate projects that serve as examples for the C++ commands and Arduino functionality. Even after you’ve built all the projects in this book, it will still be a valuable reference guide to keep next to your PC.
€ 29,95
Leden € 23,96
-

Elektor Digital Controller Area Network Projects with ARM and Arduino (E-book)
This book details the use of the ARM Cortex-M family of processors and the Arduino Uno in practical CAN bus based projects. Inside, it gives a detailed introduction to the architecture of the Cortex-M family whilst providing examples of popular hardware and software development kits. Using these kits helps to simplify the embedded design cycle considerably and makes it easier to develop, debug, and test a CAN bus based project. The architecture of the highly popular ARM Cortex-M processor STM32F407VGT6 is described at a high level by considering its various modules. In addition, the use of the mikroC Pro for ARM and Arduino Uno CAN bus library of functions are described in detail. This book is written for students, for practising engineers, for hobbyists, and for everyone else who may need to learn more about the CAN bus and its applications. The book assumes that the reader has some knowledge of basic electronics. Knowledge of the C programming language will be useful in later chapters of the book, and familiarity with at least one microcontroller will be an advantage, especially if the reader intends to develop microcontroller based projects using CAN bus. The book should be useful source of reference to anyone interested in finding an answer to one or more of the following questions: What bus systems are available for the automotive industry? What are the principles of the CAN bus? What types of frames (or data packets) are available in a CAN bus system? How can errors be detected in a CAN bus system and how reliable is a CAN bus system? What types of CAN bus controllers are there? What are the advantages of the ARM Cortex-M microcontrollers? How can one create a CAN bus project using an ARM microcontroller? How can one create a CAN bus project using an Arduino microcontroller? How can one monitor data on the CAN bus?
€ 32,95
Leden € 26,36
-
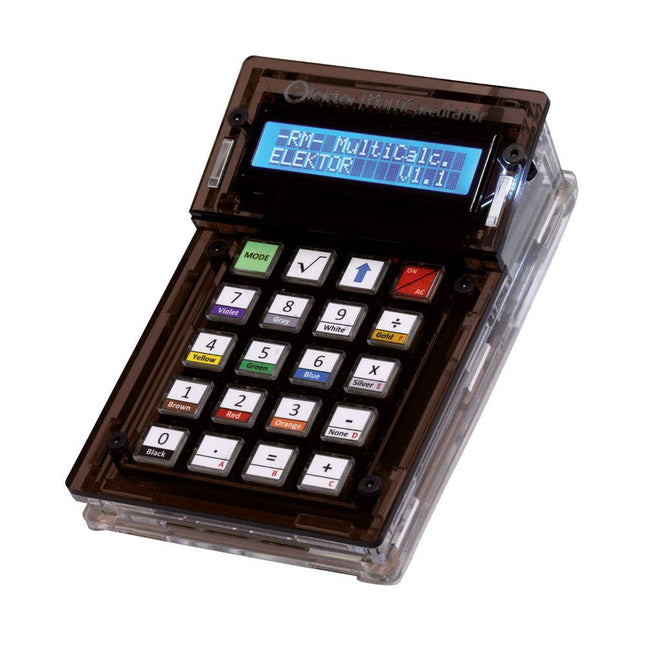
Elektor Labs Elektor Arduino MultiCalculator
De Elektor MultiCalculator Kit is een op Arduino-gebaseerde multifunctionele rekenmachine die verder gaat dan basisberekeningen. Hij biedt 22 functies, waaronder licht- en temperatuurmeting, differentiële temperatuuranalyse en NEC IR-afstandsbedieningsdecodering. De Elektor MultiCalculator is een handig hulpmiddel voor gebruik in je projecten of voor educatieve doeleinden. De kit heeft een Pro Mini module als rekeneenheid. De printplaat is eenvoudig te monteren met behulp van through-hole componenten. De behuizing bestaat uit 11 acrylpanelen en montagemateriaal voor eenvoudige montage. Bovendien is het apparaat uitgerust met een 16x2 alfanumeriek LCD-scherm, 20 knoppen en temperatuursensoren. De Elektor MultiCalculator is programmeerbaar met de Arduino IDE via een 6-weg PCB-header. De beschikbare software is tweetalig (Engels en Nederlands). De calculator kan worden geprogrammeerd met een programmeeradapter en wordt gevoed via USB-C. Bedrijfsmodi Rekenmachine 4-ringsweerstandscode 5-ringsweerstandscode Conversie van decimaal naar hexadecimaal en tekens (ASCII) Conversie van hexadecimaal naar decimaal en tekens (ASCII) Conversie van decimaal naar binair en tekens (ASCII) Conversie van binair naar decimaal en hexadecimaal Berekening van Hz, nF, capacitieve reactantie (XC) Berekening van Hz, µH, inductieve reactantie (XL) Weerstandberekening van twee parallel geschakelde weerstanden Weerstandberekening van twee in serie geschakelde weerstanden Berekening van onbekende parallelle weerstand Temperatuurmeting Verschiltemperatuurmeting T1&T2 en Delta (δ) Lichtmeting Stopwatch met rondetijdfunctie Artikelteller NEC IR-decodering van de afstandsbediening AWG-conversie (American Wire Gauge) Dobbelstenen gooien Personaliseer het opstartbericht Temperatuurkalibratie Specificaties Menutalen: Engels, Nederlands Afmetingen: 92 x 138 x 40 mm Bouwtijd: ongeveer 5 uur Inbegrepen PCB's en componenten met doorlopende gaten Voorgesneden acrylplaten met alle mechanische onderdelen Pro Mini-microcontrollermodule (ATmega328/5 V/16 MHz) Programmeeradapter Waterdichte temperatuursensoren USB-C kabel Downloads Software
€ 49,95€ 39,95
Leden identiek
-
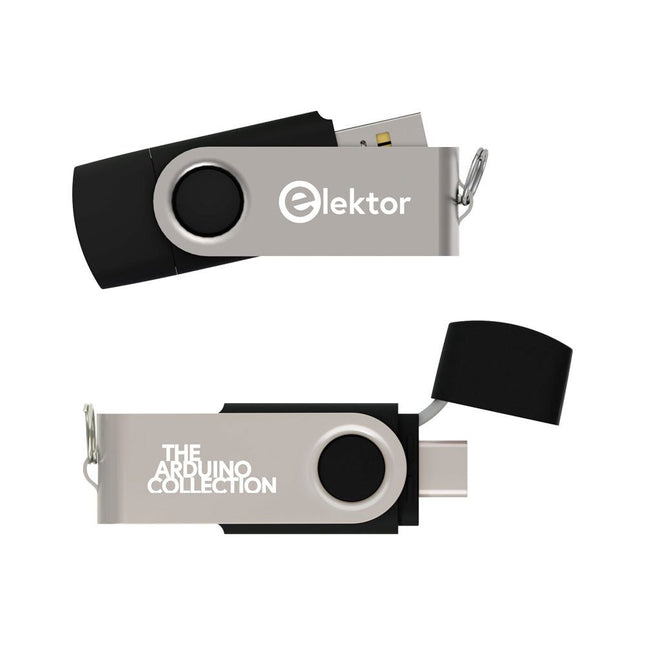
Elektor Classics The Arduino Collection (USB-stick)
Deze USB-stick bevat een selectie van meer dan 300 artikelen over Arduino gepubliceerd in Elektor Magazine. De inhoud bestaat uit zowel achtergrondartikelen als projecten met de volgende onderwerpen: Software & hardware ontwikkeling: Tutorials over de ontwikkeling van Arduino-software met behulp van Arduino IDE, Atmel Studio, Shields en essentiële programmeerconcepten. Educatie: Een microcontroller Bootcamp biedt een gestructureerde aanpak voor het programmeren van embedded systemen. Data acquisitie & meten: Projecten zoals een 16-bits datalogger, draaibank toerenteller en een AC netanalyser voor het vastleggen en analyseren van real-time signalen. Draadloze communicatie: Leer hoe je draadloze netwerken implementeert, een Android interface maakt en effectief communiceert met microcontrollers. Robotica en automatisering: Omvat de Arduino Nano Robot Controller, ondersteunende boards voor automatisering, en een verkenning van verschillende Arduino-shields om de functionaliteit te verbeteren. Zelfbouw-projecten: Unieke projecten zoals laserprojectie, Numitron klok en thermometer, ELF ontvanger, Theremino, en touch LED interfaces laten creatieve toepassingen zien. Of u nu een beginner bent of een ervaren maker, deze collectie is een waardevolle bron om te leren, te experimenteren en de grenzen van de Arduino-technologie te verleggen.
€ 49,95€ 19,98
Leden identiek
-
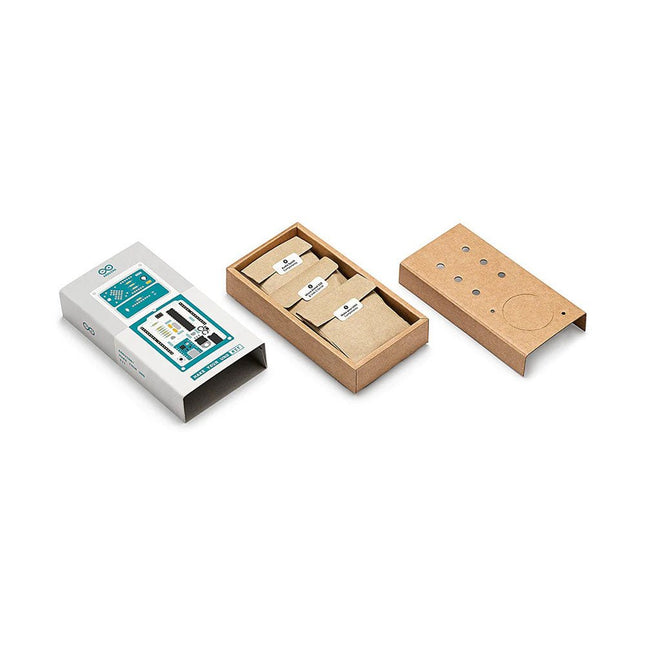
Arduino Arduino Make-Your-Uno Kit
Doe basiskennis van elektronica op door zelf handmatig uw Arduino Uno in elkaar te zetten, raak vertrouwd met solderen door eigenhandig elk onderdeel te monteren, en laat vervolgens uw creativiteit de vrije loop met de enige kit waarmee u ook meteen een synthesizer kan bouwen! De Arduino Make-Your-Uno kit is echt de beste kit om te leren solderen. En als u klaar bent kunt u met deze bundel ook een synthesizer bouwen en muziek maken. Een kit met alle componenten om uw eigen Arduino Uno mét audio synthesizerkaart te bouwen. De Make-Your-Uno kit wordt geleverd met een complete set instructies, beschikbaar op een speciale website. Deze biedt videomateriaal, een interactieve 3D-viewer voor het volgen van gedetailleerde instructies, en hoe u uw board kunt programmeren zodra deze is afgebouwd. Deze kit bevat: Arduino Make-Your-Uno 1x Make-Your-Uno PCB 1x USB C serial adapter board 7x weerstanden 1k Ohm 2x weerstanden 10k Ohm 2x weerstanden 1M Ohm 1x diode (1N4007) 1x 16 MHz kristal 4x gele LED's 1x groene LED 1x drukknop 1x MOSFET 1x LDO (3,3 V) 1x LDO (5 V) 3x keramische condensatoren (22pF) 3x elektrolytische condensatoren (47uF) 7x polyester condensatoren (100nF) 1x socket voor ATMega 328p 2x I/O connectoren 1x connector header 6 pins 1x barrel jack connector 1x ATmega 328p microcontroller Arduino Audio Synth 1x Audio Synth PCB 1x weerstand 100k Ohm 1x weerstand 10 Ohm 1x audio versterker (LM386) 1x keramische condensator (47nF) 1x elektrolytische condensator (47uF) 1x elektrolytische condensator (220uF) 1x polyester condensator (100nF) 4x connectoren pin header 6x potentiometer 10k Ohm met kunststof knoppen Reserveonderdelen 2x elektrolytische condensatoren (47uF) 2x polyester condensatoren (100nF) 2x keramische condensatoren (22pF) 1x drukknop 1x gele LED 1x groene LED Mechanische onderdelen 5x afstandhouders 12 mm 11x afstandhouders 6 mm 5x schroefmoeren 2x schroeven 12 mm
€ 79,95€ 31,98
Leden identiek
-
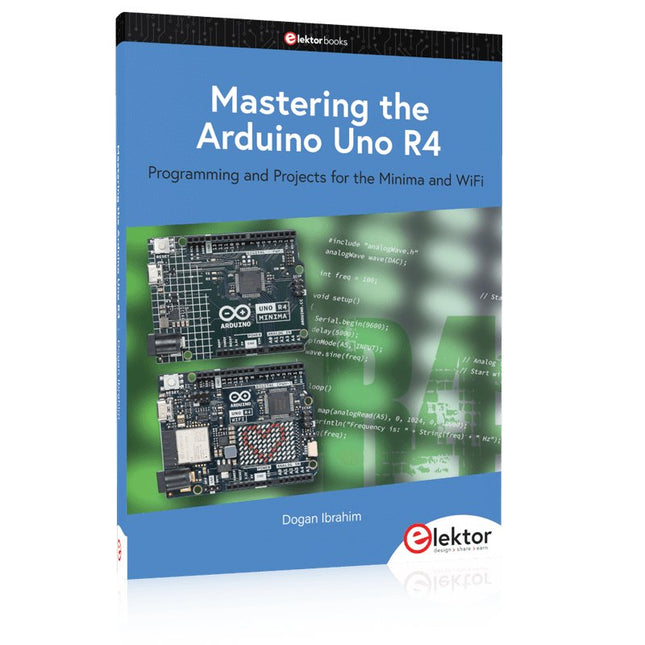
Elektor Publishing Mastering the Arduino Uno R4
Programming and Projects for the Minima and WiFi Based on the low-cost 8-bit ATmega328P processor, the Arduino Uno R3 board is likely to score as the most popular Arduino family member, and this workhorse has been with us for many years. Eleven years later, the long-overdue successor, the Arduino Uno R4, was released. It is built around a 48 MHz, 32-bit Arm Cortex-M4 microcontroller and provides significantly expanded SRAM and Flash memory. Additionally, a higher-precision ADC and a new DAC are added to the design. The Uno R4 board also supports the CAN Bus with an interface. Two versions of the board are available: Uno R4 Minima, and Uno R4 WiFi. This book is about using these new boards to develop many different and interesting projects with just a handful of parts and external modules. All projects described in the book have been fully tested on the Uno R4 Minima or the Uno R4 WiFi board, as appropriate. The project topics include the reading, control, and driving of many components and modules in the kit as well as on the relevant Uno R4 board, including LEDs 7-segment displays (using timer interrupts) LCDs Sensors RFID Reader 4x4 Keypad Real-time clock (RTC) Joystick 8×8 LED matrix Motors DAC (Digital-to-analog converter) LED matrix WiFi connectivity Serial UART CAN bus Infrared controller and receiver Simulators … all in creative and educational ways with the project operation and associated software explained in great detail.
€ 39,95
Leden € 35,96


