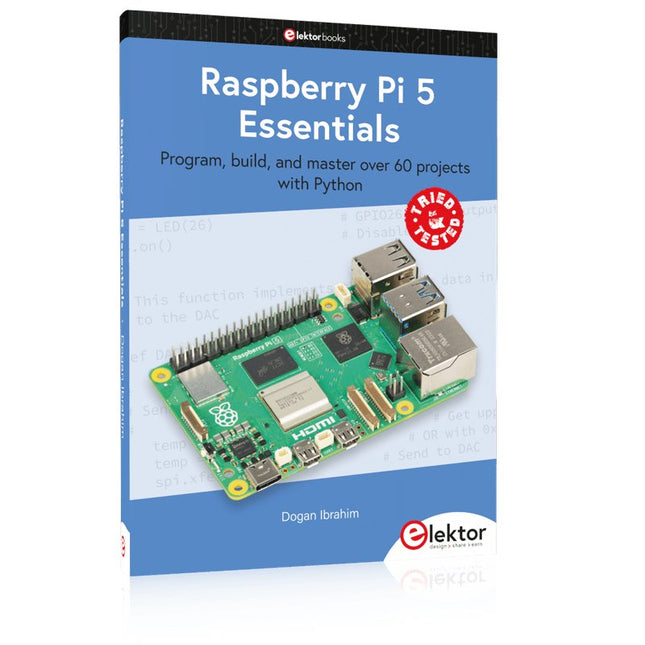
Program, build, and master over 60 projects with Python
The Raspberry Pi 5 is the latest single-board computer from the Raspberry Pi Foundation. It can be used in many applications, such as in audio and video media centers, as a desktop computer, in industrial controllers, robotics, and in many domestic and commercial applications. In addition to the well-established features found in other Raspberry Pi computers, the Raspberry Pi 5 offers Wi-Fi and Bluetooth (classic and BLE), which makes it a perfect match for IoT as well as in remote and Internet-based control and monitoring applications. It is now possible to develop many real-time projects such as audio digital signal processing, real-time digital filtering, real-time digital control and monitoring, and many other real-time operations using this tiny powerhouse.
The book starts with an introduction to the Raspberry Pi 5 computer and covers the important topics of accessing the computer locally and remotely. Use of the console language commands as well as accessing and using the desktop GUI are described with working examples. The remaining parts of the book cover many Raspberry Pi 5-based hardware projects using components and devices such as
LEDs and buzzers
LCDs
Ultrasonic sensors
Temperature and atmospheric pressure sensors
The Sense HAT
Camera modules
Example projects are given using Wi-Fi and Bluetooth modules to send and receive data from smartphones and PCs, and sending real-time temperature and atmospheric pressure data to the cloud.
All projects given in the book have been fully tested for correct operation. Only basic programming and electronics experience are required to follow the projects. Brief descriptions, block diagrams, detailed circuit diagrams, and full Python program listings are given for all projects described.
Practical Introduction to 3D Modeling from Enclosure to Front Panel
Embedding a vintage component, creating a professional looking home for a circuit board, or even designing a complex apparatus complete with a chassis – these and many other challenges turn into a stimulating pleasure with FreeCAD. Once you have internalized the basic processes, there are virtually no limits to your imagination.
Starting to use a new software is never straightforward – especially with a tool as versatile as FreeCAD. Manageable, but at the same time easily usable individual components provide the starting point in this book. Putting these components together later results in assemblies.
In the FreeCAD universe, a workable trajectory is demonstrated. The described procedure is illustrative so the examples are easily applied to custom tasks. The devices were made by the author and illustrated with photos.
Creating a 3D design is requiring some effort but the initial investment pays off soon. Besides the impressive spatial representation of the projects, the extracted drawings yield a solid base for documentation and production. Extended FreeCAD capabilities like the unfolding of sheet metal parts enormously add to efficiency and pushes models forward into practical assembly.
Soon you will definitely not want to do without FreeCAD!
With the availability of free and open source C/C++ compilers today, you might wonder why someone would be interested in assembler language. What is so compelling about the RISC-V Instruction Set Architecture (ISA)? How does RISC-V differ from existing architectures? And most importantly, how do we gain experience with the RISC-V without a major investment? Is there affordable hardware available?
The availability of the Espressif ESP32-C3 chip provides a way to get hands-on experience with RISC-V. The open sourced QEMU emulator adds a 64-bit experience in RISC-V under Linux. These are just two ways for the student and enthusiast alike to explore RISC-V in this book.
The projects in this book are boiled down to the barest essentials to keep the assembly language concepts clear and simple. In this manner you will have “aha!” moments rather than puzzling about something difficult. The focus in this book is about learning how to write RISC-V assembly language code without getting bogged down. As you work your way through this tutorial, you’ll build up small demonstration programs to be run and tested. Often the result is some simple printed messages to prove a concept. Once you’ve mastered these basic concepts, you will be well equipped to apply assembly language in larger projects.
Practical Low-Cost Methods for Reliable PCB Production
This book explains how to carry out reliable SMD assembly using affordable tools and small-scale equipment. It follows the complete workflow step by step, including tool selection, solder paste handling, stencil use, component placement, reflow methods, inspection, and rework.
The focus is on bench-level and small-lab production rather than industrial assembly lines. It shows practical methods for building single and double-sided SMD boards with repeatable results.
Topics include solder paste and flux, temperature profiles, hot air and hotplate techniques, small reflow ovens, inspection methods, and defect correction. Checklists and example workflows are included to help reduce errors and improve consistency.
Key features:
Tools and supplies for SMD assembly and rework
Solder paste types, storage, and handling
Stencils and paste application methods
Pick and place workflow and component orientation
Temperature profiles and reflow methods
Hot air, hotplate, and reflow oven processes
Inspection and quality control
Common defects such as tombstoning and solder bridges
Practical rework and component replacement
Bench-level professional workflows and checklists
This book is designed as a practical bench reference for anyone who wants to assemble and troubleshoot their own SMD boards with reliable results.
De FNIRSI SWM-20 handlasmachine is een zeer efficiënt, gebruiksvriendelijk en gemakkelijk mee te nemen lasapparaat. Hij is voorzien van dual-pulse puntlastechnologie, wat zorgt voor stabielere en betrouwbaardere lassen, en beschikt bovendien over een handige powerbankfunctie.
Uitgerust met een 2,4-inch HD-display biedt de SWM-20 een duidelijke en intuïtieve bediening. Met de draaiknop kunnen gebruikers parameters snel en nauwkeurig aanpassen, waardoor het eenvoudig is om de gewenste lasinstellingen te kiezen en de algehele gebruikerservaring te verbeteren.
Kenmerken
2-in-1: Puntlasapparaat en 5000 mAh powerbank
1200 A hoog vermogen voor sterke, betrouwbare lassen
Dual-Pulse technologie voor schoner en stabieler lassen
Twee A-klasse accu's met 8 veiligheidsfuncties
Lasmogelijkheid voor meerdere materialen van 0,1–0,5 mm
Meer dan 10.000 precisie-instelniveaus voor professionele controle
2,4-inch TFT-display met realtime gegevensbewaking
Specificaties
Maximale lasstroom
1200 A
Batterijcapaciteit
5000 mAh
Opladen
5 V/2,1 A
Ontladen
5 V/2,1 A
Lasmaterialen
Nikkel, ijzer, roestvrij staal
Lasdikte
0,1-0,5 mm
Niveau
4 vooraf ingestelde combinaties Niveaus
Inbegrepen
1x FNIRSI SWM-20 puntlasapparaat
2x Laspennen
2x Vervangingstips
1x Nikkelstrip
1x USB-C kabel
1x Manual
Downloads
Manual
Mastering Surface Mount Technology takes you on a crash course in techniques, tips and know-how to successfully introduce surface mount technology in your workflow. Even if you are on a budget you too can jumpstart your designs with advanced fine pitch parts.
Besides explaining methodology and equipment, attention is given to SMT parts technologies and soldering methods. In a step by step way, several projects introduce you to handling surface mount parts and the required skills to successfully build SMT assemblies. Many practical tips and tricks are disclosed that bring surface mount technology into everyone's reach without breaking the bank.
From SRPP and Mu-Follower to OTL Designs
Tube amplifiers suffer from distortion. Fortunately, circuits such as the SRPP amplifier, mu-follower, and beta-follower produce minimal distortion even at output voltages of 50 to 100 Vpeak.
These designs are often published with errors. Without a sound understanding of the theory, it is easy to arrive at a flawed design.
In the first section of this book, we investigate the origin of distortion, while in the second we investigate the design of and SRPP and a mu-follower.
On the internet we can find the most exotic designs. Evaluating them teaches us that these designs often make matters worse rather than better. In the chapter on incorrect SRPPs and mu-followers, we sometimes see bizarre and misguided designs where using a simple single-triode amplifier would perform much better.
Push-pull output stages also exist. A great number of them are examined, and their similarity to the SRPP is discussed. This is done especially with the help of the theory behind the OTL based on the ‘mother’ of all OTLs, the Philips HF303.
Finally, attention is given to frequency characteristics and technical matters such as the supply voltage and the filament power supply.
To illustrate these points, there are a few designs covering the subjects discussed.
This book presents much new theory that has not been published before. It is often an eye-opener, showing that many things have a beautiful and unexpected simplicity.
De Raspberry Pi 400 biedt een quad-core 64-bits processor, 4 GB RAM, draadloos netwerken, uitvoer op twee schermen, 4K-videoweergave en een 40-pins GPIO-header. Het is een krachtige, compacte computer ingebouwd in een draagbaar toetsenbord.
Specificaties
Processor
Broadcom BCM2711 quad-core Cortex-A72 (ARM v8) 64-bit SoC @ 1.8 GHz
RAM
4 GB LPDDR4-3200
Connectivity
Dual-band (2.4 GHz and 5.0 GHz) IEEE 802.11b/g/n/ac wireless LANBluetooth 5.0, BLEGigabit Ethernet2 × USB 3.0 and 1 × USB 2.0 ports
GPIO
Horizontal 40-pin GPIO header
Video & Sound
2 × micro HDMI ports (supports up to 4Kp60)
Multimedia
H.265 (4Kp60 decode)H.264 (1080p60 decode, 1080p30 encode)OpenGL ES 3.0 graphics
SD card support
MicroSD card slot for operating system and data storage
Keyboard
US keyboard
Power
5 V DC via USB connector
Operating temperature
0°C to +40°C
Dimensions
286 × 122 × 23 mm (maximum)
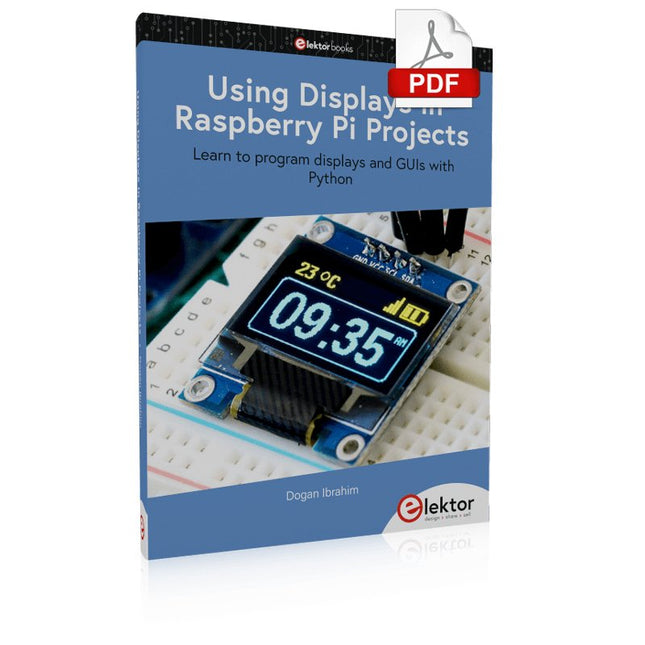
Learn to program displays and GUIs with Python
This book is about Raspberry Pi 4 display projects. The book starts by explaining how to install the latest Raspbian operating system on an SD card, and how to configure and use the GPIO ports.
The core of the book explains the following topics in simple terms with fully tested and working example projects:
Simple LED projects
Bar graph LED projects
Matrix LED projects
Bitmap LED projects
LED strips
LCDs
OLED displays
E-paper displays
TFT displays
7-inch touch screen
GUI Programming with Tkinder
One unique feature of this book is that it covers almost all types of display that readers will need to use in their Raspberry Pi based projects. The operation of each project is fully given, including block diagrams, circuit diagrams, and commented full program listings. It is therefore an easy task to convert the given projects to run on other popular platforms, such as Arduino or PIC microcontrollers.
Python program listings of all Raspberry Pi projects developed in this book are available for download at Elektor.com. Readers can use these programs in their projects. Alternatively, they can modify the programs to suit their applications.
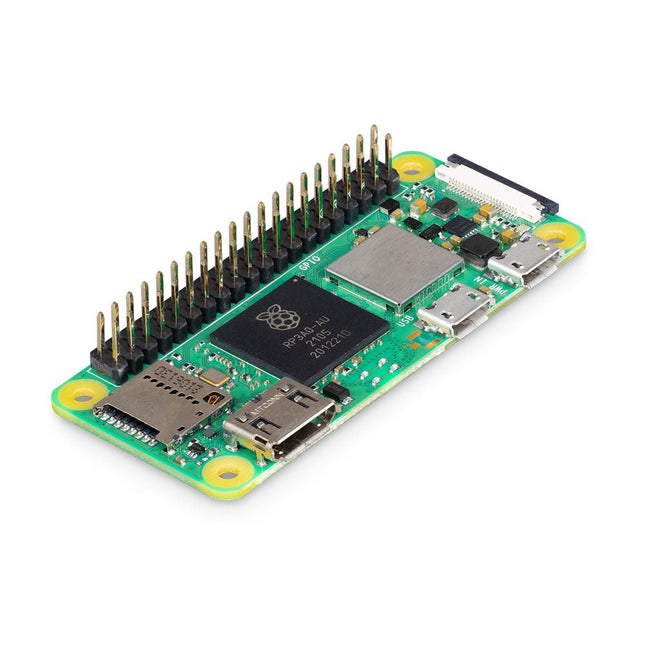
Raspberry Pi Zero 2 WH is de opvolger van de baanbrekende Raspberry Pi Zero W(H). Het bord bevat een quad-core 64-bit Arm Cortex-A53 CPU, geklokt op 1 GHz. Het hart is een Raspberry Pi RP3A0 system-in-package (SiP), waarin een Broadcom BCM2710A1 chip is geïntegreerd met 512 MB LPDDR2 SDRAM. De verbeterde processor biedt Raspberry Pi Zero 2 WH 40% meer single-threaded prestaties, en vijf keer meer multi-threaded prestaties, dan de originele single-core Raspberry Pi Zero.
Kenmerken
64-bit quad core-processor
VideoCore IV GPU
512 MB LPDDR2 DRAM
802.11b/g/n draadloos LAN
Bluetooth 4.2 / Bluetooth Low Energy (BLE)
Slot voor MicroSD-kaart
Mini HDMI- en USB 2.0 OTG-poorten
Micro-USB-voeding
Met gemonteerde 40-pins header
Composiet video- en reset-pinnen via soldeer testpunten
CSI-cameraconnector
Specificaties
SoC
Broadcom BCM2710A1
CPU
64-bit ARM Cortex-A53 (4x 1 GHz)
GPU
Broadcom VideoCore VI
RAM
512 MB LPDDR2
Wireless LAN
2,4 GHz IEEE 802.11b/g/n
Bluetooth
Bluetooth 4.2, BLE
USB
1x micro USB (voor data)1x micro USB (voor voeding)
GPIO
HAT-compatibele 40-pins GPIO-header
Video & audio
1080P HD-video en stereo-audio via mini-HDMI-connector
SD-kaart
microSD (voor besturingssysteem en opslag)
Voeding
5 VDC / 2,5 A (geleverd via micro-USB-connector)
Afmetingen
65 x 30 x 5 mm
Raspberry Pi Zero 2 WH is footprint-compatibel met eerdere Zero-modellen.
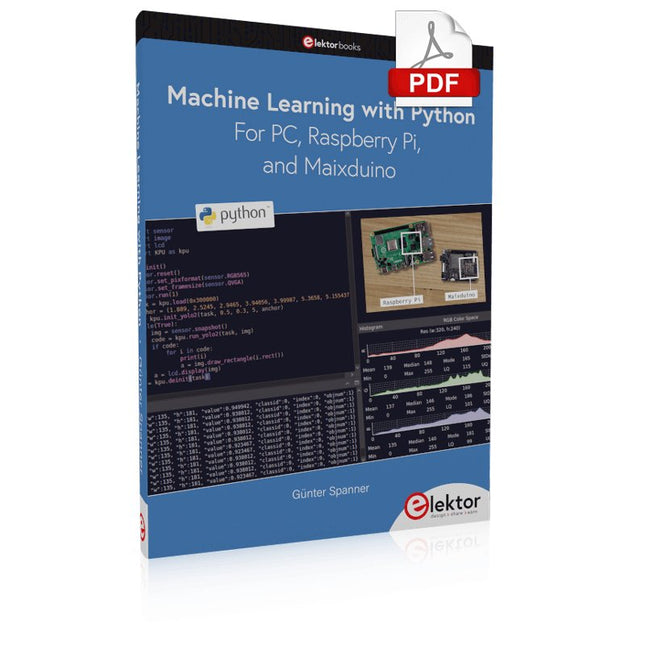
Most people are increasingly confronted with the applications of Artificial Intelligence (AI). Music or video ratings, navigation systems, shopping advice, etc. are based on methods that can be attributed to this field.
The term Artificial Intelligence was coined in 1956 at an international conference known as the Dartmouth Summer Research Project. One basic approach was to model the functioning of the human brain and to construct advanced computer systems based on this. Soon it should be clear how the human mind works. Transferring it to a machine was considered only a small step. This notion proved to be a bit too optimistic. Nevertheless, the progress of modern AI, or rather its subspecialty called Machine Learning (ML), can no longer be denied.
In this book, several different systems will be used to get to know the methods of machine learning in more detail. In addition to the PC, both the Raspberry Pi and the Maixduino will demonstrate their capabilities in the individual projects. In addition to applications such as object and facial recognition, practical systems such as bottle detectors, person counters, or a “talking eye” will also be created.
The latter is capable of acoustically describing objects or faces that are detected automatically. For example, if a vehicle is in the field of view of the connected camera, the information 'I see a car!' is output via electronically generated speech. Such devices are highly interesting examples of how, for example, blind or severely visually impaired people can also benefit from AI systems.
De Andonstar AD409 Max-ES heeft een hoogwaardige metalen lens en een uniek UV-filterontwerp. Het is gemaakt van hoogwaardige materialen van industriële kwaliteit en levert ongeëvenaarde precisie en duurzaamheid, waardoor een betrouwbare productervaring wordt gegarandeerd. Het UV-filter dat voor de metalen lens is geplaatst, blokkeert soldeerhitte, rook en stof, beschermt de lens en maakt hem perfect voor soldeer- en onderhoudsprofessionals.
De AD409 Max-ES is voorzien van een extra groot Max-station (46 x 37 x 47,5 cm) en een geavanceerde gereedschapsset, waardoor het soldeerstationoppervlak met 370% wordt uitgebreid. Deze upgrade voldoet aan de eisen van professionele soldeerwerkzaamheden en biedt voldoende werkruimte voor grotere projecten.
De gebruiksvriendelijke gereedschapshouder houdt gereedschap binnen handbereik en zorgt ervoor dat ze altijd toegankelijk zijn. Bovendien vereenvoudigen de soldeerhulphanden met draaibare klemmen soldeer- en reparatietaken, waardoor de efficiëntie en het gemak worden vergroot.
De endoscoop biedt een rondom zicht van 360°. Dit maakt duidelijke observatie van componenten van alle kanten en in leidingen mogelijk, waardoor blinde hoeken worden geëlimineerd en grondige inspecties worden gegarandeerd.
Kenmerken
Hoogwaardige metalen lens en uniek UV-filterontwerp
Nieuw Max-station
Eenvoudig te gebruiken gereedschapshouder en helpende handen bij het solderen
Microscoop met endoscoop rondom zicht 360°
Professionele HDMI digitale microscoop ondersteunt meerdere uitvoermethoden
In 8 niveaus verstelbare LED's
Handige draadloze afstandsbediening
Specificaties
Schermgrootte
10,1 inch (1200x800)
Beeldsensor
4 MP
Video uitgang
UHD 2880x2160 (24 fps)FHD 1920x1080 (60 fps/30 fps)HD 1280x720 (120 fps)
Video formaat
MP4
Vergroting
Tot 300 keer (27 inch HDMI-monitor)
Foto resolutie
Max. 24 MP (5600x4200)
Foto formaat
JPG
Focus afstand
Min. 5 cm
Frame rate
Max. 120fps
Video interface
HDMI
Opslag
MicroSD-kaart (tot 64 GB)
PC-ondersteuning
Windows, PC-software met metingen
Mobiele telefoon, tablet en terminal ondersteuning
Ondersteuning WiFi-verbinding en metingen
Voeding
5 V DC
Verlichting
2 LED's op de standaard
Endoscoop
Ja
Afmetingen standaard
46 x 37 x 47,5 cm
Inbegrepen
1x Andonstar AD409 Max-ES Digitale Microscoop
1x Endoscoop
1x Standaard met 2 LED's
1x UV-filter (reeds gemonteerd in de lens)
1x Soldeermat
1x Drager
1x Kolom
1x Gereedschapshouder
1x Solderende helpende handen
1x Voedingsadapter
1x Voedingskabel
1x HDMI-kabel
1x USB-kabel
1x IR-afstandsbediening
1x Manual
Downloads
Manual
Software
Bespaar € 10 met deze starterkit in vergelijking met afzonderlijke aankoop!
Deze speciale Raspberry Pi 4 starterkit bevat alles wat je nodig hebt om meteen aan de slag te gaan met 's werelds populairste minicomputer als ontwikkel- en multimedia-apparaat.
Inhoud van de kit
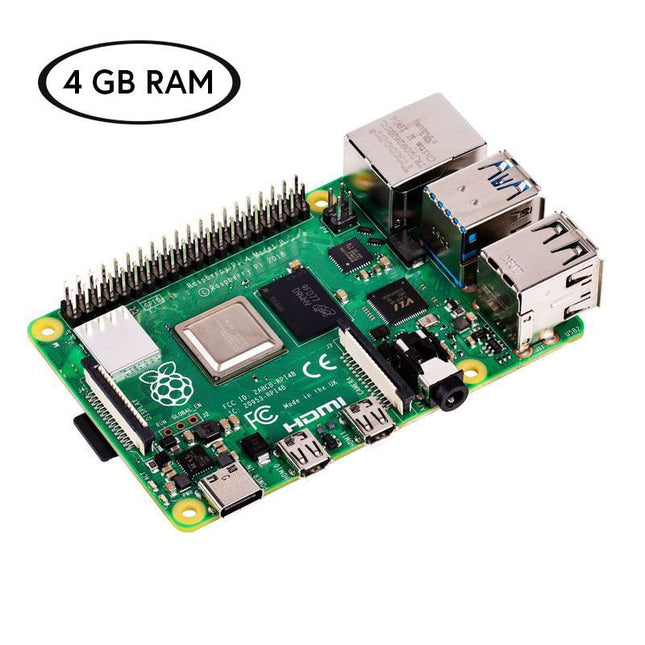
Raspberry Pi 4 B (4 GB RAM)De Raspberry Pi 4 is een compleet computersysteem in een klein formaat dat multimedia en desktop prestaties levert die vergelijkbaar zijn met die van een basis x86 PC systeem.
Broadcom BCM2711 SoC 64-bit quad-core ARM Cortex-A72 (1,5 GHz)
VideoCore VI @ 500 MHz
4 GB LPDDR4 SDRAM
Gigabit Ethernet
802.11ac Wi-Fi
Bluetooth 5.0
2x USB 3.0, 2x USB 2.0 en 1x USB-C (voor stroomvoorziening)
2x micro-HDMI (tot 4Kp60)
1x MicroSD (voor opslag)
Officiële EU voeding (5,1 V, 3 A) voor Raspberry Pi 4 (wit)De officiële Raspberry Pi USB-C voeding (15,3 W) is speciaal ontworpen om de Raspberry Pi 4 van stroom te voorzien.
MicroSD kaart (32 GB, klasse 10) met SD adapter (voorgeïnstalleerd met NOOBS)Deze microSD met voorgeïnstalleerde NOOBS (New Out Of Box Software) is een eenvoudig te gebruiken installatiemanager voor het besturingssysteem van de Raspberry Pi.
Officiële behuizing voor (wit/rood)Deze perfect passende behuizing beschermt de Raspberry Pi 4.
Officiële HDMI kabel voor Raspberry Pi 4 (wit, 1 m)De officiële Raspberry Pi micro-HDMI naar HDMI (A/M) kabel (wit, 1 m) is ontworpen voor de Raspberry Pi 4.
Koellichaamset voor Raspberry PiDeze aluminium koellichamen koelen het board en voorkomen dat de Raspberry Pi oververhit raakt.
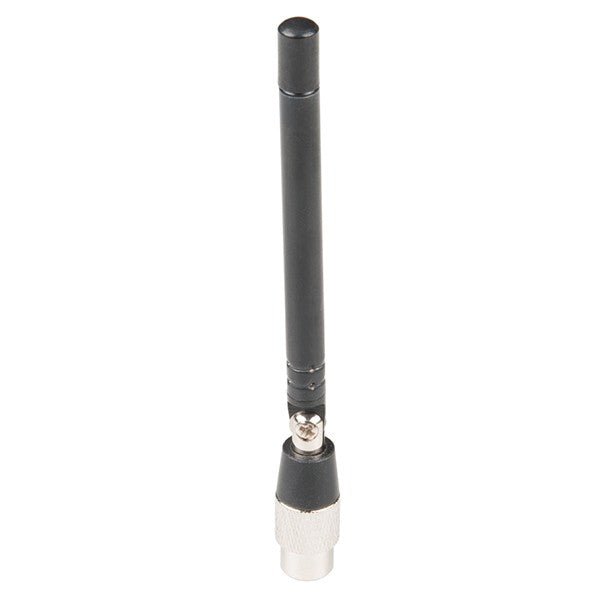
De ANT700 van Great Scott Gadgets is een lichtgewicht telescoopantenne voor gebruik tussen 300 MHz en 1100 MHz. De totale lengte kan worden ingesteld tussen 9,5 cm en 24,5 cm. De ANT700 is gemaakt van roestvrij staal en heeft een SMA-connector, een draaibare schacht en een verstelbaar kniestuk.
De ANT700 is een 50-ohm antenne voor algemeen gebruik. Het is een perfecte instapantenne voor gebruik met HackRF One/Pro.
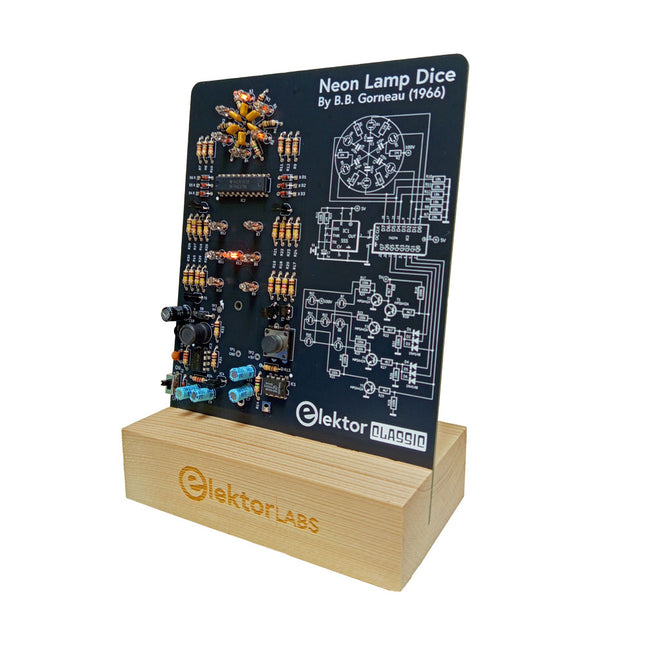
Een retro-rol met een neonziel
Dobbelstenen met leds zijn gebruikelijk, maar hun licht is koud. Dat geldt niet voor deze elektronische neon-dobbelsteen, die zijn waarde toont met de warme gloed van neonlampen. Hij is perfect om te spelen op koude, donkere winteravonden. De ogen van de dobbelsteen zijn neonlampen en de random number generator heeft zes neonlampen om aan te geven dat hij werkt.
Hoewel de dobbelsteen een ingebouwde 100 V-voeding heeft, is hij volkomen veilig. Zoals bij alle Elektor Classic-producten is ook bij de dobbelsteen het schema op de voorkant afgedrukt, terwijl een uitleg over de werking van de schakeling op de achterkant te vinden is.
De neonlamp-dobbelsteen wordt geleverd als een bouwpakket met eenvoudig te solderen doorlopende onderdelen. De voeding is een 9 V-batterij (niet meegeleverd).
Kenmerken
Warme vintage gloed
Elektor Heritage Circuit Symbolen
Getest en getest door Elektor Labs
Educatief en geeky project
Alleen doorlopende onderdelen
Inbegrepen
Printplaat
Alle componenten
Houten standaard
Vereist
9 V batterij
Stuklijst
Weerstanden (THT, 150 V, 0.25 W)
R1, R2, R3, R4, R5, R6, R14 = 1 MΩ
R7, R8, R9, R10, R11, R12 = 18 kΩ
R13, R15, R16, R17, R18, R21, R23, R24, R25, R26, R28, R30, R33 = 100 kΩ
R32, R34 = 1.2 kΩ
R19, R20, R22, R27, R29 = 4.7 kΩ
R31 = 1 Ω
Condensatoren
C1, C2, C3, C4, C5, C6 = 470 nF, 50 V, 5 mm pitch
C7, C9, C11, C12 = 1 µF, 16 V, 2 mm pitch
C8 = 470 pF, 50 V, 5 mm pitch
C10 = 1 µF, 250 V, 2.5 mm pitch
Spoelen
L1 = 470 µH
Halfgeleiders
D1, D2, D3, D4, D5, D6, D7 = 1N4148
D8 = STPS1150
IC1 = NE555
IC2 = 74HC374
IC3 = MC34063
IC4 = 78L05
T1, T2, T3, T4, T5 = MPSA42
T6 = STQ2LN60K3-AP
Diversen
K1 = PP3 9 V batterijhouder
NE1, NE2, NE3, NE4, NE5, NE6, NE7, NE8, NE9, NE10, NE11, NE12, NE13 = neonlicht
S2 = Miniatuurschuifschakelaar
S1 = Drukknop (12 x 12 mm)
De Elektor Super Servo Tester kan servo's aansturen en servosignalen meten. Hij kan tot vier servokanalen tegelijkertijd testen.
De Super Servo Tester wordt geleverd als bouwpakket. Alle onderdelen die nodig zijn om de Super Servo Tester in elkaar te zetten zijn inbegrepen in de set. Het bouwen van de kit vereist enige basisvaardigheid met solderen. De microcontroller is al geprogrammeerd.
De Super Servo Tester beschikt over twee bedrijfsmodi: Control/Manual en Measure/Inputs.
In de modus Control/Manual genereert de Super Servo Tester besturingssignalen op zijn uitgangen voor maximaal vier servo's, of voor de flight controller of ESC. De signalen worden ingeregeld door de vier potentiometers.
In de modus Measure/Inputs meet de Super Servo Tester de servosignalen die op de ingangen zijn aangesloten. Deze signalen kunnen afkomstig zijn van bijvoorbeeld een ESC, een flight controller, of de ontvanger, of een ander apparaat. De signalen worden ook naar de uitgangen geleid om de servo's of de flight controller of ESC aan te sturen. De resultaten worden op het display weergegeven.
Specificaties
Operating modi
Control/Manual & Measure/Inputs
Kanalen
3
Servosignaal ingangen
4
Servosignaal uitgangen
4
Alarm
Zoemer & LED
Weergave
0,96" OLED (128 x 32 pixels)
Ingangsspanning op K5
7 - 12 VDC
Ingangsspanning op K1
5 - 7,5 VDC
Ingangsstroom
30 mA (9 VDC op K5, en niets aangesloten op K1 en K2)
Afmetingen
113 x 66 x 25 mm
Gewicht
60 g
Inbegrepen
Weerstanden (0,25 W)
R1, R3
1 k?, 5%
R2, R4, R5, R6, R7, R9, R10
10 k?, 5%
R8
22 ?, 5%
P1, P2, P3, P4
10 k?, lin/B, verticale potentiometer
Condensatoren
C1
100 ?F 16 V
C2
10 ?F 25 V
C3, C4, C7
100 nF
C5, C6
22 pF
Halfgeleiders
D1
1N5817
D2
LM385Z-2.5
D3
BZX79-C5V1
IC1
7805
IC2
ATmega328P-PU, geprogrammeerd
LED1
LED, 3 mm, rood
T1
2N7000
Diversen
BUZ1
Piëzo-zoemer met oscillator
K1, K2
2-rijige, 12-voudige pinheader, 90°
K5
Barrel jack
K4
1-rijige, 4-polige pinvoet
K3
2-rijige, 6-voudige boxed pinheader
S1
Schuifschakelaar DPDT
S2
Schuifschakelaar SPDT
X1
Kristal, 16 MHz
28-voudige DIP-voet voor IC2
Elektor printplaat
OLED-scherm, 0,96", 128 x 32 pixels, 4-pins I²C-interface
Links
Elektor Magazine
Elektor Labs
Learn to Build Intelligent Embedded Systems
Build smarter embedded systems with Arduino UNO Q. This book gives you the tools, knowledge, and confidence to turn ideas into intelligent, working solutions using the Arduino UNO Q platform. Discover how to build intelligent embedded systems with the Arduino UNO Q and AI.
Unlock the full potential of the Arduino UNO Q, a next-generation platform that combines the real-time power of the STM32U585 microcontroller with the flexibility of a Qualcomm Dragonwing QRB2210 microprocessor.
Learn how to rapidly prototype real-world applications using the Arduino IDE for low-level embedded control and Python in Arduino App Lab for high-level development.
Build confidence through hands-on projects that guide you step by step from basic board features to complete working systems.
Explore ready-to-use, AI based Arduino App Lab examples and see how they can jump-start your development and reduce time to deployment.
Step into the world of Edge AI with a clear, practical introduction to Edge Impulse Studio—no prior AI experience required.
Follow a complete, real-world workflow to create a Keyword Spotting AI application, covering data collection, model training, optimization, and on-device inference using the Edge Impulse Studio.
Bridge the gap between embedded systems and machine learning and learn how to bring intelligence directly onto your hardware.
Perfect for embedded engineers, educators, students, and makers looking to stay ahead in AI-enabled product development.
Projects with Thonny-IDE, uPyCraft-IDE, and ESP32
The 'Python' programming language has enjoyed an enormous upswing in recent years. Not least, various single-board systems such as the Raspberry Pi have contributed to its popularity. But Python has also found widespread use in other fields, such as artificial intelligence (AI) or machine learning (ML). It is obvious, therefore, to use Python or the 'MicroPython' variant for use in SoCs (Systems on Chip) as well.
Powerful controllers such as the ESP32 from Espressif Systems offer excellent performance as well as Wi-Fi and Bluetooth functionality at an affordable price. With these features, the Maker scene has been taken by storm. Compared to other controllers, the ESP32 has a significantly larger flash and SRAM memory, as well as a much higher CPU speed. Due to these characteristics, the chip is not only suitable for classic C applications, but also for programming with MicroPython.
This book introduces the application of modern one-chip systems. In addition to the technical background, the focus is on MicroPython itself. After the introduction to the language, the programming skills learned are immediately put into practice. The individual projects are suitable for use in the laboratory as well as for everyday applications. So, in addition to the actual learning effect, the focus is also on the joy of building complete and useful devices. By using laboratory breadboards, circuits of all kinds can be realized with little effort, turning the testing and debugging of the 100% homebrew projects into an instructive pleasure.
The various applications, such as weather stations, digital voltmeters, ultrasound range finders, RFID card readers or function generators, make the projects presented ideally suited for practical courses or subject and study work in the natural sciences, or in science and technology classes.
Example projects with Node-RED, MQTT, WinCC SCADA, Blynk, and ThingSpeak
This comprehensive guide unlocks the power of Modbus TCP/IP communication with Arduino. From the basics of the Modbus protocol right up to full implementation in Arduino projects, the book walks you through the complete process with lucid explanations and practical examples.
Learn how to set up Modbus TCP/IP communication with Arduino for seamless data exchange between devices over a network. Explore different Modbus functions and master reading and writing registers to control your devices remotely. Create Modbus client and server applications to integrate into your Arduino projects, boosting their connectivity and automation level.
With detailed code snippets and illustrations, this guide is perfect for beginners and experienced Arduino enthusiasts alike. Whether you‘re a hobbyist looking to expand your skills or a professional seeking to implement Modbus TCP/IP communication in your projects, this book provides all the knowledge you need to harness the full potential of Modbus with Arduino.
Projects covered in the book:
TCP/IP communication between two Arduino Uno boards
Modbus TCP/IP communication within the Node-RED environment
Combining Arduino, Node-RED, and Blynk IoT cloud
Interfacing Modbus TCP/IP with WinCC SCADA to control sensors
Using MQTT protocol with Ethernet/ESP8266
Connecting to ThingSpeak IoT cloud using Ethernet/ESP8266
De Elektor Milliohmmeter Adapter gebruikt de precisie van een multimeter om zeer lage weerstandswaarden te meten. Het is een adapter die een weerstand omzet in een spanning die kan worden gemeten met een standaard multimeter.
De Elektor Milliohmmeter Adapter kan weerstanden meten onder 1 mΩ met behulp van een 4-draads (Kelvin) methode. Het is handig voor het lokaliseren van kortsluitingen op printplaten (PCB).
De adapter heeft drie meetbereiken – 1 mΩ, 10 mΩ en 100 mΩ – selecteerbaar via een schuifschakelaar. Het bevat ook ingebouwde kalibratieweerstanden. De Elektor Milliohmmeter Adapter wordt gevoed door drie 1,5 V AA batterijen (niet meegeleverd).
Specificaties
Meetbereiken
1 mΩ, 10 mΩ, 100 mΩ, 0,1%
Voeding
3x 1,5 V AA-batterijen (niet inbegrepen)
Afmetingen
103 x 66 x 18 mm (compatibel met Hammond 1593N-type behuizing, niet inbegrepen)
Speciale functie
Geïntegreerde kalibratieweerstanden
Downloads
Documentation
An 8-in-1 test & measurement instrument for the electronics workbench
A well-equipped electronics lab is crammed with power supplies, measuring devices, test equipment and signal generators. Wouldn‘t it be better to have one compact device for almost all tasks? Based on the Arduino, a PC interface is to be developed that’s as versatile as possible for measurement and control. It simply hangs on a USB cable and – depending on the software – forms the measuring head of a digital voltmeter or PC oscilloscope, a signal generator, an adjustable voltage source, a frequency counter, an ohmmeter, a capacitance meter, a characteristic curve recorder, and much more.
The circuits and methods collected here are not only relevant for exactly these tasks in the "MSR" electronics lab, but many details can also be used within completely different contexts.
Resonances From Aether Days
A Pictorial and Technical Analysis from WWII to the Internet Age
From the birth of radio to the late 1980s, much of real life unfolded through shortwave communication. World War II demonstrated—beyond a shadow of a doubt—that effective communications equipment was a vital prerequisite for military success. In the postwar years, shortwave became the backbone on which many of the world's most critical services depended every day.
All the radio equipment—through whose cathodes, grids, plates, and transistors so much of human history has flowed—is an exceptional subject of study and enjoyment for those of us who are passionate about vintage electronics. In this book, which begins in the aftermath of World War II, you’ll find a rich collection of information: descriptions, tips, technical notes, photos, and schematics that will be valuable for anyone interested in restoring—or simply learning about—these extraordinary witnesses to one of the most remarkable eras in technological history.
My hope is that these pages will help preserve this vast treasure of knowledge, innovation, and history—a heritage that far transcends the purely technical.
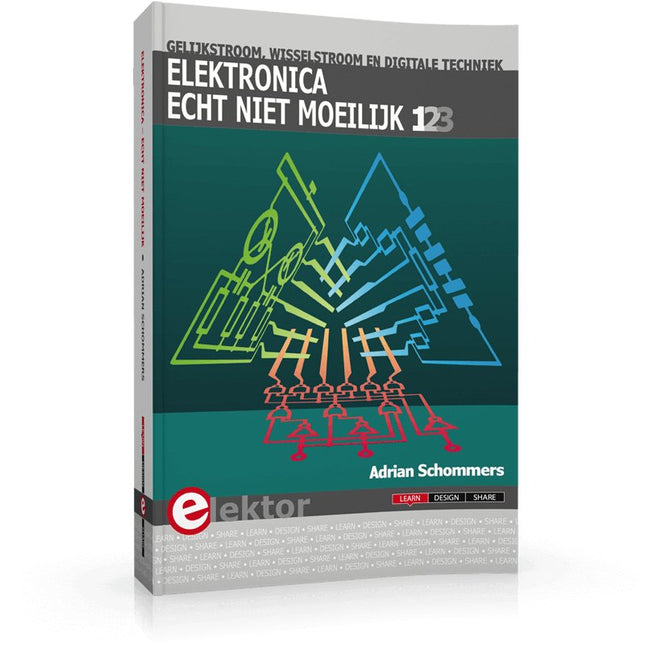
Elektronica moeilijk? De titel van dit boek geeft het antwoord!
In deze 3-in-1-band wordt de elektronica vanuit de praktijk benaderd. Dat wil zeggen veel praktijk in de vorm van experimenten en een minimum aan theorie. Zo raakt u stap voor stap vertrouwd met de behandelde onderwerpen. Daarbij ontstaan gaandeweg ook een flink aantal praktisch bruikbare schakelingen. Het gaat bij de elektronicahobby tenslotte om het bouwen of uitdenken van allerlei praktische of leuke schakelingen.
Aan het eind van elk deel is een aanhangsel opgenomen met aanvullende informatie en de gegevens van een groot aantal elektronische componenten, zodat na dit boek ook eigen ideeën en experimenten kunnen worden aangepakt.
In deze 3-in-1-band zijn de eerste drie delen uit de serie “Elektronica echt niet moeilijk” samengevoegd:
Deel 1: experimenten met gelijkstroom
Deel 2: experimenten met wisselstroom
Deel 3: experimenten met digitale techniek