Bestsellers
-
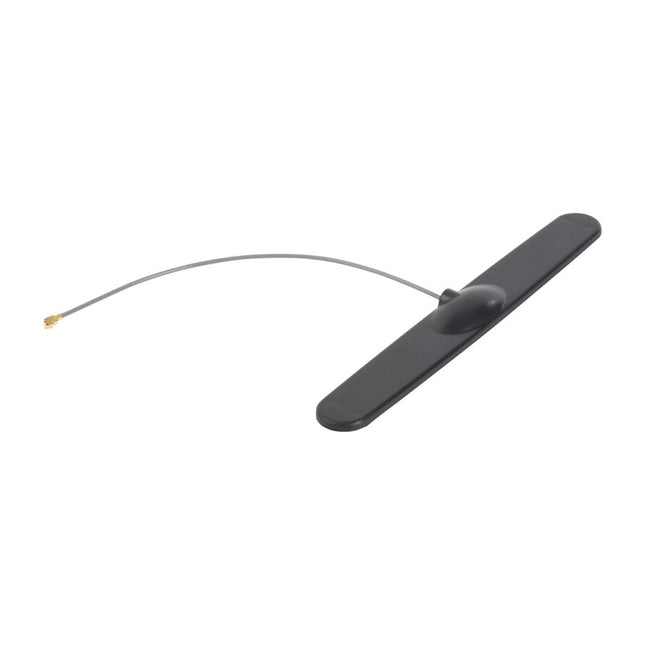
Arduino GSM Antenna for Arduino MKR Boards
Deze antenne werkt ook met Arduino MKR FOX 1200 / Ardunio MKR GSM 1400 / Arduino MKR WAN 1300. Antenne-aansluiting: U.FL GSM 433/868/915 MHz
€ 7,95€ 4,95
Leden identiek
-

Elektor Digital Elektor Juillet/Août 2025 (PDF) FR
Le téléchargement intégral de ce numéro est disponible pour nos membres GOLD et GREEN sur le site Elektor Magazine ! Pas encore membre ? Cliquez ici. tableau de bord OBD2Des cadrans anciens aux données en temps réel OBD2 : ajoutez un compte-tours et un indicateur de changement de vitesse à votre voitureRétro, mais extrêmement utile capteurs de vision et LiDAR pour la robotique Sensor+Test 2025 et PCIM 2025 mesures sans contact du champ électrique (1)Membrane vibrante pour mesurer des tensions continues ou des champs électriques statiques détecteur de courrier sans filCapteurs optiques, radars… quelques options à explorer Elektor Mini-WheelieUn robot auto-équilibré cellules solairesDrôles de composants, la série premiers pas avec un capteur radar moderneUn capteur précis qui ne passe pas inaperçu sur le vifUsine de papier CybersécuritéDes temps difficiles pour les hackers Infographie : IdO et capteurs le Bluetooth 6.0 pour des applications de télémétrie amélioréesCette nouvelle version offre des fonctions de localisation améliorées découvrez la communication sans fil avec BeagleY-AI Projet 2.0Corrections, mises à jour et courrier des lecteurs démarrer en électronique……Conclusion sur les ampli-op un puissant assistant de codage de l'IAAccélérez votre développement avec Continue et Visual Studio Code contrôleur de charge solaire avec MPPT (2)Le circuit détecteur d'obstacles à ultrasonsUn projet simple pour aider les malvoyants une odyssée de l'IABilan du premier semestre synthétiseur MIDI autonome Raspberry Pi (3)plus intelligent avec une interface utilisateur Meshtastic : un projet de démoUn réseau intelligent de noeuds LoRa générateur analogique de fréquences audioGénérateur de signaux sinusoïdaux de haute qualité à fréquence réglable
€ 10,95
-
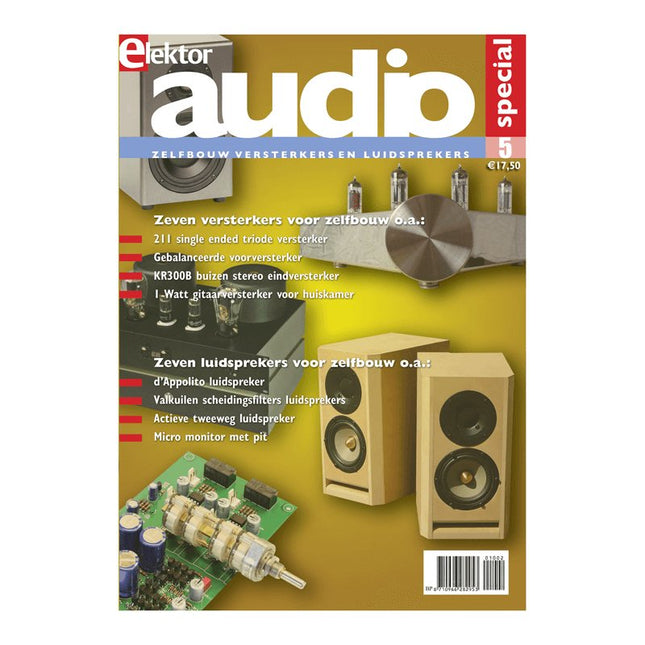
Elektor Digital Elektor Special: Audio 5 (PDF)
Zelfbouw versterkers en luidsprekers Ook deze vijfde Audio Special staat weer vol met interessante bouwbeschrijvingen en achtergrondartikelen van internationaal gerenommeerde ontwerpers. Ook dit jaar weer de inmiddels bekende mix van buizenversterkers en luidsprekers, zodat er voor iedere zelfbouwer ongetwijfeld iets interessants te lezen of te bouwen valt. Het gaat in alle gevallen om nieuwe, nog niet eerder gepubliceerde artikelen. Inhoud Versterkers Classic Three voorversterker Lijnvoorversterker met 6C33 De Dirigent – buizenvoorversterker met actief scheidingsfilter Single ended KR300B stereo eindversterker 1 Watt gitaarversterker – voor huiskamer Single ended 211 triode versterker – met interstage trafo Dieper kijken in de uitgangstransformator Prelude voorversterker – minimalisme in optima forma Klik aan, klik uit schakelaar – een netschakelaar met legio toepassingen Luidsprekers Scheidingsfilters voor luidsprekerboxen – meer valkuilen dan je lief is Morel Elite 420 – actieve tweeweg boekenplank luidspreker All back – een verrassend veelzijdige compacte TL HATT-SE MkII Micro Monitor – kleine luidspreker met pit Silverado – een d’Appolito met pit Nebular Monitor – een compacte luidspreker met een groots geluid LBVS – zelfbouwklassieker van eigen bodem Solo 201 – er is maar één weg!
€ 17,50
Leden € 15,75
-

Elektor Digital Kleine zenders voor zelfbouw (E-book)
Er zijn niet zoveel boeken te vinden over het ontwerpen en bouwen van zenders met een klein uitgangsvermogen. Dit boek beschrijft nauwkeurig de werking en bouw van maar liefst twintig audio- en videozender(tje)s. Daarmee biedt het aan de amateur-elektronicus, technicus, zendamateur en andere radio-enthousiasten het noodzakelijke materiaal om zich verder te bekwamen op dit gebied. Er wordt slechts weinig aandacht besteed aan de theorie, maar dat heeft een groot voordeel: ruim 300 pagina’s vol praktijk. De zenders, sommige eenvoudig, andere meer gecompliceerd, werden speciaal ontworpen voor het gebruik door amateurs. Ze werken tussen 150 kHz en 1300 MHz. De gebruikte techniek dateert vooral uit de jaren 90. Dit mag op het eerste gezicht een tekortkoming lijken, maar het is juist een extra argument voor publicatie. De technieken hebben zich inmiddels bewezen en er worden eenvoudige, goedkope en nog steeds goed verkrijgbare onderdelen gebruikt. Dit boek richt zich dus in de eerste plaats tot de potentiële gebruiker van HF-technieken, die er niet voor terugschrikt om dit soort schakelingen in elkaar te zetten. De schakelingen zijn probleemloos na te bouwen (nog een voordeel van zich bewezen technieken). Om dat te bereiken hebben de auteurs veel aandacht besteed aan: de testprocedures voor elke schakeling, de onderdelenlijst, instructies voor het vervaardigen van de spoelen en voor de afregeling. Bij de meeste schakelingen is bovendien een printontwerp afgedrukt. Naast zenders voor o.a. FM-stereo, AM, VHF-FM-amateur, R/C-TV, 40-m-CW-zender, 10-m-SSB, 2-m-NBFM, FM-video-link en amateur-TV vindt u in dit boek ook verwante schakelingen, zoals een down-converter voor 400, 900 en 1300 MHz en een HF-vermogensmeter.
€ 29,95
Leden € 23,96
-

Elektor Digital Moderne High-End buizenversterkers (E-book)
met ringkern-uitgangstranformatoren Buizenversterkers vormen voor velen het neusje van de zalm, wanneer het gaat om de versterking van audiosignalen. De combinatie van klassieke techniek met moderne componenten heeft geleid tot een ware revival van de buizenversterker. De toepassing van de in de afgelopen 15 jaar door de auteur ontwikkelde 'ringkern-uitgangstransformatoren' heeft daar mede toe bijgedragen. Opvallend aan deze transformatoren zijn vooral het extreem grote frequentie bereik en de geringe lineaire en niet-lineaire vervormingen. Het hoe en waarom van de transformator wordt op verschillende niveaus uitgelegd, beginnend bij inleidende begripsvorming en eindigende bij complete wiskundige beschrijvingen, waarbij ook de samenwerking van de transformator met de buizen en de luidspreker centraal staat. Naast de beschrijving van schematuur en zelfbouw van eenvoudig na te bouwen moderne high-end buizenversterkers met een uitgangsvermogen van 10 tot 100 Watt, worden bijzondere buizenversterkers met ringkerntransformatoren besproken: innovatieve oplossingen voor perfecte audiokwaliteit. Zowel de zelfbouwer als degene die kennis en inzicht wil verwerven in de complexe materie van transformatoren, buizenversterkers en audiosignaalverwerking zal dit boek met plezier ter hand nemen.
€ 29,95
Leden € 23,96
-

Elektor Digital Elektor Circuit Special 2024 PDF (FR)
Le téléchargement intégral de ce numéro est disponible pour nos membres GOLD et GREEN sur le site Elektor Magazine ! Pas encore membre ? Cliquez ici. charge électronique pour les tests à haute intensitéde la nécessité à l'innovation suppresseur de voixcircuit pour un karaoké instantané sélecteur audio A/B avec réglage de gaincommuter de l'entrée micro à l'entrée ligne optimiser la rechrage du LIR2032prenez soin de vos piles bouton la détection tactile en toute simplicitéun guide de fabrication pour n'importe quel microcontrôleur interrupteur universel à télécommandeune nouvelle vie pour les vieilles télécommandes une boite à meuh avec un microcontrôleurproduire des sons amusants à l'aide d'un microcontrôleur interface de batterie externe USB alimenter les appareils à faible consommation avec des batteries externesune Solution pour les maintenir actives mini-ampli audio de classe A avec sortie en courantpiloter les haut-parleurs en courant au lieu de tension module pseudo-symétriqueCMRR élevé avec des liaisons audio asymétriques chargeur automatique d'accu Ni-MHrechargez toutes vos batteries simultanément ! protection pour alimentation électrique basée sur un thyristor lecteur d'empreintes digitalesdispositif utile d'identification convertisseur de puissance DC-DC 3Aaméliorer vos sources de tension fixes innovations de la plateforme Arduino Project Hubnouveaux projets de la communauté contrôle à distance du chauffe-eaudétection de tension et de courant pour les lignes à courant alternatif atténuateurs pour signaux audio (1)sélection par cavaliers cure de jouvence pour votre vieux chargeur (1)ne le jetez pas, modernisez-le ! une carte pour « The Blue »circuit imprimé pour le potentiomètre motorisé d'Alps référence 50 Hz à partir d'une tension secteur 60 Hzconversion de 50 Hz à 60 Hz isolateurs numériquesréalisation facile de l’isolation galvanique amplificateur mono Hi-Fi compact de 12 Wpetit mais puissant générateur de rampe LM386 générateur triphaséavec Raspberry Pi Pico ouverture de porte pour les personnes ayant des talents musicaux classique d’Elektor : synthétiseur Surfgénérateur d’ambiance océanique relaxante (de Chhhh à Zzzz) cure de jouvence pour votre vieux chargeur (2)ne le jetez pas, modernisez-le ! surveillance du courant d'une lampe avec Raspberry Pi Pico télégraphie infrarouge Fnirsi SWM-10appareil portable de soudage par point intelligent pour réparer vos packs d’accumulateur Codec audio stéréo pour ESP32 et Ciela mesure audio : pas de panique techniques de soudure à l’étain faites-le correctement dès maintenant ! atténuateurs pour signaux audio (2) sélection par relais alimentation USB-CDrawing Power from USB-C Power Adapters trois circuits avec deux et trois puces 4017 comptez sur les 4017 composants actifs - la diode un minuteur pour des délais ultra-Longs réglez-le et oubliez-le ! Jack In & Jack Out maillon d’E/S pour chaînes audio alimenter un ESP32 à partir d'une seule cellule Li-ion Hexadoku
€ 10,95
-

Elektor Digital Elektor Janvier/Février 2025 (PDF) FR
Le téléchargement intégral de ce numéro est disponible pour nos membres GOLD et GREEN sur le site Elektor Magazine ! Pas encore membre ? Cliquez ici. stockage de l’énergieRéalisez votre propre stockage d’énergie pour réseau de panneaux photovoltaïques simulateur de panneau solaireUne solution pour tester et optimiser les trackers MPP et les onduleurs le concours STM32 Edge AIDécouvrez le STM32N6 et gagnez les 5000 € du concours ! Matériaux à large bande interditePourquoi y a-t-il un tel intérêt pour le SiC et le GaN ? batterie externe pour ordinateur portableProlongez la durée de vie de votre vieil ordinateur portable robots médicauxSurmonter les obstacles techniques et réglementaires prévention du gel pour les vergersavec enregistrement des températures The Analog ThingL'Arduino de l’ordinateur analogique ? commande de relais à faible consommation d'énergieÉconomiser 90% de la puissance de commande amélioration de la charge DC ET5410A+pour un meilleur refroidissement et moins de bruit electronica 2024 : rétrospective compatibilité électromagnétiqueLa CEM en quelques mots ! démarrer en électronique......Filtres actifs réduisez les pertes des chutes de tension avec des condensateursprofitez astucieusement de la réactance capacitive le MCP4725 : un convertisseur numérique-analogique 12 bits pas cheravec une fonction EEPROM pour un comportement sûr au démarrage la pince de test intelligente Fnirsi LCR-ST1 pour CMS labo de test et de mesure personnel basé sur Raspberry PiPour commencer : l'ADC une charge électroniqueUn projet prêt à l'emploi 2025 : l'odyssée de l'IAQuelques projets pour le nouvel an AmpVolt v2.0 : mise à jour100 A et plus ! projet 2.0Corrections, mises à jour et courrier des lecteurs transparence éthiqueCe que révèle l’enquête réalisée par Ethics in Electronics carte Elektor Audio DSP FX Processor (2)Création d'applications
€ 10,95
-

Elektor Digital E-Book: Designing Tube Amplifiers EN ANGLAIS
This book focuses more on practical aspects than on theory, and it has an contemplative nature, as though the author were viewing amplifiers from above. Knowledge elements are integrated and placed in the context of a broad overview. Even now tube amplifiers still sound great perhaps better than ever before. In part that is because we now have access to modern components such as toroidal output transformers, extremely high-quality resistors and capacitors, and many sorts of wire with good acoustic properties. Modern audio sources, such as CD players, and the latest top-end loudspeakers also enable us to appreciate how well tube amplifiers reproduce music even better than before. This new book from Menno van der Veen looks at tube amplifiers from more than just a theoretical perspective. It focuses primarily on the design phase, where decisions must be taken with regard to the purpose and requirements of the amplifier, and it addresses the following questions: How do these aspects relate to subjective and objective criteria? Which circuits sound the best, and why? If you want to develop and market an amplifier, what problems should you expect? What are the significance and meaning of measurements? Are they still meaningful, or have they lost their relevance? Thanks to the enormous processing power of computers, we can now measure more details than ever before. How can these new methods be applied to tube amplifiers? Previously it was sufficient to measure the frequency range, power and distortion of an amplifier in order to characterize the amplifier. Are these measurements still sufficient, or should we start measuring according to how we hear, using real music signals instead of waveforms from signal generators? The author sketches a future where amplifier measurements that conform to our sense of hearing enable us to arrive at new insights. This book focuses more on practical aspects than on theory, and it has an contemplative nature, as though the author were viewing amplifiers from above. Knowledge elements are integrated and placed in the context of a broad overview.
€ 29,95
Leden € 23,96
-
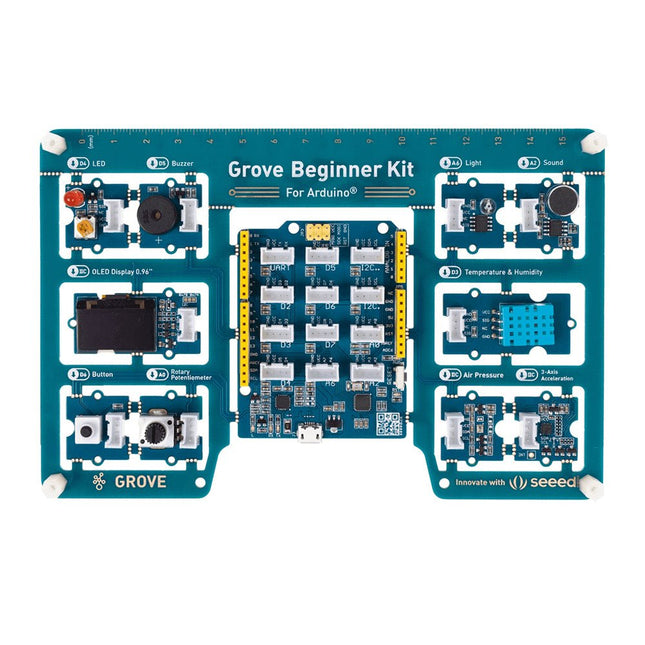
Seeed Studio Seeed Studio Grove Beginner Kit for Arduino
Unlike most kits, the Grove Beginner Kit for Arduino is an all-in-one kit, no breadboard, no soldering, even no wiring is needed. The kit is powered by one Arduino compatible Board (Seeeduino Lotus) together with 10 additional Grove Arduino sensors all in one piece of the board. All the modules have been connected to the Seeeduino(Microcontroller) through the PCB stamp holes so no Grove cables are needed to connect. This is perfect for educational fields where frustrating wiring and soldering are no longer needed. Of course, you can also take the modules out and use Grove cables to connect the modules. You can build any Arduino project you like with this Grove Beginner Kit For Arduino. Included in Kit: 1 x Grove Beginner Kit For Arduino Board 1 x Micro USB Cable 6 x Grove Cables Included onboard: 1 x Grove - LED 1 x Grove - Buzzer 1 x Grove - OLED Display 0.96' 1 x Grove - Button 1 x Grove - Rotary Potentiometer 1 x Grove - Light 1 x Grove - Sound 1 x Grove - Temperature & Humidity Sensor 1 x Grove - Air Pressure Sensor 1 x Grove - 3-Axis Accelerator 1 x Seeeduino Lotus
€ 34,95
Leden € 31,46
-
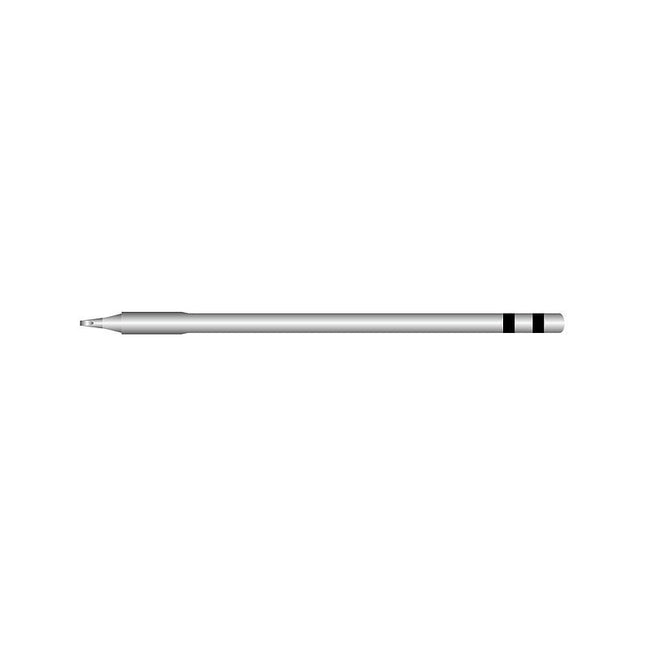
ATETOOL T80-D Soldering Tip for Soldering Station AE970D
T80-D (T80-D12) Soldering Tip for Soldering Station AE970D (1.2 mm, chisel)
€ 9,95
Leden € 8,96
-
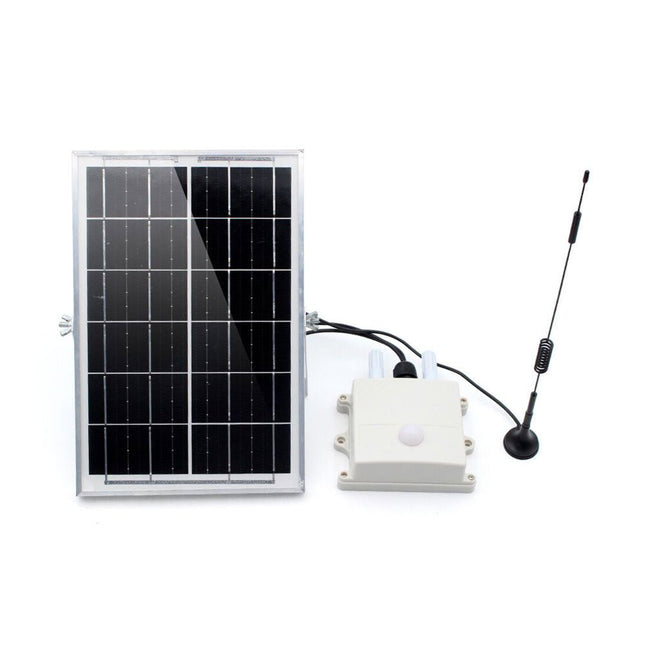
Makerfabs Makerfabs SenseLoRa Industrial-grade Air Monitor (EU868)
This air monitor is specifically used for monitoring greenhouses. It detects: Air temperature & Humidity CO2 concentration Light intensity Then transmit the data via LoRa P2P to the LoRa receiver (on your desk in the room) so that the user can monitor the field status or have it recorded for long-term analysis. This module monitors the greenhouse field status and sends all sensor data regularly via LoRa P2P in Jason format. This LoRa signal can be received by the Makerfabs LoRa receiver and thus displayed/recorded/analyzed on the PC. The monitoring name/data cycle can be set with a phone, so it can be easily implemented into the file. This air monitor is powered by an internal LiPo battery charged by a solar panel and can be used for at least 1 year with the default setting (cycle 1 hour). Features ESP32S3 module onboard with the WiFi and Bluetooth Ready to use: Power it on directly to use Module name/signal interval settable easily by phone IP68 water-proof Temperature: -40°C~80°C, ±0.3 Humidity: 0~100% moisture CO2: 0~1000 ppm Light intensity: 1-65535 lx Communication distance: Lora: >3 km 1000 mAh battery, charger IC onboard Solar panel 6 W, ensure system works Downloads Manual BH1750 Datasheet SGP30 Datasheet
€ 69,95€ 34,95
Leden identiek
-

JOY-iT JOY-iT Explorer Board for Raspberry Pi Pico
The Explorer Board is the easy and efficient way to develop your Raspberry Pi Pico projects. Since the most important components are already integrated, you save time and effort on wiring. The Explorer Board has a wide range of interface connectors so you can connect your projects to a variety of modules and devices. With the integrated breadboard, you can quickly build and realize your own projects. Thanks to the possibility to connect or disconnect all modules individually, you can use your pins, which are additionally led separately to the outside, for other projects or experiment on the integrated breadboard at any time. Features Fast and efficient experimenting with the Raspberry Pi Pico Raspberry Pi Pico can be plugged in directly All modules can be switched on and off individually Additional integrated breadboard for own development Specifications Integrated modules: 4 RGB LEDs, buzzer, relay, 1.8“ TFT display, DHT11 temperature sensor, 4 buttons, breadboard Interfaces: 4x servo motor, SPI, I²C, UART, 5x crocodile clip connector Power supply: 5 V USB-C Dimensions: 219 x 110 x 27 mm Downloads Manual Examples and libraries
€ 27,95€ 13,95
Leden identiek
-

Seeed Studio Seeed Studio Grove CAN-BUS Module (based on GD32E103)
This Grove CAN-BUS Module based on GD32E103 adopts a brand-new design, uses the cost-effective and high-performance GD32E103 microcontroller as the main control and cooperates with a firmware we wrote to complete the function of the serial port to CAN FD. Features Support CAN communication: Implements CAN FD at up to 5 Mb/s Easy to program: Support AT command which enables simple serial port programming Grove ecosystem: 20 x 40 x 10 mm small size, 4-pin Grove connector to plug and play, Arduino compatible This Grove CAN-BUS Module supports CAN FD(CAN with Flexible Data-Rate) communication, which is an extension to the original CAN protocol as specified in ISO 11898-1 that responds to increased bandwidth requirements in automotive networks. In CAN FD, the data rate (i.e. number of bits transmitted per second) is increased to be 5 times faster than the classic CAN (5 Mbit/s for the data payload only, the arbitration bit rate is still limited to 1Mbit/s for compatibility). It supports AT command which enables simple serial port programming. This Grove CAN-BUS Module is based on GD32E103 with a frequency up to 120 MHz. It has a flash size from 64 KB to 128 KB and an SRAM size from 20 KB to 32 KB. Applications Car hacking: allows different parts of the vehicle to talk to each other, including the engine, the transmission, and the brakes. Windows, doors, and mirror adjustment. 3D Printers Building automation Lighting control systems Medical instruments and equipment Specifications MCU GD32E103 UART baud rate Up to 115200 (default 9600) CAN FD baud rate Up to 5 Mb/s Indicator TX and RX led Working voltage 3.3 V Grove connector 4-pin Grove connector to plug and play Size 20 x 40 x 10 mm Downloads Datasheet GitHub
€ 13,95
Leden € 12,56
-
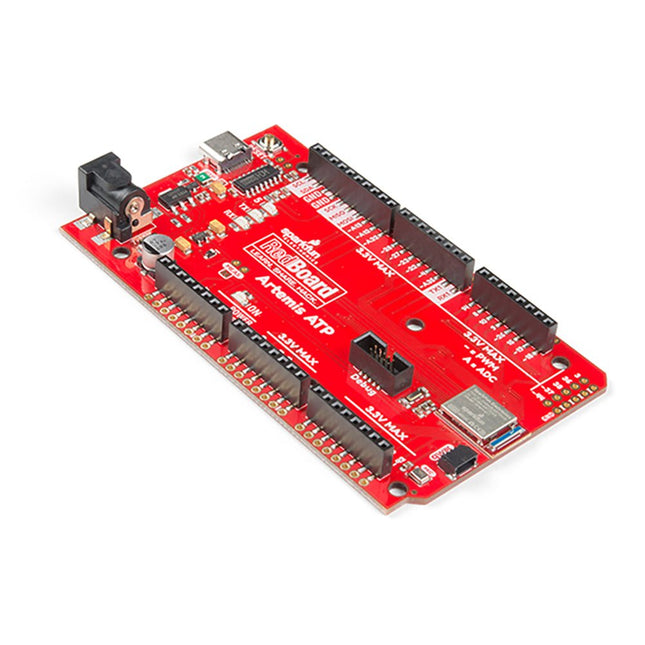
SparkFun SparkFun RedBoard Artemis ATP
Hoe zit het met de zeefdruk labels? Ze zitten overal. We hebben besloten om de pinnen te labelen zoals ze zijn toegewezen op het Apollo3 IC zelf. Dit maakt het vinden van de pin met de gewenste functie een stuk eenvoudiger. Bekijk de full pin map van de Apollo3 datasheet. Als u echt de 4-bit SPI functionaliteit van de Artemis wilt uitproberen, dan zult u de pinnen 4, 22, 23 en 26 moeten gebruiken. Wilt u de differentiële ADC poort 1 uitproberen? Pinnen 14 en 15. Met de RedBoard Artemis ATP kunt u de indrukwekkende mogelijkheden van de Artemis module uitproberen.De RedBoard Artemis ATP heeft de verbeterde power conditioning en USB naar serieel die we in de loop der jaren hebben verfijnd op onze RedBoard lijn van producten. Een moderne USB-C connector maakt programmeren eenvoudig. Een Qwiic connector maakt I²C eenvoudig. De ATP is volledig compatibel met SparkFun's Arduino kern en kan gemakkelijk geprogrammeerd worden onder de Arduino IDE. We hebben de JTAG connector blootgelegd voor meer gevorderde gebruikers die liever de kracht en snelheid van professionele tools gebruiken. Als u veel GPIO's nodig hebt met een eenvoudig programma, klaar om op de markt te brengen, is de ATP de oplossing die u nodig hebt. We hebben een digitale MEMS microfoon toegevoegd voor mensen die willen experimenteren met always-on spraakcommando's met TensorFlow en machine learning. We hebben zelfs een handige jumper toegevoegd om het stroomverbruik te meten voor testen met laag stroomverbruik.Met 1MB flash en 384k RAM heb je genoeg ruimte voor je schetsen. De Artemis module draait op 48MHz met een 96MHz turbo mode beschikbaar en met Bluetooth om te starten!Kenmerken Arduino Mega Voetafdruk 1M Flash / 384k RAM 48MHz / 96MHz turbo beschikbaar 6uA/MHz (werkt minder dan 5mW bij volledige werking) 48 GPIO - allen onderbreekbaar 31 PWM kanalen Ingebouwde BLE radio 10 ADC-kanalen met 14-bits precisie met tot 2,67 miljoen samples per seconde effectieve continue, multi-slot sampling rate 2-kanaals differentiële ADC 2 UART's 6 I²C-bussen 6 SPI-bussen 2/4/8-bit SPI-bus PDM-interface I²S-interface Beveiligde 'Smart Card'-interface Qwiic-connector
€ 30,95€ 19,95
Leden identiek
-

OWON OWON HDS2202s 2-kanaals oscilloscoop (200 MHz) + multimeter + signaalgenerator
De OWON HDS2202s is een draagbare 3-in-1 multifunctionele tester, die kan worden gebruikt als een 2-kanaals oscilloscoop met een bandbreedte van 200 MHz, en als een multimeter en signaalgenerator. Hij beschikt over een contrastrijk 3,5-inch kleurendisplay dat geschikt is voor onderhoud buitenshuis, snelle metingen ter plaatse, auto-onderhoud, stroomdetectie, enzovoort./p> Kenmerken Oscilloscoop + multimeter + golfvormgenerator, multifunctioneel in één 3,5-inch LCD-kleurenscherm met hoge resolutie en hoog contrast, geschikt voor gebruik buitenshuis 18650 lithium accu, kan 3-6 uur continu werken USB type-C interface, ondersteuning voor powerbank, ondersteuning voor software via een pc Zelfkalibratie functie Ondersteunt SCPI, faciliteert secundary development Specificaties Bandbreedte 200 MHz Kanalen 2-kanaals oscilloscoop + 1-kanaals generator Sample frequentie 1 GSa/s Acquisitie methode Normaal, Piekdetectie Record length 8K Scherm 3,5-inch LCD Golfvorm refresh rate 10.000 wfrms/s Ingangssignaal DC, AC en Aarde Ingangsimpedantie 1 MΩ ±2%, met parallel 16pF ±10pF Dempingswaarden probe 1X,10X,100X,1000X,10000X Maximale ingangsspanning 400 V (DC+AC, PK-PK, 1MΩ ingangsimpedantie) (10:1 demping op de probe) Bandbreedte limiet (typical) 20 MHz Horizontale schaal 2ns/div - 1000s/div, in stappen van 1 - 2 - 5 Verticale gevoeligheid 10mV/div - 10V/div Verticale resolutie 8 bits Triggertype Edge Triggermodi Auto, Normaal, Single Automatische metingen Frequentie, Periode, Amplitude, Max, Min, Gemiddelde, PK-PK Cursormeting ΔV, ΔT, ΔT&ΔV tussen cursors Communicatie interface USB Type-C Multimeter Specificaties Max. resolutie 20.000 counts Testmodus Spanning, Stroom, Weerstand, Capaciteit, Diode en Continuïteitstest Ingangsimpedantie 10 MΩ Maximale ingangsspanning AC 750 V, DC 1000 V Max ingangsstroom DC: 10 A, AC: 10 A Diode 0-2 V Waveform Generator Specificaties Frequentie uitgang Sinus 0,1 Hz - 25 MHz Square 0,1 Hz - 5MHz Ramp 0,1 Hz - 1 MHz Pulse 0,1 Hz - 5 MHz Arbitrary 0,1 Hz - 5 MHz Sample frequentie 125 MSa/s Kanalen 1 kanaal Amplitudebereik (hoge impedantie) 20 mVpp - 5 Vpp Golfvorm Lengte 8K Verticale resolutie 14 bits Uitgangsimpedantie 50 Ω Inbegrepen 1x OWON HDS2202s 1x Voedingsadapter 1x USB-kabel 1x Passieve probe 2x Krokodillenklem kabels 1x Set multimeter probes (een rode en een zwarte) 1x Gebruiksaanwijzing 1x Insteltool voor aanpassing van de probe Downloads Gebruikershandleiding Specificaties SCPI Protocol Quick Guide Software
€ 242,00
-

Elektor Digital The Connected Autonomous Vehicle and its Environment (E-book)
An Introduction to Real and Reduced-Scale Autonomous Vehicles Want to cut through the hype and get to the core of autonomous and connected vehicles? Then this book is your clear, accessible guide to a complex and fast-moving field. Starting with Intelligent Transport Systems (ITS), it walks you through the essential foundations, including Advanced Driver Assistance Systems (ADAS) – the stepping stones to full autonomy. Explore how self-driving cars mimic human behavior through a loop of perception, analysis, decision, and action. Discover the key functions that make it possible: localization, obstacle detection, driver monitoring, cooperative awareness – and the most challenging of all, trajectory planning, across strategic, tactical, and operational levels. Will vehicles be connected? The debate is on – but the standards are already here. Learn how connectivity, infrastructure, and vehicles can work in synergy through the innovative concept of floating car data (FCD). Dive into real-world implementation: with embedded electronics account-ing for over 30% of a modern vehicle‘s cost, we unpack the architecture, coordination, and tools required to manage the complexity – brought to life with a hands-on case study. To finish, we open the door to the future: building your own 1:10 scale autonomous vehicle. No plug-and-play solutions – just the foundations for a collaborative, creative, and geek-friendly challenge. Let’s drive the future together.
€ 29,95
Leden € 23,96
-
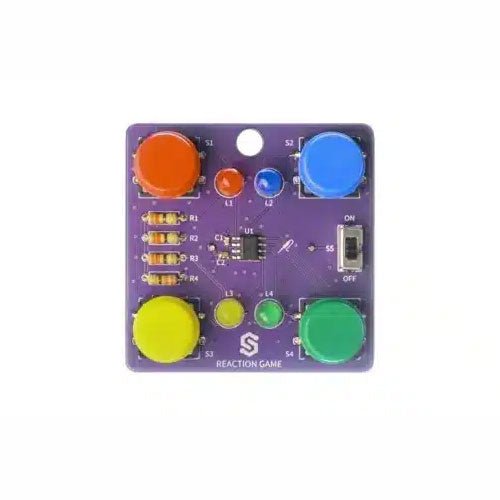
Soldered Reaction Game Solder Kit
If you are looking for a simple way to learn soldering, or just want to make a small gadget that you can carry, this set is a great opportunity. Reaction game is an educational kit which teaches you how to solder, and in the end, you get to have your own small game. The goal of the game is to press the button next to the LED as soon as it turns on. With every correct answer, the game gets a bit harder – the time you have to press the button shortens. How many correct answers can you get? It’s based on ATtiny404 microcontroller, programmed in Arduino. At its back, you’ll find CR2032 battery which makes the kit portable. There’s keychain holder as well. Soldering process is easy enough based on the mark on the PCB. Included 1x PCB 1x ATtiny404 microcontroller 4x LEDs 4x Pushbuttons 1x Switch 4x Resistors (330 ohm) 1x CR2032 battery holder 1x Battery CR2032 1x Keychain holder
€ 9,95
Leden € 8,96
-

Soldered Soldered CONNECT Programmer
De Soldered CONNECT Programmer is ontworpen om programmeerborden gebaseerd op ESP8266 en ESP32 microcontrollers extreem eenvoudig te maken. Hij bevat alle benodigde elektronica en logica, waardoor programmeren eenvoudig is door simpelweg een USB-kabel in de CONNECT Programmer te steken en deze aan te sluiten op de programmeerheader. De ingebouwde schakeling regelt automatisch de timing en signaalsequentie, waardoor de ESP-microcontroller in de bootloadermodus wordt gezet zonder handmatige tussenkomst. Kenmerken IC: CH340 Pin-indeling: GPIO0, RESET, RX, TX, 3V3, GND LED's: RX, TX, voeding Interface: USB-C Afmetingen: 38 x 22 mm Downloads Datasheet GitHub
€ 5,95
Leden € 5,36
-
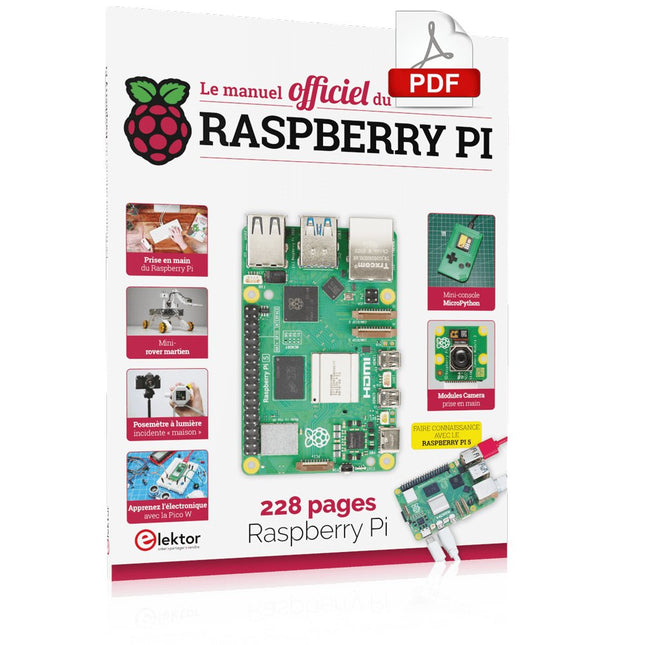
Elektor Digital Le manuel officiel du Raspberry Pi (PDF)
Réalisés par les créateurs du MagPi, le magazine officiel de Raspberry Pi Démarrez avec le Raspberry Pi 5, le dernier-né et le plus performant de la famille des nano-ordinateurs Raspberry Pi. Apprenez à coder et à réaliser des projets avec cet ordinateur étonnant. Dans ce manuel dédié au Raspberry Pi 5, nous vous proposons aussi de nombreuses idées de projets également réalisables avec le Raspberry Pi 4, le Raspberry Pi Zero 2 W et le Raspberry Pi Pico W. Avec des tutoriels, des projets pratiques, des essais techniques, des guides et bien plus encore, il s’agit de la ressource ultime pour le Raspberry Pi ! 228 pages sur le Raspberry Pi Tout ce que vous devez savoir sur le Raspberry Pi 5 Prise en main de tous les Raspberry Pi Amusez-vous et apprenez l’électronique avec le Pico W Des projets inspirants pour vous donner des idées de réalisations Apprenez μPython en construisant une mini-console Démarrez avec le module caméra Raspberry Pi Intelligence artificielle, codage de son propre agent ChatGP
€ 29,95
Leden € 23,96
-

Elektor Digital 307 Circuits FR (E-book)
307 schémas d'électronique analogique, logique ou numérique, tous signés Elektor. Voici une mine d'idées, de trouvailles et d'astuces. Beaucoup sont présentés sous une forme assez élaborée, avec plan détaillé, dessin du circuit imprimé, liste des compositions complètes et circuit imprimé... ces célèbres dessins sont à la base d'une grande partie de la réputation de l'Électricien. Tous les domaines de prédilection de l'électronique sont abordés : audio, vidéo, auto, moto, vélo, maison, loisirs, HF, mesure, test, alimentation et micro-informatique. Depuis le processus de production de la série, les 307 circuits sont une véritable ligne directrice pour l'électronique moderne, source des idées originales qui guident le processus de travail sur les variantes. Recevez les articles qui intéressent le nombre de doubles publiés dans la revue d'Elektor, publiés par la tradition du présent et publiés, et le nombre d'appels de Hors-Gabarit, conformes aux exceptions en vigueur. Voici les domaines familiaux et les usages de l'électronique : alimentations, régulateurs et chargeurs audio Video communication hautes fréquences informatique jeux & modélisme maison et automobile mesurer et tester processeur et contrôleur
€ 29,95
Leden € 23,96
-
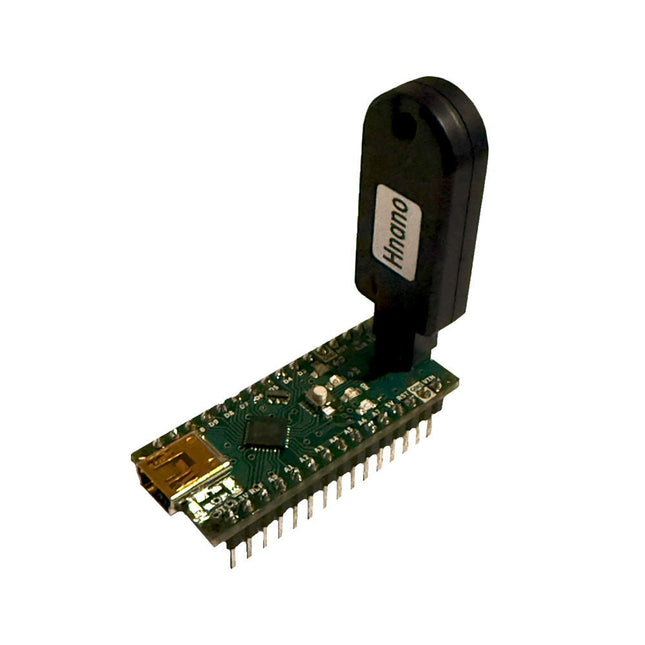
Generic Auto Bootloader/Programmer voor Arduino Nano
Deze programmeur is speciaal ontworpen voor het branden van bootloaders (zonder computer) op Arduino-compatibele ATmega328-ontwikkelborden. Sluit de programmeur eenvoudigweg aan op de ICSP-interface om de bootloader opnieuw te branden. Het is ook compatibel met nieuwe chips, op voorwaarde dat de IC functioneel is. Opmerking: Als u een bootloader brandt, worden alle eerdere chipgegevens gewist. Kenmerken Werkspanning: 3,1-5,3 V Werkstroom: 10 mA Compatibel met op Arduino Nano gebaseerde borden (ATmega328) Afmetingen: 39,6 x 15,5 x 7,8 mm
€ 14,95€ 7,50
Leden identiek
-

Cytron Cytron Maker Pi Pico Mini W (with pre-soldered Raspberry Pi Pico W & preloaded CircuitPython)
Love the Cytron Maker Pi Pico (SKU 19706) but can't fit it into your project? Now there is the Cytron Maker Pi Pico Mini W. Powered by the awesome Raspberry Pi Pico W, it also inherited most of the useful features from its bigger sibling such as GPIO status LEDs, WS2812B Neopixel RGB LED, passive piezo buzzer, and not forget the user button and reset button.Features Powered by Raspberry Pi Pico W Single-cell LiPo connector with overcharge / over-discharge protection circuit, rechargeable via USB. 6x Status indicator LEDs for GPIOs 1x Passive piezo buzzer (Able to play musical tone or melody) 1x Reset button 1x User programmable button 1x RGB LEDs (WS2812B Neopixel) 3x Maker Ports, compatible with Qwiic, STEMMA QT, and Grove (via conversion cable) Support Arduino IDE, CircuitPython and MicroPython Dimension: 23.12 x 53.85 mm Included 1x Maker Pi Pico Mini W (pre-soldered Raspberry Pi Pico W with preloaded CircuitPython) 3x Grove to JST-SH (Qwiic / STEMMA QT) Cable Downloads Maker Pi Pico Mini Datasheet Maker Pi Pico Mini Schematic Maker Pi Pico Mini Pinout Diagram Official Raspberry Pi Pico Page Getting started with Raspberry Pi Pico CircuitPython for Raspberry Pi Pico Raspberry Pi Pico Datasheet RP2040 Datasheet Raspberry Pi Pico Python SDK Raspberry Pi Pico C/C++ SDK
€ 19,95€ 9,95
Leden identiek
-

Farnell element14 OKdo E1 Development Board
The OKdo E1 is an ultra-low-cost Development Board based on the NXP LPC55S69JBD100 dual-core Arm Cortex-M33 microcontroller. The E1 board is perfect for Industrial IoT, building control and automation, consumer electronics, general embedded and secure applications. Features Processor with Arm TrustZone, Floating Point Unit (FPU) and Memory Protection Unit (MPU) CASPER Crypto co-processor to enable hardware acceleration for certain asymmetric cryptographic algorithms PowerQuad Hardware Accelerator for fixed and floating point DSP functions SRAM Physical Unclonable Function (PUF) for key generation, storage and reconstruction PRINCE module for real-time encryption and decryption of flash data AES-256 and SHA2 engines Up to Nine Flexcomm interfaces. Each Flexcomm interface can be selected by software to be a USART, SPI, I²C, and I²S interface USB 2.0 High-Speed Host/Device controller with on-chip PHY USB 2.0 Full-Speed Host/Device controller with on-chip PHY Up to 64 GPIOs Secure digital input/output (SD/MMC and SDIO) card interface Specifications LPC55S69JBD100 640kbyte flash microcontroller In-built CMSIS-DAP v1.0.7 debugger based on LPC11U35 Internal PLL support up to 100MHz operation, 16MHz can be mounted for full 150MHz operation. SRAM 320kB 32kHz crystal for real-time clock 4 user switches 3-colour LED User USB connector 2-off 16-way expansion connectors UART over USB virtual COM port
€ 24,95€ 12,50
Leden identiek
-
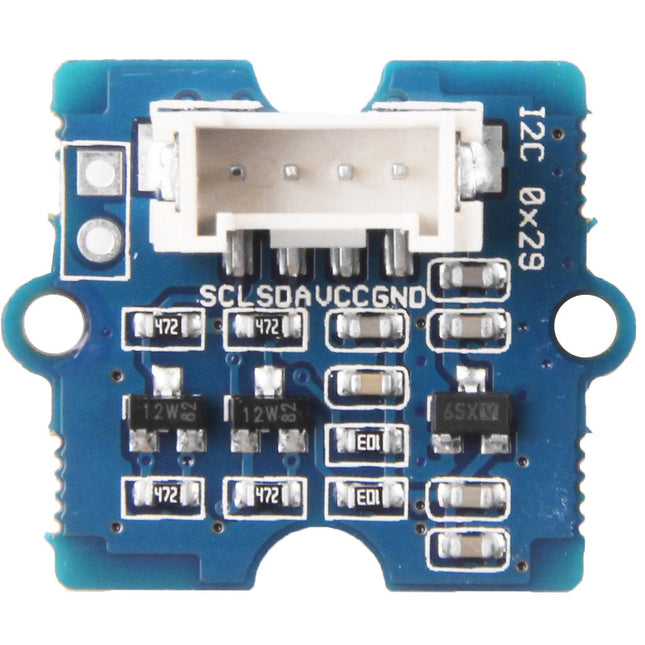
Seeed Studio Seeed Studio Grove Time of Flight Distance Sensor (VL53L0X)
Grove - Time of Flight Afstandsensor-VL53L0X is een hoge snelheid, hoge nauwkeurigheid en lange afstandsensor gebaseerd op VL53L0X.De VL53L0X is een nieuwe generatie Time-of-Flight (ToF) laser-ranging module en het is een van de kleinste op de markt vandaag. Het biedt nauwkeurige afstandsmeting onafhankelijk van de doelreflecties, waardoor het superieur is aan andere conventionele technologieën. Het kan absolute afstanden meten tot 2 m, waardoor de standaard in afstandsprestaties wordt verhoogd en diverse nieuwe toepassingen mogelijk worden.De VL53L0X integreert een toonaangevende SPAD array (Single Photon Avalanche Diodes) en bevat ST's tweede generatie Flight SenseTM gepatenteerde technologie.De 940 nm VCSEL emitter (Vertical-Cavity Surface-Emitting Laser) van de VL53L0X, is volledig onzichtbaar voor het menselijk oog, gekoppeld aan interne fysieke infrarood filters, maakt het mogelijk langere afstanden te overbruggen, hogere immuniteit voor omgevingslicht, en een betere robuustheid om glas optische overspraak te dekken.Features VCSEL driver afstandssensor met geavanceerde ingebedde microcontroller Geavanceerde ingebouwde optische overspraakcompensatie om de keuze van afdekglas te vereenvoudigen Veilig voor de ogen: Klasse 1 laserapparaat dat voldoet aan de nieuwste norm IEC 60825-1:2014 - 3e editie Een enkele stroomvoorziening I²C-interface voor apparaatbesturing en gegevensoverdracht Xshutdown (reset) en GPIO-interrupt Programmeerbaar I²C-adres Werkspanning: 3,3 V / 5 V Werkende temperatuur: 20 ? - 70 ? Aanbevolen meetafstand: 30 mm - 1000 mm Standaard I²C-adres: 0x52 Inbegrepen 1x Grove - Time of Flight Afstandsensor-VL53L0X 1x Grove kabel
€ 19,95
Leden € 17,96


