Bestsellers
-
Elektor Digital Arduino ontdekken in 45 Elektronica Projecten (E-book)
In dit boek worden een serie spannende en leuke projecten voor de Arduino behandeld, zoals een stil alarm, mensensensor, lichtmeter, besturing van een motor, internet en draadloze bediening (via een radioverbinding). In tegenstelling tot veel gratis projecten op internet zijn de projecten in dit boek in de praktijk getest, en werken gegarandeerd! U kunt dit boek gebruiken als projectenboek, en de 45 projecten nabouwen en in de praktijk inzetten. Door de duidelijke uitleg, schema's en zelfs foto's van de opstelling op is het nabouwen een erg leuke bezigheid. De foto's zijn gemaakt van een werkende opstelling, dus u weet zeker dat ze kloppen. U kunt de projecten in dit boek ook met elkaar combineren om zo uw eigen projecten te maken. Per project wordt duidelijk uitgelegd waarom het project op die manier is uitgevoerd. Al doende leert u veel over het project en de gebruikte onderdelen, en kunt u het project zelf aanpassen en uitbreiden naar uw eigen wensen. Daarnaast is het boek ook als naslagwerk inzetbaar. Via de index vindt u gemakkelijk projecten die als voorbeeld voor het gebruik van C++ opdrachten en Arduino-functionaliteit kunnen dienen. Zelfs als u alle projecten gemaakt hebt zal dit boek om die reden nog lang een plekje naast uw PC behouden.
€ 24,95
Leden: € 22,46
-
Elektor Digital High-End Buizenversterkers 2 (E-book)
Niemand twijfelt er aan dat buizenversterkers een opmerkelijk mooi geluid produceren. Ze klinken levendig, diep en doortekend; het klankbeeld is zeer aangenaam en dynamisch schijnen ze nagenoeg geen beperkingen te kennen.Via een systematisch theoretisch onderzoek gaat de auteur na waardoor deze fraaie eigenschappen ontstaan. Hij ontwikkelt nieuwe modellen voor versterkerbuizen en transformatoren, waardoor het mogelijk wordt om op voorhand, tijdens het ontwerp, al te bepalen wat de eigenschappen van de buizenversterker worden. De koppeling tussen eindbuizen en de uitgangstransformator wordt diepgaand gemodelleerd. Daarbij ontstaan nieuwe inzichten in een uitzonderlijk soort vervorming: de dynamische dempingsfactor vervorming (DDFD). Via rekenmodellen in het complexe domein worden vooral de eigenschappen in de grenzen van het hoorbare gebied (tussen 20 Hz en 20 kHz) onderzocht en ontstaan stabiliteitsvoorwaarden waar de versterker minstens aan moet voldoen. In versterkers wordt vaak tegenkoppeling toegepast, die uitgebreid wordt gemodelleerd en waarvan de gehoorsmatige gevolgen diepgaand worden besproken.Vervolgens wordt een fraaie selectie van bijzondere buizenversterkers besproken. Kenmerkend in dit boek is dat de auteur niet alleen technisch schrijft, maar verhalend laat zien dat het ontwikkelen van buizenversterkers ook ingrijpt in je dagelijkse leven; zelfs het nut van patenten wordt besproken. Samenvattend: nieuwe theorieën en oplossingen voor een perfecte audiokwaliteit met buizenversterkers. Zowel de zelfbouwer als diegene die kennis en inzicht wil verwerven zal dit boek met plezier ter hand nemen.
€ 34,95
Leden: € 31,46
-

Elektor Digital Les installations domestiques à énergies renouvelables (PDF)
Les Accords de Kyoto, le réchauffement climatique, le Grenelle de l'environnement sont autant de termes devenus familles dans le cadre d'une réflexion éco-citoyenne collective. Au cours de la conversation, il est important de mener des actions concrètes et de veiller à ce que votre énergie soit renouvelable dans le cadre de votre maison individuelle. Les applications possibles sont légion : production électrique photovoltaïque, éolienne ou hydraulique, chauffe-eau solaire, chauffage des locaux par géothermie, par aérothermie ou par biomasse (bois-énergie). Pour répondre à cette demande croissante, une nouvelle filière connue ou développement fulgurant, mesurable à la création quasi quotidienne d'entreprises spécialisées. Les cellules sont immergées dans les techniques propositionnelles qui servent à les adapter, mais à cause de l'émanation de compétences professionnelles. Il est important de savoir évaluer les compétences des techniques avancées proposées par les métiers ; Pour que l’énergie soit renouvelable, la connaissance du vocabulaire, des principes de physique et des méthodes de dimensionnement des matériaux sont nécessaires. C'est la mission assignée à cet ouvrage.
€ 24,95
Leden: € 22,46
-
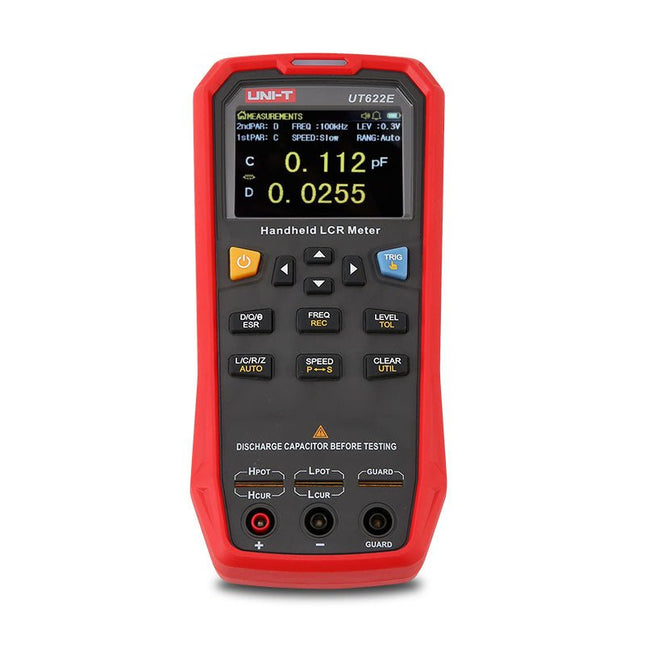
Uni-Trend UNI-T UT622E LCR Meter
The UT622E handheld LCR meter features powerful functions, high accuracy, fast speed, and long standby time. With a clear and intuitive 2.8-inch TFT LCD display, large-capacity rechargeable battery, and 100 kHz test frequency, the meter can be used for longstanding accurate and convenient measurement in any occasion. It is suitable for the measurement and screening of inductance, capacitance, and resistance in laboratories, production lines, maintenance points, etc. Features Max. test frequency: 100 kHz Accuracy: 0.1% Display count: 99999 Max. test rate: 20 times/s DCR: Yes Connectivity: Mini-USB Display: 2.8" TFT LCD Specifications Testfrequency 100 Hz, 120 Hz, 1 kHz, 10 kHz, 100 kHz Test level 0.1 Vmrs, 0.3 Vrms, 1 Vrms Output impedance 100 Ω Measurement parameters Primary: L/C/R/Z/DCRSecondary: D/Q/Θ/ESR DSR speed test Fast (20 times/s), medium (5 times/s), or slow (2 times/s) Range Auto/Hold Tolerance range 1%~20% Equivalent mode Series/Parallel Clearing connection Open/Short circuit Fuse of test ports 0.1 A/250 V Communication interface Mini-USB MAX reading of primary parameters 99999 MIN resolution 0.0001 Maximum accuracy 0.10% L 0.00 µH~99.999 H C 0.00 pF~99.999 mF Z/R 0.0000 Ω~9.9999 MΩ ESR 0.0000 Ω~999.99 Ω D 0.0000~9.9999 Q 0.0000~99999 Θ -179.9°~179.9° DCR 0.01 mΩ~20.000 MΩ Power supply 3.7 V/1800 mAh lithium polymer battery Display 2.8" TFT LCD (320x240) Dimensions 93 x 192 x 44 mm Weight 420 g Included UT622E LCR meter Short circuit board Four-terminal kelvin test leads USB cable Manual Downloads Datasheet Manual Software
€ 325,49
-

Elektor Digital Elektor Juillet/Août 2025 (PDF) FR
Le téléchargement intégral de ce numéro est disponible pour nos membres GOLD et GREEN sur le site Elektor Magazine ! Pas encore membre ? Cliquez ici. tableau de bord OBD2Des cadrans anciens aux données en temps réel OBD2 : ajoutez un compte-tours et un indicateur de changement de vitesse à votre voitureRétro, mais extrêmement utile capteurs de vision et LiDAR pour la robotique Sensor+Test 2025 et PCIM 2025 mesures sans contact du champ électrique (1)Membrane vibrante pour mesurer des tensions continues ou des champs électriques statiques détecteur de courrier sans filCapteurs optiques, radars… quelques options à explorer Elektor Mini-WheelieUn robot auto-équilibré cellules solairesDrôles de composants, la série premiers pas avec un capteur radar moderneUn capteur précis qui ne passe pas inaperçu sur le vifUsine de papier CybersécuritéDes temps difficiles pour les hackers Infographie : IdO et capteurs le Bluetooth 6.0 pour des applications de télémétrie amélioréesCette nouvelle version offre des fonctions de localisation améliorées découvrez la communication sans fil avec BeagleY-AI Projet 2.0Corrections, mises à jour et courrier des lecteurs démarrer en électronique……Conclusion sur les ampli-op un puissant assistant de codage de l'IAAccélérez votre développement avec Continue et Visual Studio Code contrôleur de charge solaire avec MPPT (2)Le circuit détecteur d'obstacles à ultrasonsUn projet simple pour aider les malvoyants une odyssée de l'IABilan du premier semestre synthétiseur MIDI autonome Raspberry Pi (3)plus intelligent avec une interface utilisateur Meshtastic : un projet de démoUn réseau intelligent de noeuds LoRa générateur analogique de fréquences audioGénérateur de signaux sinusoïdaux de haute qualité à fréquence réglable
€ 10,95
-

Elektor Digital Moderne High-End buizenversterkers (E-book)
met ringkern-uitgangstranformatoren Buizenversterkers vormen voor velen het neusje van de zalm, wanneer het gaat om de versterking van audiosignalen. De combinatie van klassieke techniek met moderne componenten heeft geleid tot een ware revival van de buizenversterker. De toepassing van de in de afgelopen 15 jaar door de auteur ontwikkelde 'ringkern-uitgangstransformatoren' heeft daar mede toe bijgedragen. Opvallend aan deze transformatoren zijn vooral het extreem grote frequentie bereik en de geringe lineaire en niet-lineaire vervormingen. Het hoe en waarom van de transformator wordt op verschillende niveaus uitgelegd, beginnend bij inleidende begripsvorming en eindigende bij complete wiskundige beschrijvingen, waarbij ook de samenwerking van de transformator met de buizen en de luidspreker centraal staat. Naast de beschrijving van schematuur en zelfbouw van eenvoudig na te bouwen moderne high-end buizenversterkers met een uitgangsvermogen van 10 tot 100 Watt, worden bijzondere buizenversterkers met ringkerntransformatoren besproken: innovatieve oplossingen voor perfecte audiokwaliteit. Zowel de zelfbouwer als degene die kennis en inzicht wil verwerven in de complexe materie van transformatoren, buizenversterkers en audiosignaalverwerking zal dit boek met plezier ter hand nemen.
€ 29,95
Leden: € 26,96
-

Elektor Digital Advanced Control Robotics (E-book)
If you enjoy DIY electronics, projects, software and robots, you’ll find this book intellectually stimulating and immediately useful. With the right parts and a little guidance, you can build robot systems that suit your needs more than overpriced commercial systems can. 20 years ago, robots based on simple 8-bit processors and touch sensors were the norm. Now, it’s possible to build multi-core robots that can react to their surroundings with intelligence. Today’s robots combine sensor readings from accelerometers, gyroscopes and computer vision sensors to learn about their environments. They can respond using sophisticated control algorithms and they can process data both locally and in the cloud. This book, which covers the theory and best practices associated with advanced robot technologies, was written to help roboticists, whether amateur hobbyist or professional, take their designs to the next level. As will be seen, building advanced applications does not require extremely costly robot technology. All that is needed is simply the knowledge of which technologies are out there and how best to use each of them. Each chapter in this book will introduce one of these different technologies and discuss how best to use it in a robotics application. On the hardware side, we’ll cover microcontrollers, servos, and sensors, hopefully inspiring you to design your own awe-inspiring, next-generation systems. On the software side, we’ll cover programming languages, debugging, algorithms, and state machines. We’ll focus on the Arduino, the Parallax Propeller, Revolution Education PICAXE and projects I’ve with which I’ve been involved, including the TBot educational robot, the PropScope oscilloscope, the 12Blocks visual programming language, and the ViewPort development environment. In addition, we’ll serve up a comprehensive introduction to a variety of essential topics, including output (e.g. LEDs, servo motors), and communication technologies (e.g. infrared, audio), that you can use to develop systems that interact to stimuli and communicate with humans and other robots. To make these topics as accessible as possible, handy schematics, sample code and practical tips regarding building and debugging have been included. Hanno Sander Christchurch, New Zealand
€ 24,95
Leden: € 22,46
-

Elektor Digital Introduction to Control Engineering (E-book)
This book is aimed at practising engineers, students and hobbyists. It is intended as a source of reference for hardware and software associated with instrumentation and control engineering. Examples are presented from a range of industries and applications. Throughout the book, circuit diagrams and software listings are described, typical of many measurement and control applications. The hardware and software designs may be used as a basis for application by the reader. The book contains examples of PIC, PLC, PAC and PC programming. All code samples are available to download free of charge from the support website. After an introductory section on control theory and modelling, the text focus is upon software for control system simulation and implementation, with appropriate reference to interfacing, electronic hardware and computing platforms. Introduction to Control Engineering is a sourcebook of solutions for control system applications!
€ 24,95
Leden: € 22,46
-

Elektor Digital Elektor Janvier/Février 2025 (PDF) FR
Le téléchargement intégral de ce numéro est disponible pour nos membres GOLD et GREEN sur le site Elektor Magazine ! Pas encore membre ? Cliquez ici. stockage de l’énergieRéalisez votre propre stockage d’énergie pour réseau de panneaux photovoltaïques simulateur de panneau solaireUne solution pour tester et optimiser les trackers MPP et les onduleurs le concours STM32 Edge AIDécouvrez le STM32N6 et gagnez les 5000 € du concours ! Matériaux à large bande interditePourquoi y a-t-il un tel intérêt pour le SiC et le GaN ? batterie externe pour ordinateur portableProlongez la durée de vie de votre vieil ordinateur portable robots médicauxSurmonter les obstacles techniques et réglementaires prévention du gel pour les vergersavec enregistrement des températures The Analog ThingL'Arduino de l’ordinateur analogique ? commande de relais à faible consommation d'énergieÉconomiser 90% de la puissance de commande amélioration de la charge DC ET5410A+pour un meilleur refroidissement et moins de bruit electronica 2024 : rétrospective compatibilité électromagnétiqueLa CEM en quelques mots ! démarrer en électronique......Filtres actifs réduisez les pertes des chutes de tension avec des condensateursprofitez astucieusement de la réactance capacitive le MCP4725 : un convertisseur numérique-analogique 12 bits pas cheravec une fonction EEPROM pour un comportement sûr au démarrage la pince de test intelligente Fnirsi LCR-ST1 pour CMS labo de test et de mesure personnel basé sur Raspberry PiPour commencer : l'ADC une charge électroniqueUn projet prêt à l'emploi 2025 : l'odyssée de l'IAQuelques projets pour le nouvel an AmpVolt v2.0 : mise à jour100 A et plus ! projet 2.0Corrections, mises à jour et courrier des lecteurs transparence éthiqueCe que révèle l’enquête réalisée par Ethics in Electronics carte Elektor Audio DSP FX Processor (2)Création d'applications
€ 10,95
-

Elektor Digital Arduino in Control (3e versie) E-book
Physical Computing met het Arduino-platform Dit leerboek over het Arduino-platform is uniek en brengt u stap voor stap van beginner tot gevorderde Arduino-gebruiker. Er wordt duidelijk in uitgelegd waarom en waardoor toepassingen werken, ondersteund door gedetailleerde afbeeldingen in kleur. Er is slechts een geringe elektronische basiskennis vereist, omdat de benodigde hardware uitgebreid wordt besproken. Het laatste gedeelte van dit boek bevat een degelijke theoretische verdieping, zodat u een krachtig naslagwerk achter de hand houdt. Er bestond in het Nederlands nog geen lesboek over dit platform. De didactische opbouw is zodanig dat de vereiste abstracte kennis wordt uitgelegd aan de hand van toepasbare en actuele praktijkvoorbeelden. De meeste toepassingen zijn gericht op ‘physical computing’, dat is de interactie tussen sensoren, actoren, elektronica en software. Hierdoor is het boek ook geschikt voor technisch beroepsonderwijs, o.a. voor de richting mechatronica. De opbouw van het boek is als volgt: Algemene introductie microcontrollers. Informatie over het Arduino-platform. Oefeningen met uitleg aan de hand van 21 voorbeelden. Praktijkvoorbeelden met uitleg aan de hand van 5 voorbeelden. Theoretische verdieping van de software en hardware. Praktische elektronicaschema´s. Alle software-voorbeelden in het boek zijn als download beschikbaar.
€ 34,95
Leden: € 31,46
-

Elektor Digital Kleine zenders voor zelfbouw (E-book)
Er zijn niet zoveel boeken te vinden over het ontwerpen en bouwen van zenders met een klein uitgangsvermogen. Dit boek beschrijft nauwkeurig de werking en bouw van maar liefst twintig audio- en videozender(tje)s. Daarmee biedt het aan de amateur-elektronicus, technicus, zendamateur en andere radio-enthousiasten het noodzakelijke materiaal om zich verder te bekwamen op dit gebied. Er wordt slechts weinig aandacht besteed aan de theorie, maar dat heeft een groot voordeel: ruim 300 pagina’s vol praktijk. De zenders, sommige eenvoudig, andere meer gecompliceerd, werden speciaal ontworpen voor het gebruik door amateurs. Ze werken tussen 150 kHz en 1300 MHz. De gebruikte techniek dateert vooral uit de jaren 90. Dit mag op het eerste gezicht een tekortkoming lijken, maar het is juist een extra argument voor publicatie. De technieken hebben zich inmiddels bewezen en er worden eenvoudige, goedkope en nog steeds goed verkrijgbare onderdelen gebruikt. Dit boek richt zich dus in de eerste plaats tot de potentiële gebruiker van HF-technieken, die er niet voor terugschrikt om dit soort schakelingen in elkaar te zetten. De schakelingen zijn probleemloos na te bouwen (nog een voordeel van zich bewezen technieken). Om dat te bereiken hebben de auteurs veel aandacht besteed aan: de testprocedures voor elke schakeling, de onderdelenlijst, instructies voor het vervaardigen van de spoelen en voor de afregeling. Bij de meeste schakelingen is bovendien een printontwerp afgedrukt. Naast zenders voor o.a. FM-stereo, AM, VHF-FM-amateur, R/C-TV, 40-m-CW-zender, 10-m-SSB, 2-m-NBFM, FM-video-link en amateur-TV vindt u in dit boek ook verwante schakelingen, zoals een down-converter voor 400, 900 en 1300 MHz en een HF-vermogensmeter.
€ 29,95
Leden: € 26,96
-

Elektor Digital Design your own Embedded Linux Control Centre (E-book)
This book is all about building your own DIY home control system. It presents two innovative ways to assemble such a system: By recycling old PC hardware – possibly extending the life of an old PC, or by using Raspberry Pi. In both cases, the main system outlined in this book will consist of a computer platform, a wireless mains outlet, a controller and a USB webcam – All linked together by Linux. By using the Raspberry Pi in conjunction with Arduino (used as an advanced I/O system board), it is possible to construct a small, compact, embedded control system offering enhanced capacity for USB integration, webcams, thermal monitoring and communication with the outside world. The experience required to undertake the projects within this book are minimal exposure to PC hardware and software, the ability to surf the internet, burn a CD-ROM and assemble a small PCB.
€ 34,95
Leden: € 31,46
-
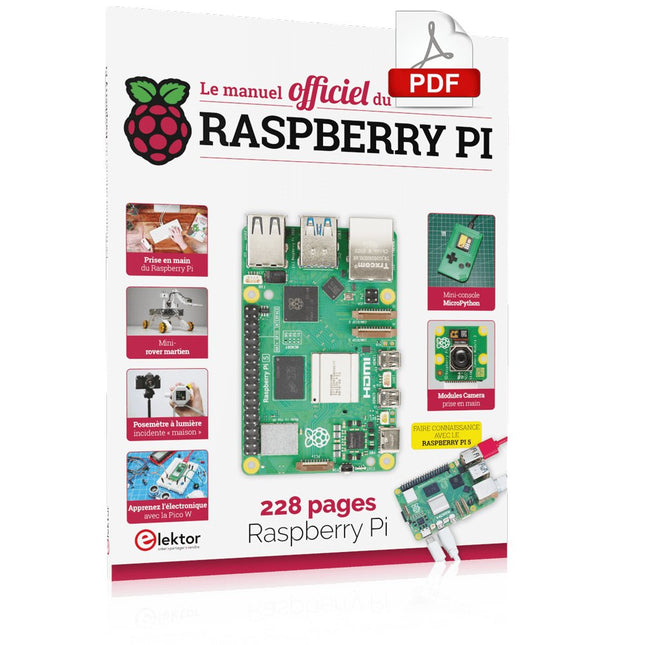
Elektor Digital Le manuel officiel du Raspberry Pi (PDF)
Réalisés par les créateurs du MagPi, le magazine officiel de Raspberry Pi Démarrez avec le Raspberry Pi 5, le dernier-né et le plus performant de la famille des nano-ordinateurs Raspberry Pi. Apprenez à coder et à réaliser des projets avec cet ordinateur étonnant. Dans ce manuel dédié au Raspberry Pi 5, nous vous proposons aussi de nombreuses idées de projets également réalisables avec le Raspberry Pi 4, le Raspberry Pi Zero 2 W et le Raspberry Pi Pico W. Avec des tutoriels, des projets pratiques, des essais techniques, des guides et bien plus encore, il s’agit de la ressource ultime pour le Raspberry Pi ! 228 pages sur le Raspberry Pi Tout ce que vous devez savoir sur le Raspberry Pi 5 Prise en main de tous les Raspberry Pi Amusez-vous et apprenez l’électronique avec le Pico W Des projets inspirants pour vous donner des idées de réalisations Apprenez μPython en construisant une mini-console Démarrez avec le module caméra Raspberry Pi Intelligence artificielle, codage de son propre agent ChatGP
€ 29,95
Leden: € 26,96
-

Elektor Digital 307 Circuits FR (E-book)
307 schémas d'électronique analogique, logique ou numérique, tous signés Elektor. Voici une mine d'idées, de trouvailles et d'astuces. Beaucoup sont présentés sous une forme assez élaborée, avec plan détaillé, dessin du circuit imprimé, liste des compositions complètes et circuit imprimé... ces célèbres dessins sont à la base d'une grande partie de la réputation de l'Électricien. Tous les domaines de prédilection de l'électronique sont abordés : audio, vidéo, auto, moto, vélo, maison, loisirs, HF, mesure, test, alimentation et micro-informatique. Depuis le processus de production de la série, les 307 circuits sont une véritable ligne directrice pour l'électronique moderne, source des idées originales qui guident le processus de travail sur les variantes. Recevez les articles qui intéressent le nombre de doubles publiés dans la revue d'Elektor, publiés par la tradition du présent et publiés, et le nombre d'appels de Hors-Gabarit, conformes aux exceptions en vigueur. Voici les domaines familiaux et les usages de l'électronique : alimentations, régulateurs et chargeurs audio Video communication hautes fréquences informatique jeux & modélisme maison et automobile mesurer et tester processeur et contrôleur
€ 29,95
Leden: € 26,96
-
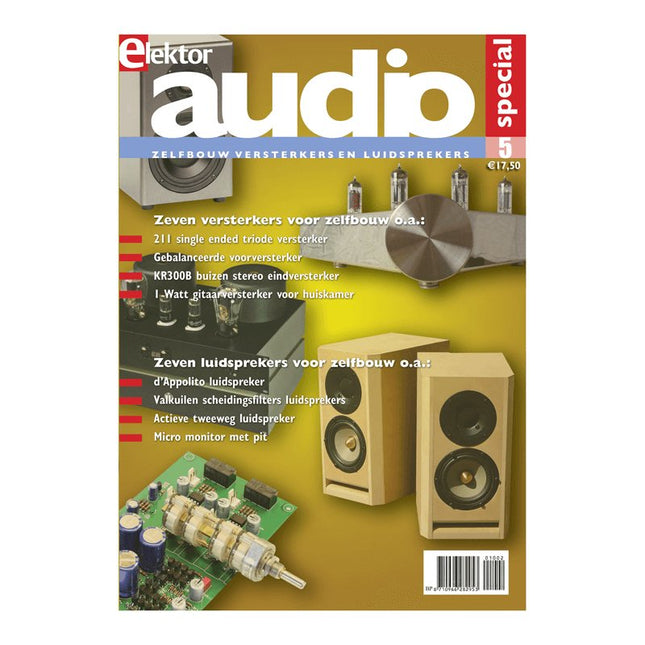
Elektor Digital Elektor Special: Audio 5 (PDF)
Zelfbouw versterkers en luidsprekers Ook deze vijfde Audio Special staat weer vol met interessante bouwbeschrijvingen en achtergrondartikelen van internationaal gerenommeerde ontwerpers. Ook dit jaar weer de inmiddels bekende mix van buizenversterkers en luidsprekers, zodat er voor iedere zelfbouwer ongetwijfeld iets interessants te lezen of te bouwen valt. Het gaat in alle gevallen om nieuwe, nog niet eerder gepubliceerde artikelen. Inhoud Versterkers Classic Three voorversterker Lijnvoorversterker met 6C33 De Dirigent – buizenvoorversterker met actief scheidingsfilter Single ended KR300B stereo eindversterker 1 Watt gitaarversterker – voor huiskamer Single ended 211 triode versterker – met interstage trafo Dieper kijken in de uitgangstransformator Prelude voorversterker – minimalisme in optima forma Klik aan, klik uit schakelaar – een netschakelaar met legio toepassingen Luidsprekers Scheidingsfilters voor luidsprekerboxen – meer valkuilen dan je lief is Morel Elite 420 – actieve tweeweg boekenplank luidspreker All back – een verrassend veelzijdige compacte TL HATT-SE MkII Micro Monitor – kleine luidspreker met pit Silverado – een d’Appolito met pit Nebular Monitor – een compacte luidspreker met een groots geluid LBVS – zelfbouwklassieker van eigen bodem Solo 201 – er is maar één weg!
€ 17,50
Leden: € 15,75
-

Elektor Digital ARM Microcontroller Projects (E-book)
It is becoming important for microcontroller users to quickly learn and adapt to new technologies and architecture used in high performance 32-bit microcontrollers. Many manufacturers now offer 32-bit microcontrollers as general purpose processors in embedded applications. ARM provide 32 and 64-bit processors mainly for embedded applications. These days, the majority of mobile devices including mobile phones, tablets, and GPS receivers are based on ARM technology. The low cost, low power consumption, and high performance of ARM processors makes them ideal for use in complex communication and mixed signal applications. This book makes use of the ARM Cortex-M family of processors in easy-to-follow, practical projects. It gives a detailed introduction to the architecture of the Cortex-M family. Examples of popular hardware and software development kits are described. The architecture of the highly popular ARM Cortex-M processor STM32F107VCT6 is described at a high level, taking into consideration its clock mechanisms, general input/output ports, interrupt sources, ADC and DAC converters, timer facilities, and more. The information provided here should act as a basis for most readers to start using and programming the STM32F107VCT6 microcontroller together with a development kit. Furthermore, the use of the mikroC Pro for ARM integrated development environment (IDE) has been described in detail. This IDE includes everything required to create a project; namely an editor, compiler, simulator, debugger, and device programmer. Although the book is based on the STM32F107VCT6 microcontroller, readers should not find it difficult to follow the projects using other ARM processor family members.
€ 34,95
Leden: € 31,46
-

Elektor Digital Elektor Circuit Special 2024 PDF (FR)
Le téléchargement intégral de ce numéro est disponible pour nos membres GOLD et GREEN sur le site Elektor Magazine ! Pas encore membre ? Cliquez ici. charge électronique pour les tests à haute intensitéde la nécessité à l'innovation suppresseur de voixcircuit pour un karaoké instantané sélecteur audio A/B avec réglage de gaincommuter de l'entrée micro à l'entrée ligne optimiser la rechrage du LIR2032prenez soin de vos piles bouton la détection tactile en toute simplicitéun guide de fabrication pour n'importe quel microcontrôleur interrupteur universel à télécommandeune nouvelle vie pour les vieilles télécommandes une boite à meuh avec un microcontrôleurproduire des sons amusants à l'aide d'un microcontrôleur interface de batterie externe USB alimenter les appareils à faible consommation avec des batteries externesune Solution pour les maintenir actives mini-ampli audio de classe A avec sortie en courantpiloter les haut-parleurs en courant au lieu de tension module pseudo-symétriqueCMRR élevé avec des liaisons audio asymétriques chargeur automatique d'accu Ni-MHrechargez toutes vos batteries simultanément ! protection pour alimentation électrique basée sur un thyristor lecteur d'empreintes digitalesdispositif utile d'identification convertisseur de puissance DC-DC 3Aaméliorer vos sources de tension fixes innovations de la plateforme Arduino Project Hubnouveaux projets de la communauté contrôle à distance du chauffe-eaudétection de tension et de courant pour les lignes à courant alternatif atténuateurs pour signaux audio (1)sélection par cavaliers cure de jouvence pour votre vieux chargeur (1)ne le jetez pas, modernisez-le ! une carte pour « The Blue »circuit imprimé pour le potentiomètre motorisé d'Alps référence 50 Hz à partir d'une tension secteur 60 Hzconversion de 50 Hz à 60 Hz isolateurs numériquesréalisation facile de l’isolation galvanique amplificateur mono Hi-Fi compact de 12 Wpetit mais puissant générateur de rampe LM386 générateur triphaséavec Raspberry Pi Pico ouverture de porte pour les personnes ayant des talents musicaux classique d’Elektor : synthétiseur Surfgénérateur d’ambiance océanique relaxante (de Chhhh à Zzzz) cure de jouvence pour votre vieux chargeur (2)ne le jetez pas, modernisez-le ! surveillance du courant d'une lampe avec Raspberry Pi Pico télégraphie infrarouge Fnirsi SWM-10appareil portable de soudage par point intelligent pour réparer vos packs d’accumulateur Codec audio stéréo pour ESP32 et Ciela mesure audio : pas de panique techniques de soudure à l’étain faites-le correctement dès maintenant ! atténuateurs pour signaux audio (2) sélection par relais alimentation USB-CDrawing Power from USB-C Power Adapters trois circuits avec deux et trois puces 4017 comptez sur les 4017 composants actifs - la diode un minuteur pour des délais ultra-Longs réglez-le et oubliez-le ! Jack In & Jack Out maillon d’E/S pour chaînes audio alimenter un ESP32 à partir d'une seule cellule Li-ion Hexadoku
€ 10,95
-

Elektor Digital Elektor Janvier/Février 2024 (PDF)
Le chargeur intégré est disponible pour nos clients OR et VERT sur le site d'Elektor Magazine ! Pas encore membre ? Cliquez ici . Comment fonctionne le projet : conception de la base énergétique pour l'ESP32 Prochaines étapes du prototypage optimisation des centrales solaires sur le balcon Considérations, faits et calculs ESP32 avec OpenDTU pour les centrales électriques sur le balcon Relever les données des petits onduleurs avec des microcontrôleurs alimentation linéaire variable Ensemble Alimentation 0-50 V / 0-2 A + alim symétrique double le stockage d'énergie aujourd'hui et dans le futur interview Simon Engelke 2024 : l'Odyssée de l'IA sans répétition Bluetooth LE sur le STM32 Plus que suffisant pour mesurer la distance boîte de conservation centre intelligent sur l'être humain MAUI : programmation pour PC, tablettes et smartphones le nouveau framework en théorie et en pratique ChatMagLev lévitation magnétique ? versionIA Régulateur de pulsation simple PV Réalisation du système de gestion de l'énergie photovoltaïque de base les composants à cathode froide sur le vif nostalgie démarrer en électronique ?Leçon FET tutoriel bus CAN pour l'Arduino UNO R4 deux UNO R4 connectés au bus infographie assistance complète en conception et développement les services d'ingénierie d'Arrow comparativement parlant, la force et l'efficacité de l'énergie condensateurs électrolytiques et aluminium sources potentielles de distorsions et technologie audio tester et mesurer l'USB le Fnirsi FNB58 l'outil Pick-and-Place manuel Pixel Pump simplifier l'assemblage du manuel des cartes CMS visite à domicile Naguère, dans un pays lointain ? « Dans le monde de l'éthique et de l'électronique, les petites choses sont faites avec un impact significatif. » éthique et électronique les orientations de l'OCDE et le soin apporté aux diligences impliquées dans la chaîne d'agrément Chadèche : chargeur/déchargeur intelligent pour accumulation NiMh résumé du projet de lecture projet 2.0 Corrections, mises à jour et courriers des lecteurs
€ 10,95
-

Andonstar Andonstar Max Station Upgrade-set voor AD409-modellen
Upgrade je Andonstar AD409, AD409 Pro of AD409 Pro-ES naar het Max-model met deze uitbreidingsset. Het nieuw ontworpen, oversized Max-station biedt voldoende werkruimte, waardoor het perfect is voor grotere projecten en ideaal voor professionele soldeertaken. Inbegrepen 1x Standaard met 2 LED's 1x Reparatiemat 1x Drager 1x Kolom 1x Gereedschapshouder 1x Solderende helpende handen
€ 60,00
-
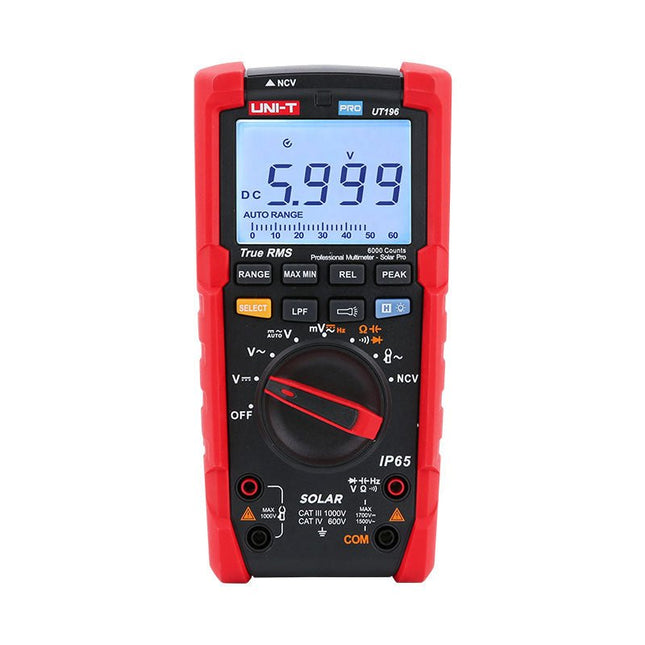
Uni-Trend UNI-T UT196 True RMS Solar Multimeter
De UT196 True RMS Solar multimeter is een ideaal hulpmiddel bij het onderhoud van zonne-energie systemen. Deze robuuste meter is ontworpen voor technici die in weer en wind buiten werken. De UT196 kan spanning meten tot 1700 V DC en 1500 V AC, en stroom tot 3000 A AC met behulp van een externe stroomtangsensor. Deze solar meter is waterdicht conform IP65, en is ook bestand tegen een val van 2 m. De UT196 Solar multimeter is ontworpen met beveiligingen tegen overbelasting van 1700 V DC en 1500 Vrms AC, en getest voor veilig gebruik in CAT III 1000 V en CAT IV 600 V omgevingen. Kenmerken True RMS Meet tot 1700 V DC en 1500 V AC bij hoogspanningstoepassingen zoals zonnepanelen en wind Bescherming conform IP65 CAT III 1000V, CAT IV 600 V Analoge staafgrafiek Frequentiebereik: 45 Hz~1 kHz Laagdoorlaatfilter functie Modus voor lage impedantie Ingebouwde zaklamp, heldere achtergrondverlichting, en visueel alarm Toepassingen Meten van hoge DC-spanningen Uitgangsspanning- en frequentiemeting Spannings- en frequentiemeting Stroom- en frequentiemeting Specificaties Bereik UT196 DC-spanning (V) 1700 V ±0,2% +5 AC-spanning (V) 1500 V ±0,8% +3 Frequentie (Hz) 1 MHz ±0,08% +4 Weerstand (?) 60 M? ±0,8% +2 Capaciteit (F) 60 mF ±1,9% +5 Voeding 9 V batterij Afmetingen 195 x 95 x 58 mm Inbegrepen UT196 Solar multimeter Batterij Meetsnoeren Downloads Datasheet Gebruikershandleiding
€ 129,63
-

OWON OWON HDS2202s 2-kanaals oscilloscoop (200 MHz) + multimeter + signaalgenerator
De OWON HDS2202s is een draagbare 3-in-1 multifunctionele tester, die kan worden gebruikt als een 2-kanaals oscilloscoop met een bandbreedte van 200 MHz, en als een multimeter en signaalgenerator. Hij beschikt over een contrastrijk 3,5-inch kleurendisplay dat geschikt is voor onderhoud buitenshuis, snelle metingen ter plaatse, auto-onderhoud, stroomdetectie, enzovoort./p> Kenmerken Oscilloscoop + multimeter + golfvormgenerator, multifunctioneel in één 3,5-inch LCD-kleurenscherm met hoge resolutie en hoog contrast, geschikt voor gebruik buitenshuis 18650 lithium accu, kan 3-6 uur continu werken USB type-C interface, ondersteuning voor powerbank, ondersteuning voor software via een pc Zelfkalibratie functie Ondersteunt SCPI, faciliteert secundary development Specificaties Bandbreedte 200 MHz Kanalen 2-kanaals oscilloscoop + 1-kanaals generator Sample frequentie 1 GSa/s Acquisitie methode Normaal, Piekdetectie Record length 8K Scherm 3,5-inch LCD Golfvorm refresh rate 10.000 wfrms/s Ingangssignaal DC, AC en Aarde Ingangsimpedantie 1 MΩ ±2%, met parallel 16pF ±10pF Dempingswaarden probe 1X,10X,100X,1000X,10000X Maximale ingangsspanning 400 V (DC+AC, PK-PK, 1MΩ ingangsimpedantie) (10:1 demping op de probe) Bandbreedte limiet (typical) 20 MHz Horizontale schaal 2ns/div - 1000s/div, in stappen van 1 - 2 - 5 Verticale gevoeligheid 10mV/div - 10V/div Verticale resolutie 8 bits Triggertype Edge Triggermodi Auto, Normaal, Single Automatische metingen Frequentie, Periode, Amplitude, Max, Min, Gemiddelde, PK-PK Cursormeting ΔV, ΔT, ΔT&ΔV tussen cursors Communicatie interface USB Type-C Multimeter Specificaties Max. resolutie 20.000 counts Testmodus Spanning, Stroom, Weerstand, Capaciteit, Diode en Continuïteitstest Ingangsimpedantie 10 MΩ Maximale ingangsspanning AC 750 V, DC 1000 V Max ingangsstroom DC: 10 A, AC: 10 A Diode 0-2 V Waveform Generator Specificaties Frequentie uitgang Sinus 0,1 Hz - 25 MHz Square 0,1 Hz - 5MHz Ramp 0,1 Hz - 1 MHz Pulse 0,1 Hz - 5 MHz Arbitrary 0,1 Hz - 5 MHz Sample frequentie 125 MSa/s Kanalen 1 kanaal Amplitudebereik (hoge impedantie) 20 mVpp - 5 Vpp Golfvorm Lengte 8K Verticale resolutie 14 bits Uitgangsimpedantie 50 Ω Inbegrepen 1x OWON HDS2202s 1x Voedingsadapter 1x USB-kabel 1x Passieve probe 2x Krokodillenklem kabels 1x Set multimeter probes (een rode en een zwarte) 1x Gebruiksaanwijzing 1x Insteltool voor aanpassing van de probe Downloads Gebruikershandleiding Specificaties SCPI Protocol Quick Guide Software
€ 242,00
-
Elektor Digital Ontwerpen van Buizenversterkers (E-book)
Ook in deze tijd klinken buizenversterkers nog steeds fantastisch, misschien wel mooier dan ooit. Nu hebben we immers de beschikking over moderne materialen als ringkern uitgangstransformatoren, uiterst hoogwaardige weerstanden en condensatoren en vele soorten goed klinkend draad. Ook de moderne geluidsbronnen als de CD speler en de nieuwste hoogwaardige luidsprekers laten beter dan ooit horen hoe goed de buizenversterker weergeeft.Dit boek van Menno van der Veen kijkt niet alleen theoretisch naar buizenversterkers, maar vooral ook naar de ontwerpfase waarin besluiten moeten worden genomen over de doelen en eisen van de versterker. Hoe hangen deze samen met subjectieve en objectieve criteria? Welke schakelingen klinken vooral prachtig en waarom doen ze dat? Stel dat je een versterker gaat ontwikkelen en in de handel wilt brengen, tegen welke problemen loop je dan aan? En wat te zeggen van het belang en de betekenis van metingen? Zeggen ze nu iets of zeggen ze niets? Dankzij de grote rekenkracht van de computer kunnen we tegenwoordig dieper meten dan ooit. Hoe pas je deze technieken toe bij buizenversterkers? Tot nu toe waren metingen over frequentiebereik en vermogen en vervorming voldoende om een beeld van de eigenschappen van een versterker te geven. Maar zijn zulke metingen voldoende of moeten we gaan meten zoals ons oor waarneemt, met echte muzieksignalen in plaats van meettoontjes? De auteur schetst een toekomst waarbij meten aan de versterker de eigenschappen van ons horen moet volgen om tot nieuwe inzichten te komen.Dit boek is meer op de praktijk gericht dan op de theorie en heeft een beschouwend karakter, alsof de auteur van bovenaf naar de buizenversterker kijkt. Kenniselementen worden geïntegreerd en in een breed overzichtelijk kader geplaatst.
€ 29,95
Leden: € 26,96
-

Elektor Digital Artificial Intelligence (E-book)
23 projects to bring your microcontroller to life! This book contains 23 special and exciting artificial intelligence machine-learning projects, for microcontroller and PC. Learn how to set up a neural network in a microcontroller, and how to make the network self-learning. Discover how you can breed robots, and how changing a fitness function results in a totally different behavior. Find out how a PC program exposes your weak spots in a game, and ruthlessly exploits them. Build a free-will robot, or have one clean your floor! Example projects from the book: A microcontroller that learns what your favourite color is. A robot wandering about the house looking for someone to play with. A bred robot program that is incapable of crossing a black line. A microcontroller that learns how to play a game until You just can't win anymore. A PC that programs a microcontroller all by itself. Complete with free software that you can download containing: All source code for the microcontroller. All sources of compiled PC programs (MS Windows). JAL programming language, with special editor and extension libraries. Robot breed program. Plus a support webpage with links, errata and FAQ. Several artificial intelligence techniques are discussed and used in projects such as expert system, neural network, subsumption, emerging behavior, genetic algorithm, cellular automata and roulette brains. Every project has clear instructions and pictures so you can start immediately. Suggestions and literature links allow you to go way beyond the scope of the book. Even after you have built all the projects contained within, this book will remain a valuable reference guide to keep next to your PC. A unique book for anyone with an interest in artificial intelligence and machine learning.
€ 29,95
Leden: € 26,96
-

Elektor Digital 310 Circuits (PDF)
Cet ouvrage est un trésor : il réunit 310 schémas d'électronique analogique, logique ou numérique, des programmes, des liens vers des sites internet, des tableaux de caractéristiques de composants et des dessins de circuit imprimé. Il est le onzième volume de la collection « 300 circuits » (301... 302... 303... 304... 305... 306... 307... 308... 309 circuits). Ses deux tables des matières alphabétique et thématique vous permettent de trouver rapidement et facilement parmi les 310 articles proposés ceux qui correspondent à vos besoins. Ces articles viennent des numéros doubles de la revue Elektor, publiés chaque année en été, et appelés numéros Hors-Gabarit, par allusion à leur contenu exceptionnellement riche. Ils forment un véritable catalogue d'idées, de trouvailles et d'astuces. C'est une source d'inspiration inépuisable, et à partir de laquelle chacun élaborera ses propres variantes qu'il combinera ensuite à sa guise avec d'autres circuits. Tous les domaines familiers et usuels de l'électronique sont abordés : alimentations, régulateurs et chargeurs audio & vidéo communication hautes fréquences informatique jeux & modélisme maison & automobile mesure & test processeur & contrôleur Les robots et leurs accessoires (moteurs, capteurs, mécanique) arrivent en force. Certaines de ces réalisations sont présentées sous une forme succincte, d'autres sont élaborées avec schéma détaillé, dessin de circuit imprimé, liste de composants complète et circuit imprimé, ces fameux circuits imprimés qui ont fait une partie de la réputation d'Elektor. Un concentré de tout le savoir-faire du laboratoire d'Elektor pour un prix modique. On y trouve beaucoup plus que ce qu'on y cherche.
€ 29,95
Leden: € 26,96


