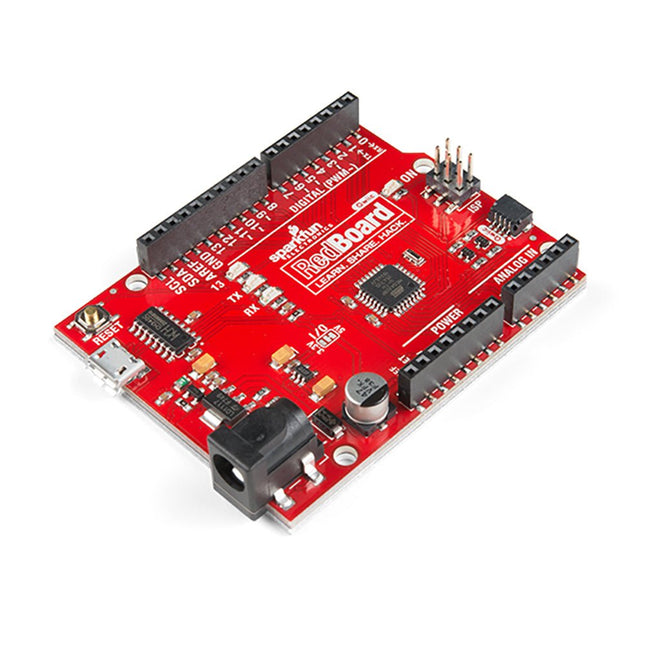
Features ATmega328 microcontroller met Optiboot Bootloader R3 Shield Compatible CH340C serieel-USB-converter 3.3 V tot 5 V Spanningsniveau Jumper A4 / A5 jumpers AP2112 spanningsregelaar ISP-kopje Ingangsspanning: 7 V - 15 V 1 Qwiic aansluiting 16 MHz kloksnelheid 32 k Flash-geheugen Alle SMD constructie verbeterde resetknop
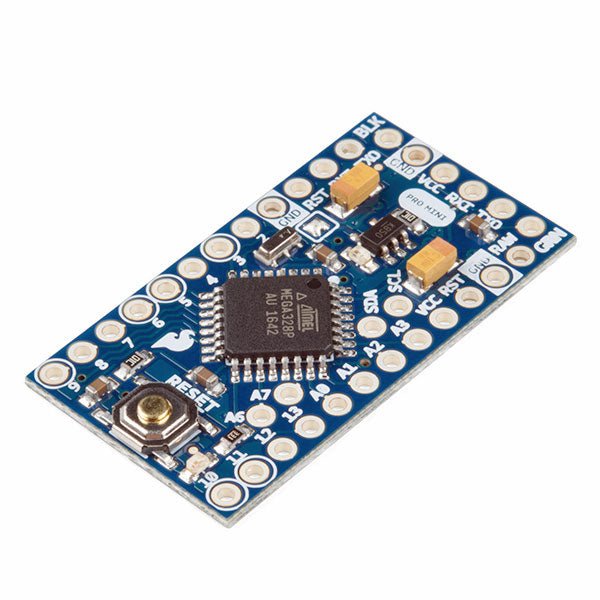
De Arduino Pro Mini is een microcontroller board gebaseerd op de ATmega328P.
Het heeft 14 digitale in-/uitgangspinnen (waarvan er 6 kunnen worden gebruikt als PWM-uitgangen), 6 analoge ingangen, een on-board resonator, een reset-knop, en gaten voor het monteren van pin headers. Een six-pin header kan worden aangesloten op een FTDI-kabel of Sparkfun breakout board om USB-voeding en communicatie te bieden aan de board.
De Arduino Pro Mini is bedoeld voor semi-permanente installatie in voorwerpen of tentoonstellingen. Het board komt zonder pre-gemonteerde headers, waardoor het gebruik van diverse types van schakelaars of het directe solderen van draden is toegestaan. De pin lay-out is compatibel met Arduino Mini.
Specificaties
Microcontroller
ATmega328P
Boord Stroomvoorziening
5-12 V
Circuit Werkspanning
5 V
Digitale I/O Pinnen
14
PWM Pennen
6
UART
1
SPI
1
I²C
1
Analoge ingangspinnen
6
Externe Onderbrekingen
2
DC stroom per I/O Pin
40 mA
Flash Geheugen
32 KB waarvan 2 KB gebruikt door bootloader
SRAM
2 KB
EEPROM
1 KB
Kloksnelheid
16 MHz
Afmetingen
18 x 33,3 mm
Downloads
Eagle files
Schematics
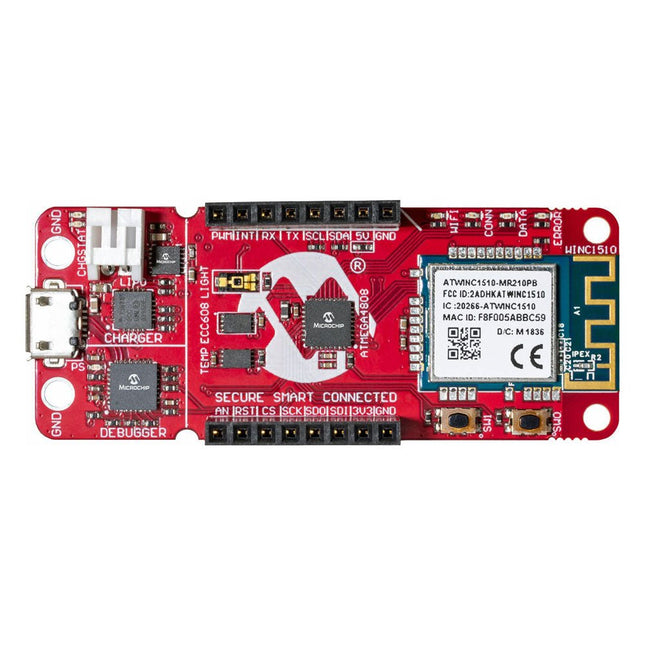
The AVR-IoT WA development board combines a powerful ATmega4808 AVR MCU, an ATECC608A CryptoAuthentication™ secure element IC and the fully certified ATWINC1510 Wi-Fi network controller – which provides the most simple and effective way to connect your embedded application to Amazon Web Services (AWS). The board also includes an on-board debugger, and requires no external hardware to program and debug the MCU.Out of the box, the MCU comes preloaded with a firmware image that enables you to quickly connect and send data to the AWS platform using the on-board temperature and light sensors. Once you are ready to build your own custom design, you can easily generate code using the free software libraries in Atmel START or MPLAB Code Configurator (MCC).The AVR-IoT WA board is supported by two award-winning Integrated Development Environments (IDEs) – Atmel Studio and Microchip MPLAB X IDE – giving you the freedom to innovate with your environment of choice.Features
ATmega4808 microcontroller
Four user LED’s
Two mechanical buttons
mikroBUS header footprint
TEMT6000 Light sensor
MCP9808 Temperature sensor
ATECC608A CryptoAuthentication™ device
WINC1510 WiFi Module
On-board Debugger
Auto-ID for board identification in Atmel Studio and Microchip MPLAB X
One green board power and status LED
Programming and debugging
Virtual COM port (CDC)
Two DGI GPIO lines
USB and battery powered
Integrated Li-Ion/LiPo battery charger
There are many so-called 'Arduino compatible' platforms on the market. The ESP8266 – in the form of the WeMos D1 Mini Pro – is one that really stands out. This device includes WiFi Internet access and the option of a flash file system using up to 16 MB of external flash memory. Furthermore, there are ample in/output pins (though only one analogue input), PWM, I²C, and one-wire. Needless to say, you are easily able to construct many small IoT devices!
This book contains the following builds:
A colourful smart home accessory
refrigerator controller
230 V power monitor
door lock monitor
and some further spin-off devices.
All builds are documented together with relevant background information for further study. For your convenience, there is a small PCB for most of the designs; you can also use a perf board. You don’t need to be an expert but the minimum recommended essentials include basic experience with a PC, software, and hardware, including the ability to surf the Internet and assemble PCBs.
And of course: A handle was kept on development costs. All custom software for the IoT devices and PCB layouts are available for free download from at Elektor.com.
Affordable solutions with the ESP8266 and 3D printing
If you are looking for a small yet powerful IoT device, you are likely to come across the ESP8266 and compatible products on the market today. One of these, the Wemos/Lolin D1 Mini Pro board strikes a remarkable balance between cost and performance. A small and very affordable prototype board, the D1 Mini Pro stands out with its WiFi functionality and a 16-Mbytes flash memory for easy creation of a flash file system. In addition, there are sufficient input and output pins (only one analog input though) to support PWM, I²C, and One-Wire systems to mention but a few. The book describes the operation, modding, construction, and programming of home appliances including a colorful smart home accessory, a refrigerator/greenhouse controller, an AC powerline monitor, a door lock monitor, and an IKEA Trådfri controller.
As a benefit, all firmware developed for these DIY, "IoT-ized" devices can be updated over-the-air (OTA).
For most of the designs in the book, a small printed circuit board (PCB) and an enclosure are presented so readers can have a finished and attractive-looking product. Readers having – or with access to! – a 3D printer can "print" the suggested enclosures at home or in a shop.
Some of the constructions benefit from a Raspberry Pi configured as a gateway or cms server. This is also described in detail with all the necessary configuring.
You don’t need to be an expert but the prerequisites to successful replication of the projects include basic skills with PC software including the ability to surf the Internet. In terms of hardware, you should be comfortable with soldering and generally assembling the PCBs presented in the book.
All custom software written for the IoT devices, the PCB layouts, and 3D print files described in the book are available for free downloading.
In 35 Projects with the Raspberry Pi and Arduino
The Internet of Things (IoT) is a trend with a strong technological impulse. At home, we want to do everything on our tablets, from browsing Facebook to watching TV, from operating lights to keeping an eye on the temperature.
In 35 fun projects, this book will show you how to build your own Internet of Things system. We'll cover the hardware (primarily the Raspberry Pi and Arduino) and the software that makes control via Internet possible. We employ Wi-Fi and radio links so no requirement any longer to install cabling crisscross through your home.
Assuming the projects in the book are finished, you have a complete Internet of Things system that allows you to control and view of everything in your home. For example, if there's something in the mail box or the car is securely in the garage. Also, you can switch on the lights and the alarm from your couch. The crisp explanations allow the projects to be customized with ease, for example, to turn on your coffee machine or TV remotely. The index gives easy access to creative projects that can serve as an example, enabling you to do all the connecting to the IoT independently. All project software can be downloaded free of charge from the Elektor website.
In this unique book, Raspberry Pi, Arduino and HTML webpages with stylesheets and JavaScript come together in clearly-described, easy-to-build projects. This special book is an essential part of your collection!
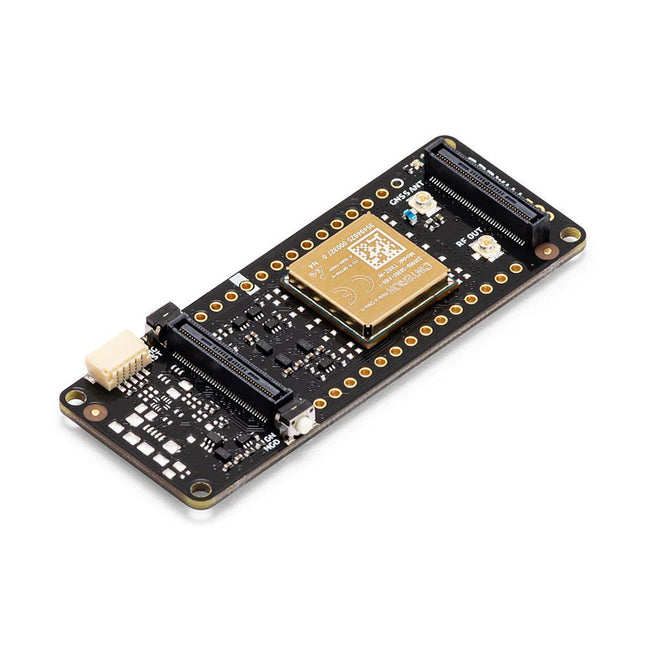
De Portenta Cat. M1/NB IoT GNSS Shield kan van nut zijn bij het verbeteren van de connectiviteits-mogelijkheden van uw Portenta H7 toepassingen. Deze uitbreidingskaart maakt gebruik van de draadloze Cinterion TX62 module van Thales, ontworpen om aan efficiënte en energiezuinige IoT-toepassingen geoptimaliseerde bandbreedte en prestaties te bieden.De Portenta Cat. M1/NB IoT GNSS Shield is een uitbreiding op de krachtige edge-computing van de Portenta H7, om de ontwikkeling van asset tracking en remote monitoring mogelijk te maken in zowel industriële omgevingen, als ook in de landbouw, bij nutsbedrijven als bij smart city’s. De kaart biedt mobiele connectiviteit met zowel Cat. M1 als NB-IoT netwerken, met hierbij de optie om eSIM-technologie te gebruiken. Volg eenvoudig uw waardevolle goederen, in uw stad of wereldwijd, met een keuze uit GPS, GLONASS, Galileo of BeiDou.Functies
Connectiviteitsopties wijzigen zonder het board te hoeven wijzigen
Voeg NB-IoT, CAT. M1 en plaatsbepaling toe aan elk Portenta product
Optie om een kleine multiprotocol router (WiFi - BT + NB-IoT/CAT. M1) te maken
Verlaag de eisen qua communicatie-bandbreedte bij IoT-toepassingen aanzienlijk
Module met laag stroomgebruik
Ook compatibel met MKR-boards
Monitoring op afstandIndustriële en agrarische bedrijven kunnen gebruik maken van de Portenta Cat. M1/NB IoT GNSS Shield voor het op afstand monitoren van gasdetectoren, optische sensoren, machine alarmsystemen, biologische bestrijdingsapparatuur en meer.Technologieleveranciers die smart city oplossingen bieden kunnen de kracht en de betrouwbaarheid van de Portenta H7 combineren met de Portenta Cat. M1/NB IoT GNSS Shield, om data uit te wisselen en taken te automatiseren, en om zo een geoptimaliseerd gebruik van middelen en een verbeterde gebruikerservaring te realiseren.Bewaking van bedrijfsmiddelenVoeg monitoring opties toe aan uw bedrijfsmiddelen door de prestaties en edge computing functies van de boards uit de Portenta familie te combineren. De Portenta Cat. M1/NB IoT GNSS Shield is ideaal voor het bewaken van waardevolle goederen, en voor het monitoren van industriële machines en apparatuur.Specificaties
Connectiviteit
Cinterion TX62 draadloze module; NB-IoT - LTE CAT. M1; 3GPP Rel. 14 Compliant Protocol LTE Cat. M1/NB1/NB2; UMTS BANDEN: 1 / 2 / 3 / 4 / 5 / 8 / 12 (17) / 13 / 18 / 19 / 20 / 25 / 26 / 27 / 28 / 66 / 71 / 85; LTE Cat. M1 DL: max. 300 kbps, UL: max. 1,1 Mbps; LTE Cat. NB1 DL: max. 27 kbps, UL: max. 63 kbps; LTE Cat. NB2 DL: max. 124 kbps, UL: max. 158 kbps
Short messaging service (SMS)
Point-to-point Mobile Terminated (MT) en Mobile Originated (MO) Text Mode; Protocol Data Unit (PDU) Mode
Plaatsbepaling
GNSS capability (GPS/BeiDou/Galileo/GLONASS)
Overig
Embedded IPv4 en IPv6 TCP/IP stack access; Internet services: TCP server/client, UDP client, DNS, Ping, HTTP client, FTP client, MQTT client Secure Connection met TLS/DTLS Secure Boot
Dimensies
66 x 25,4 mm
Bedrijfstemperatuur
-40° C tot +85° C (-104° F tot 185°F)
Downloads
Datasheet
Schema
Learn programming for Alexa devices, extend it to smart home devices and control the Raspberry Pi
The book is split into two parts: the first part covers creating Alexa skills and the second part, designing Internet of Things and Smart Home devices using a Raspberry Pi.
The first chapters describe the process of Alexa communication, opening an Amazon account and creating a skill for free. The operation of an Alexa skill and terminology such as utterances, intents, slots, and conversations are explained. Debugging your code, saving user data between sessions, S3 data storage and Dynamo DB database are discussed.
In-skill purchasing, enabling users to buy items for your skill as well as certification and publication is outlined. Creating skills using AWS Lambda and ASK CLI is covered, along with the Visual Studio code editor and local debugging. Also covered is the process of designing skills for visual displays and interactive touch designs using Alexa Presentation Language.
The second half of the book starts by creating a Raspberry Pi IoT 'thing' to control a robot from your Alexa device. This covers security issues and methods of sending and receiving MQTT messages between an Alexa device and the Raspberry Pi.
Creating a smart home device is described including forming a security profile, linking with Amazon, and writing a Lambda function that gets triggered by an Alexa skill. Device discovery and on/off control is demonstrated.
Next, readers discover how to control a smart home Raspberry Pi display from an Alexa skill using Simple Queue Service (SQS) messaging to switch the display on and off or change the color.
A node-RED design is discussed from the basic user interface right up to configuring MQTT nodes. MQTT messages sent from a user are displayed on a Raspberry Pi.
A chapter discusses sending a proactive notification such as a weather alert from a Raspberry Pi to an Alexa device. The book concludes by explaining how to create Raspberry Pi as a stand-alone Alexa device.
Ready-to-use devices and self-built Arduino nodes in the 'The Things Network'
LoRaWAN has developed excellently as a communication solution in the IoT. The Things Network (TTN) has contributed to this. The Things Network was upgraded to The Things Stack Community Edition (TTS (CE)). The TTN V2 clusters were closed towards the end of 2021.
This book shows you the necessary steps to operate LoRaWAN nodes using TTS (CE) and maybe extend the network of gateways with an own gateway. Meanwhile, there are even LoRaWAN gateways suitable for mobile use with which you can connect to the TTN server via your cell phone.
The author presents several commercial LoRaWAN nodes and new, low-cost and battery-powered hardware for building autonomous LoRaWAN nodes. Registering LoRaWAN nodes and gateways in the TTS (CE), providing the collected data via MQTT and visualization via Node-RED, Cayenne, Thingspeak, and Datacake enable complex IoT projects and completely new applications at very low cost.
This book will enable you to provide and visualize data collected with battery-powered sensors (LoRaWAN nodes) wirelessly on the Internet. You will learn the basics for smart city and IoT applications that enable, for example, the measurement of air quality, water levels, snow depths, the determination of free parking spaces (smart parking), and the intelligent control of street lighting (smart lighting), among others.
Learn programming for Alexa devices, extend it to smart home devices and control the Raspberry Pi
The book is split into two parts: the first part covers creating Alexa skills and the second part, designing Internet of Things and Smart Home devices using a Raspberry Pi.
The first chapters describe the process of Alexa communication, opening an Amazon account and creating a skill for free. The operation of an Alexa skill and terminology such as utterances, intents, slots, and conversations are explained. Debugging your code, saving user data between sessions, S3 data storage and Dynamo DB database are discussed.
In-skill purchasing, enabling users to buy items for your skill as well as certification and publication is outlined. Creating skills using AWS Lambda and ASK CLI is covered, along with the Visual Studio code editor and local debugging. Also covered is the process of designing skills for visual displays and interactive touch designs using Alexa Presentation Language.
The second half of the book starts by creating a Raspberry Pi IoT 'thing' to control a robot from your Alexa device. This covers security issues and methods of sending and receiving MQTT messages between an Alexa device and the Raspberry Pi.
Creating a smart home device is described including forming a security profile, linking with Amazon, and writing a Lambda function that gets triggered by an Alexa skill. Device discovery and on/off control is demonstrated.
Next, readers discover how to control a smart home Raspberry Pi display from an Alexa skill using Simple Queue Service (SQS) messaging to switch the display on and off or change the color.
A node-RED design is discussed from the basic user interface right up to configuring MQTT nodes. MQTT messages sent from a user are displayed on a Raspberry Pi.
A chapter discusses sending a proactive notification such as a weather alert from a Raspberry Pi to an Alexa device. The book concludes by explaining how to create Raspberry Pi as a stand-alone Alexa device.
BEAUCOUP D'AMOUR D'INGÉNIERIE DE L'UE ET DES ÉTATS-UNIS
SPARKFUN : LA VISION D'UN INGÉNIEUR
DÉMARRER AVEC MICROMOD
UNE MISE À NIVEAU POUR VOTRE JETBOT SPARKFUN comment j'ai étendu les fonctionnalités de mon JetBot (avec le Jetson Nano de NVIDIA).
PROGRAMMER UN FPGA
CONSTRUISEZ VOTRE PROPRE STATION DE RÉFÉRENCE GNSS
LE PROJET HORLOGE
SOUS LE CAPOT : KIT DE L'INVENTEUR SPARKFUN
GLENN SAMALA DE SPARKFUN SUR LE DÉVELOPPEMENT DE PRODUITS ET LES NOUVEAUX MARCHÉS
IMPRIMEZ LE VÔTRE AVEC SPARKFUN À LA CARTE
CONCEVOIR AVEC LE SPARKFUN ARTEMIS
PROTOTYPAGE RAPIDE AVEC L'ÉCOSYSTÈME QWIIC
AFFICHE - QWIIC
SOUS LE CAPOT : LE KIT SUPERCHARGEUR LIPO GREATSCOTT!/ELEKTOR DIY
UNE ÉLECTRONIQUE REMARQUABLE du passé de SparkFun
PARKING PARFAIT AVEC LIDAR
RÉPARATION D'UN 'COUSSIN ENTERRÉ'
DE LA CONCEPTION AU PRODUIT : LE SPARKFUN RTK SURVEYOR
BONJOUR LE MONDE DU RASPBERRY PI PICO ET RP2040 le premier microcontrôleur et puce Raspberry Pi
ROBOTS À QUATRE PATTES POUR AUTO-CONSTRUCTION
AFFICHE - MICROMOD
DÉVELOPPEMENT RISC-V IOT DANS AWS AVEC LES BIBLIOTHÈQUES FREERTOS
OUI, ÉLECTRONIQUE = FUN ! passionnés d'électronique entre eux
CATALOGUE DE PRODUITS SPARKFUN
HEXADOKU Le Sudoku électorisé original
,
van Saad Imtiaz
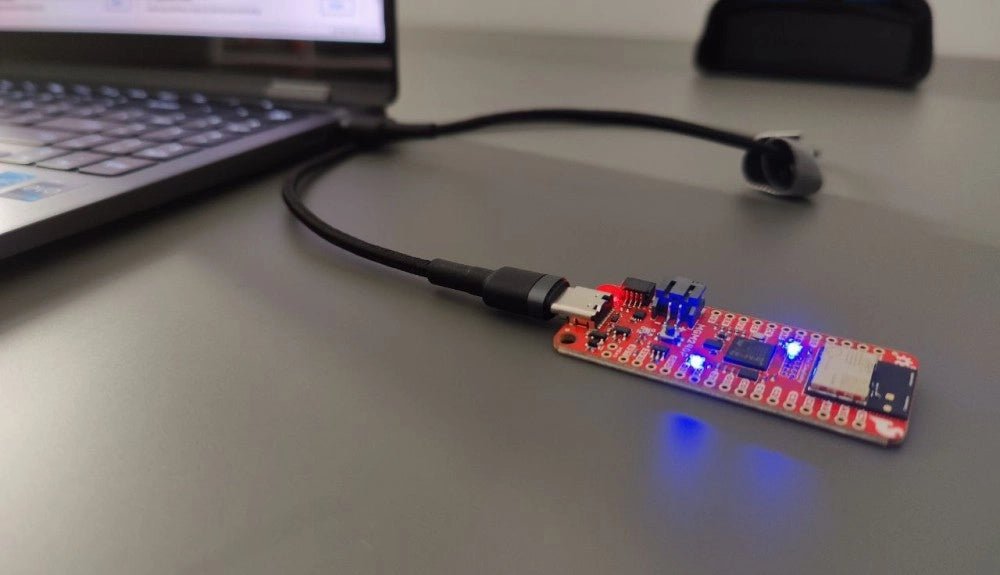
SparkFun Thing Plus Matter (MGM240P): Een veelzijdig Matter gebaseerd IoT Ontwikkelboard (Review)
De SparkFun Thing Plus Matter - MGM240P is a veelzijdig ontwikkelboard dat rijk is aan features en ontworpen is voor het ontwikkelen van Matter-gebaseerde IoT...