Leer hoe je de ESP32 Microcontroller en het programmeren met MicroPython in je toekomstige projecten kunt gebruiken!
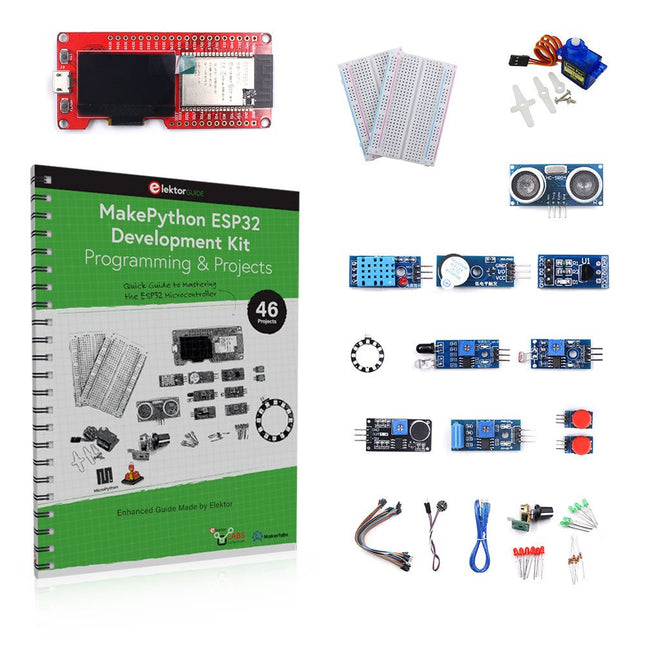
Het (Engelstalige) projectboek, geschreven door de bekende Elektor auteur Dogan Ibrahim, bevat vele software- en hardware-gebaseerde projecten die speciaal voor de MakePython ESP32 ontwikkelkit ontwikkeld zijn. De kit wordt geleverd met verschillende LED's, sensoren, en actuatoren. De kit helpt je de basiskennis op te doen om eigen IoT projecten te maken.
Alle volledig geëvalueerde projecten in het boek zijn voorzien van de bijgeleverde componenten. Elk project bevat een blokschema, een schakelschema, een volledige programmalijst, en een volledige programma beschrijving.
Inbegrepen in de kit
1x MakePython ESP32 ontwikkelingsboard met LCD
1x Ultrasone afstandsmeter
1x Temperatuur- en luchtvochtigheidssensor
1x Zoemer module
1x DS18B20 module
1x Infrarood module
1x Potentiometer
1x WS2812 module
1x Geluidssensor
1x Trilsensor
1x Module met lichtgevoelige weerstand
1x Puls sensor
1x Servo motor
1x USB kabel
2x Knop
2x Breadboard
45x Schakeldraad
10x Weerstand 330R
10x LED (Rood)
10x LED (Groen)
1x Projectboek (Engelstalig, 206 pagina's)
Boek met 46 projecten
LED Projecten
Knipperende LED
SOS knipperende LED
Knipperende LED – met behulp van een timer
Afwisselend knipperende LEDs
Knopbediening
De knippersnelheid van de LED's veranderen met drukknop onderbrekingen
Chasing-LEDs
Binaire teller met LEDs
Kerstverlichting (willekeurig-knipperende 8 LEDs)
Elektronische dobbelsteen
Geluksdag van het week
Projecten voor Pulsewidth Modulation (PWM)
Genereer een PWM golfvorm van 1000 Hz met 50% duty cycle
LED helderheid regelen
Meten van de frequentie en duty cycle van een PWM golfvorm
Melodieën maker
Eenvoudig elektronisch orgel
Servo motor besturing
Servo motor DS18B20 thermometer
Projecten voor analoog naar digitaal converteren (ADC)
Voltmeter
Plotten van de analoge ingangsspanning
Interne temperatuursensor van de ESP32
Ohmmeter
Lichtgevoelige weerstandsmodule
Projecten voor digitaal naar analoog converteren (DAC)
Opwekken van vaste spanningen
Opwekken van een zaagtand-golf signaal
Opwekken van een driehoek-golf signaal
Golfvorm met willekeurige periode
Genereren van een sinus-golf signaal
Genereren van een nauwkeurig sinus-golf signaal met behulp van een timer interrupts
Gebruik van het OLED Display
Seconden teller
Gebeurtenisteller
DS18B20 digitale thermometer met OLED
ON-OFF temperatuur regelaar
Meten van temperatuur en luchtvochtigheid
Ultrasone afstandsmeting
Hoogte van een persoon (stadiometer)
Hartslag (polsslag) meten
Andere bij de set geleverde sensoren
Diefstal alarm
Met geluid geactiveerd licht
Infrarood obstakel-vermijding met zoemer
WS2812 RGB LED ring
Tijdregistratie van temperatuur en luchtvochtigheid
Netwerkprogrammering
Wi-Fi scanner
Bediening op afstand vanuit de Internet browser (met een smartphone of PC) – Webserver
Temperatuur- en luchtvochtigheidsgegevens opslaan in de Cloud
Werking met Low-Power
Gebruik een timer om de processor te laten ontwaken
Meer dan 40 volledig geteste ESP32-projecten met Arduino IDE en de LVGL grafische bibliotheek
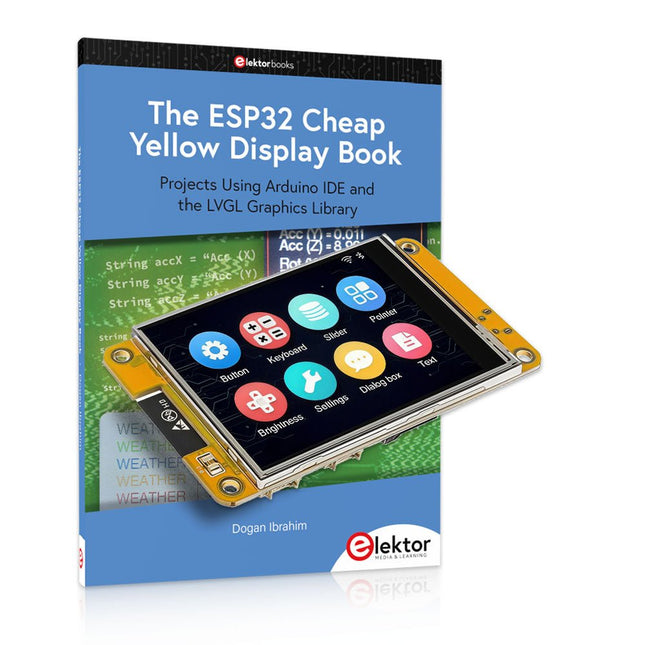
Deze bundel bevat de ESP32 Cheap Yellow Display (CYD) – een compact ontwikkelbord dat een standaard ESP32-microcontroller combineert met een TFT-kleurendisplay van 320 x 240 pixels. Het bord beschikt ook over meerdere aansluitingen voor GPIO, seriële communicatie (TX/RX), voeding en aarde. Het ingebouwde display is een groot voordeel, omdat gebruikers hiermee complexe, grafische projecten kunnen maken zonder dat er externe LCD's of displays nodig zijn.
Het bijbehorende boek introduceert de hardware en de ingebouwde aansluitingen van het CYD-bord in detail. Het biedt een reeks projecten van beginners- tot gevorderdenniveau, ontwikkeld met de populaire Arduino IDE 2.0. Zowel basis grafische functies als de krachtige LVGL grafische bibliotheek worden behandeld, met praktische projecten die elke aanpak illustreren.
Alle meegeleverde projecten zijn volledig getest en klaar voor gebruik. Het boek bevat blokdiagrammen, circuitschema's, complete codelijsten en stapsgewijze uitleg. Met de LVGL-bibliotheek kunnen lezers moderne, kleurrijke grafische interfaces maken met behulp van widgets zoals knoppen, labels, schuifregelaars, kalenders, toetsenborden, grafieken, tabellen, menu's, animaties en meer.
ESP32 Cheap Yellow Display Board
Dit ontwikkelbord (ook bekend als "Cheap Yellow Display") wordt aangedreven door de ESP-WROOM-32, een dual-core MCU met geïntegreerde Wi-Fi- en Bluetooth-mogelijkheden. Het werkt op een hoofdfrequentie tot 240 MHz, met 520 KB SRAM, 448 KBROM en 4 MB Flash-geheugen. Het bord is voorzien van een 2,8-inch scherm met een resolutie van 240 x 320 en resistieve aanraking.
Bovendien bevat het bord een achtergrondverlichtingsbesturingscircuit, aanraakbesturingscircuit, luidsprekeraandrijfcircuit, lichtgevoelig circuit en RGB-LED-besturingscircuit. Het biedt ook een TF-kaartsleuf, seriële interface, DHT11 temperatuur- en vochtigheidssensorinterface en extra IO-poorten.
De module ondersteunt ontwikkeling in Arduino IDE, ESP-IDE, MicroPython en Mixly.
Toepassingen
Beeldoverdracht voor Smart Home-apparaat
Draadloze bewaking
Slimme landbouw
Draadloze QR-herkenning
Signaal van draadloos positioneringssysteem
En andere IoT-toepassingen
Specificaties
Microcontroller
ESP-WROOM-32 (Dual-core MCU met geïntegreerde Wi-Fi en Bluetooth)
Frequentie
Tot 240 MHz (rekenkracht is maximaal 600 DMIPS)
SRAM
520 KB
ROM
448 KB
Flash
4 MB
Bedrijfsspanning
5 V
Stroomverbruik
ca. 115 mA
Display
2,8" TFT-kleurenscherm (240 x 320)
Touch
Resistief Touch
Driver chip
ILI9341
Afmetingen
50 x 86 mm
Gewicht
50 g
Downloads
GitHub
Deze bundel bevat:
The ESP32 Cheap Yellow Display Book (normale prijs: € 35)
ESP32 Cheap Yellow Display Board (normale prijs: € 25)
1x ESP32 Dev Board met 2,8" display en acryl-behuizing
1x Touchpen
1x Aansluitkabel
1x USB-kabel
The Arduino Uno is an open-source microcontroller development system encompassing hardware, an Integrated Development Environment (IDE), and a vast number of libraries. It is supported by an enormous community of programmers, electronic engineers, enthusiasts, and academics. The libraries in particular really smooth Arduino programming and reduce programming time. What’s more, the libraries greatly facilitate testing your programs since most come fully tested and working.
The Raspberry Pi 4 can be used in many applications such as audio and video media devices. It also works in industrial controllers, robotics, games, and in many domestic and commercial applications. The Raspberry Pi 4 also offers Wi-Fi and Bluetooth capability which makes it great for remote and Internet-based control and monitoring applications.
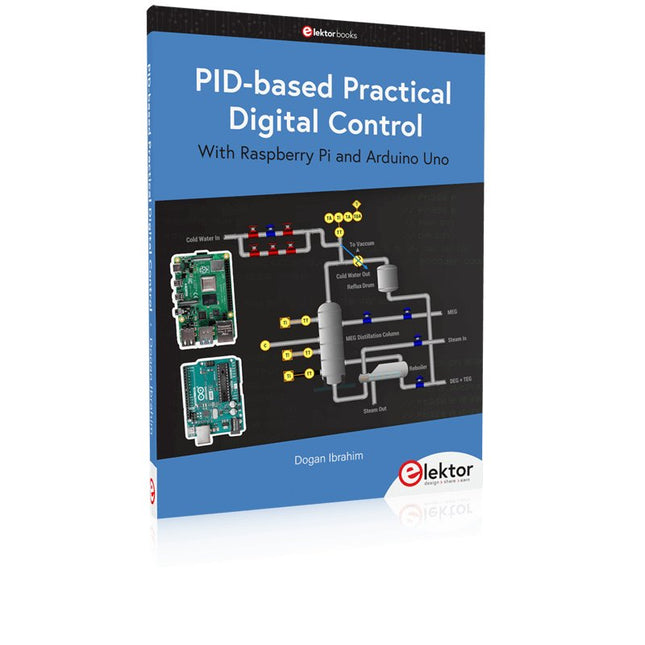
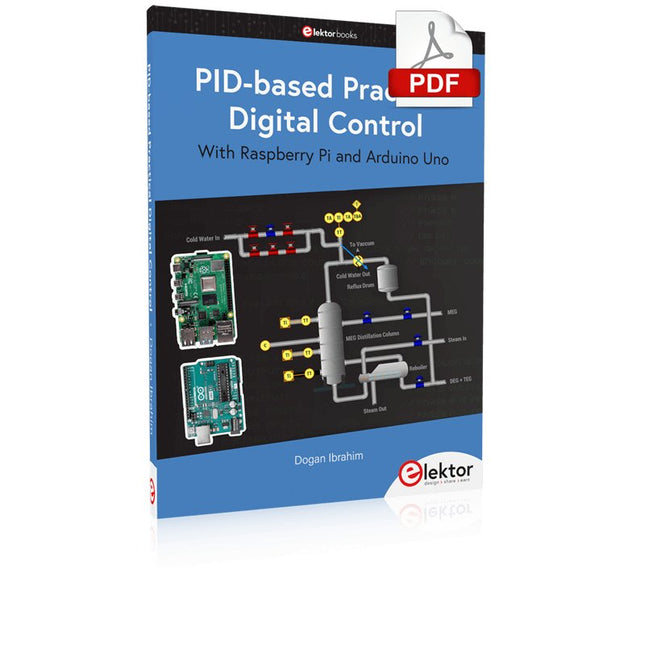
This book is about using both the Raspberry Pi 4 and the Arduino Uno in PID-based automatic control applications. The book starts with basic theory of the control systems and feedback control. Working and tested projects are given for controlling real-life systems using PID controllers. The open-loop step time response, tuning the PID parameters, and the closed-loop time response of the developed systems are discussed together with the block diagrams, circuit diagrams, PID controller algorithms, and the full program listings for both the Raspberry Pi and the Arduino Uno.
The projects given in the book aim to teach the theory and applications of PID controllers and can be modified easily as desired for other applications. The projects given for the Raspberry Pi 4 should work with all other models of Raspberry Pi family.
The book covers the following topics:
Open-loop and closed-loop control systems
Analog and digital sensors
Transfer functions and continuous-time systems
First-order and second-order system time responses
Discrete-time digital systems
Continuous-time PID controllers
Discrete-time PID controllers
ON-OFF temperature control with Raspberry Pi and Arduino Uno
PID-based temperature control with Raspberry Pi and Arduino Uno
PID-based DC motor control with Raspberry Pi and Arduino Uno
PID-based water level control with Raspberry Pi and Arduino Uno
PID-based LED-LDR brightness control with Raspberry Pi and Arduino Uno
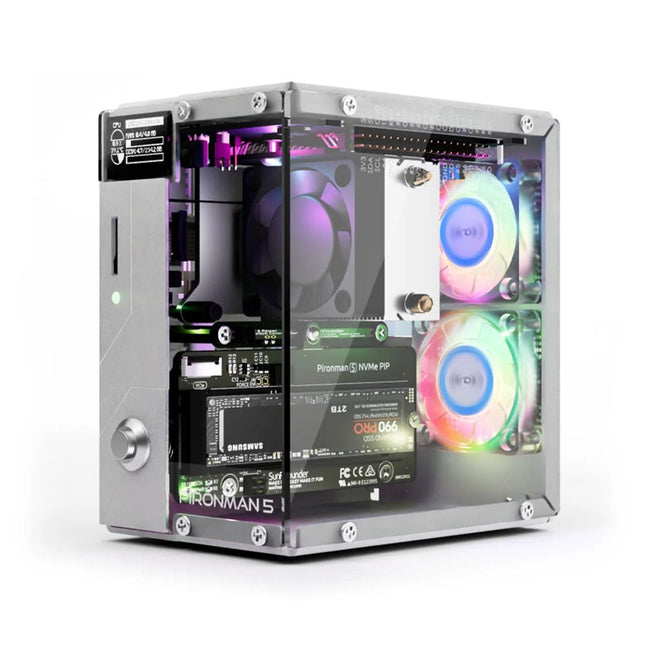
Verbeter je Raspberry Pi 5 met de Pironman 5, gebouwd met stevig aluminium, superieure koeling, NVMe M.2 SSD-ondersteuning, OLED-display, RGB-verlichting, standaard HDMI-poorten x2 en een veilige aan/uit-schakelaar. Het is perfect voor NAS, Home Assistant, Media en Game Centers. De Pironman 5 is niet zomaar een behuizing; het is een upgrade die uw Raspberry Pi 5 verandert in een krachtig, efficiënt en stijlvol apparaat.
De Pironman 5 bevat de Pi 5 NVMe PIP (PCIe Peripheral Board), een PCIe-adapterkaart die speciaal is ontworpen voor NVMe solid-state drives. Dit bord ondersteunt NVMe SSD's in vier formaten: 2230, 2242, 2260 en 2280, die allemaal in een M.2 M key-slot kunnen worden geïnstalleerd. De verbinding is gecertificeerd voor Gen2.0-snelheden (5 GT/sec), maar kan worden geforceerd naar Gen 3.0 (10 GT/sec) voor snellere prestaties.
Uitbreidbaar NVMe M.2 SSD-slot
Verbeter de prestaties van uw Raspberry Pi 5 met de NVMe M.2 SSD-sleuf van de Pironman 5, die meerdere formaten ondersteunt (2230, 2242, 2260, 2280) voor meer opslag en snellere systeemreactie.
Geavanceerd koelsysteem
Houd je Raspberry Pi 5 koel en stijlvol met de torenkoeler en dubbele RGB-ventilatoren van de Pironman 5, voorzien van stoffilters voor een duurzame en onderhoudsarme werking.
OLED-display voor direct inzicht
De Pironman 5 heeft een OLED-scherm van 0,96 inch, dat onmiddellijke updates biedt over CPU- en RAM-gebruik, temperatuur, IP-adres en meer.
Verbeterde functionaliteit en veiligheid
De Pironman 5 beveiligt je Raspberry Pi 5 met functies zoals veilig uitschakelen, aanpasbare RGB-LED's, HDMI-poorten, een IR-ontvanger en een externe GPIO-extender, waardoor de functionaliteit en connectiviteit worden verbeterd.
Kenmerken
Raspberry Pi 5 mini-pc
OLED-display van 0,96 inch waarop het CPU-gebruik, de temperatuur, het schijfgebruik, het IP-adres, het RAM-gebruik enz. van de Raspberry Pi worden weergegeven.
Torenkoeler kan een CPU-belasting Pi van 100% koelen tot 39°C bij een kamertemperatuur van 25°C
2 RGB-ventilatoren, met GPIO-bediening
1 PWM-ventilator op de torenkoeler wordt bestuurd door het Raspberry Pi-systeem.
Ondersteunt vier (PCIe Gen 2.0 / PCIe Gen 3.0) NVMe M.2 SSD-formaten: 2230, 2242, 2260 en 2280.
4 WS2812 adresseerbare RGB-LED's verlichten de hele behuizing met een cool lichteffect
IR-ontvanger voor multimediacentra zoals Kodi of Volumio
Retro metalen aan/uit-knop voor veilig uitschakelen
Externe GPIO-extender met pinnaamlabel, voor gemakkelijke toegang
Uitgerust met een veerbelaste aansluiting voor eenvoudig verwijderen van de kaart
Aluminium hoofdgedeelte met helder acryl zijpaneel
Beschikt over twee standaard HDMI-poorten
Downloads
Documentation
De ZD-915 is een digitaal desoldeerstation met ESD-bescherming en digitale weergave van zowel de actuele als de ingestelde waarde op een LCD-scherm. Dit desoldeerstation heeft een hoog vermogen in een compacte en robuuste behuizing en maakt desolderen eenvoudig, omdat het met één hand kan worden bediend.
De ZD-915 heeft een soldeerpistool dat een filter bevat dat eventueel opgezogen materiaal opvangt, zodat u alleen de filters hoeft te vervangen om weer door te kunnen gaan. Er zit ook een temperatuursensor in de punt, zodat temperatuurschommelingen snel kunnen worden opgevangen.
Features
De temperatuur is eenvoudig in te stellen met eenvoudige omhoog/omlaag knoppen.
140 W temperatuurgeregeld soldeerstation met instelbaar bereik van 160°C tot 480°C.
Het desoldeerstation is speciaal ontworpen voor loodvrij desolderen.
De zijkant van het station is voorzien van een standaard houder met spons.
Een verlichte aan/uit-schakelaar is op de voorzijde aangebracht.
Specificaties
Station
Voeding
220-240 V
Vermogen
140 W
Vacuum druk
600 mm HG
Desoldeerpistool
Vermogen
24 V AC 80 WOpwarmbegrenzing 130 W
Temperatuur
160-480 °C
Verwarmingselement
Keramisch element
Inbegrepen
1x ZD-915 Desoldeerstation
2x Reserve soldeerstift
3x Reinigingsnaald voor desoldeerstiften
1x Reserve filter voor desoldeerpistool
1x Handleiding
De OWON SDS1102 is een betaalbare benchtop digitale oscilloscoop die solide prestaties combineert met essentiële meetfuncties. Deze 2-kanaals oscilloscoop biedt een bandbreedte van 100 MHz, een sample rate van 1 GS/s, een 7-inch LCD-display en een geheugendiepte van 10 kpts. Daarmee is het een praktische keuze voor dagelijkse elektronicatests, foutopsporing en onderwijs.
De SDS1102 beschikt over een vereenvoudigd triggersysteem met niveau- en flanktriggering, waardoor gangbare signalen eenvoudig kunnen worden vastgelegd en geanalyseerd. Het apparaat is ontworpen voor toepassingen waarvoor geen grote geheugendiepte of geavanceerde triggerfuncties nodig zijn, en biedt een eenvoudige en kostenefficiënte oplossing voor basis-signaalanalyse.
Kenmerken
Bandbreedte: 100 MHz
2 kanalen
Bemonsteringssnelheid: 1 GS/s
Ultradunne behuizing
7-inch lcd met hoge resolutie
Ondersteuning voor SCPI en LabVIEW
Specificaties
Bandbreedte
100 MHz
Horizontale schaal (s/div)
5 ns/div - 1000 s/div
Kanalen
2
Verticale gevoeligheid
5 mV/div - 5 V/div (bij ingang)
DC Gain nauwkeurigheid
3%
Verticale resolutie (A/D)
8 bits (2 kanalen tegelijk)
Ingang
Ingangsimpedantie
1 MΩ, 10 pF
Ingangskoppeling
AC, DC, GND
Max ingangsspanning
± 400 V, CATI, CATII
Passieve probes
x1; 10
Probe verzwakkingsfactor
x1; x10; x100; x1000
Triggersysteem
Trigger mode
Auto, Normal, Single
Trigger type
Flank, Video
Flank triggerbron
CH1, CH2
Video trigger
Sampletype
Real-time
Samplefrequentie
1 GS/s
Equivalente samplesnelheid
No
Golflengte
10K pts
Interpolatie
sin(x)/x
Meet- en rekenkundig bewerkingssysteem
Automatische meting
Vpp, Vavg, RMS, Frequency, Period, Vmax, Vmin, Vtop, Vbase, Width, Overshoot, Pre-shoot Rise time, Fall time, +Width, -Width, +Duty, -Duty, Delay A->B, Delay A->B, area, cycle area
Rekenkundige functies
Addition, Subtraction, Multiplication, Division, FFT
Algemene kenmerken
Display maat
7" color LCD
Display resolutie
800 x 480
Voeding
100-240 V, 45-440 Hz, <15 W
Afmetingen
301 x 70 x 152 mm
Gewicht
1,1 kg
Inbegrepen
1x OWON SDS1102 Oscilloscoop
2x Oscilloscoopsonde
1x Sonde aanpassen
1x Netsnoer
1x USB-kabel
1x CD-Rom
1x Snelstartgids
Downloads
Quick Guide
Manual
PC Software
SCPI Commands
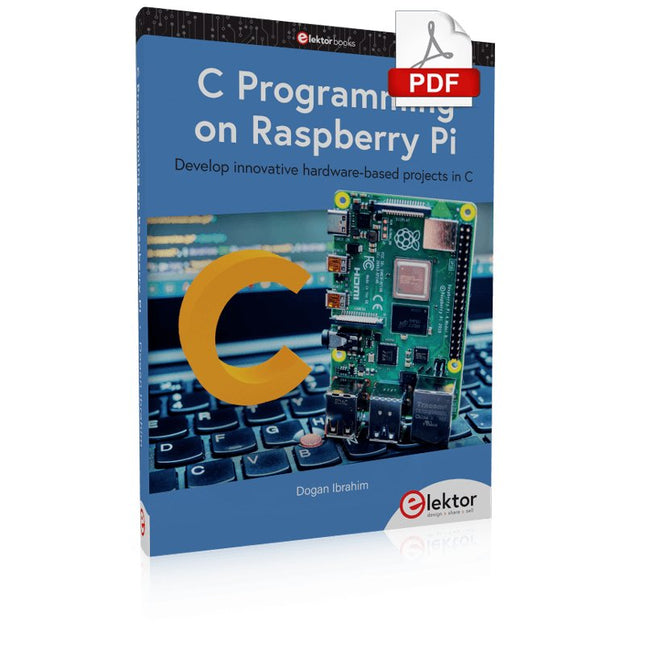
Develop innovative hardware-based projects in C
The Raspberry Pi has traditionally been programmed using Python. Although this is a very powerful language, many programmers may not be familiar with it. C on the other hand is perhaps the most commonly used programming language and all embedded microcontrollers can be programmed using it.
The C language is taught in most technical colleges and universities and almost all engineering students are familiar with using it with their projects. This book is about using the Raspberry Pi with C to develop a range of hardware-based projects. Two of the most popular C libraries, wiringPi and pigpio are used.
The book starts with an introduction to C and most students and newcomers will find this chapter invaluable. Many projects are provided in the book, including using Wi-Fi and Bluetooth to establish communication with smartphones.
Many sensor and hardware-based projects are included. Both wiringPi and pigpio libraries are used in all projects. Complete program listings are given with full explanations. All projects have been fully tested and work.
The following hardware-based projects are provided in the book:
Using sensors
Using LCDs
I²C and SPI buses
Serial communication
Multitasking
External and timer interrupts
Using Wi-Fi
Webservers
Communicating with smartphones
Using Bluetooth
Sending data to the cloud
Program listings of all Raspberry Pi projects developed in this book are available on the Elektor website. Readers can download and use these programs in their projects. Alternatively, they can customize them to suit their applications.
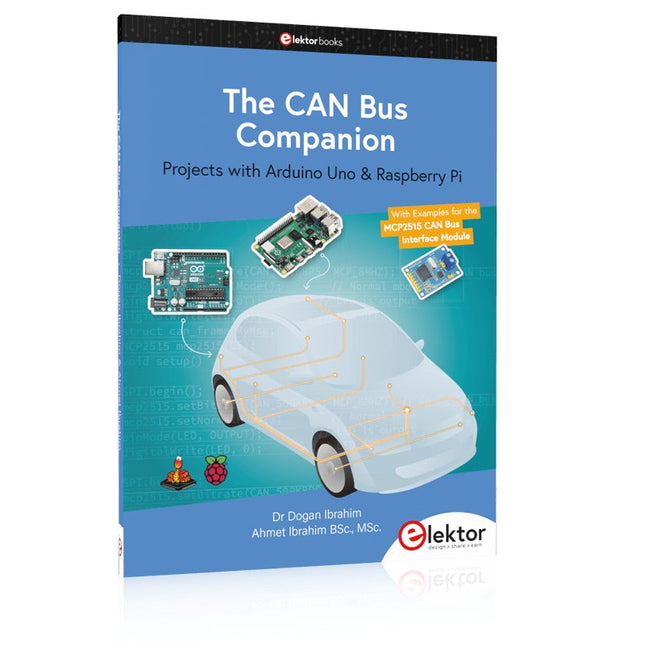
Projects with Arduino Uno & Raspberry Pi with Examples for the MCP2515 CAN Bus Interface Module
This book details the use of the Arduino Uno and the Raspberry Pi 4 in practical CAN bus based projects. Using either the Arduino Uno or the Raspberry Pi with off-the-shelf CAN bus interface modules considerably ease developing, debugging, and testing CAN bus based projects.
This book is written for students, practicing engineers, enthusiasts, and for everyone else wanting to learn more about the CAN bus and its applications. The book assumes that the reader has some knowledge of basic electronics. Knowledge of the C and Python programming languages and programming the Arduino Uno using its IDE and Raspberry Pi will be useful, especially if the reader intends to develop microcontroller-based projects using the CAN bus.
The book should be a useful source of reference material for anyone interested in finding answers to questions such as:
What bus systems are available for the automotive industry?
What are the principles of the CAN bus?
How can I create a physical CAN bus?
What types of frames (or data packets) are available in a CAN bus system?
How can errors be detected in a CAN bus system and how dependable is a CAN bus system?
What types of CAN bus controllers exist?
How do I use the MCP2515 CAN bus controller?
How do I create 2-node Arduino Uno-based CAN bus projects?
How do I create 3-node Arduino Uno-based CAN bus projects?
How do I set the acceptance masks and acceptance filters?
How do I analyze data on the CAN bus?
How do I create 2-node Raspberry Pi-based CAN bus projects?
How do I create 3-node Raspberry Pi-based CAN bus projects?
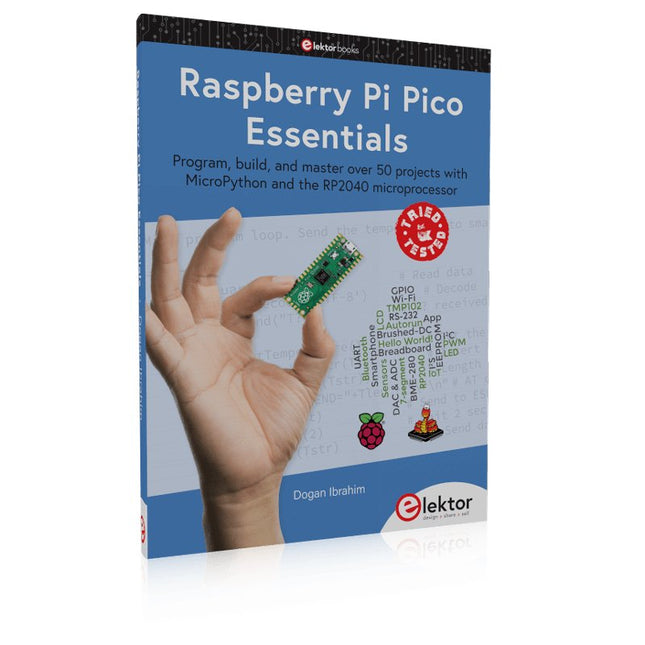
Program, build, and master over 50 projects with MicroPython and the RP2040 microprocessor The Raspberry Pi Pico is a high-performance microcontroller module designed especially for physical computing. Microcontrollers differ from single-board computers, like the Raspberry Pi 4, in not having an operating system. The Raspberry Pi Pico can be programmed to run a single task very efficiently within real-time control and monitoring applications requiring speed. The ‘Pico’ as we call it, is based on the fast, efficient, and low-cost dual-core ARM Cortex-M0+ RP2040 microcontroller chip running at up to 133 MHz and sporting 264 KB of SRAM, and 2 MB of Flash memory. Besides its large memory, the Pico has even more attractive features including a vast number of GPIO pins, and popular interface modules like ADC, SPI, I²C, UART, and PWM. To cap it all, the chip offers fast and accurate timing modules, a hardware debug interface, and an internal temperature sensor. The Raspberry Pi Pico is easily programmed using popular high-level languages such as MicroPython and or C/C++. This book is an introduction to using the Raspberry Pi Pico microcontroller in conjunction with the MicroPython programming language. The Thonny development environment (IDE) is used in all the projects described. There are over 50 working and tested projects in the book, covering the following topics: Installing the MicroPython on Raspberry Pi Pico using a Raspberry Pi or a PC Timer interrupts and external interrupts Analogue-to-digital converter (ADC) projects Using the internal temperature sensor and external temperature sensor chips Datalogging projects PWM, UART, I²C, and SPI projects Using Wi-Fi and apps to communicate with smartphones Using Bluetooth and apps to communicate with smartphones Digital-to-analogue converter (DAC) projects All projects given in the book have been fully tested and are working. Only basic programming and electronics experience is required to follow the projects. Brief descriptions, block diagrams, detailed circuit diagrams, and full MicroPython program listings are given for all projects described. Readers can find the program listings on the Elektor web page created to support the book.
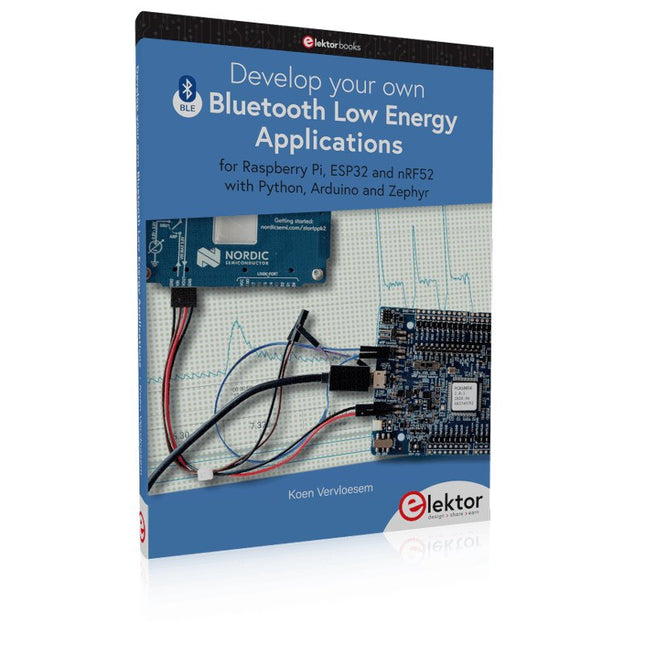
For Raspberry Pi, ESP32 and nRF52 with Python, Arduino and Zephyr
Bluetooth Low Energy (BLE) radio chips are ubiquitous from Raspberry Pi to light bulbs. BLE is an elaborate technology with a comprehensive specification, but the basics are quite accessible.
A progressive and systematic approach will lead you far in mastering this wireless communication technique, which is essential for working in low power scenarios.
In this book, you’ll learn how to:
Discover BLE devices in the neighborhood by listening to their advertisements.
Create your own BLE devices advertising data.
Connect to BLE devices such as heart rate monitors and proximity reporters.
Create secure connections to BLE devices with encryption and authentication.
Understand BLE service and profile specifications and implement them.
Reverse engineer a BLE device with a proprietary implementation and control it with your own software.
Make your BLE devices use as little power as possible.
This book shows you the ropes of BLE programming with Python and the Bleak library on a Raspberry Pi or PC, with C++ and NimBLE-Arduino on Espressif’s ESP32 development boards, and with C on one of the development boards supported by the Zephyr real-time operating system, such as Nordic Semiconductor's nRF52 boards.
Starting with a very little amount of theory, you’ll develop code right from the beginning. After you’ve completed this book, you’ll know enough to create your own BLE applications.
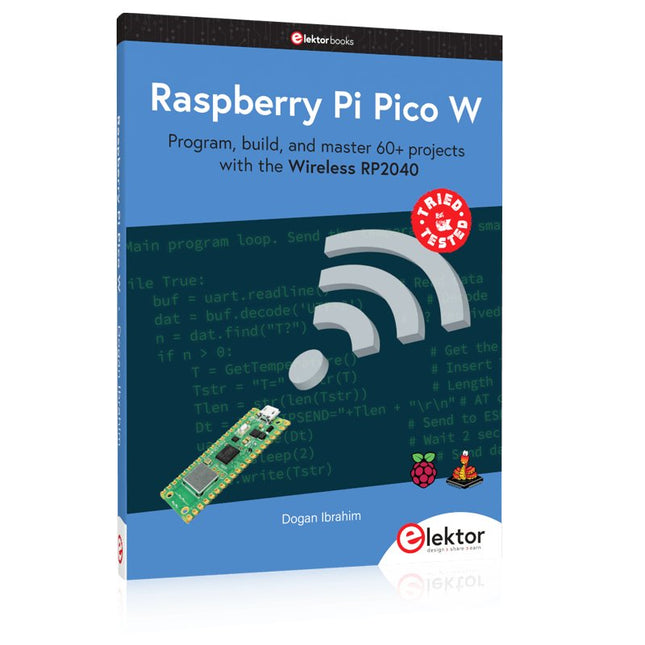
Program, build, and master 60+ projects with the Wireless RP2040
The Raspberry Pi Pico and Pico W are based on the fast, efficient, and low-cost dual-core ARM Cortex M0+ RP2040 microcontroller chip running at up to 133 MHz and sporting 264 KB of SRAM and 2 MB of Flash memory. Besides spacious memory, the Pico and Pico W offer many GPIO pins, and popular peripheral interface modules like ADC, SPI, I²C, UART, PWM, timing modules, a hardware debug interface, and an internal temperature sensor.
The Raspberry Pi Pico W additionally includes an on-board Infineon CYW43439 Bluetooth and Wi-Fi chipset. At the time of writing this book, the Bluetooth firmware was not yet available. Wi-Fi is however fully supported at 2.4 GHz using the 802.11b/g/n protocols.
This book is an introduction to using the Raspberry Pi Pico W in conjunction with the MicroPython programming language. The Thonny development environment (IDE) is used in all of the 60+ working and tested projects covering the following topics:
Installing the MicroPython on Raspberry Pi Pico using a Raspberry Pi or a PC
Timer interrupts and external interrupts
Analogue-to-digital converter (ADC) projects
Using the internal temperature sensor and external sensor chips
Using the internal temperature sensor and external temperature sensor chips
Datalogging projects
PWM, UART, I²C, and SPI projects
Using Bluetooth, WiFi, and apps to communicate with smartphones
Digital-to-analogue converter (DAC) projects
All projects are tried & tested. They can be implemented on both the Raspberry Pi Pico and Raspberry Pi Pico W, although the Wi-Fi-based subjects will run on the Pico W only. Basic programming and electronics experience are required to follow the projects. Brief descriptions, block diagrams, detailed circuit diagrams, and full MicroPython program listings are given for all projects.
The Arduino Uno is an open-source microcontroller development system encompassing hardware, an Integrated Development Environment (IDE), and a vast number of libraries. It is supported by an enormous community of programmers, electronic engineers, enthusiasts, and academics. The libraries in particular really smooth Arduino programming and reduce programming time. What’s more, the libraries greatly facilitate testing your programs since most come fully tested and working.
The Raspberry Pi 4 can be used in many applications such as audio and video media devices. It also works in industrial controllers, robotics, games, and in many domestic and commercial applications. The Raspberry Pi 4 also offers Wi-Fi and Bluetooth capability which makes it great for remote and Internet-based control and monitoring applications.
This book is about using both the Raspberry Pi 4 and the Arduino Uno in PID-based automatic control applications. The book starts with basic theory of the control systems and feedback control. Working and tested projects are given for controlling real-life systems using PID controllers. The open-loop step time response, tuning the PID parameters, and the closed-loop time response of the developed systems are discussed together with the block diagrams, circuit diagrams, PID controller algorithms, and the full program listings for both the Raspberry Pi and the Arduino Uno.
The projects given in the book aim to teach the theory and applications of PID controllers and can be modified easily as desired for other applications. The projects given for the Raspberry Pi 4 should work with all other models of Raspberry Pi family.
The book covers the following topics:
Open-loop and closed-loop control systems
Analog and digital sensors
Transfer functions and continuous-time systems
First-order and second-order system time responses
Discrete-time digital systems
Continuous-time PID controllers
Discrete-time PID controllers
ON-OFF temperature control with Raspberry Pi and Arduino Uno
PID-based temperature control with Raspberry Pi and Arduino Uno
PID-based DC motor control with Raspberry Pi and Arduino Uno
PID-based water level control with Raspberry Pi and Arduino Uno
PID-based LED-LDR brightness control with Raspberry Pi and Arduino Uno
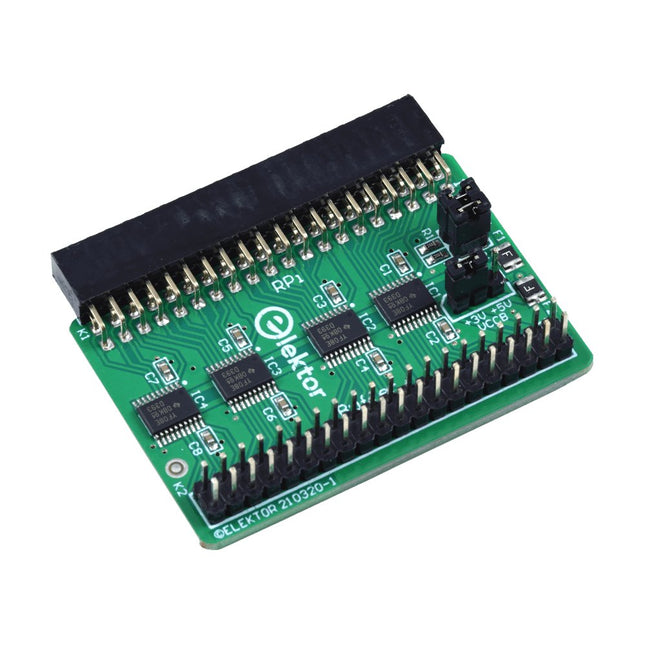
Wanneer u regelmatig experimenteert met de Raspberry Pi en verschillende externe hardware aansluit op de GPIO-poort via de header, heeft u mogelijk in het verleden schade veroorzaakt. Het Elektor Raspberry Pi Buffer Board is er om dit te voorkomen! Het board is compatibel met de Raspberry Pi Zero, Zero 2 (W), 3, 4, 5, 400 en 500.
Alle 26 GPIO's zijn gebufferd met bidirectionele spanningsomzetters om de Raspberry Pi te beschermen tijdens het experimenteren met nieuwe circuits. De printplaat is bedoeld om aan de achterkant van de Raspberry Pi 400/500 te worden geplaatst. De connector voor aansluiting op de Raspberry Pi is een haakse 40-polige connector (2x20). De printplaat is slechts iets breder. Een 40-polige flatcable met bijpassende 2x20 headers kan worden aangesloten op de buffer-uitgangsheader om bijvoorbeeld te experimenteren met een circuit op een breadboard of een printplaat.
Het circuit maakt gebruik van 4x TXS0108E IC's van Texas Instruments. De printplaat kan ook rechtop op een Raspberry Pi worden geplaatst.
Downloads
Schematics
Layout
Jan Didden schiep Linear Audio in 2010 en publiceerde 14 delen tussen 2010 en 2017. Elk deel van 200 bladzijden bevat gemiddeld 10 artikelen van deskundige auteurs op het gebied van audio, akoestiek, en instrumentatie. Of je nu geïnteresseerd bent in buizenversterkers, solid-state apparatuur, luidsprekerontwerp, condensator- en weerstandsvervorming of vervormingsmeting, je vindt er zeker nuttige adviezen en interessante discussies. Van beginner tot gevorderd niveau, voor de audio professional of de serieuze hobbyist, deze ExpertCollection zal je kennis vergroten en nieuwe perspectieven bieden op veel voorkomende problemen. Bonusmateriaal bij deze collectie is een 5-delige YouTube serie over negatieve feedback toegepast op audio van de bekende auteur Jan Didden, en nog negen andere baanbrekende audio artikelen en presentaties. Als je serieus geïnteresseerd bent in audio, akoestiek, en instrumentatie, mag je dit niet missen! Het gepubliceerde materiaal is geïndexeerd en volledig doorzoekbaar en zal een bijna onbeperkte bron zijn voor vele jaren. Je kunt over de auteurs van Linear Audio lezen, en de inhoudsopgave van elk deel, zie linearaudio.net.
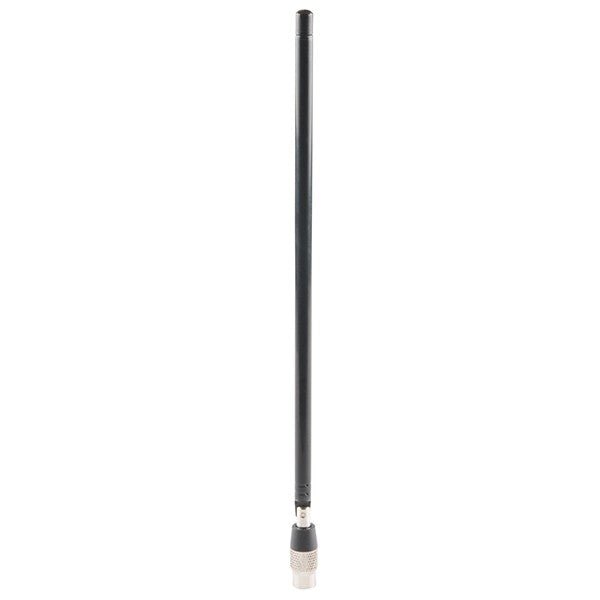
De ANT500 van Great Scott Gadgets is een telescopische antenne die is ontworpen voor gebruik tussen 75 MHz en 1 GHz. De totale lengte is instelbaar van 20 cm tot 88 cm. De ANT500 is gemaakt van roestvrij staal en heeft een SMA-mannelijke connector, een draaibare as en een verstelbare elleboog.
De ANT500 is een 50 ohm antenne voor algemeen gebruik. Het is de perfecte eerste antenne voor gebruik met HackRF One/Pro.
Secure, Modular, Open-Source and Self-Sufficient
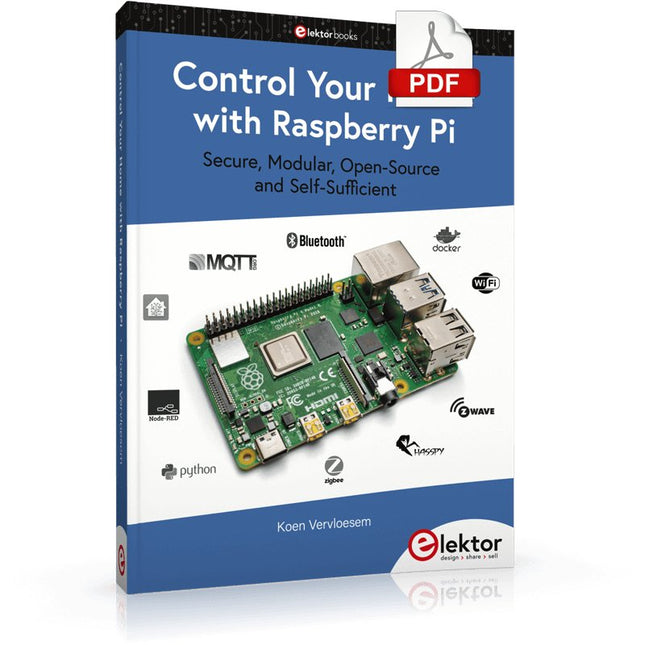
Ever since the Raspberry Pi was introduced, it has been used by enthusiasts to automate their homes. The Raspberry Pi is a powerful computer in a small package, with lots of interfacing options to control various devices. This book shows you how you can automate your home with a Raspberry Pi. You’ll learn how to use various wireless protocols for home automation, such as Bluetooth, 433.92 MHz radio waves, Z-Wave, and Zigbee. Soon you’ll automate your home with Python, Node-RED, and Home Assistant, and you’ll even be able to speak to your home automation system. All this is done securely, with a modular system, completely open-source, without relying on third-party services. You’re in control of your home, and no one else.
At the end of this book, you can install and configure your Raspberry Pi as a highly flexible home automation gateway for protocols of your choice, and link various services with MQTT to make it your own system. This DIY (do it yourself) approach is a bit more laborious than just installing an off-the-shelf home automation system, but in the process, you can learn a lot, and in the end, you know exactly what’s running your house and how to tweak it. This is why you were interested in the Raspberry Pi in the first place, right?
Turn your Raspberry Pi into a reliable gateway for various home automation protocols.
Make your home automation setup reproducible with Docker Compose.
Secure all your network communication with TLS.
Create a video surveillance system for your home.
Automate your home with Python, Node-RED, Home Assistant and AppDaemon.
Securely access your home automation dashboard from remote locations.
Use fully offline voice commands in your own language.
Download the software and view the errata for the book on GitHub.
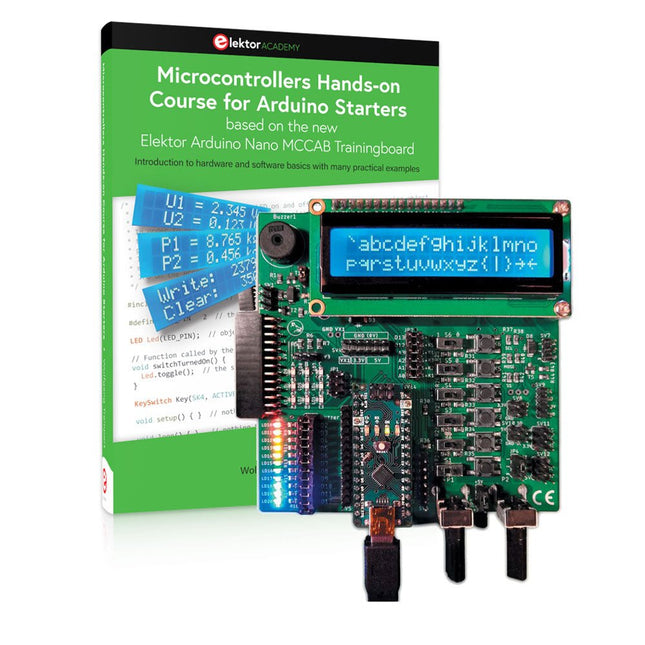
Bouw uw eigen projecten met het Elektor Arduino Nano MCCAB Training Board
De microcontroller is waarschijnlijk het meest fascinerende onderwerp van de moderne elektronica. Door de veelheid aan functies die hij op zijn chip combineert is het een universeel multi-tool voor ontwikkelaars om hun projecten mee te bouwen. Vrijwel elk dagelijks gebruikt apparaat wordt tegenwoordig bestuurd door een microcontroller. Voor een elektronica-leek is het realiseren van de eigen ideeën met een microcontroller echter tot nu toe een utopie gebleven vanwege de complexiteit ervan. Het Arduino-concept heeft het gebruik van microcontrollers sterk vereenvoudigd, zodat zelfs onervaren starters nu hun eigen elektronica ideeën kunnen realiseren met een microcontroller.
Book & Hardware in de bundel: 'Leren door te doen'
Het boek, dat ook in de bundel zit, leert ons hoe je zelfs zonder veel ervaring met elektronica en programmeertalen je eigen projecten met een microcontroller kunt bouwen. Het is een echte hands-on cursus microcontrollers voor starters. Want na een beschrijving van het inwendige van de microcontroller en een introductie in de programmeertaal C, ligt de focus van de cursus op praktische oefeningen. De lezer bouwt de nodige kennis op met 'leren door te doen': in het uitgebreide praktische gedeelte van het boek, met 12 projecten en 46 oefeningen, wordt het geleerde in het voorste deel van het boek met veel voorbeelden onderbouwd. Elke oefening wordt gevolgd door een uitgewerkt voorbeeld met uitleg en toelichting, wat de lezer helpt om de vraagstukken op te lossen en met de eigen oplossing te vergelijken.
Arduino IDE
De Arduino IDE is een software ontwikkelomgeving die gratis op de eigen pc kan worden gedownload, en die alle software bevat die nodig is voor uw eigen microcontroller-projecten. U schrijft de programma's ('apps') met de editor van de IDE in de programmeertaal C. En U vertaalt ze naar bits en bytes die de microcontroller begrijpt met behulp van de ingebouwde compiler van de Arduino IDE. En kunt ze vervolgens via een USB-kabel laden naar het geheugen van de microcontroller op het Elektor Arduino MCAB Nano Training Board.
Externe sensoren, motoren of schakelingen checken of besturen
Naast een Arduino Nano microcontroller module bevat het Elektor Arduino Nano MCCAB Training Board ook alle componenten die nodig zijn voor de oefeningen, zoals LED’s, schakelaars, drukknoppen, buzzer enz. Ook externe sensoren, motoren of modules kunnen worden gecheckt of bestuurd met dit microcontroller-trainingssysteem.
Specificaties (Arduino Nano Training Board MCCAB)
Voeding
Via de USB-aansluiting van de aangesloten pc of een externe voeding (niet inbegrepen)
Spanning
+5 Vcc
Ingangsspanning
Alle ingangen
0 V tot +5 V
VX1 en VX2
+8 V tot +12 V (alleen bij gebruik van een externe voeding)
Hardware
LCD
2x16 karakters
Potentiometer P1 & P2
JP3: Selectie van de werkspanning van P1 & P2
Verdelers
SV4: Verdeler voor de werkspanningenSV5, SV6: Verdelers voor de in-/uitgangen van de microcontroller
Schakelaars en knoppen
RESET knop op de Arduino Nano module; 6x drukknop schakelaars K1 ... K6; 6x Schuifschakelaars S1 ... S6; JP2: Jumper van de schakelaars met de ingangen van de microcontroller
Buzzer
Piezo buzzer ‘Buzzer1’ met jumper op JP6
Indicator LED’s
11 x LED: Status indicator voor de ingangen/uitgangen LED L op de Arduino Nano module, aangesloten op GPIO D13 JP6; Aansluiting van LED's LD10 ... LD20 met GPIO's D2 ... D12
Seriële interfacesSPI & I²C
JP4: Selectie van het signaal op pin X van de SPI-connector SV12 SV9 naar SV12: SPI-interface (3,3 V/5 V) of I²C-interface
Uitgangen voor externe apparaten
SV1, SV7: Geschakelde uitgang (maximaal +24 V/160 mA, extern aangesloten) SV2: 2x13 pinnen voor aansluiting van externe modules
3x3 LED matrix(9 rode LED's)
SV3: Kolommen van de 3x3 LED matrix (uitgangen D6 ... D8) JP1: Verbinding van de rijen met de GPIO's D3 ... D5
Software
MCCABLib library
Controle van hardware componenten (schakelaars, knoppen, LED's, 3x3 LED matrix, buzzer) op het MCCAB Training Board
Werktemperatuur
Tot +40 °C
Afmetingen
100 x 100 x 20 mm
Specificaties (Arduino Nano)
Microcontroller
ATmega328P
Architectuur
AVR
Spanning
5 V
Flash memory
32 KB, waarvan 2 KB gebruikt door de bootloader
SRAM
2 KB
Kloksnelheid
16 MHz
Analoge IN Pinnen
8
EEPROM
1 KB
DC stroom per I/O-pin
40 mA op één I/O-pin, totaal maximaal 200 mA op alle pinnen samen
Ingangsspanning
7-12 V
Digitale I/O-pinnen
22 (waarvan 6 PWM)
PWM Uitgangen
6
Stroomverbruik
19 mA
Afmetingen
18 x 45 mm
Gewicht
7 g
Inbegrepen
Elektor Arduino Nano MCCAB Training Board
Arduino Nano
Boek: Microcontrollers Hands-on Course for Arduino Starters
Onderzoek je schakelingen met hoge precisie en soldeer zelfs de kleinste SMD's en onderdelen zonder problemen.
Features
De multifunctionele HDMI Digitale Microscoop heeft Full HD, comfortabele beeldschermruimte, een verbeterde ergonomie, meerdere uitgangssignalen met verschillende resoluties.
De kantelhoek van de brede LCD monitor is instelbaar.
Wordt geleverd met afstandsbediening.
Kan als zelfstandig apparaat worden gebruikt.
Specificaties
Beeldscherm
7 inch (17,8 cm)
Beeldsensor
4 MP
Video output
UHD 2880x2160 (24fps)FHD 1920x1080 (60fps/30fps)HD 1280x720 (120fps)
Video formaat
MP4
Vergrotingsfactor
Tot 270 keer (27 inch HDMI monitor)
Foto resolutie
Max. 12 MP (4032x3024)
Foto formaat
JPG
Focus bereik
Min. 5 cm
Frame snelheid
Max. 120 fps (onder 600 Lux helderheid & HDP120)
Video interface
HDMI
Opslag
microSD card (tot 32 GB)
Voeding
5 V DC
Lichtbron
2 LED's met standaard
Afmetingen
20 x 12 x 19 cm
Inbegrepen
1x Andonstar AD407 Digitale Microscoop
1x Metalen statief met 2 LED's
1x Optische beugel
1x UV-filter
1x IR afstandsbediening
1x Verloopkabel
1x Voedingsadapter
1x HDMI kabel
2x Schroeven
1x Schroevendraaier
1x Gebruiksaanwijzing
Downloads
Manual
Model vergelijking
AD407
AD407 Pro
AD409
AD409 Pro-ES
Screen size
7 inch (17,8 cm)
7 inch (17,8 cm)
10,1 inch (25,7 cm)
10,1 inch (25,7 cm)
Image sensor
4 MP
4 MP
4 MP
4 MP
Video output
2160p
2160p
2160p
2160p
Interfaces
HDMI
HDMI
USB, HDMI, WiFi
USB, HDMI, WiFi
Video format
MP4
MP4
MP4
MP4
Magnification
Up to 270x
Up to 270x
Up to 300x
Up to 300x
Photo resolution
Max. 4032x3024
Max. 4032x3024
Max. 4032x3024
Max. 4032x3024
Photo format
JPG
JPG
JPG
JPG
Focus distance
Min. 5 cm
Min. 5 cm
Min. 5 cm
Min. 5 cm
Frame rate
Max. 120f/s
Max. 120f/s
Max. 120f/s
Max. 120f/s
Storage
microSD card
microSD card
microSD card
microSD card
PC support
No
No
Windows
Windows
Mobile connection
No
No
WiFi + Measurement
WiFi + Measurement
Power source
5 V DC
5 V DC
5 V DC
5 V DC
Light source
2 LEDs with the stand
2 LEDs with the stand
2 LEDs with the stand
2 LEDs with the stand
Endoscope
No
No
No
Yes
Stand size
20 x 12 x 19 cm
20 x 18 x 32 cm
18 x 20 x 30 cm
18 x 20 x 32 cm
Weight
1,6 kg
2,1 kg
2,2 kg
2,5 kg
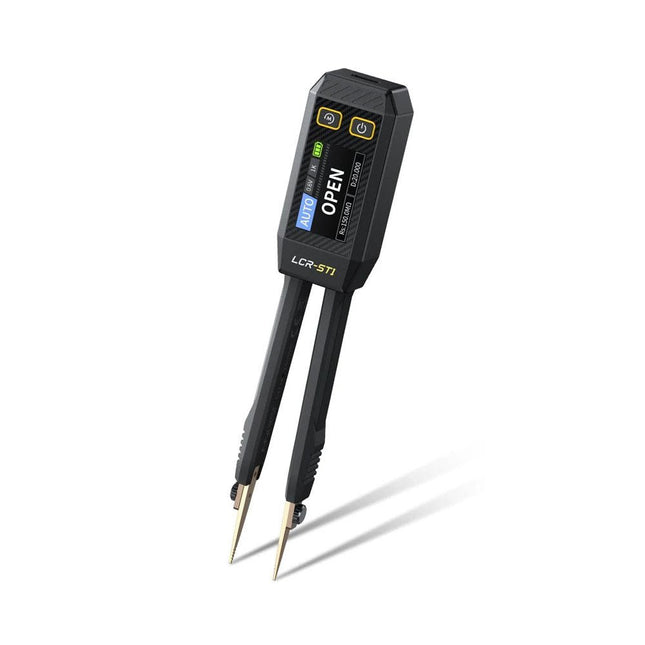
De FNIRSI LCR-ST1 is een compacte, multifunctionele en intelligente LCR-tester die automatische metingen van weerstand, capaciteit, inductantie, diodetests en continuïteit ondersteunt.
Het 1,14-inch kleurendisplay in combinatie met een handige magnetische adsorptiefunctie verbetert het gebruiksgemak, terwijl de ingebouwde lithiumbatterij van 250 mAh langdurige prestaties garandeert. Het apparaat ondersteunt drie frequentiebereiken (100 Hz, 1 kHz en 10 kHz) en biedt 0,3 V en 0,6 V RMS-testniveaus voor veelzijdige testtoepassingen.
Het unieke pincetvormige ontwerp van de LCR-ST1 is ideaal voor delicate taken in kleine ruimtes en maakt het snel en nauwkeurig testen van elektronische componenten mogelijk. Het lichte gewicht en het draagbare ontwerp maken het tot een hulpmiddel van onschatbare waarde voor zowel veld- als laboratoriumgebruik.
Of u nu een ervaren ingenieur bent of net begint in de elektronica, de LCR-ST1 levert betrouwbare en nauwkeurige meetresultaten, waardoor u uw taken efficiënter en nauwkeuriger kunt uitvoeren.
Kenmerken
Biedt 3 testfrequenties (100 Hz, 1 kHz, 10 kHz) en 2 testspanningsniveaus.
Beschikt over automatische componentidentificatie voor snellere en betrouwbaardere metingen.
1,14-inch kleurendisplay met hoge resolutie voor duidelijke aflezingen.
Ondersteunt automatische gegevensregistratie en -opslag.
De pincetpunten zijn gemaakt van verguld messing voor verbeterde duurzaamheid en geleiding.
Specificaties
Weerstandsbereik
10 mΩ – 10 MΩ
Capaciteitsbereik
1 pF – 22 mF
Inductiebereik
1 μu – 10 H
Diode
Aanspanning 0,7 V
Frequentietest
100 Hz, 1 kHz, 10 kHz
Niveautest
0,3 V, 0,6 V RMS
Parameterweergave
ESR, D-waarde, Q-waarde, Z-waarde, X-waarde
Display
1,14" HD-kleurenscherm
Oplaadinterface
USB-C, 5 V/1 A
Voeding
Ingebouwde lithiumbatterij van 250 mAh
Automatische herkenningsmeting
Ja
Vervangbare pincetkop
Ja
Automatische uitschakeling
Ja
Gegevensopslag
Ja
Geschiedenisrecord
Verbinden met pc om te bekijken en exporteren
Afmetingen
28 x 19 x 150 mm
Gewicht
41 g
Inbegrepen
1x LCR-ST1 SMD-pincet
2x Haakpunten
1x Magnetische patch
1x USB-kabel
1x Opbergtas
1x Manual
Downloads
Manual
Firmware V1.6
An Introduction to Circuit Simulation
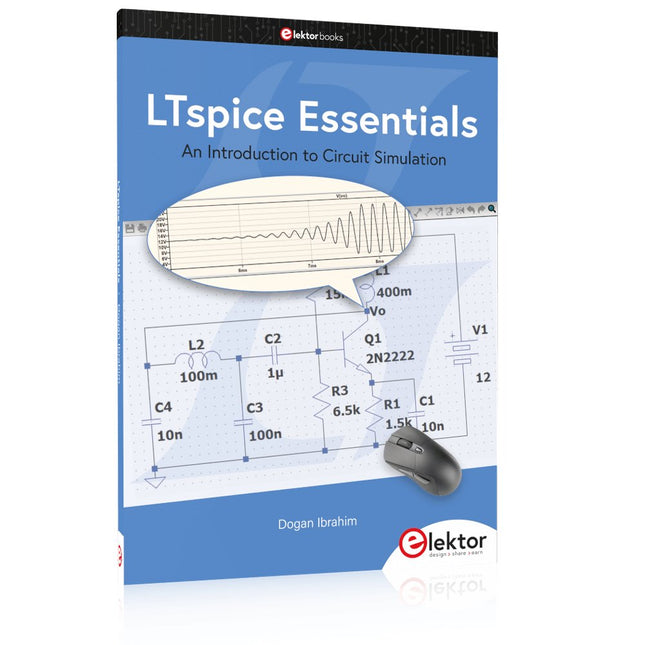
LTspice, developed by Analog Devices, is a powerful, fast, and free SPICE simulator, schematic capture, and waveform viewer with a large database of components supported by SPICE models from all over the world. Drawing a schematic in LTspice is easy and fast. Thanks to its powerful graphing features, you can visualize the voltages and currents in a circuit, and also the power consumption of its components and much more.
This book is about learning to design and simulate electronic circuits using LTspice. Among others, the following topics are treated:
DC and AC circuits
Signal diodes and Zener diodes
Transistor circuits including oscillators
Thyristor/SCR, diac, and triac circuits
Operational amplifier circuits including oscillators
The 555 timer IC
Filters
Voltage regulators
Optocouplers
Waveform generation
Digital logic simulation including the 74HC family
SPICE modeling LTspice is a powerful electronic circuit simulation tool with many features and possibilities. Covering them all in detail is not possible in a book of this size. Therefore, this book presents the most common topics like DC and AC circuit analysis, parameter sweeping, transfer functions, oscillators, graphing, etc. Although this book is an introduction to LTspice, it covers most topics of interest to people engaged in electronic circuit simulation.
The book is aimed at electronic/electrical engineers, students, teachers, and hobbyists. Many tested simulation examples are given in the book. Readers do not need to have any computer programming skills, but it will help if they are familiar with basic electronic circuit design and operation principles. Readers who want to dive deeper can find many detailed tutorials, articles, videos, design files, and SPICE circuit models on the Internet.
All the simulation examples used in the book are available as files at the webpage of this book. Readers can use these example circuits for learning or modify them for their own applications.
Projecten met Arduino, ESPHome, Home Assistant en Raspberry Pi & Co.
Dit e-book bevat verschillende voorbeeldprojecten, te beginnen met een inleiding tot elektronica. Het legt ook uit hoe je Home Assistant installeert op een Raspberry Pi, hoe je binnenklimaatsensoren gebruikt voor temperatuur en vochtigheid, hoe je het MQTT-protocol en andere interfaces implementeert, en hoe je ESPHome gebruikt om sensoren en actuatoren te integreren in Home Assistant. Talrijke video tutorials vullen het boek aan.
The book begins with an introduction to electrical engineering. You will learn the basics of voltage, current, resistors, diodes and transistors.
Arduino and microcontrollers
A complete section is dedicated to the Arduino Uno. You will get to know the structure, write your first programs and work on practical examples.
Home Assistant and automation
You will learn how to set up Home Assistant on a Raspberry Pi and how to use automations, scenes and devices. In addition, Zigbee, MQTT and ESP-NOW – important technologies for home automation – will be discussed.
ESP8266, ESP32 and ESP32-CAM
The popular ESP microcontrollers are covered in detail. A theoretical introduction is followed by practical projects that show you how to get the most out of these devices.
Sensors and actuators
The book explains the functionality and application of numerous sensors such as temperature and humidity sensors, motion detectors and RFID readers. For actuators, stepper motors, e-ink displays, servo motors and much more are covered. There are practical application examples for all devices.
ESPHome
This chapter shows you how to integrate sensors and actuators into Home Assistant without any programming effort. You will be guided step by step through the setup with ESPHome.
LEDs and lighting technology
In this chapter, you will learn about different types of LEDs and how they can be used. The basics of lighting technology are also explained.
Node-RED
A whole chapter is dedicated to Node-RED. You will learn the basics of this powerful tool and be guided step by step through its setup and use.
Integrated Circuits (ICs)
In electronics, there are numerous ICs that make our lives easier. You will get to know the most important ones and apply your knowledge in practical projects.
Professional programming
Advanced topics such as the correct use of buttons, the use of interrupts and the use of an NTP server for time synchronisation are covered in detail in this chapter.
Downloads
GitHub
Mit dem Elektor Arduino Nano Trainingsboard (MCCAB) eigene Projekte realisieren
Der Mikrocontroller ist das wohl faszinierendste Teilgebiet der Elektronik, denn aufgrund der Vielzahl von Funktionen, die er auf seinem Chip vereinigt, ist er für den Entwickler ein universelles Multi-Tool zur Realisierung seiner Projekte. Praktisch jedes Gerät des täglichen Gebrauchs wird heute von einem Mikrocontroller gesteuert. Für einen elektronischen Laien blieb es aufgrund der Komplexität bisher allerdings ein Wunschtraum, eigene Ideen mit einem Mikrocontroller zu realisieren. Das Arduino-Konzept hat den Einsatz von Mikrocontrollern weitgehend vereinfacht, sodass jetzt auch Laien eigene Elektronik-Ideen mit einem Mikrocontroller verwirklichen können.
Buch & Hardware im Bundle: 'Learning by Doing'
Dieses im Bundle mitgelieferte Buch (im großen A4-Format) zeigt, wie man auch ohne große Erfahrung in Elektronik und Programmiersprachen eigene Projekte mit einem Mikrocontroller realisieren kann. Es ist ein Mikrocontroller-Praxiskurs für Einsteiger, denn nach einem Überblick über die Interna des Mikrocontrollers und einer Einführung in die Programmiersprache C liegt der Schwerpunkt des Kurses auf den praktischen Übungen. Der Leser eignet sich die erforderlichen Kenntnisse durch 'Learning by Doing' an: in dem umfangreichen Praxisteil mit 12 Projekten und 46 Übungen wird das im vorderen Teil des Buches Gelernte mit vielen Beispielen unterlegt. Die Übungen sind dabei so aufgebaut, dass der Bearbeiter eine Aufgabenstellung erhält, die er mit seinem im Theorieteil des Buches aufgebauten Wissen löst. Für jede Übung gibt es anschließend eine ausführlich erklärte und kommentierte Musterlösung, die dem Bearbeiter bei Problemen weiterhilft und die er mit seiner eigenen Lösung vergleichen kann.
Arduino IDE
In der Arduino IDE, einer Software-Entwicklungsumgebung, die kostenlos auf den eigenen PC heruntergeladen werden kann und die das gesamte Softwarepaket enthält, das für ein eigenes Mikrocontroller-Projekt benötigt wird, schreibt der Bearbeiter mit dem Editor der IDE seine Programme („Apps“) in der Programmiersprache C. Der in die Arduino IDE integrierte Compiler übersetzt sie in die Bits und Bytes, die der Mikrocontroller versteht und die dann über ein USB-Kabel in den Speicher des Mikrocontrollers auf dem Elektor Arduino Nano Trainingsboard (MCCAB) geladen werden.
Externe Sensoren, Motoren oder Baugruppen abfragen oder steuern
Das Elektor Arduino Nano Trainingsboard (MCCAB) enthält neben einem Mikrocontrollermodul Arduino Nano alle für die Übungen benötigten Bauteile wie Leuchtdioden, Schalter, Taster, akustische Signalgeber usw. Auch externe Sensoren, Motoren oder Baugruppen können mit diesem Mikrocontroller-Übungssystem abgefragt oder gesteuert werden.
Technische Daten (Arduino Nano Trainingsboard MCCAB)
Stromversorgung
Über die USB-Verbindung des zur Erstellung der Programme sowieso angeschlossenen PCs oder ein externes Netzteil (nicht im Lieferumfang enthalten)
Betriebsspannung
+5 Vcc
Eingangsspannung
Alle Eingänge
0 V bis +5 V
VX1 und VX2
+8 V bis +12 V (nur bei Verwendung eines externen Netzteils)
Mikrocontrollermodul
Arduino Nano
Hardwareperipherie
LCD
2x16 Zeichen
Potenziometer P1 & P2
JP3: Auswahl der Betriebsspannung von P1 & P2
Verteiler
SV4: Verteiler für die BetriebsspannungenSV5, SV6: Verteiler für die Ein-/Ausgänge des Mikrocontrollers
Schalter und Taster
RESET-Taster auf dem Arduino Nano-Modul6x Tastschalter K1 … K66x Schiebeschalter S1 … S6JP2: Verbindung der Schalter mit den Eingängen des Mikrocontrollers
Summer
Piezo-Summer Buzzer1 mit Steckbrücke auf JP6
Leuchtanzeigen
LED L auf dem Arduino Nano-Modul, verbunden mit GPIO D1311x LED: Zustandsanzeige für die Ein-/AusgängeJP6: Verbindung der LEDs LD10 … LD20 mit den GPIOs D2 … D12
Serielle SchnittstellenSPI & I²C
JP4: Auswahl des Signals an Pin X der SPI-Steckerleiste SV12SV9 bis SV12: SPI-Interface (3,3 V/5 V) bzw. I²C-Interface
Schaltausgang für externe Geräte
SV1, SV7: Schaltausgang (maximal +24 V/160 mA, extern zugeführt)SV2: 2x13 Pins zum Anschluss externer Module
3x3 LED-Matrix (9 rote LEDs)
SV3: Spalten der 3x3 LED-Matrix (Ausgänge D6 … D8)JP1: Verbindung der Reihen mit den GPIOs D3 … D5
Software
Library MCCABLib
Steuerung der Hardware-Komponenten (Schalter, Taster, Leuchtdioden, 3x3 LED-Matrix, Summer) auf dem MCCAB Trainingsboard
Betriebstemperatur
bis +40 °C
Abmessungen
100 x 100 x 20 mm
Technische Daten (Arduino Nano)
Mikrocontroller
ATmega328P
Architektur
AVR
Betriebsspannung
5 V
Flashspeicher
32 KB, davon 2 KB vom Bootloader belegt
SRAM
2 KB
Taktfrequenz
16 MHz
Analoge IN-Pins
8
EEPROM
1 KB
DC-Strom pro I/O-Pin
40 mA an einem I/O-Pin, insgesamt maximal 200 mA an allen Pins gemeinsam
Eingangsspannung
7-12 V
Digitale I/O-Pins
22 (6 davon sind PWM-fähig)
PWM-Ausgänge
6
Stromverbrauch
19 mA
Abmessungen
18 x 45 mm
Gewicht
7 g
Lieferumfang
Elektor Arduino Nano MCCAB Trainingsboard
Arduino Nano
Buch: Mikrocontroller-Praxiskurs für Arduino-Einsteiger
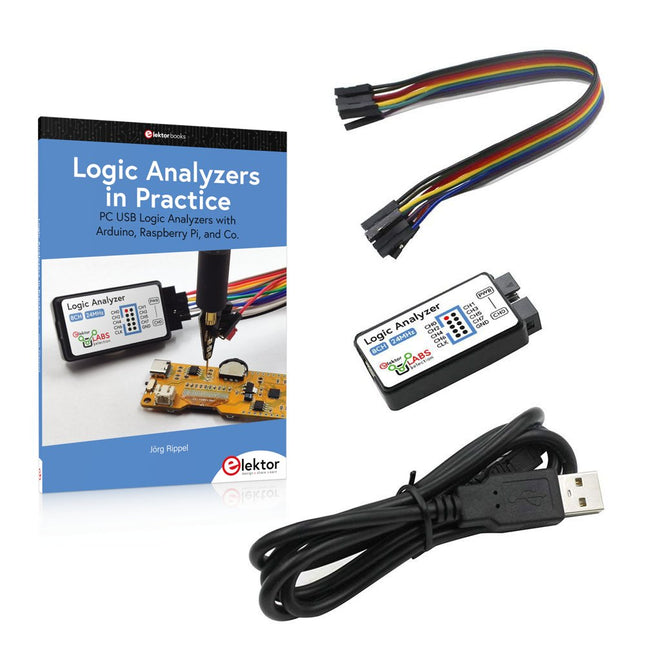
Boek: Logic Analyzers in Practice
Step-by-step instructions guide you through the analysis of modern protocols such as I²C, SPI, UART, RS-232, NeoPixel, WS28xx, HD44780 and 1-Wire. With the help of numerous experimental circuits based on the Raspberry Pi Pico, Arduino Uno and the Bus Pirate, you will learn the practical application of popular USB logic analyzers.
All the experimental circuits presented in this book have been fully tested and are fully functional. The necessary program listings are included – no special programming or electronics knowledge is required for these circuits. The programming languages used are MicroPython and C along with the development environments Thonny and Arduino IDE.
This book uses several models of flexible and widely available USB logic analyzers and shows the strengths and weaknesses of each price range.
You will learn about the criteria that matter for your work and be able to find the right device for you.
Whether Arduino, Raspberry Pi or Raspberry Pi Pico, the example circuits shown allow you to get started quickly with protocol analysis and can also serve as a basis for your own experiments.
After reading this book, you will be familiar with all the important terms and contexts, conduct your own experiments, analyze protocols independently, culminating in a comprehensive knowledge set of digital signals and protocols.
USB Logic Analyzer (8-ch, 24 MHz)
Deze USB Logic Analyzer is een 8-kanaals logic analyzer met elke ingang bedoeld voor het op twee manieren opnemen van analoge data. Hij is perfect voor het debuggen en analyseren van signalen zoals I²C, UART, SPI, CAN en 1-Wire. De analyzer bemonstert een digitale ingang die is aangesloten op een te testen apparaat (DUT) met een hoge bemonsteringssnelheid. De aansluiting op de PC gaat via USB.
Specificaties
Kanalen
8 digitale kanalen
Maximale bemonsteringssnelheid
24 MHz
Maximale ingangsspanning
0 V ~ 5 V
Bedrijfstemperatuur
0°C ~ 70°C
Ingangsimpedantie
1 MΩ || 10 pF
Ondersteunde protocollen
I²C, SPI, UART, CAN, 1-wire, enz.
PC-aansluiting
USB
Afmetingen
55 x 28 x 14 mm
Downloads
Software
Deze bundel bevat:
Boek "Logic Analyzers in Practice" (normale prijs: € 35)
USB Logic Analyzer (8-kanaals, 24 MHz) (normale prijs: € 20)
USB-kabel
Jumper Draad Lintkabel
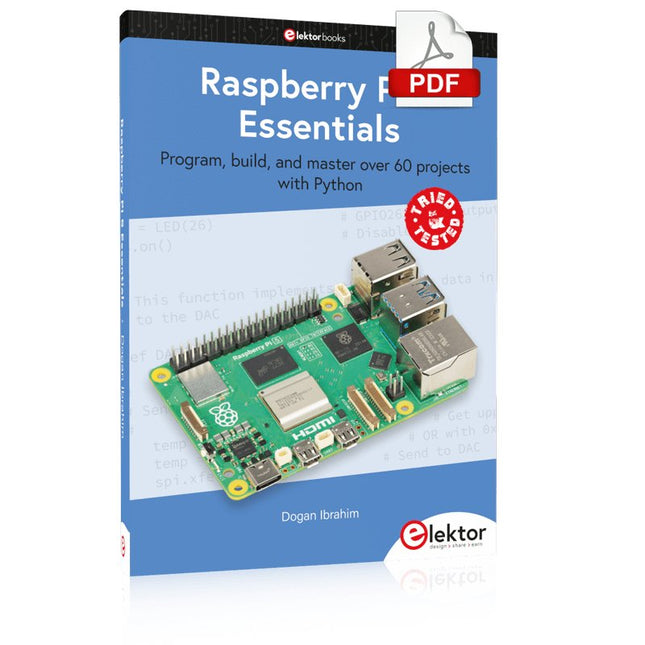
Program, build, and master over 60 projects with Python
The Raspberry Pi 5 is the latest single-board computer from the Raspberry Pi Foundation. It can be used in many applications, such as in audio and video media centers, as a desktop computer, in industrial controllers, robotics, and in many domestic and commercial applications. In addition to the well-established features found in other Raspberry Pi computers, the Raspberry Pi 5 offers Wi-Fi and Bluetooth (classic and BLE), which makes it a perfect match for IoT as well as in remote and Internet-based control and monitoring applications. It is now possible to develop many real-time projects such as audio digital signal processing, real-time digital filtering, real-time digital control and monitoring, and many other real-time operations using this tiny powerhouse.
The book starts with an introduction to the Raspberry Pi 5 computer and covers the important topics of accessing the computer locally and remotely. Use of the console language commands as well as accessing and using the desktop GUI are described with working examples. The remaining parts of the book cover many Raspberry Pi 5-based hardware projects using components and devices such as
LEDs and buzzers
LCDs
Ultrasonic sensors
Temperature and atmospheric pressure sensors
The Sense HAT
Camera modules
Example projects are given using Wi-Fi and Bluetooth modules to send and receive data from smartphones and PCs, and sending real-time temperature and atmospheric pressure data to the cloud.
All projects given in the book have been fully tested for correct operation. Only basic programming and electronics experience are required to follow the projects. Brief descriptions, block diagrams, detailed circuit diagrams, and full Python program listings are given for all projects described.