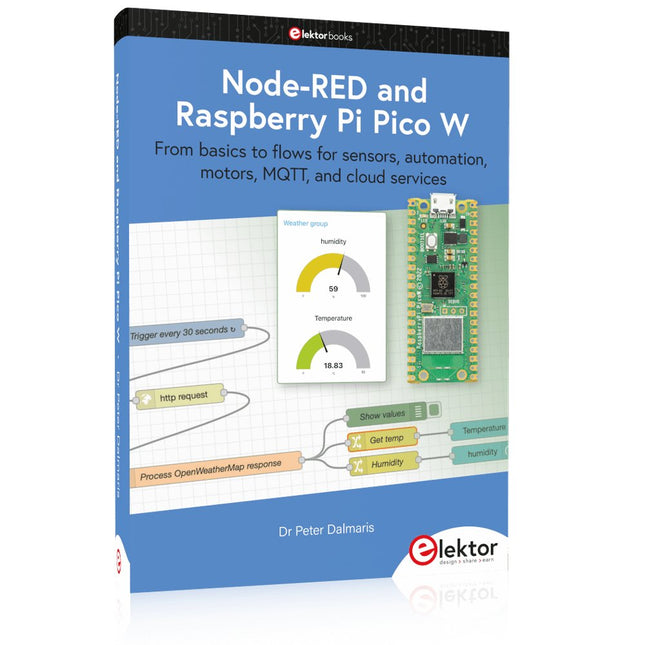
From basics to flows for sensors, automation, motors, MQTT, and cloud services
This book is a learning guide and a reference. Use it to learn Node-RED, Raspberry Pi Pico W, and MicroPython, and add these state-of-the-art tools to your technology toolkit. It will introduce you to virtual machines, Docker, and MySQL in support of IoT projects based on Node-RED and the Raspberry Pi Pico W.
This book combines several elements into a platform that powers the development of modern Internet of Things applications. These elements are a flow-based server, a WiFi-enabled microcontroller, a high-level programming language, and a deployment technology. Combining these elements gives you the tools you need to create automation systems at any scale. From home automation to industrial automation, this book will help you get started.
Node-RED is an open-source flow-based development tool that makes it easy to wire together devices, APIs, and online services. Drag and drop nodes to create a flowchart that turns on your lights at sunset or sends you an email when a sensor detects movement. Raspberry Pi Pico W is a version of the Raspberry Pi Pico with added 802.11n Wi-Fi capability. It is an ideal device for physical computing tasks and an excellent match to the Node-RED.
Quick book facts
Project-based learning approach.
Assumes no prior knowledge of flow-based programming tools.
Learn to use essential infrastructure tools in your projects, such as virtual machines, Docker, MySQL and useful web APIs such as Google Sheets and OpenWeatherMap.
Dozens of mini-projects supported by photographs, wiring schematics, and source code. Get these from the book GitHub repository.
Step-by-step instructions on everything.
All experiments are based on the Raspberry Pi Pico W. A Wi-Fi network is required for all projects.
Hardware (including the Raspberry Pi Pico W) is available as a kit.
Downloads
GitHub
STmicroelectronics’ wireless IoT & wearable sensor development kit
‘SensorTile.box’ is a portable multi-sensor circuit board housed in a plastic box and developed by STMicroelectronics. It is equipped with a high-performance 32-bit ARM Cortex-M4 processor with DSP and FPU, and various sensor modules, such as accelerometer, gyroscope, temperature sensor, humidity sensor, atmospheric pressure sensor, microphone, and so on. SensorTile.box is ready to use with wireless IoT and Bluetooth connectivity that can easily be used with an iOS or Android compatible smartphone, regardless of the level of expertise of the users. SensorTile.box is shipped with a long-life battery and all the user has to do is connect the battery to the circuit to start using the box.
The SensorTile.box can be operated in three modes: Basic mode, Expert mode, and Pro mode. Basic mode is the easiest way of using the box since it is pre-loaded with demo apps and all the user has to do is choose the required apps and display or plot the measured data on a smartphone using an app called STE BLE Sensor. In Expert mode users can develop simple apps using a graphical wizard provided with the STE BLE Sensor. Pro mode is the most complex mode allowing users to develop programs and upload them to the SensorTile.box.
This book is an introduction to the SensorTile.box and includes the following:
Brief specifications of the SensorTile.box; description of how to install the STE BLE Sensor app on an iOS or Android compatible smartphone required to communicate with the box.
Operation of the SensorTile.box in Basic mode is described in detail by going through all of the pre-loaded demo apps, explaining how to run these apps through a smartphone.
An introduction to the Expert mode with many example apps developed and explained in detail enabling users to develop their own apps in this mode. Again, the STE BLE Sensor app is used on the smartphone to communicate with the SensorTile.box and to run the developed apps.
The book then describes in detail how to upload the sensor data to the cloud. This is an important topic since it allows the sensor measurements to be accessed from anywhere with an Internet connection, at any time.
Finally, Pro mode is described in detail where more experienced people can use the SensorTile.box to develop, debug, and test their own apps using the STM32 open development environment (STM32 ODE). The Chapter explains how to upload the developed firmware to the SensorTile.box using several methods. Additionally, the installation and use of the Unicleo-GUI package is described with reference to the SensorTile.box. This PC software package enables all of the SensorTile.box sensor measurements to be displayed or plotted in real time on the PC.
Diese Ausgabe steht allen GOLD- und GREEN-Mitgliedern auf der ElektorMagazine-Website zum Download bereit!
Sie sind noch kein Mitglied? Hier klicken!
Der Raspberry Pi 5Gegenüber seinem Vorgänger enorm verbessert
KI im ElektroniklaborSchaltungsdesign, Bauteil-Suche, Software
Funktionsgenerator mit dem Arduino NanoNano + Code = Funktionsgenerator
Solarbetriebene WeihnachtsgirlandeEine umweltfreundliche Lösung für die Dekoration Ihres Balkons
USB-Killer-DetektorBesser sicher als traurig
Ein einfaches CNC-GehäuseSchritt für Schritt mit Autodesk Fusion 360
Platinenproduktion in kleinen StückzahlenMit und ohne Bestückung
IoT-Simulation vereinfacht mit WokwiEntwickler Uri Shaked über Entwicklung, Software und mehr
Eine Anleitung zur Bare-Metal-ProgrammierungTeil 3: CMSIS-Header, automatische Tests und ein Webserver
LoRa, ein Schweizer TaschenmesserTeil 2: Hard- und Software
MEMS-MikrofoneEntwurf und Konstruktion eines Messmikrofons
Werkzeuge zum Ausprobieren, bevor Sie lötenSimulations- und 3D-Modellierungstools, die kostenlos genutzt werden können
Neue Tools von Microchip!Version 5 von PICkit und ICD jetzt erhältlich
Rapid Prototyping von flexibler, dehnbarer ElektronikWie Voltera NOVA Innovationen bei tragbaren elektronischen Systemen beschleunigt
Galvanische TrennungPhototransistor-Optokoppler erfolgreich einsetzen
Die komplexe Lösung oder die Lösung von Anybus?Embedded Industrial Ethernet als Kurzstrecke statt als Marathon
Ihre essentielle DFM-ChecklisteWie Sie mit dem Entwurf für die Fertigung beginnen
Filamente für den 3D-DruckArten, Eigenschaften und Verwendung im Prototyping
Spezialisten für eine effektive Signalauswertung von ELF bis EHF-BandAaronias neueste Echtzeit-Spektrumanalyzer der SPECTRAN® V6-Serie
Herausforderungen der DFM-Analyse für Flex- und Rigid-Flex-Design
Einrichten einer SMT-Fertigungsstrecke
Die richtige Kombination für die zuverlässige Baugruppe
Revolution in der IndustrieDer Aufstieg der Autonomen Mobilen Roboter (AMR)
Für höchste Anforderungen weiterentwickeltR&S MXO 5 mit acht Kanälen ergänzt Oszilloskope der nächsten Generation
Aller Anfang...... muss nicht schwer sein: Verstärkung von Unterschieden
Mini-Reflow-PlatteFür die Bestückung und die Reparatur kleiner SMD-Schaltungen
Starte nicht mit einem Prototyp – starte mit einem Pretotyp!Prüfe erst, ob es einen Markt für dein Produkt gibt, bevor du deinen Lötkolben vorwärmst
2023: Odyssee in die KIHilfe beim Entwerfen eines physikalischen Projekts erhalten
Innovationen aus BrüsselUnterstützung für die Spitzentechnologie
Example projects with Node-RED, MQTT, WinCC SCADA, Blynk, and ThingSpeak
This comprehensive guide unlocks the power of Modbus TCP/IP communication with Arduino. From the basics of the Modbus protocol right up to full implementation in Arduino projects, the book walks you through the complete process with lucid explanations and practical examples.
Learn how to set up Modbus TCP/IP communication with Arduino for seamless data exchange between devices over a network. Explore different Modbus functions and master reading and writing registers to control your devices remotely. Create Modbus client and server applications to integrate into your Arduino projects, boosting their connectivity and automation level.
With detailed code snippets and illustrations, this guide is perfect for beginners and experienced Arduino enthusiasts alike. Whether you‘re a hobbyist looking to expand your skills or a professional seeking to implement Modbus TCP/IP communication in your projects, this book provides all the knowledge you need to harness the full potential of Modbus with Arduino.
Projects covered in the book:
TCP/IP communication between two Arduino Uno boards
Modbus TCP/IP communication within the Node-RED environment
Combining Arduino, Node-RED, and Blynk IoT cloud
Interfacing Modbus TCP/IP with WinCC SCADA to control sensors
Using MQTT protocol with Ethernet/ESP8266
Connecting to ThingSpeak IoT cloud using Ethernet/ESP8266
De Joy-Pi Note 2 is een draagbaar, alles-in-één platform voor elektronica-experimenten en educatie, dat volledig compatibel is met de Raspberry Pi 4 en 5. Dankzij de combinatie van een 11,6-inch IPS-scherm, een afneembaar draadloos toetsenbord en een compacte, robuuste behuizing biedt het een flexibele omgeving voor elektronicaontwikkeling, programmeren en onderwijs.
Met meer dan 45 praktische cursussen en projecten ondersteunt de Joy-Pi Note 2 het leren en experimenteren met Python, Scratch, robotica en IoT-toepassingen. Het geïntegreerde leerplatform biedt stapsgewijze instructies, waardoor het uitermate geschikt is voor beginners, studenten, docenten en ervaren makers.
Het systeem is uitgerust met meer dan 22 ingebouwde sensoren en modules, waaronder sensoren voor temperatuur, licht, beweging en afstand, evenals led-displays en interfaces voor motoren. Dankzij extra aansluitmogelijkheden, zoals USB-C en GPIO-uitbreidingspoorten, kunnen gebruikers hun eigen projecten ontwikkelen en testen.
Dankzij de ondersteuning voor de Raspberry Pi 5 profiteert de Joy-Pi Note 2 bovendien van verbeterde rekenkracht en grafische prestaties. Hierdoor is het een veelzijdig platform voor elektronicaonderwijs, prototyping en geavanceerde experimenten.
Kenmerken
Complete set voor elektronica-experimenten
Alles-in-één platform voor leren en experimenteren
Compatibel met Raspberry Pi 4 & 5
Vooraf geïnstalleerd interactief leerplatform
Afneembaar draadloos toetsenbord
Geïntegreerd opbergvak voor powerbank en accessoires
Specificaties
Display
11,6" lcd-scherm
Camera
2 MP
Leerplatform
45+ cursussen & projecten
Displays
7-segmentendisplay, 16x2-display, 1,8" TFT-display, 0,96" OLED-display, 8x8 RGB-matrix
Voeding
5 V/5 A, USB-C
Displays
7-segmentendisplay, 16x2-LCD-module, 8x8 RGB-matrix
Sensoren
DHT-temperatuur- en vochtigheidssensor, kantelsensor, bewegingssensor, geluidssensor, aanraaksensor, RFID-module, lichtsensor, ultrasone sensor
Motoren
Servo-interface, stappenmotorinterface, vibratiemotor
Besturingssysteem
Joystick, 4x4-knopsmatrix, schakelaar voor Raspberry Pi- & pc-verbinding, gevoeligheidsregelaar voor bewegingssensor, gevoeligheidsregelaar voor geluidssensor, helderheidsregelaar voor 16x2-LCD-module
Diversen
Relais, ventilator, GPIO-uitbreiding, GPIO-led-indicator, breadboard, IO-/ADC-/I²C-/UART-uitbreidingsinterface, infraroodsensor-interface, zoemer, display-driver
Accessoires
RFID-chip, RFID-kaart, voedingseenheid, servomotor, stappenmotor, infraroodontvanger, infraroodafstandsbediening, gelijkstroommotor met ventilatoropzetstuk, schroevendraaier, microSD-kaart (32 GB), SD-kaartlezer, elektronische accessoires, draadloze muis, draadloos toetsenbord
Afmetingen
291 x 190 x 46 mm
Gewicht
1,3 kg
Inbegrepen
Joy-Pi Note 2 Notebook
Raspberry Pi 5 (8 GB RAM)
Accessoires
USB-C-voedingsadapter
Snelstartgids
Downloads
Joy-Pi website
Datasheet
Open-Source-Code mit Arduino IDE und PlatformIO
Autonomes Fahren: GPS, Accelerometer, Gyroskop
PS3-Controller
Mikrocontroller wie der Arduino und Einplatinenrechner wie der Raspberry Pi haben sich zu beliebten Komponenten entwickelt. Dritter im Bunde ist der ESP32 der Firma Espressif. Mikrocontroller dieser Baureihe zeichnen sich durch eine Vielzahl implementierter Funktionen aus, die bei einem Arduino konventioneller Prägung mit einem Atmel-AVR-Mikrocontroller erst mit weiterer Hardware möglich sind. Prominentes Beispiel sind hier die WiFi- und Bluetooth-Funktionalitäten. Gegenüber einem Raspberry Pi zeichnen sie sich durch einen deutlich geringeren Preis aus.
Allgemeine Informationen für die Realisierung eines Roboterauto-Projekts mit dem ESP32 sind leicht zu finden. Dabei handelt es sich aber oft nur um Ausführungen zu einem Teilaspekt, ohne inhaltliche oder funktionale Abstimmung. So ist nicht nur die Beschaffung der benötigten Informationen mühselig und zeitaufwändig, sie kann auch außerordentlich fehlerträchtig sein.
Ansatzpunkt dieses Buches ist, diese Lücke zu schließen. Es geht auf verschiedene Möglichkeiten eines Chassis ein, vermittelt nötige Kenntnisse und führt schrittweise von einer einfachen Motorsteuerung zu einem komplexen sensor- und sprachgesteuerten Roboterauto. Hacks rund um GPS und eine PlayStation 3 runden die Sache ab.
Inhalt
Bei der Reihenfolge der Kapitel wurde versucht – beginnend bei der Darstellung von grundlegenden Informationen – über die Lösung einfacher Aufgaben zu etwas anspruchsvolleren Techniken zu führen.
Der Mikrocontroller ESP32
Die Software erstellen
Die Stromversorgung
Rund um die Hardware
Das Chassis
Der Gleichstrommotor
Kabellose Steuerung über WiFi
Mit Sensoren Hindernisse erkennen
Eine eigene Roboterauto-App
Servo und Lichtsensor
GPS
Accelerometer / Gyroskop
PS3-Controller
Roboterauto-App
Hinweis zur Software
Die Dateien haben das Suffix (.cpp). Grund ist die Entwicklung mit PlatformIO. Mit Copy & Paste sollten sie auch in der Arduino-IDE verwendet werden können.
De SDRplay RSP1B is een verbeterde versie van de populaire RSP1A – een krachtige, breedbandige, complete 14-bits SDR die het RF-spectrum van 1 kHz tot 2 GHz bestrijkt. De RSP1B is uitgevoerd in een robuuste, zwartgelakte stalen behuizing en biedt aanzienlijk verbeterde ruisprestaties.
Het enige wat nodig is, is een computer en een antenne voor uitstekende communicatie- en ontvangstfunctionaliteit. Het wordt geleverd met SDRuno voor Windows en de multi-platform SDRconnect-software voor Windows, macOS en Linux (gratis geleverd door SDRplay). U kunt tot 10 MHz spectrum tegelijk monitoren.
Een gedocumenteerde API stelt ontwikkelaars in staat om nieuwe demodulatoren of applicaties voor het platform te creëren.
Kenmerken
Covers all frequencies from 1 kHz through VLF, LF, MW, HF, VHF, UHF and L-band to 2 GHz, with no gaps
Receive, monitor and record up to 10 MHz of spectrum at a time
Free use of windows-based SDRuno software which provides an ever-increasing feature-set
Strong and growing software support network
Calibrated S meter/ RF power and SNR measurement with SDRuno (including datalogging to .CSV file capability)
Documented API provided to allow demodulator or application development on multiple platforms
Excellent dynamic range for challenging reception conditions
Works with popular 3rd party SDR software (including HDSDR, SDR Console and Cubic SDR)
ExtIO based plugin available
Software upgradeable for future standards
Strong and growing software support network
API provided to allow demodulator or application development
Multiplatform driver and API support including Windows, Linux, Mac, Android and Raspberry Pi
Up to 16 individual receivers in any 10 MHz slice of spectrum using SDRuno
Calibrated S meter and power measurements with SDRuno
Stand-alone windows-based spectrum analyser software available (with sweep, sample and hold features)
Ideal for monitoring of ISM/IoT/Telemetry bands <2 GHz
Ideal for portable operation
Specificaties
Frequency Range
1 kHz – 2 GHz
Antenna Connector
SMA
Antenna Impedance
50 Ohms
Current Consumption (Typical)
185 mA (excl. Bias-T)
USB Connector
USB Type B
Maximum Input Power
+0 dBm Continuous+10 dBm Short Duration
ADC Sample Rates
2-10.66 MSPS
ADC Number of Bits
14 bit 2-6.048 MSPS12 bit 6.048-8.064 MSPS10 bit 8.064-9.216 MSPS8 bit >9.216 MSPS
Bias-T
4.7 V100 mA guaranteed
Reference
0.5ppm 24 MHz TCXO.Frequency error trimmable to 0.01ppm in field.
Operating Temperature Range
-10✓C to +60✓C
Dimensions
98 x 88 x 34 mm
Weight
110 g
Downloads
Datasheet
Software
RSP1B vs RSPdx vs RSPduo
RSP1B
RSPdx
RSPduo
Continuous coverage from 1 kHz to 2 GHz
✓
✓
✓
Up to 10 Mhz visible bandwidth
✓
✓
✓
14-bit ADC silicon technology plus multiple high-performance input filters
✓
✓
✓
Software selectable AM/FM & DAB broadcast band notch filters
✓
✓
✓
4.7 V Bias-T for powering external remote antenna amplifier
✓
✓
✓
Powers over the USB cable with a simple type B socket
✓
✓
✓
50✓ SMA antenna input(s) for 1 kHz to 2 GHz operation (software selectable)
1
2
2
Additional software selectable Hi-Z input for up to 30 Mhz operation
✓
Additional software selectable 50✓ BNC input for up to 200 MHz operation
✓
Additional LF/VLF filter for below 500 kHz
✓
24 MHz reference clock input (+ output on RSPduo)
✓
✓
Dual tuners enabling reception on 2 totally independent 2 MHz ranges
✓
Dual tuners enabling diversity reception using SDRuno
✓
Robust and strong plastic case (with internal RF shielding layer)
✓
Rugged black painted steel case
✓
✓
Overall performance below 2 MHz for MW and LF
+
++
+
Multiple simultaneous applications
+
+
++
Performance in challenging fading conditions (*using diversity tuning)
+
+
*++
Das Programmpaket Laboratory Virtual Instrument Engineering Workbench (oder kurz LabVIEW) ist ein international anerkannter Standard zur Entwicklung und Gestaltung von Messgeräten und Prozesssteueroberflächen. Seine Universalität konfrontiert den LabVIEW-Einsteiger allerdings mit einer unübersichtlichen Vielfalt von Funktionen, die er ohne fundierte Anleitung kaum überblicken kann.
Hier setzt diese neue mehrteilige Lehrbuchreihe an: Von Grund auf werden in einfach nachvollziehbaren Schritten der Aufbau, die Struktur und die Verwendung von LabVIEW erklärt, in praktischen Beispielen dargestellt und mit Übungen vertieft. Die notwendigen Vorkenntnisse sind äußerst gering, die erreichbaren Ergebnisse dagegen äußerst sehenswert.
Der erste Band erläutert die Grunddatentypen und die zugehörigen numerischen Grundfunktionen ebenso ausführlich wie die elementaren Programmstrukturen.
Im folgenden Band liegt der Schwerpunkt bei der Kopplung beliebiger Mikrocontrollersysteme über die serielle (USB-)Schnittstelle an den PC und an LabVIEW.
Im dritten Band stehen Entwurf und Betrieb kompletter MSR-Systeme mit Hard- und Softwarekomponenten der wichtigsten Messtechnikhersteller im Vordergrund, einschließlich Fernsteuerung, -überwachung und -diagnose über das Internet oder WLAN-Systeme.
Diese Lehrbuchreihe richtet sich an Schüler/Auszubildende technischer Bildungseinrichtungen, an Studenten von Fachhochschulen/Universitäten und an den engagierten Praktiker in der Industrie oder im privaten Bereich.
311 Schaltungen – das zwölfte Buch innerhalb der „Dreihunderter-Reihe“. 311 Schaltungen und neue Konzepte in einem Buch sind ein (fast) unerschöpflicher Fundus zu allen Bereichen der Elektronik: Audio & Video, Spiel & Hobby, Haus & Hof, Prozessor & Controller, Messen & Testen, PC & Peripherie, Stromversorgung & Ladetechnik sowie zu Themen, die sich nicht katalogisieren lassen.
311 Schaltungen – enthält viele komplette Problemlösungen, zumindest aber die Idee hierzu. Nicht zuletzt sind die 311 Schaltungen der Anstoß zu ganz neuen Überlegungen.
311 Schaltungen – sind eine Zusammenfassung der Beiträge aus den Halbleiterheften 2009 bis 2011. Die Halbleiterhefte sind die jährlichen Doppelausgaben Juli/August der Zeitschrift Elektor.
311 Schaltungen ist das Buch für alle, die kreativ mit der Elektronik umgehen; sei es im Beruf oder als Hobby.
Praktische Anwendungen und Projekte mit Arduino, ESP32 und RP2040
Tauchen Sie ein in die faszinierende Welt der Regelungstechnik mit Arduino und ESP32! Dieses Buch bietet Ihnen einen praxisnahen Einstieg in die klassischen und modernen Methoden der Regelung, darunter PID-Regler, Fuzzy-Logik und Sliding-Mode-Regler.
Im ersten Teil lernen Sie die Grundlagen der beliebten Arduino-Controller, wie den Arduino Uno und den ESP32, sowie die Integration von Sensoren für Temperatur- und pH-Messung (NTC, PT100, PT1000, pH-Sensor). Sie erfahren, wie diese Sensoren in verschiedenen Projekten eingesetzt werden und wie Sie Daten auf einem Nextion TFT-Display visualisieren.
Weiter geht es mit der Einführung in Stellglieder wie MOSFET-Schalter, H-Brücken und Solid-State-Relais, die zur Steuerung von Motoren und Aktoren verwendet werden. Sie lernen, Regelstrecken zu analysieren und zu modellieren, einschließlich PT1- und PT2-Regelungen.
Der Schwerpunkt des Buches liegt auf der Implementierung von Fuzzy- und PID-Reglern zur Regelung von Temperatur und DC-Motoren. Dabei werden sowohl der Arduino Uno als auch der ESP32 eingesetzt. Zudem wird der Sliding-Mode-Regler vorgestellt.
Im vorletzten Kapitel erkunden Sie die Grundlagen neuronaler Netze und lernen, wie maschinelles Lernen auf einem Arduino eingesetzt werden kann. Im letzten Kapitel gibt es noch ein praktisches Beispiel für einen Fuzzy-Regler zur Stromeinspeisung ins Hausnetz.
Dieses Buch ist die perfekte Wahl für Ingenieure, Studierende und Elektroniker, die ihre Projekte mit innovativen Regelungstechniken erweitern möchten.
Projekte mit Arduino Uno und Raspberry Pi
In diesem Buch werden Anwendungen von Arduino Uno und Raspberry Pi 4 in praxisnahen Projekten auf Basis von CAN-Bus detailliert beschrieben. Durch den Einsatz von entweder Arduino Uno oder Raspberry Pi in Verbindung mit handelsüblichen CAN-Bus-Schnittstellenmodulen werden die Entwicklung, Fehlersuche und Fehlerbeseitigung sowie die Überprüfung von Projekten auf CAN-Bus-Basis erheblich erleichtert.
Dieses Buch richtet sich an jeden, der mehr über den CAN-Bus lernen möchte und mit den Grundlagen der Elektronik vertraut ist. Hilfreich ist auch Erfahrung mit den Programmiersprachen C und Python sowie mit der Programmierung von Arduino Uno unter Verwendung seiner IDE und von Raspberry Pi zu haben.
Das Buch ist eine nützliche Informationsquelle und ein Nachschlagewerk für jeden, der Antworten auf eine oder mehrere der folgenden Fragen sucht:
Welche Bussysteme stehen für die Automobilindustrie zur Verfügung?
Was sind die Grundprinzipien des CAN-Bus?
Welche Arten von Frames (oder Datenpaketen) stehen in einem CAN-Bussystem zur Verfügung?
Wie können Fehler in einem CAN-Bussystem erkannt werden, und wie zuverlässig ist ein CAN-Bussystem?
Welche Arten von CAN-Bus-Controllern gibt es?
Welches sind die Funktionsprinzipien des MCP2515 CAN-Bus-Controllers?
Wie kann ich ein CAN-Bus-Projekt mit Arduino Uno realisieren?
Wie kann ich Arduino oder Raspberry Pi CAN-Bus-Projekte mit 2 und 3 Knoten erstellen?
Wie kann ich die Daten auf dem CAN-Bus analysieren?
Wie kann ich ein CAN-Bus-Projekt mit Raspberry Pi ausführen?
Get Cracking with the Arduino Nano V3, Nano Every, and Nano 33 IoT
The seven chapters in this book serve as the first step for novices and microcontroller enthusiasts wishing to make a head start in Arduino programming. The first chapter introduces the Arduino platform, ecosystem, and existing varieties of Arduino Nano boards. It also teaches how to install various tools needed to get started with Arduino Programming. The second chapter kicks off with electronic circuit building and programming around your Arduino. The third chapter explores various buses and analog inputs. In the fourth chapter, you get acquainted with the concept of pulse width modulation (PWM) and working with unipolar stepper motors.
In the fifth chapter, you are sure to learn about creating beautiful graphics and basic but useful animation with the aid of an external display. The sixth chapter introduces the readers to the concept of I/O devices such as sensors and the piezo buzzer, exploring their methods of interfacing and programming with the Arduino Nano. The last chapter explores another member of Arduino Nano family, Arduino Nano 33 IoT with its highly interesting capabilities. This chapter employs and deepens many concepts learned from previous chapters to create interesting applications for the vast world of the Internet of Things.
The entire book follows a step-by-step approach to explain concepts and the operation of things. Each concept is invariably followed by a to-the-point circuit diagram and code examples. Next come detailed explanations of the syntax and the logic used. By closely following the concepts, you will become comfortable with circuit building, Arduino programming, the workings of the code examples, and the circuit diagrams presented. The book also has plenty of references to external resources wherever needed.
An archive file (.zip) comprising the software examples and Fritzing-style circuit diagrams discussed in the book may be downloaded free of charge below.