Een op de Raspberry Pi Pico gebaseerde Eye Catcher
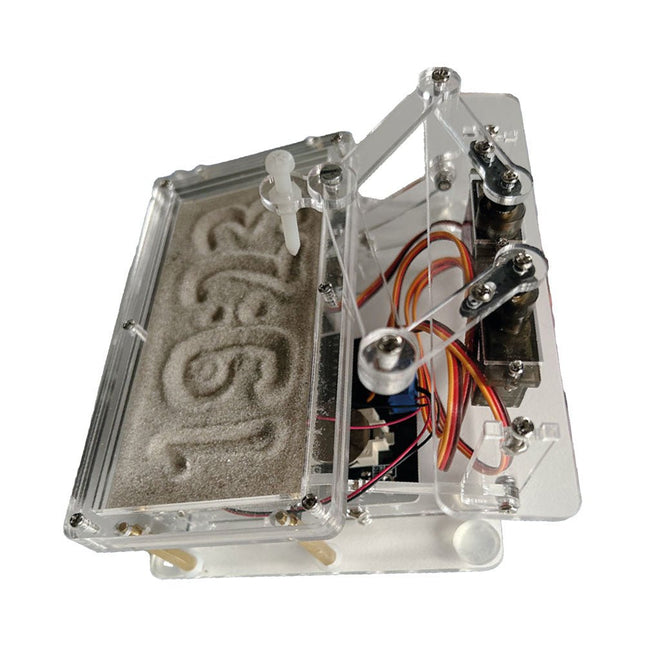
Een standaard zandklok laat meestal slechts zien hoe de tijd verstrijkt. Deze door een Raspberry Pi Pico aangestuurde zandklok toont daarentegen de exacte tijd door de vier cijfers voor uren en minuten in een zandlaag te "graveren". Na een vooraf ingestelde periode wordt het zand door twee trilmotoren vlak getrild en begint alles weer van voren af aan.
Het hart van de zandklok wordt gevormd door twee servomotoren, die via een pantograafmechanisme een schrijfpen aandrijven. Een derde servomotor tilt deze pen op en neer. Het zandbakje is voorzien van twee trilmotoren om het zand weer vlak te trillen. Het elektronische deel van de zandklok bestaat uit een Raspberry Pi Pico en een RTC/driverbord met een real-time klok, plus drivercircuits voor de servomotoren.
Een gedetailleerde bouwhandleiding is beschikbaar via download.
Kenmerken
Afmetingen: 135 x 110 x 80 mm
Bouwtijd: ca. 1,5 tot 2 uur
Inbegrepen
3x Voorgesneden acrylaatplaten met alle mechanische onderdelen
3x Mini servomotoren
2x Trilmotoren
1x Raspberry Pi Pico
1x RTC/driverkaart met geassembleerde onderdelen
Moeren, boutjes, afstandhouders en draden voor de montage
Fijnkorrelig wit zand
Deze bundel bevat alles wat u nodig hebt om direct aan de slag te gaan met het XIAO ESP32-C3 development board. Leer de basisprincipes van de ESP32-C3 en bouw praktische projecten met Wi-Fi, Bluetooth, sensoren, displays, PWM, Deep Sleep en nog veel meer.
Boek: Build Smart Projects with the XIAO ESP32-C3 Board
Het XIAO ESP32-C3 board combineert de ultracompacte vormfactor van de XIAO-serie met de uitgebreide mogelijkheden van de ESP32-C3-chip, inclusief geïntegreerde Wi-Fi en Bluetooth 5.0. Dit boek is een uitgebreide, praktische gids waarmee u het maximale uit dit krachtige en toch betaalbare development board kunt halen.
De auteur neemt de lezer mee van de basisprincipes tot geavanceerde projecten. Na het laten knipperen en dimmen van leds komen ADC en PWM aan bod voor nauwkeurige sensoraansluiting en PWM-gestuurde lichteffecten. Vervolgens gaat u aan de slag met praktische toepassingen, waaronder:
Een Wi-Fi-weerstation met OLED-display en actuele online weergegevens
Een ultrasone parkeerassistent met akoestische feedback
Een koelkastmonitor met klimaatsensoren en Deep Sleep voor jarenlang batterijgebruik
Een retro Pong-spel dat contactloos met een sensor wordt bestuurd
Een microfoongebaseerde party-app die reageert op handgeklap
En nog veel meer: lichtregeling, reactietijdmeting, analyse van de netfrequentie, bodemvochtmeting, sfeerverlichting met leds en 7-segmentdisplays
Seeed Studio XIAO ESP32C3
De Seeed Studio XIAO ESP32C3 is uitgerust met een sterk geïntegreerde ESP32-C3-chip, gebaseerd op een 32-bits RISC-V-processor met een viertraps pipeline die werkt met een kloksnelheid tot 160 MHz.
Het board beschikt over een sterk geïntegreerde ESP32-C3 SoC. De chip bevat een volledig 2,4-GHz Wi-Fi-subsysteem en ondersteunt daarmee Station-modus, SoftAP-modus, SoftAP & Station-modus en promiscuous-modus voor uiteenlopende Wi-Fi-toepassingen. Tegelijkertijd werkt de chip met een zeer laag energieverbruik en ondersteunt hij Bluetooth 5 en Bluetooth Mesh. Met 400 KB SRAM en 4 MB Flash biedt de chip voldoende programmeerruimte en volop mogelijkheden voor IoT-besturingstoepassingen.
Toepassingen
Internet of Things
Wearables
Gezondheidsmonitoring
Onderwijs
Energiezuinige netwerken
Snelle prototyping
Specificaties
Processor
ESP32-C3 SoC
RISC-V single-core 32-bit chip processor with a four-stage pipeline that operates at up to 160 MHz
Wireless
Complete 2.4GHz Wi-Fi subsystem
Bluetooth Low Energy 5.0/ Bluetooth Mesh
On-chip Memory
400 KB SRAM & 4 MB Flash
Interface
1x UART, 1x I²C, 1x SPI, 11x GPIO (PWM), 4x ADC
1x Reset button, 1x Boot button
Power (Typ.)
Max 3.3 V Output Current: 500 mA Test Condition: BAT Pin Input @ 3.8 V Source Capability: 3 A
Charging current: 380 mA(Fast) / 40 mA(Trickle)
Input voltage (VIN): 5 VInput voltage (BAT): 3.7 V
Deep Sleep Power Consumption
Deep Sleep Mode: 44 μA
Wi-Fi Enabled Power Consumption
Active Mode: 75 mA
Modem-sleep Mode: 25 mA
Light-sleep Mode: 4 mA
BLE Enabled Power Consumption
Modem-sleep Mode: 27 mA
Light-sleep Mode: 10 mA
Dimensions
21 x 17.8 mm
Inbegrepen
1x Seeed Studio XIAO ESP32C3
1x Antenne
2x 7-pins header
Downloads
Wiki
Datasheet
Deze bundel bevat:
Boek: Build Smart Projects with the XIAO ESP32-C3 Board (t.w.v. € 35)
Board: Seeed Studio XIAO ESP32C3 (t.w.v. € 10)
AI Projects for the Raspberry Pi with the AI HAT+
Edge AI is transforming everyday devices by putting intelligence where it matters most: directly inside the hardware. With on-device inference, a camera can recognize a visitor instantly, a phone can translate speech without streaming audio to the cloud, and a wearable can detect anomalies in real time—fast, private, and reliable even when the network disappears.
This book is your practical guide to building exactly those kinds of systems with the Raspberry Pi AI HAT+ and the Hailo-8L accelerator. You’ll start with clear foundations: core AI and machine-learning concepts, how neural networks work, and what truly distinguishes Edge AI from cloud AI—plus an honest look at ethical considerations and future impacts.
Then it’s straight to hands-on physical computing. Step by step, you’ll set up Raspberry Pi OS, power and cooling, and develop in Python using the Thonny IDE. You’ll learn GPIO basics with lights and servos, mount the AI HAT+ hardware, install and verify the Hailo software stack, and connect the right camera—official modules or USB webcams, even multiple cameras.
From your first pipeline to real projects, you’ll run person detection, pose estimation, segmentation, and depth estimation, then level up with YOLO object detection: smart alerts, guest counters, and custom extensions. You’ll even connect vision to motion by combining gesture recognition with servo-driven mechanisms, including a robotic arm.
With troubleshooting tips, hardware essentials, and a practical Python refresher, this book turns Edge AI from buzzword into buildable reality.
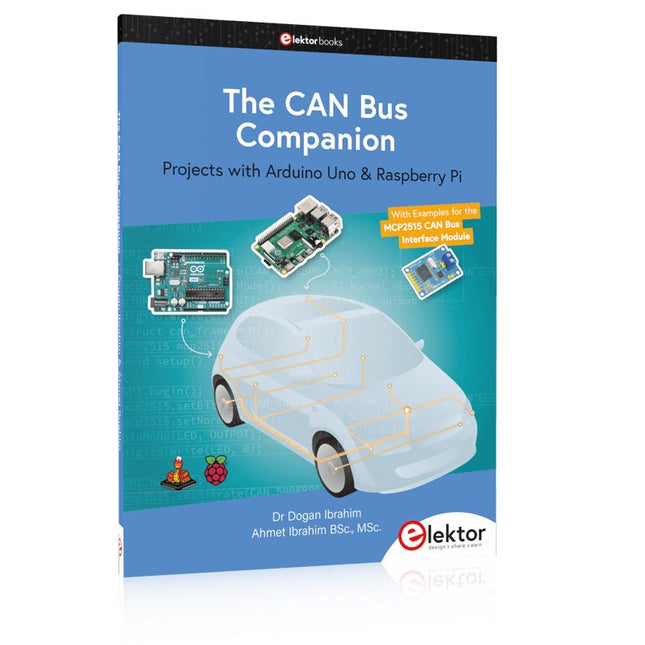
Projects with Arduino Uno & Raspberry Pi with Examples for the MCP2515 CAN Bus Interface Module
This book details the use of the Arduino Uno and the Raspberry Pi 4 in practical CAN bus based projects. Using either the Arduino Uno or the Raspberry Pi with off-the-shelf CAN bus interface modules considerably ease developing, debugging, and testing CAN bus based projects.
This book is written for students, practicing engineers, enthusiasts, and for everyone else wanting to learn more about the CAN bus and its applications. The book assumes that the reader has some knowledge of basic electronics. Knowledge of the C and Python programming languages and programming the Arduino Uno using its IDE and Raspberry Pi will be useful, especially if the reader intends to develop microcontroller-based projects using the CAN bus.
The book should be a useful source of reference material for anyone interested in finding answers to questions such as:
What bus systems are available for the automotive industry?
What are the principles of the CAN bus?
How can I create a physical CAN bus?
What types of frames (or data packets) are available in a CAN bus system?
How can errors be detected in a CAN bus system and how dependable is a CAN bus system?
What types of CAN bus controllers exist?
How do I use the MCP2515 CAN bus controller?
How do I create 2-node Arduino Uno-based CAN bus projects?
How do I create 3-node Arduino Uno-based CAN bus projects?
How do I set the acceptance masks and acceptance filters?
How do I analyze data on the CAN bus?
How do I create 2-node Raspberry Pi-based CAN bus projects?
How do I create 3-node Raspberry Pi-based CAN bus projects?
Meertalige DIY-kit (incl. 27 RGB-LED's + Raspberry Pi Pico)
Geef uw kerstperiode een vleugje techniek met de "woordrijke" LED-kerstboom van Elektor. De prachtig ontworpen 3D-kerstboom combineert elf printplaten, een Raspberry Pi Pico en 27 adresseerbare RGB-LED's om feestelijke boodschappen in zeven talen te laten oplichten: Deens, Nederlands, Engels, Frans, Duits, Italiaans en Spaans.
In tegenstelling tot gewone LED-bomen heeft elk woord in de boom zijn eigen lichtkamer, waardoor een verfijnd, zacht gloeiend display ontstaat zonder geluid of flikkering. De LED's zijn volledig WS2812-compatibel en worden aangestuurd via de populaire Adafruit NeoPixel-bibliotheek, waardoor je eenvoudig aangepaste animaties en kleureffecten kunt maken.
Perfect voor makers, knutselaars en fans van feestelijke elektronica. Deze kit is zowel een leuke bouwervaring als een opvallende, gesprekswaardige decoratie. De Elektor LED-kerstboom is het ideale knutselproject voor de feestdagen!
Kenmerken
Meertalige begroetingen (7 talen) gefreesd in het frontpaneel
3D-constructie van 11 in elkaar grijpende printplaten
Aangedreven door Raspberry Pi Pico
27 individueel adresseerbare RGB-leds (voorgemonteerd)
Vloeiende fade-in en fade-out animaties
Volledig programmeerbaar met Arduino IDE
Voor maximale helderheid wordt een 5 V-voeding (met micro-USB-connector) met een capaciteit van ≥1 A aanbevolen (niet meegeleverd)
Afmetingen (H x B x D): 130 x 115 x 75 mm
Inbegrepen
Alle benodigde printplaten met leds en andere SMD-onderdelen gemonteerd
Raspberry Pi Pico (door de gebruiker te solderen en te programmeren)
3-polige pinheader (door de gebruiker te solderen)
3-polige pinsocket (door de gebruiker te solderen)
4x Zelfklevende rubberen buffers
Projectpagina
Elektor Labs
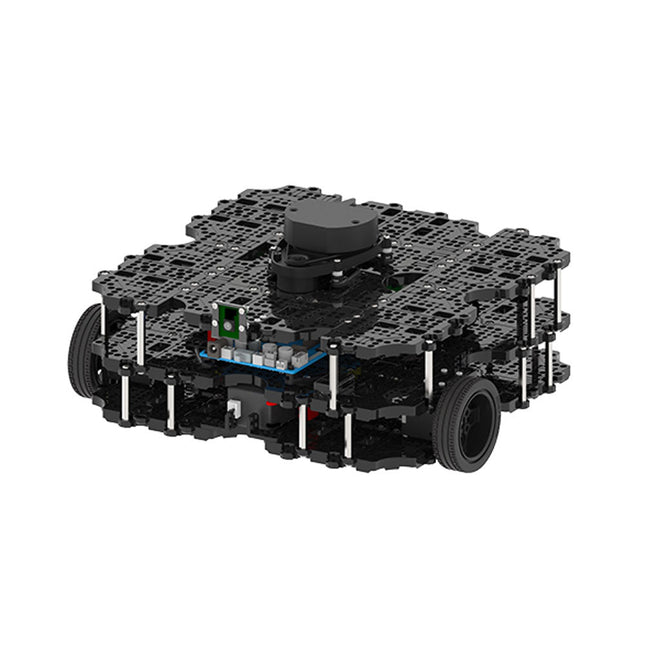
World’s Most Popular ROS PlatformTurtleBot is the most popular open source robot for education and research. The new generation TurtleBot3 is a small, low cost, fully programmable, ROS based mobile robot. It is intended to be used for education, research, hobby and product prototyping.Affordable CostTurtleBot was developed to meet the cost-conscious needs of schools, laboratories and companies. TurtleBot3 is the most affordable robot among the SLAM-able mobile robots equipped with a 360° Laser Distance Sensor LDS-01.ROS StandardThe TurtleBot brand is managed by Open Robotics, which develops and maintains ROS. Nowadays, ROS has become the go-to platform for all the roboticists around the world. TurtleBot can be integrated with existing ROS-based robot components, but TurtleBot3 can be an affordable platform for whom want to get started learning ROS.ExtensibilityTurtleBot3 encourages users to customize its mechanical structure with some alternative options: open source embedded board (as a control board), computer and sensors. TurtleBot3 Waffle Pi is a two-wheeled differential drive type platform but it is able to be structurally and mechanically customized in many ways: Cars, Bikes, Trailers and so on. Extend your ideas beyond imagination with various SBC, sensors and motors on a scalable structure.Modular Actuator for Mobile RobotTurtleBot3 is able to get a precise spatial data by using 2 DYNAMIXEL’s in the wheel joints. DYNAMIXEL XM series can be operated by one of 6 operating modes (XL series: 4 operating modes): Velocity control mode for wheels, Torque control mode or Position control mode for joint, etc. DYNAMIXEL can be used even to make a mobile manipulator which is light but can be precisely controlled with velocity, torque and position control. DYNAMIXEL is a core component that makes TurtleBot3 perfect. It is easy to assemble, maintain, replace and reconfigure.Open Control Board for ROSThe control board is open-sourced in hardware wise and in software wise for ROS communication. The open source control board OpenCR1.0 is powerful enough to control not only DYNAMIXEL’s but also ROBOTIS sensors that are frequently being used for basic recognition tasks in cost effective way. Various sensors such as Touch sensor, Infrared sensor, Color sensor and a handful more are available. The OpenCR1.0 has an IMU sensor inside the board so that it can enhance precise control for countless applications. The board has 3.3 V, 5 V, 12 V power supplies to reinforce the available computer device lineups.Open SourceThe hardware, firmware and software of TurtleBot3 are open source which means that users are welcomed to download, modify and share source codes. All components of TurtleBot3 are manufactured with injection molded plastic to achieve low cost, however, the 3D CAD data is also available for 3D printing.Specifications
Maximum translational velocity
0.26 m/s
Maximum rotational velocity
1.82 rad/s (104.27 deg/s)
Maximum payload
30 kg
Size (L x W x H)
281 x 306 x 141 mm
Weight (+ SBC + Battery + Sensors)
1.8 kg
Threshold of climbing
10 mm or lower
Expected operating time
2h
Expected charging time
2h 30m
SBC (Single Board Computers)
Raspberry Pi 4 (2 GB RAM)
MCU
32-bit ARM Cortex-M7 with FPU (216 MHz, 462 DMIPS)
Remote Controller
RC-100B + BT-410 Set (Bluetooth 4, BLE)
Actuator
XL430-W210
LDS (Laser Distance Sensor)
360 Laser Distance Sensor LDS-01 or LDS-02
Camera
Raspberry Pi Camera Module v2.1
IMU
Gyroscope 3 AxisAccelerometer 3 Axis
Power connectors
3.3 V/800 mA5 V/4 A12 V/1 A
Expansion pins
GPIO 18 pinsArduino 32 pin
Peripheral
3x UART, 1x CAN, 1x SPI, 1x I²C, 5x ADC, 4x 5-pin OLLO
DYNAMIXEL ports
3x RS485, 3x TTL
Audio
Several programmable beep sequences
Programmable LEDs
4x User LED
Status LEDs
1x Board status LED1x Arduino LED1x Power LED
Buttons and Switches
2x Push buttons, 1x Reset button, 2x Dip switch
Battery
Lithium polymer 11.1 V 1800 mAh / 19.98 Wh 5C
PC connection
USB
Firmware upgrade
via USB / via JTAG
Power adapter (SMPS)
Input: 100-240 VAC 50/60 Hz, 1.5 A @maxOutput: 12 VDC, 5 A
Downloads
ROS Robot Programming
GitHub
E-Manual
Community
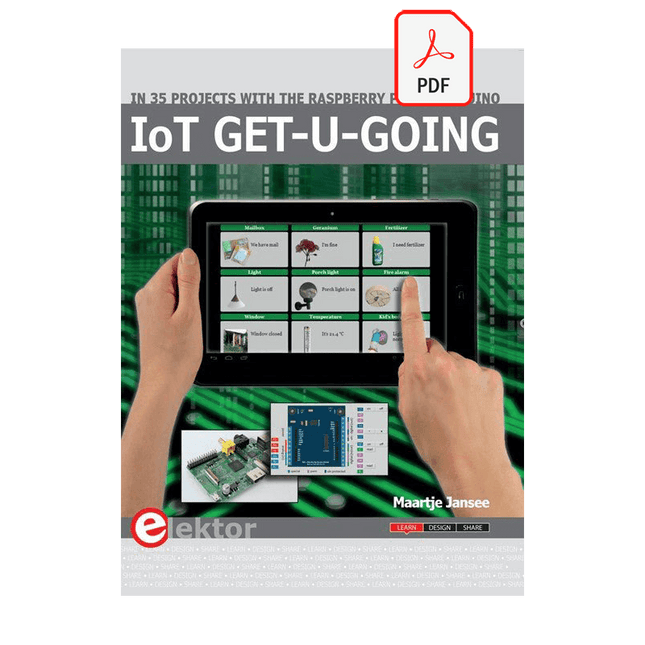
In 35 Projects with the Raspberry Pi and Arduino
The Internet of Things (IoT) is a trend with a strong technological impulse. At home, we want to do everything on our tablets, from browsing Facebook to watching TV, from operating lights to keeping an eye on the temperature.
In 35 fun projects, this book will show you how to build your own Internet of Things system. We'll cover the hardware (primarily the Raspberry Pi and Arduino) and the software that makes control via Internet possible. We employ Wi-Fi and radio links so no requirement any longer to install cabling crisscross through your home.
Assuming the projects in the book are finished, you have a complete Internet of Things system that allows you to control and view of everything in your home. For example, if there's something in the mail box or the car is securely in the garage. Also, you can switch on the lights and the alarm from your couch. The crisp explanations allow the projects to be customized with ease, for example, to turn on your coffee machine or TV remotely. The index gives easy access to creative projects that can serve as an example, enabling you to do all the connecting to the IoT independently. All project software can be downloaded free of charge from the Elektor website.
In this unique book, Raspberry Pi, Arduino and HTML webpages with stylesheets and JavaScript come together in clearly-described, easy-to-build projects. This special book is an essential part of your collection!
USB-Logikanalysatoren am PC mit Arduino, Raspberry Pi und Co
Schritt-für-Schritt-Anleitungen führen Sie in die Analyse moderner Protokolle von I²C, SPI, UART, RS-232, NeoPixel, WS28xx, HD44780 und 1-Wire Protokollen ein. Anhand von zahlreichen Experimentierschaltungen mit dem Raspberry Pi Pico, Arduino Uno und dem Bus Pirate üben Sie die praxisnahe Anwendung gängiger USB-Logikanalysatoren ein.
Alle in diesem Buch vorgestellten Experimentierschaltungen wurden vollständig getestet und sind funktionsfähig. Die notwendigen Programmlistings sind enthalten, es sind keine besonderen Programmier- oder Elektronikkenntnisse für diese Schaltungen notwendig. Es werden die Programmiersprachen MicroPython und C mit den Entwicklungsumgebungen Thonny und Arduino IDE eingesetzt.
Dieses Buch verwendet mehrere Modelle flexibler und weit verbreiteter USB-Logikanalysatoren und zeigt die Stärken und Schwächen jeder Preisklasse. Sie werden kennenlernen, welche Kriterien für Ihre Arbeit wichtig sind und in der Lage sein, das für Sie passende Gerät zu finden.
Egal ob Arduino, Raspberry Pi oder Raspberry Pi Pico: Die abgebildeten Beispielschaltungen ermöglichen einen schnellen Start in die Protokollanalyse und können auch als Grundlage für eigene weitere Experimente dienen.
Sie werden alle wichtigen Begriffe und Zusammenhänge kennenlernen, eigene Experimente durchführen, selbstständig Protokolle analysieren und nach der Lektüre dieses Buches – im Bereich der digitalen Signale und Protokolle – ein umfassendes Wissen aufgebaut haben.
USB Logic Analyzer (8 Kanäle, 24 MHz)
Dieser USB Logic Analyzer ist ein 8-Kanal-Logikanalysator, bei dem jeder Eingang doppelt für die analoge Datenaufzeichnung dient. Es eignet sich perfekt zum Debuggen und Analysieren von Signalen wie I²C, UART, SPI, CAN und 1-Wire. Dabei wird ein digitaler Eingang, der mit einem zu testenden Gerät (DUT) verbunden ist, mit einer hohen Abtastrate abgetastet. Die Verbindung zum PC erfolgt via USB.
Technische Daten
Kanäle
8 digitale Kanäle
Maximale Abtastrate
24 MHz
Maximale Eingangsspannung
0 V ~ 5 V
Betriebstemperatur
0°C ~ 70°C
Eingangsimpedanz
1 MΩ || 10 pF
Unterstützte Protokolle
I²C, SPI, UART, CAN, 1-Wire etc.
PC-Verbindung
USB
Abmessungen
55 x 28 x 14 mm
Downloads
Software
Dieses Bundle enthält:
Neues Buch "Logic Analyzer im Einsatz" (Einzelpreis: 32,80 €)
USB Logic Analyzer (8 Kanäle, 24 MHz) (Einzelpreis: 12,95 €)
USB-Kabel
Jumper Wire Ribbon Kabel
Praxisnahe Projekte, Profi-Tricks und eigene Anwendungen
Dieses Buch führt Sie Schritt für Schritt in die faszinierende Welt der State Machines ein und zeigt, wie Sie Hardware direkt und effizient ansteuern können – jenseits klassischer CPU-gesteuerter Ansätze.
In diesem Buch lernen Sie:
LEDs und NeoPixel kreativ steuern: Blinken, Dimmen, Farbwechsel und komplexe Animationen
Taster und Encoder zuverlässig auslesen und in Echtzeit in Ihre Projekte integrieren
Analoge Eingänge (ADC) nutzen und Signale digital steuern
Servos präzise ansteuern und Bewegungsabläufe automatisieren
SPI mit PIO umsetzen, um Displays, Sensoren und Module anzusteuern
Menüsysteme und Submenüs auf SPI-Displays realisieren, inklusive Navigation über mehrere Taster
PWM, Signalgenerierung und Frequenzsteuerung für akustische oder visuelle Effekte
Debugging-Strategien und Tipps, um Ihre PIO-Programme effizient zu entwickeln
Alle Beispiele sind praxisnah, sofort umsetzbar und zuverlässig. Mit klaren Anleitungen, Hintergrundwissen und fertigen Codebeispielen lernen Sie, die PIO-Fähigkeiten des Pico maximal zu nutzen – egal ob für Maker-Projekte, Prototypen oder professionelle Anwendungen.
Erleben Sie, wie Sie komplexe Hardwaresteuerung elegant mit dem Pico realisieren können – schneller, flexibler und leistungsfähiger als je zuvor.
Design IoT Projects with Raspberry Pi, Arduino and ESP32 The Internet of Things (IoT) is becoming a major application area for embedded systems. As a result, more and more people are becoming interested in learning about embedded design and programming. Technical colleges and universities are moving away from legacy 8 and 16-bit microcontrollers and are introducing 32-bit embedded microcontrollers to their curriculums. Many IoT applications demand precision, high processing power, and low power consumption. Produced by IBM, Node-RED is an open-source visual editor for wiring the Internet of Things. Node-RED comes with a large number of nodes to handle a multitude of tasks. The required nodes are selected and joined together to perform a particular task. Node-RED is based on flow type programming where nodes are configured and joined together to form an application program. There are nodes for performing complex tasks, including web access, Twitter, E-mail, HTTP, Bluetooth, MQTT, controlling GPIO ports, etc. One particularly nice aspect of Node-RED is that the programmer does not need to learn how to write complex programs. For example, an email can be sent by simply joining nodes together and writing only a few lines of code. The aim of this book is to teach how Node-RED can be used in projects. The main hardware platform used with most of the projects in this book is Raspberry Pi 4. Chapters are included to show how Node-RED can be also be used with Arduino Uno, ESP32 DevKitC, and the ESP8266 NodeMCU microcontroller development boards.
Le téléchargement intégral de ce numéro est disponible pour nos membres GOLD et GREEN sur le site Elektor Magazine !
Pas encore membre ? Cliquez ici.
programmation PIO sur le Raspberry Pi PicoNeuf instructions, de multiples possibilités
l'IA en ligne de commandeDéveloppement, compilation et validation de projets embarqués depuis le terminal
le Scrutiny DebuggerDéboguer, visualiser et tester du code C/C++ embarqué
carte breakout Sigfox (1)Développement d’une BoB radio
alimentation à faible bruit (2)Construction, assemblage et mise en œuvre pratique
générateur de signaux simple basé sur le RP2040Signaux analogiques et numériques
à la découverte du futur de la domotique avec Matter et l’IA EdgeLes dernières versions de Matter et l’essor de l’IA en périphérie de réseau (edge) donnent-ils enfin aux ingénieurs les outils nécessaires pour construire les maisons intelligentes et parfaitement intégrées promises aux utilisateurs ?
capteurs de pression différentielleLa maintenance prédictive appliquée aux systèmes CVC
la sécurité dès la conceptionPrincipes d’ingénierie pour limiter les défaillances
la sécurité des systèmes embarqués n’est plus une option
la CRA et la PQC redéfinissent les priorités de la sécurité embarquéePourquoi même les petites entreprises IoT et industrielles doivent prévoir une mise à niveau
embedded world 2026Entretien avec Benedikt Weyerer, directeur d’embedded world
prise en main du bus I3CUtilisation de matériel de ST et Microchip
le projet BLEnkyPrototypage rapide d’applications Bluetooth Low Energy
modulation de largeur d’impulsionDu thermostat tout ou rien à un signal analogique continu filtré
audiotroniqueDes circuits audio agréables à l’écoute, à réaliser soi-même
sur le vifLisez donc le manuel !
carte émetteur-récepteur audio ESP32 (4)Réglage des horloges et une option filaire
2026 : une odyssée de l’IAConséquences du vibe coding
charge CC symétriqueCharge CC symétrique, statique ou dynamique
comptage de visages avec MaixCAMUne méthode simple pour estimer la taille d’un public
Zeitsteuerung, Scheduler, PIO und Zustandsmaschinen
Multitasking ist der Schlüssel zu leistungsfähigen Embedded-Systemen, und zugleich eine der größten Herausforderungen in der Mikrocontroller-Programmierung. Dieses Buch zeigt Ihnen Schritt für Schritt, wie Sie von einem einfachen Ein-Task-Programm zu einem strukturierten, reaktionsfähigen und skalierbaren System gelangen. Dabei steht nicht nur das Wie, sondern vor allem das Warum im Mittelpunkt.
Sie lernen:
warum scheinbare Parallelität entsteht
weshalb blockierende Programme instabil werden
wie Aufgaben effizient und kontrolliert parallel ablaufen
Ausgehend vom klassischen Superloop vermittelt das Buch moderne Multitasking-Strategien – von nicht-blockierender Programmierung und Tick-Systemen bis zu Task-Schedulern, Zustandsmaschinen und ereignisgesteuerten Konzepten.
Der Fokus liegt auf der Praxis: Sensoren, Displays, Kommunikation und reale Anwendungen werden Schritt für Schritt integriert und mit verständlich kommentierten Beispielprogrammen erklärt.
Fortgeschrittene Themen umfassen:
Multicore-Programmierung mit dem Raspberry Pi Pico
asynchrones Programmieren mit uasyncio
RTOS-Grundlagen mit FreeRTOS
die Kombination aus Multicore und RTOS
Dabei werden auch die Grenzen dieser Techniken, insbesondere unter MicroPython, klar aufgezeigt.
Das Buch richtet sich an ambitionierte Einsteiger und fortgeschrittene Entwickler, die Embedded-Systeme fundiert verstehen und robuste, wartbare Multitasking-Anwendungen entwickeln möchten.