Open-Source-Code mit Arduino IDE und PlatformIO
Autonomes Fahren: GPS, Accelerometer, Gyroskop
PS3-Controller
Mikrocontroller wie der Arduino und Einplatinenrechner wie der Raspberry Pi haben sich zu beliebten Komponenten entwickelt. Dritter im Bunde ist der ESP32 der Firma Espressif. Mikrocontroller dieser Baureihe zeichnen sich durch eine Vielzahl implementierter Funktionen aus, die bei einem Arduino konventioneller Prägung mit einem Atmel-AVR-Mikrocontroller erst mit weiterer Hardware möglich sind. Prominentes Beispiel sind hier die WiFi- und Bluetooth-Funktionalitäten. Gegenüber einem Raspberry Pi zeichnen sie sich durch einen deutlich geringeren Preis aus.
Allgemeine Informationen für die Realisierung eines Roboterauto-Projekts mit dem ESP32 sind leicht zu finden. Dabei handelt es sich aber oft nur um Ausführungen zu einem Teilaspekt, ohne inhaltliche oder funktionale Abstimmung. So ist nicht nur die Beschaffung der benötigten Informationen mühselig und zeitaufwändig, sie kann auch außerordentlich fehlerträchtig sein.
Ansatzpunkt dieses Buches ist, diese Lücke zu schließen. Es geht auf verschiedene Möglichkeiten eines Chassis ein, vermittelt nötige Kenntnisse und führt schrittweise von einer einfachen Motorsteuerung zu einem komplexen sensor- und sprachgesteuerten Roboterauto. Hacks rund um GPS und eine PlayStation 3 runden die Sache ab.
Inhalt
Bei der Reihenfolge der Kapitel wurde versucht – beginnend bei der Darstellung von grundlegenden Informationen – über die Lösung einfacher Aufgaben zu etwas anspruchsvolleren Techniken zu führen.
Der Mikrocontroller ESP32
Die Software erstellen
Die Stromversorgung
Rund um die Hardware
Das Chassis
Der Gleichstrommotor
Kabellose Steuerung über WiFi
Mit Sensoren Hindernisse erkennen
Eine eigene Roboterauto-App
Servo und Lichtsensor
GPS
Accelerometer / Gyroskop
PS3-Controller
Roboterauto-App
Hinweis zur Software
Die Dateien haben das Suffix (.cpp). Grund ist die Entwicklung mit PlatformIO. Mit Copy & Paste sollten sie auch in der Arduino-IDE verwendet werden können.
Deze bundel bevat de AI Fusion Lab Kit met meer dan 450 componenten en het boek Physical AI with Raspberry Pi. Samen bieden ze een uitgebreide, praktijkgerichte introductie tot AI, elektronica en programmeren met Python.
Bouw praktische projecten waarin computervisie, spraakinteractie, sensoren, motoren en grote taalmodellen (LLM's) worden gecombineerd. Het bijgeleverde boek begeleidt je stap voor stap: van de installatie van de Raspberry Pi en het aansturen van hardware tot geavanceerde toepassingen met OpenCV, MediaPipe, YOLO, OpenAI-diensten en lokale Ollama-modellen.
SunFounder AI Fusion Lab Kit voor Raspberry Pi (450+ onderdelen)
De AI Fusion Lab Kit verandert een Raspberry Pi in een compleet platform voor het leren van kunstmatige intelligentie, elektronica en Python-programmeren. De kit ondersteunt de Raspberry Pi 5, 4B, 3B+, 3B en Zero 2 W, evenals populaire AI-modellen en -diensten zoals ChatGPT, Gemini, Grok, DeepSeek, Qwen, Doubao en Ollama.
Dankzij de camera, Pan-Tilt HAT, 10-assige sensormodule, microfoon, luidspreker en elektronische componenten kunnen gebruikers interactieve AI-projecten bouwen die spraak, beeldherkenning, beweging en sensordata combineren. De kit is geschikt voor beginners, studenten, makers en iedereen die praktische AI-toepassingen wil verkennen.
Bouw multimodale AI-projecten
Combineer grote taalmodellen (LLM's) met spraakherkenning, tekst-naar-spraak, camerabeeld, sensoren en breadboard-schakelingen. Creëer projecten die kunnen luisteren, spreken, zien, reageren en interageren met hun omgeving, terwijl je leert hoe moderne AI-systemen werken.
Verken AI-beeldherkenning en objectvolging
Gebruik YOLO, OpenCV en MediaPipe om objecten, kleuren, gezichten en menselijke bewegingen te detecteren en te volgen. Met de gemotoriseerde Pan-Tilt HAT kan de camera doelen automatisch volgen, wat laat zien hoe computervisie en bewegingsbesturing samenwerken.
Spraak-AI met de Fusion HAT+
De Fusion HAT+ vereenvoudigt de aansturing van hardware via een uniforme Python-bibliotheek en ondersteunt het veilig afsluiten van de Raspberry Pi. Dankzij de geïntegreerde microfoon en luidspreker is het eenvoudig om spraakgestuurde assistenten en andere conversatie-AI-toepassingen te ontwikkelen.
Compatibel met Raspberry Pi 5, 4B, 3B+, 3B en Zero 2 W
Ondersteunt diverse cloud-gebaseerde en lokale AI-modellen
Inclusief camera, Pan-Tilt HAT, 10DOF-module, microfoon en luidspreker
Projecten op het gebied van spraak-AI, computer vision, sensoren en elektronica
Videolessen, documentatie en voorbeeldcode
Boek: Physical AI with Raspberry Pi
Aan de hand van de Raspberry Pi en de AI Fusion Lab Kit neemt dit boek je stap voor stap mee: van de basisbeginselen van hardware-interfacing tot de ontwikkeling van intelligente systemen die kunnen zien, luisteren, spreken en beslissingen nemen. Of je nu student, docent, maker of professioneel ingenieur bent, je doet waardevolle ervaring op met projecten die zijn ontworpen om zowel je kennis als je zelfvertrouwen te vergroten.
Het boek begint met de systeeminstallatie, GPIO-programmering, sensoren, displays, motoren en automatiseringstechnieken, en introduceert gaandeweg geavanceerdere onderwerpen zoals spraakherkenning, tekst-naar-spraak-synthese, conversationele AI, objectherkenning en machine learning. Onderweg leer je hoe je spraakgestuurde apparaten, intelligente assistenten, cameravolgsystemen, oplossingen voor omgevingsmonitoring en AI-gestuurde embedded applicaties kunt bouwen.
Verken moderne technologieën zoals OpenAI-diensten, lokale 'large language models' via Ollama, OpenCV, MediaPipe en YOLO-objectdetectie, terwijl je praktische ervaring opdoet met toepassingen uit de praktijk in robotica, industriële automatisering, slimme apparaten en autonome systemen. Je ontdekt hoe intelligente software kan samenwerken met sensoren, camera's, motoren en displays om systemen te creëren die op natuurlijke wijze reageren op hun omgeving.
In plaats van alleen maar codevoorbeelden te volgen, word je aangemoedigd om te experimenteren, aanpassingen te doen en elk project uit te breiden. De technieken en vaardigheden die je in dit boek ontwikkelt, vormen een solide basis voor toekomstige innovatie, snelle prototyping, onderzoek en productontwikkeling. Als je klaar bent om verder te kijken dan traditionele elektronica en de toekomst van intelligente embedded systemen wilt verkennen, begeleidt dit boek je bij elke stap.
Deze bundel bevat:
SunFounder AI Fusion Lab Kit for Raspberry Pi (t.w.v. € 100)
Boek: Physical AI with Raspberry Pi (t.w.v. € 45)
Niet inbegrepen
Raspberry Pi
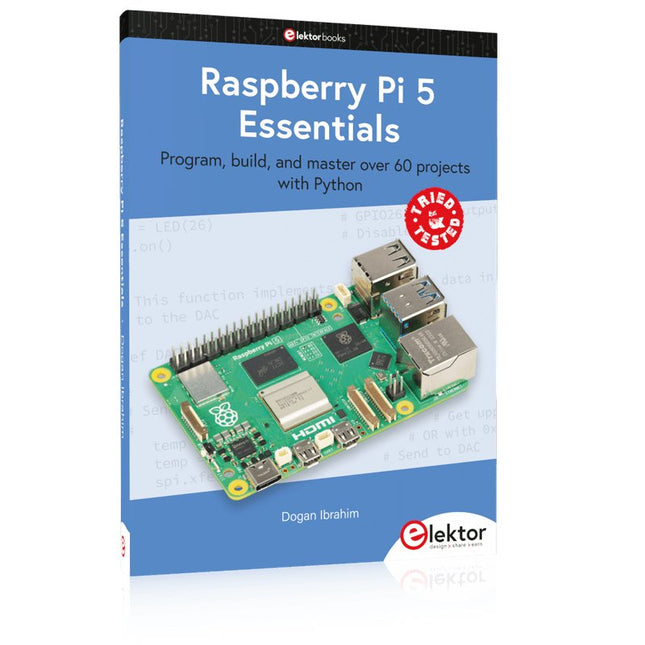
Program, build, and master over 60 projects with Python
The Raspberry Pi 5 is the latest single-board computer from the Raspberry Pi Foundation. It can be used in many applications, such as in audio and video media centers, as a desktop computer, in industrial controllers, robotics, and in many domestic and commercial applications. In addition to the well-established features found in other Raspberry Pi computers, the Raspberry Pi 5 offers Wi-Fi and Bluetooth (classic and BLE), which makes it a perfect match for IoT as well as in remote and Internet-based control and monitoring applications. It is now possible to develop many real-time projects such as audio digital signal processing, real-time digital filtering, real-time digital control and monitoring, and many other real-time operations using this tiny powerhouse.
The book starts with an introduction to the Raspberry Pi 5 computer and covers the important topics of accessing the computer locally and remotely. Use of the console language commands as well as accessing and using the desktop GUI are described with working examples. The remaining parts of the book cover many Raspberry Pi 5-based hardware projects using components and devices such as
LEDs and buzzers
LCDs
Ultrasonic sensors
Temperature and atmospheric pressure sensors
The Sense HAT
Camera modules
Example projects are given using Wi-Fi and Bluetooth modules to send and receive data from smartphones and PCs, and sending real-time temperature and atmospheric pressure data to the cloud.
All projects given in the book have been fully tested for correct operation. Only basic programming and electronics experience are required to follow the projects. Brief descriptions, block diagrams, detailed circuit diagrams, and full Python program listings are given for all projects described.
Elektor GREEN and GOLD members can download their digital edition here.
Not a member yet? Click here.
USB Measurement AdapterTesting Current and Signal Quality of USB Ports
4...20 mA Current Output for Arduino UnoA Reliable, EMI-Insensitive Current Loop Interface
Vacuum Cleaner Automatic ControlKeep Your Tools’ Work Area Clean
DDS Generator with ATtiny
Opamp-Tester V2New PCB – Now Also Suitable for SMDs
550-mW “Lamp” Audio AmplifierGet the Warm Sound of Vacuum Tubes With Ease
Fuse GuardMonitoring a Fuse with a Flashing LED
HQ RIAA PreamplifierGet the Most Out of Your Vinyl Records!
Turntable Speed CalibratorAn Arduino-Based 100–120 Hz Strobe Light Generator
Elektor Classics: video buffer/repeater
Infrared Remote-Controlled DimmerControl Your Halogen or LED Floor Lamp Effortlessly and With Style
How to Use switch…case on Strings in C++/Arduino IDE
Magnet FinderWith a Simple Hall-Effect Sensor
Raspberry Pi Smart Power ButtonA Solution for Raspberry Pi Up to Model 4
Essential Maker TipsProfessional Insights for Everyday Making
Practical Projects with the 555 TimerDC Motor Control and Fast Reaction Challenges
Basic AC-Load-On MonitorSave Energy with a Simple Device
Power Banks in ParallelA Three-Day Continuous Power Solution
VFO Up to 15 MHzAn Implementation With Raspberry Pi Pico
Violin Tuner with ATtiny202
Elektor Classics: video amplifier for B/W television sets
Capacitance Meter20 pF to 600 nF
Quasi-Analog Clockwork Mk IITwo LED Rings for Hours and Minutes
You Can Do Anything You Want(with the Arduino Ecosystem at Your Side)
Neon Lamp Dice
Elektor Classics: RTTY calibrator indicator
Inspiring Hardware Designs for Your ESPs
Elektor Classics: variable 3 A power supply
RGB LEDs with Integrated Control CircuitLight with Precision: ICLEDs Set Standards
Experiment: Towards a Mixed-Signal Theremin?Blending Modern Time-of-Flight Sensors With the Timeless XR2206 Analog Generator
ESP32 Audio Transceiver Board (Part 1)SD Card WAV File Player Demo
Infographics: Circuits and Circuit Design 2025
Small Audio MixerA Simple and Versatile Scalable Design
Smart Staircase Light TimerSave More Money on the Energy Bill!
Smarten Up Your ShuttersControlling Velux Hardware With an ESP32 and MQTT
Solid-State Foot WarmerEnergy-Efficient Comfort
Is the M5Stamp Fly Quadcopter the Next Tello?
Boosting Wi-Fi Range of the ESP32-C3 SuperMiniA Simple and Effective Antenna Mod
ZD-8968 Hot-Air Soldering StationA Budget-Friendly Workhorse or Just Hot Air?
Parking Sensor TesterFinding Defects in the PDC System of a Car
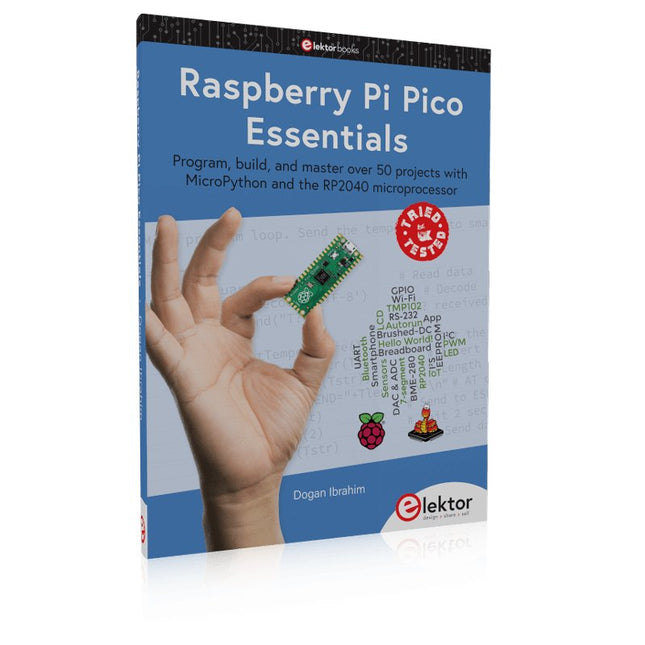
Program, build, and master over 50 projects with MicroPython and the RP2040 microprocessor The Raspberry Pi Pico is a high-performance microcontroller module designed especially for physical computing. Microcontrollers differ from single-board computers, like the Raspberry Pi 4, in not having an operating system. The Raspberry Pi Pico can be programmed to run a single task very efficiently within real-time control and monitoring applications requiring speed. The ‘Pico’ as we call it, is based on the fast, efficient, and low-cost dual-core ARM Cortex-M0+ RP2040 microcontroller chip running at up to 133 MHz and sporting 264 KB of SRAM, and 2 MB of Flash memory. Besides its large memory, the Pico has even more attractive features including a vast number of GPIO pins, and popular interface modules like ADC, SPI, I²C, UART, and PWM. To cap it all, the chip offers fast and accurate timing modules, a hardware debug interface, and an internal temperature sensor. The Raspberry Pi Pico is easily programmed using popular high-level languages such as MicroPython and or C/C++. This book is an introduction to using the Raspberry Pi Pico microcontroller in conjunction with the MicroPython programming language. The Thonny development environment (IDE) is used in all the projects described. There are over 50 working and tested projects in the book, covering the following topics: Installing the MicroPython on Raspberry Pi Pico using a Raspberry Pi or a PC Timer interrupts and external interrupts Analogue-to-digital converter (ADC) projects Using the internal temperature sensor and external temperature sensor chips Datalogging projects PWM, UART, I²C, and SPI projects Using Wi-Fi and apps to communicate with smartphones Using Bluetooth and apps to communicate with smartphones Digital-to-analogue converter (DAC) projects All projects given in the book have been fully tested and are working. Only basic programming and electronics experience is required to follow the projects. Brief descriptions, block diagrams, detailed circuit diagrams, and full MicroPython program listings are given for all projects described. Readers can find the program listings on the Elektor web page created to support the book.
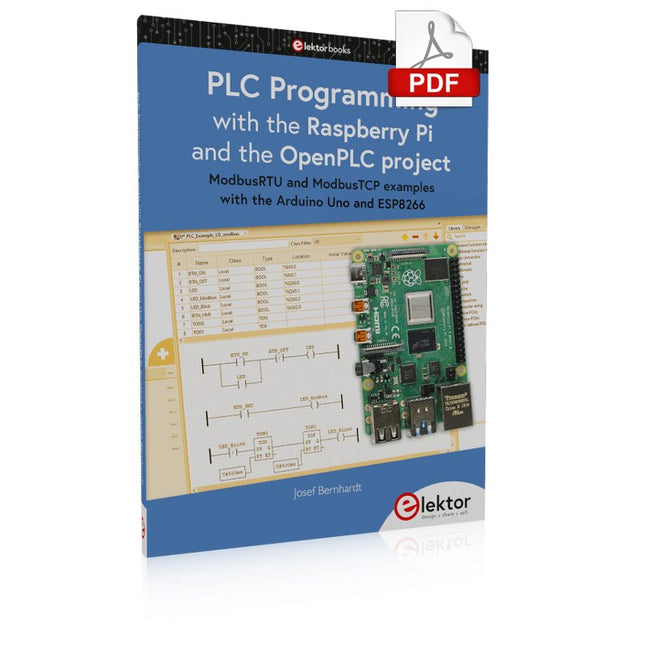
ModbusRTU and ModbusTCP examples with the Arduino Uno and ESP8266
Introduction to PLC programming with OpenPLC, the first fully open source Programmable Logic Controller on the Raspberry Pi, and Modbus examples with Arduino Uno and ESP8266
PLC programming is very common in industry and home automation. This book describes how the Raspberry Pi 4 can be used as a Programmable Logic Controller. Before taking you into the programming, the author starts with the software installation on the Raspberry Pi and the PLC editor on the PC, followed by a description of the hardware.
You'll then find interesting examples in the different programming languages complying with the IEC 61131-3 standard. This manual also explains in detail how to use the PLC editor and how to load and execute the programs on the Raspberry Pi. All IEC languages are explained with examples, starting with LD (Ladder Diagram) over ST (Structured Control Language) to SFC (Special Function Chart). All examples can be downloaded from the author's website.
Networking gets thorough attention too. The Arduino Uno and the ESP8266 are programmed as ModbusRTU or ModbusTCP modules to get access to external peripherals, reading sensors and switching electrical loads. I/O circuits complying with the 24 V industry standard may also be of interest for the reader.
The book ends with an overview of commands for ST and LD. After reading the book, the reader will be able to create his own controllers with the Raspberry Pi.
Vom Messwert zur stabilen Entscheidung
Wie wird aus einem einfachen Mikrocontroller ein intelligentes System, das Sensorwerte erfasst, verarbeitet und sinnvoll darauf reagiert? Dieses Buch zeigt es Ihnen Schritt für Schritt – verständlich, praxisnah und ohne unnötige Vorkenntnisse.
Sie beginnen mit den Grundlagen der digitalen und analogen Ein- und Ausgänge. Anschließend lernen Sie, wie Sensorwerte gelesen, geglättet und zuverlässig bewertet werden. Anschauliche Beispiele erklären, warum einzelne Messwerte oft täuschen können und wie Mittelwertbildung, Hysterese und einfache Entscheidungsregeln für stabile Ergebnisse sorgen. Nach und nach erweitern Sie Ihre Projekte um Displays, I²C-Kommunikation und mehrere vernetzte Mikrocontroller. So entstehen verteilte Systeme, in denen Raspberry Pi Pico und ATtiny-Controller Daten austauschen und gemeinsam Aufgaben übernehmen.
Im fortgeschrittenen Teil erhalten Sie einen leicht verständlichen Einstieg in Merkmalsbildung, Datenvorverarbeitung, hybride Entscheidungsmodelle und TinyML-nahe Anwendungen. Dabei verbinden Sie klassische Regelungstechnik mit modernen datenbasierten Methoden.
Alle Projekte werden von ausführlich kommentierten Programmen in C und MicroPython begleitet. Das Buch richtet sich an Einsteiger, Maker, Studierende und alle, die Embedded-Systeme von Grund auf verstehen möchten.
Am Ende können Sie eigene Systeme entwickeln, die nicht nur messen, sondern Informationen auswerten, zuverlässige Entscheidungen treffen und gezielt reagieren.
Met de Raspberry Pi heeft u voor slechts een paar tientjes een complete computer in handen, waar op eenvoudige wijze allerlei elektronica aangesloten kan worden. In deze 2e herziene en uitgebreide versie gaan we in op een van de sterke kanten van de Raspberry Pi: de combinatie van programmeren en elektronica.
Na een korte introductie van de Raspberry Pi wordt de benodigde software geïnstalleerd. Op de SD-kaart die u bij dit boek kunt aanschaffen, is die allemaal al aanwezig voor de Raspberry Pi. Aan de (optionele) Windows PC kant gebeurt dit met gratis software die u kunt downloaden.
Daarna volgt een beknopte inleiding in het besturingssysteem Linux en gaan we programmeren in Bash, Python en JavaScript. De nadruk ligt hierbij op Python, maar in alle gevallen houden we het kort. We bespreken net voldoende zodat u de projecten kunt begrijpen en aan uw wensen aanpassen, en gaan dan aan de slag met leuke projecten.
Maar liefst 45 spannende en interessante projecten worden in detail besproken en uitgelegd. Van wisselknipperlicht, aansluiten van een elektromotor, het verwerken en maken van analoge signalen tot lichtmeter en temperatuurregeling. Maar ook gecompliceerdere projecten zoals een motorsnelheidsregeling, webserver met CGI, client-server applicaties en Xwindows programma‘s. U kunt dit boek gebruiken als projecten boek en de projecten nabouwen en in de praktijk inzetten. Door de duidelijke uitleg, schema‘s en foto‘s van de opstellingen op een steekbord wordt het nabouwen een erg leuke bezigheid.
RPi
Alle software voor de RPi is voorgeïnstalleerd op een SD-kaart die u bij dit boek kunt aanschaffen. Dat wil zeggen dat alle software en drivers voor SSH, SPI, I²C, GPIO, PWM, muziek, Python Ontwikkelversie, wxPython, IdleX en de seriële verbinding gegarandeerd werken. Tevens staan alle broncodes van de projecten uitdit boek op deze kaart.
Windows-PC
In het gratis download-pakket dat bij dit boek hoort, vindt u de software die in dit boek gebruikt wordt op de Windows-PC handig bij elkaar in een enkel ZIP-bestand. Alle software is gratis. Tevens bevat het pakket een filmpje van de Nutteloze Doos (Useless Machine) van project 13.4.
Software download-pakket
WinOscillo
Putty
Xming
WinSCP
DiskImager
Notepad2
IdleX
Useless Box film
Specificaties
Dubbele ARM Cortex-M0+ @ 133 MHz
264 kB on-chip SRAM in zes onafhankelijke banken
Ondersteuning tot 16 MB off-chip Flash memory via speciale QSPI bus
DMA-controller
Volledig aangesloten AHB crossbar
Interpolator en integer divider peripherals
On-chip programmeerbare LDO om spanning voor de core te genereren
2x on-chip PLL's om USB en core kloksignalen te genereren
30x GPIO pins, waarvan er 4 als analoge ingangen kunnen worden gebruikt
Randapparatuur
2x UARTs
2x SPI controllers
2x I²C controllers
16x PWM kanalen
USB 1.1 controller en PHY, met host en device support
8x PIO state machines
Wat je krijgt
10x RP2040 ICs
Deze complete programmeercursus voor de ESP32-microcontroller bevat een leerboek, een componentenkit, praktijkgerichte projecten en een uitgebreide online cursus met simulaties. Ideaal om stap voor stap embedded systems te leren programmeren met Arduino via een praktische, hands-on aanpak.
Een praktische introductie tot embedded systems met de ESP32
Deze cursus is ontworpen voor beginners in embedded systems die op zoek zijn naar een gestructureerde en voorbeeldgerichte start.
Een kit met LED’s en weerstanden, schakelaars, sensoren en actuatoren, displays, een breadboard en draden is inbegrepen. Deze worden in de cursus gebruikt om voorbeeldtoepassingen te demonstreren.
Er is geen voorkennis van Arduino of embedded ontwikkeling vereist. Elke sectie bevat praktische voorbeelden en mini-projecten om belangrijke concepten te versterken en verdere verkenning te stimuleren. Aan het einde van de cursus kunt u niet alleen de voorbeelden reproduceren, maar ook uitbreiden met uw eigen ideeën en toepassingen.
Wat leert u?
Microcontroller programmeren met de ESP32 via de Arduino IDE
Werken met digitale I/O, knoppen en encoders uitlezen, LED’s en relais aansturen
Analoge ingangen, spanningen en sensoren uitlezen
Genereren van analoge uitgangssignalen en PWM
Gebruik van seriële communicatie zoals UART, I²C en SPI om displays aan te sturen en digitale sensoren en SD-kaarten uit te lezen
Tijdbeheer
Werken met interrupts
Realtime sensorinput en besturing via knoppen, LED’s en displays
Aansturen van actuatoren zoals relais en servomotoren
Voor wie is dit?
Studenten en zelflerenden die embedded systems willen ontdekken
Makers en IoT-enthousiastelingen die hun hardwarevaardigheden willen verbeteren
Docenten en trainers die kant-en-klaar lesmateriaal zoeken
Wat zit er in de doos?
Toegang tot de volledige cursus op het Elektor Academy Pro leerplatform
ESP32 microcontrollerboard + USB-kabel
Boek: Programming Microcontrollers in C/C++ Using Arduino
Downloadbare projectbestanden voor elke module
Componentenkit:
2× LED, rood, 5 mm
LED, groen, 5 mm
3× weerstand, 470 Ω, 0,25 W
LDR
Potentiometer, 10 kΩ, lineair
Drukknop
Rotary encoder module
Relaismodule
DHT22 temperatuur- en vochtigheidssensor
TM1637-compatibel 4-digit 7-segment display
MPU-6050 IMU met headers
SSD1306-compatibel I²C OLED display
Micro SD-kaartadapter met header
Buzzer
SG90 micro servo
ILI9341-compatibel SPI 240×320 TFT display
20× jumper wires
Breadboard
Alle programmeercursussen (en verschillen in inhoud)
Cursus
Arduino
Raspberry Pi Pico with Arduino C/C++
ESP32 with Arduino C/C++
Raspberry Pi Pico with MicroPython
ESP32 with MicroPython
Online cursus
Access to Arduino Course
Access to Pico with Arduino C/C++ Course
Access to ESP32 with Arduino C/C++ Course
Access to Pico with MicroPython Course
Access to ESP32 with MicroPython Course
Board
Uno R3
Raspberry Pi Pico
ESP32
Raspberry Pi Pico
ESP32
Boek
Programming Microcontrollers in C/C++ Using Arduino
Programming Microcontrollers in C/C++ Using Arduino
Programming Microcontrollers in C/C++ Using Arduino
Programming Microcontrollers in MicroPython
Programming Microcontrollers in MicroPython
Kit
40-delige componenten-kit
40-delige componenten-kit
40-delige componenten-kit
40-delige componenten-kit
40-delige componenten-kit
Bouw je eigen vintage radiozender
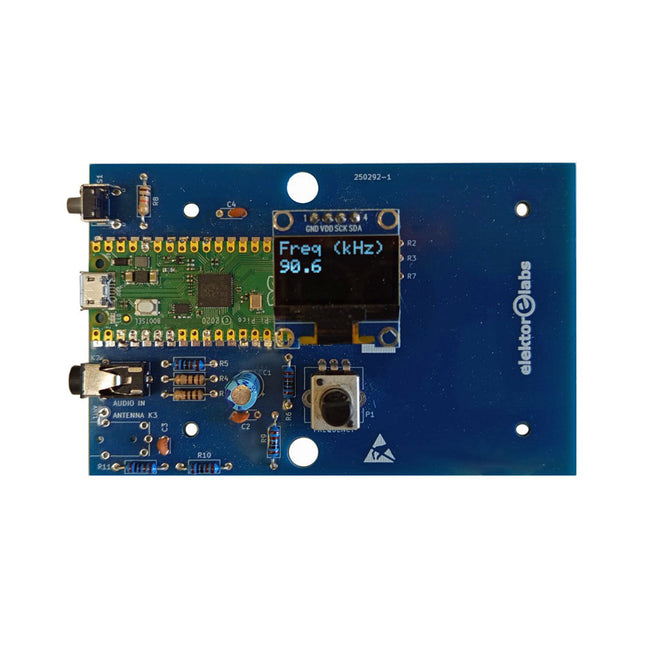
De Elektor AM-zender kit maakt het mogelijk om audio te streamen naar vintage AM-radiotoestellen. Gebaseerd op een Raspberry Pi Pico microcontroller-module kan de AM-zender uitzenden op 32 frequenties in de AM-band, van 500 kHz tot 1,6 MHz in 32 stappen van ca. 35 kHz.
De frequentie wordt gekozen met een potentiometer en weergegeven op een 0,96" OLED-display. Een drukknop maakt het mogelijk om de zendmodus te schakelen tussen Aan en Uit. Het bereik van de zender hangt af van de antenne. De ingebouwde antenne biedt een bereik van enkele centimeters, waardoor de AM-zender dicht bij of in de radio moet worden geplaatst. Een externe lusantenne (niet inbegrepen) kan worden aangesloten om het bereik te vergroten.
De Elektor AM-zender kit wordt geleverd als een bouwpakket dat je zelf op de printplaat moet solderen.
Kenmerken
De printplaat is compatibel met een Hammond 1593N-behuizing (niet inbegrepen).Een 5 VDC-voeding met micro-USB-connector (bijv. een oude telefoonoplader) is nodig om de kit van stroom te voorzien (niet inbegrepen). Stroomverbruik: 100 mA.
De Arduino-software (vereist het RP2040-boards-pakket van Earle Philhower) voor de Elektor AM-zenderkit plus meer informatie is beschikbaar op de Elektor Labs-pagina van dit project.
Componentenlijst
Weerstanden
R1, R4 = 100 Ω
R2, R3, R8 = 10 kΩ
R5, R6, R9, R10, R11 = 1 kΩ
R7 = optioneel (niet inbegrepen)
P1 = potentiometer 100 kΩ, lineair
Condensatoren
C1 = 22 µF 16V
C2, C4 = 10 nF
C3 = 150 pF
Diversen
K1 = 4×1 pinheader
K2, K3 = 3,5 mm-aansluiting
Raspberry Pi Pico
Drukknop, haaks gemonteerd
0,96" monochroom I²C OLED-display
PCB 150292-1
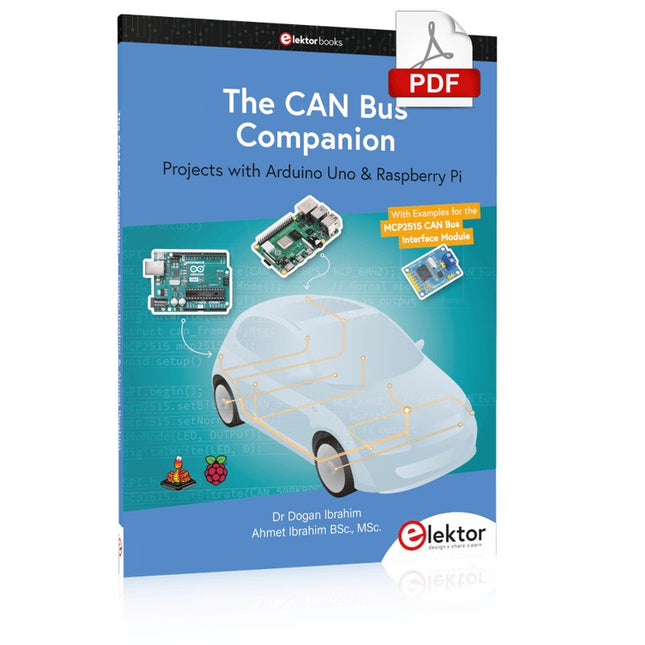
Projects with Arduino Uno & Raspberry Pi with Examples for the MCP2515 CAN Bus Interface Module
This book details the use of the Arduino Uno and the Raspberry Pi 4 in practical CAN bus based projects. Using either the Arduino Uno or the Raspberry Pi with off-the-shelf CAN bus interface modules considerably ease developing, debugging, and testing CAN bus based projects.
This book is written for students, practicing engineers, enthusiasts, and for everyone else wanting to learn more about the CAN bus and its applications. The book assumes that the reader has some knowledge of basic electronics. Knowledge of the C and Python programming languages and programming the Arduino Uno using its IDE and Raspberry Pi will be useful, especially if the reader intends to develop microcontroller-based projects using the CAN bus.
The book should be a useful source of reference material for anyone interested in finding answers to questions such as:
What bus systems are available for the automotive industry?
What are the principles of the CAN bus?
How can I create a physical CAN bus?
What types of frames (or data packets) are available in a CAN bus system?
How can errors be detected in a CAN bus system and how dependable is a CAN bus system?
What types of CAN bus controllers exist?
How do I use the MCP2515 CAN bus controller?
How do I create 2-node Arduino Uno-based CAN bus projects?
How do I create 3-node Arduino Uno-based CAN bus projects?
How do I set the acceptance masks and acceptance filters?
How do I analyze data on the CAN bus?
How do I create 2-node Raspberry Pi-based CAN bus projects?
How do I create 3-node Raspberry Pi-based CAN bus projects?