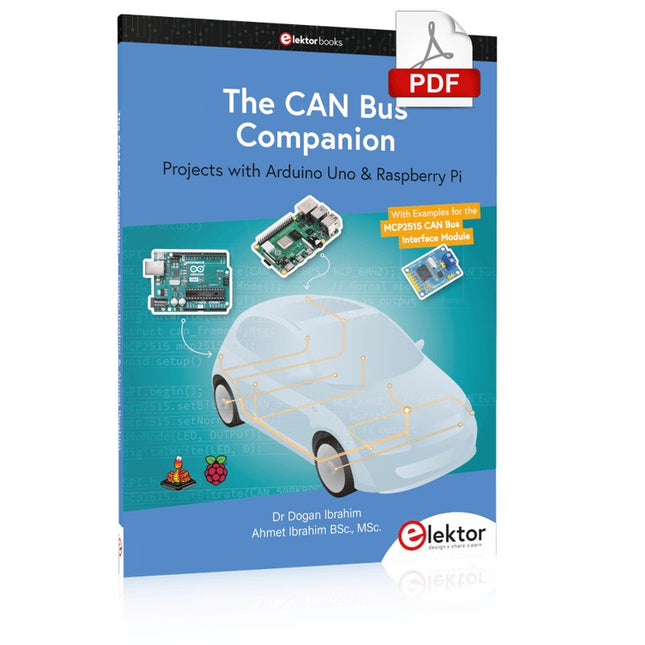
Projects with Arduino Uno & Raspberry Pi with Examples for the MCP2515 CAN Bus Interface Module
This book details the use of the Arduino Uno and the Raspberry Pi 4 in practical CAN bus based projects. Using either the Arduino Uno or the Raspberry Pi with off-the-shelf CAN bus interface modules considerably ease developing, debugging, and testing CAN bus based projects.
This book is written for students, practicing engineers, enthusiasts, and for everyone else wanting to learn more about the CAN bus and its applications. The book assumes that the reader has some knowledge of basic electronics. Knowledge of the C and Python programming languages and programming the Arduino Uno using its IDE and Raspberry Pi will be useful, especially if the reader intends to develop microcontroller-based projects using the CAN bus.
The book should be a useful source of reference material for anyone interested in finding answers to questions such as:
What bus systems are available for the automotive industry?
What are the principles of the CAN bus?
How can I create a physical CAN bus?
What types of frames (or data packets) are available in a CAN bus system?
How can errors be detected in a CAN bus system and how dependable is a CAN bus system?
What types of CAN bus controllers exist?
How do I use the MCP2515 CAN bus controller?
How do I create 2-node Arduino Uno-based CAN bus projects?
How do I create 3-node Arduino Uno-based CAN bus projects?
How do I set the acceptance masks and acceptance filters?
How do I analyze data on the CAN bus?
How do I create 2-node Raspberry Pi-based CAN bus projects?
How do I create 3-node Raspberry Pi-based CAN bus projects?
Diese Ausgabe steht allen GOLD- und GREEN-Mitgliedern auf der ElektorMagazine-Website zum Download bereit!
Sie sind noch kein Mitglied? Hier klicken!
USB-MessadapterStrom und Signalqualität von USB-Anschlüssen testen
4...20 mA Stromausgang für Arduino UnoEine zuverlässige, EMI-unempfindliche Stromschleifenschnittstelle
Automatische StaubsaugersteuerungHalten Sie den Arbeitsbereich Ihrer Werkzeuge sauber
DDS-Generator mit ATtiny
Opamp-Tester V2Neue Platine – nun auch für SMDs geeignet
550-mW-„Lamp“-AudioverstärkerDer warme Klang von Röhren – ganz einfach
SicherungswächterSicherung mit Blink-LED überwachen
Hochwertiger RIAA-VorverstärkerHolen Sie das Beste aus Ihren Vinyl-Schallplatten heraus!
Drahzahlkalibrator für PlattenspielerEin Arduino-basierter Stroboskopgenerator mit 100–120 Hz
Infrarot-fernbedienbarer DimmerSteuern Sie Ihre Halogen- oder LED-Stehleuchte mühelos und mit Stil
Wie man switch…case mit Strings in C++/Arduino IDE verwendet
Magnetfindermit einfachem Hall-Effekt-Sensor
Intelligenter Einschaltknopf für Raspberry PiEine Lösung für Raspberry Pi bis zum Modell 4
Essenzielle Maker-TippsProfessionelle Einblicke für den Maker-Alltag
Praktische Projekte mit dem 555-TimerGleichstrommotorsteuerung und Reaktionszeitschallungen
Einfacher AC-Last-Ein-MonitorEnergie sparen mit einem einfachen Gerät
Powerbanks parallel schaltenEine durchgehende Stromversorgung für drei Tage
VFO bis 15 MHzMit Raspberry Pi Pico
Geigen-Stimmgerät mit ATtiny202
Elektor Classics: Video-Eingangsverstärker für S/W-Fernseher
Kapazitätsmesser20 pF bis 600 nF
Quasi-analoges Uhrwerk MkIIZwei LED-Ringe für Stunden und Minuten
Sie können alles tun, was Sie wollen(mit dem Arduino-Ökosystem an Ihrer Seite)
Neon-Würfel mit Glimmlampen
Elektor Classics: Video-Verstärker
Inspirierende Hardware-Designs für Ihre ESPs
Elektor Classics: RTTY-Abgleichanzeige
RGB-LEDs mit integrierter SteuerschaltungLicht mit Präzision: ICLEDs setzen Maßstäbe
Experiment: Auf dem Weg zu einem Mixed-Signal-Theremin?Moderne Time-of-Flight-Sensoren im Zusammenspiel mit dem zeitlosen XR2206-Analoggenerator
ESP32-Audio-Transceiver-Board (Teil 1)SD-Karten-WAV-Player-Demo
Infografiken: Schaltungen & Schaltungsdesign 2025
Kleiner Audio-MixerEinfaches und vielseitiges skalierbares Design
Intelligenter Treppenlicht-TimerEffiziente Lichtsteuerung zur Reduzierung des Energieverbrauchs
Machen Sie Ihre Rollläden smartVelux-Hardware steuern mit ESP32 und MQTT
Solid-State-FußwärmerEnergieeffizienter Komfort
Ist der M5Stamp Fly Quadcopter der nächste Tello?
Erhöhung der WLAN-Reichweite des ESP32-C3 SuperMiniEine einfache und wirkungsvolle Antennenmodifikation
ZD-8968 Heißluft-LötstationEin preisgünstiges Arbeitstier oder nur heiße Luft?
Parksensor-TesterDefekte beim PDC-System am Auto finden
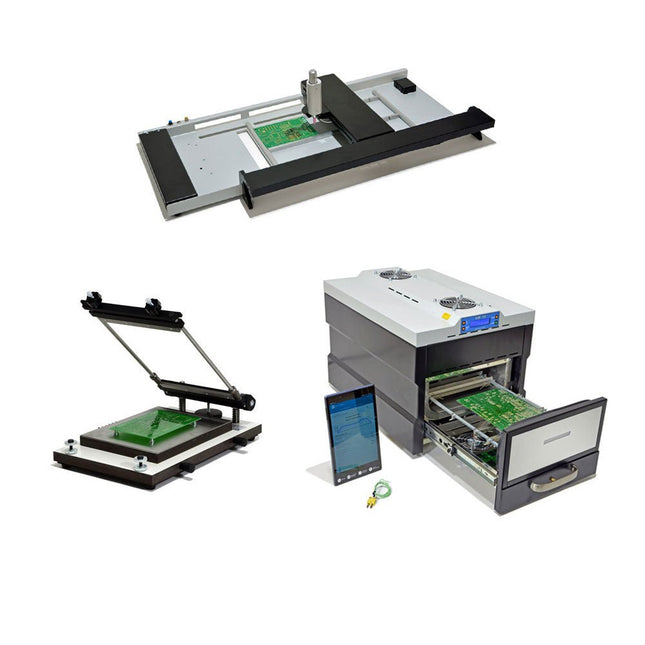
De SMD Starter I prototype-productielijn bestaat uit de TSD240 stencilprinter, de PlaceMAN SMD-plaatsingsmachine en de 3LHR10 reflow-oven. Stencilprinter SD240 (+ metalen rakel 155 mm) Stencilformaat: max. 175 x 255 mm Boardformaat: max. 180 x 240 mm Afmetingen basiseenheid: 410 x 270 x 110 mm Gewicht: 6,7 kg incl. metalen rakel 155 mm incl. 8 magneten om de printplaat vast te houden, waarvan 6 met M3-instelschroef incl. transparante plaatsingshulp en viltstift Handmatige SMD-plaatsingsmachine PlaceMAN voor standaardcomponenten incl. vacuümpomp (zonder feeders, camera, monitor en dispenser) Uitgerust met soepel lopende plaatsingsarm, plaatsingskop met eenhandsbediening, rotatie van de Z-as en automatische vacuümafsluiting, incl. printplaathouder, vacuümunit en 2 plaatsingsmondstukken met rubberen zuignappen. Capaciteit feeders (niet inbegrepen) 2x invoercassette voor 10 x 8 mm rollen links 4x invoercassette voor toevoereenheden van elk 5 magazijnen Verdere toevoersystemen zijn mogelijk binnen het plaatsingsgebied, bijvoorbeeld een insteeksysteem voor strooktoevoer. Afmetingen Basiseenheid (LxBxH): 765 x 390 x 210 mm Met invoercassette voor 10 x 8 mm rollen (LxBxH): 765 x 390 x 210 mm Met voedingscassette voor 10 x 8 mm rollen en voedingscassette voor magazijninvoer (LxBxH): 765 x 430 x 210 mm (hoogte kan variëren afhankelijk van de lengte van het magazijn) Met voedingscassette voor 10 x 8 mm rollen incl. houder voor 10 rollen en voedingscassette voor magazijninvoer (LxBxH): 765 x 430 x 210 mm (hoogte kan variëren afhankelijk van de lengte van het magazijn) Specificaties Gewicht basiseenheid: ca. 6 kg As verplaatsing (x,y,z): 470 x 230 x 15 mm Max. Werkgebied: 380 x 240 mm Max. PCB-formaat: 230 x 360 mm Voeding Netadapter: 230/12 V, 800 mA Voeding vacuümpomp: 230 V, 6 W 3LHR10 Reflow Oven (programmeerbaar voor loodvrij solderen met handmatige lade en met tabletbediening) Reflow-oven met IR- en convectieverwarming. Geforceerde hete lucht convectie zorgt voor een gelijkmatig temperatuurprofiel in de hele oven. Na het handmatige openen van de afsluiting worden de ventilatoren ingeschakeld en wordt de gesoldeerde printplaat snel afgekoeld. Kleine reflow-oven met handmatige opening Klaar voor Industrie 4.0, Bluetooth-communicatie + tablet IR + convectieverwarming. Android-app voor verbinding met tablet of smartphone 100 verschillende gebruikersprogramma's Leveringsomvang: 3LHR10, tablet met app, beschermhoes voor tablet, 4 printplaathouders, extern thermokoppel, handleiding in tablet Toepassing Sluit de oven aan op het elektriciteitsnet en sluit de optioneel verkrijgbare afzuigunit (3LFE10S) aan op de luchtafvoeraansluiting. Na de eerste keer inschakelen zoekt de oven naar een tablet of smartphone. Wanneer beide verbonden zijn in de Android-app, selecteer je de programmering van de oven. Hier kunnen de temperatuur en voorverwarmingstijd worden ingesteld, evenals andere dingen. Registreer je met de tablet om de software in zijn geheel te kunnen gebruiken. Als de oven al geprogrammeerd is, kan de gebruiker het proces bedienen met de knoppen en het display aan de voorkant. Er klinkt een toon wanneer het reflow proces is voltooid. Er wordt ook een signaal weergegeven op de tablet/smartphone. De lade moet nu handmatig worden geopend. De Android-app geeft de processtatus, tijd en temperatuur of andere informatie weer. Specificaties Netaansluiting: 230 V, 50 Hz Maximaal vermogen: 3100 W Temperaturen: 50-260°C Afmetingen: 510 x 370 x 340 mm Maximaal gewicht: 16 kg Afmetingen rooster: 350 x 220 mm Maximale afmetingen van de printplaat: 300 x 200 mm Maximale componenthoogte op de PCB: 50 mm boven, 30 mm onder Leveringsomvang Stencilprinter TSD240 SMD-plaatsingsmachine PlaceMAN Reflow-oven 3LHR10
Dit bundel bevat de populaire Elektor zandklok voor Raspberry Pi Pico en de nieuwe Elektor laserkop upgrade, en biedt daarmee nog meer mogelijkheden om de tijd weer te geven. U kunt de actuele tijd nu niet alleen in zand "graveren", maar ook op een lichtgevende folie schrijven of groene tekeningen maken.
Inhoud van de bundel
Elektor Zandklok voor Raspberry Pi Pico (normale prijs: € 50)
Elektor Laserkop Upgrade voor Zandklok (normale prijs: € 35)
Zandklok voor Raspberry Pi (een op de Raspberry Pi Pico gebaseerde Eye Catcher)
Een standaard zandklok laat meestal slechts zien hoe de tijd verstrijkt. Deze door een Raspberry Pi Pico aangestuurde zandklok toont daarentegen de exacte tijd door de vier cijfers voor uren en minuten in een zandlaag te "graveren". Na een vooraf ingestelde periode wordt het zand door twee trilmotoren vlak getrild en begint alles weer van voren af aan.
Het hart van de zandklok wordt gevormd door twee servomotoren, die via een pantograafmechanisme een schrijfpen aandrijven. Een derde servomotor tilt deze pen op en neer. Het zandbakje is voorzien van twee trilmotoren om het zand weer vlak te trillen. Het elektronische deel van de zandklok bestaat uit een Raspberry Pi Pico en een RTC/driverbord met een real-time klok, plus drivercircuits voor de servomotoren.
Een gedetailleerde bouwhandleiding is beschikbaar via download.
Kenmerken
Afmetingen: 135 x 110 x 80 mm
Bouwtijd: ca. 1,5 tot 2 uur
Inbegrepen
3x Voorgesneden acrylaatplaten met alle mechanische onderdelen
3x Mini servomotoren
2x Trilmotoren
1x Raspberry Pi Pico
1x RTC/driverkaart met geassembleerde onderdelen
Moeren, boutjes, afstandhouders en draden voor de montage
Fijnkorrelig wit zand
Elektor Laserkop Upgrade voor Zandklok
De nieuwe Elektor Laserkop transformeert de Elektor Zandklok in een klok die de tijd op glow-in-the-dark-film schrijft in plaats van op zand. Naast het weergeven van de tijd kan het ook worden gebruikt om kortstondige tekeningen te maken. De 5 mW laserpointer, met een golflengte van 405 nm, produceert heldergroene tekeningen op de glow-in-the-dark-film. Voor het beste resultaat gebruikt u de kit in een slecht verlichte kamer. Waarschuwing: Kijk nooit rechtstreeks in de laserstraal!
De kit bevat alle benodigde componenten, maar het solderen van drie draden is vereist.
Opmerking: Deze kit is ook compatibel met de originele Arduino-gebaseerde Zandklok uit 2017. Voor meer details, zie Elektor 1-2/2017 en Elektor 1-2/2018.
Program and build Arduino-based ham station utilities, tools, and instruments
In addition to a detailed introduction to the exciting world of the Arduino microcontroller and its many variants, this book introduces you to the shields, modules, and components you can connect to the Arduino. Many of these components are discussed in detail and used in the projects included in this book to help you understand how these components can be incorporated into your own Arduino projects. Emphasis has been placed on designing and creating a wide range of amateur radio-related projects that can easily be built in just a few days.
This book is written for ham radio operators and Arduino enthusiasts of all skill levels, and includes discussions about the tools, construction methods, and troubleshooting techniques used in creating amateur radio-related Arduino projects. The book teaches you how to create feature-rich Arduino-based projects, with the goal of helping you to advance beyond this book, and design and build your own ham radio Arduino projects.
In addition, this book describes in detail the design, construction, programming, and operation of the following projects:
CW Beacon and Foxhunt Keyer
Mini Weather Station
RF Probe with LED Bar Graph
DTMF Tone Encoder
DTMF Tone Decoder
Waveform Generator
Auto Power On/Off
Bluetooth CW Keyer
Station Power Monitor
AC Current Monitor
This book assumes a basic knowledge of electronics and circuit construction. Basic knowledge of how to program the Arduino using its IDE will also be beneficial.
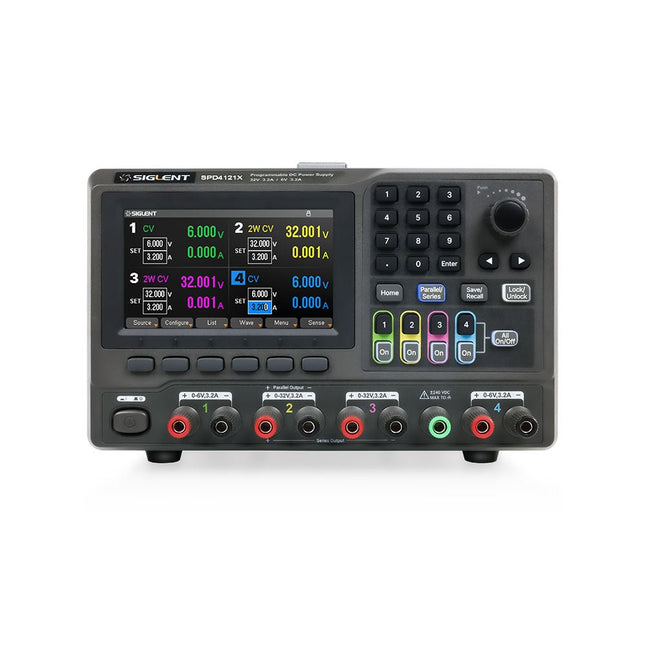
The Siglent SPD4121X is a 4-channel DC Linear Programmable Power Supply equipped with a 4.3-inch TFT-LCD display, friendly human-machine interface, and excellent performance indicators. Real-time waveform display provides engineers with an informative user interface.
SPD4121X offers a total output power of 285 W with a resolution of 1 mV/1 mA. The maximum voltage and current for each channel are as follows:
CH1: 15 V/1.5 A
CH2: 12 V/10 A
CH3: 12 V/10 A
CH4: 15 V/1.5 A
Kenmerken
Rated output power: 285 W
Rated voltage: 32 V, 12 V, 30 V
Up to four high-precision power supplies with independent controllable outputs, supporting CH2 and CH3 series and parallel connections
Clear graphical interface with waveform and timer display modes
5-digit voltage and current display with minimum resolution of 1 mV, 1 mA
Fast output response time: <50us
The high current channel support remote voltage compensation sense function. The maximum compensation voltage is 0.6 V
Overvoltage protection and overcurrent protection or safe and accurate operation
Equipped with a 4.3-inch TFT-LCD display (480 x 272 resolution)
USB and LAN standard communication
USB-GPIB module is optional
Excellent channel density with up to 4 channels in a 3U half rack package
Internal data storage for setups and parameters
Embedded Web Server with instrument communication that doesn’t require software installation
Fully SCPI programming command set support as well as a LabView driver for remote control and system automation
Specificaties
SPD4323X
SPD4121X
SPD4306X
Channel Output
CH1: Voltage 0 to 6 V Current 0 to 3.2 ACH2: Voltage 0 to 32 V Current 0 to 3.2 ACH3: Voltage 0 to 32 V Current 0 to 3.2 ACH4: Voltage 0 to 6 V Current 0 to 3.2 A
CH1: Voltage 0 to 15 V Current 0 to 1.5 ACH2: Voltage 0 to 12 V Current 0 to 10 ACH3: Voltage 0 to 12 V Current 0 to 10 ACH4: Voltage 0 to 15 V Current 0 to 1.5 A
CH1: Voltage 0 to 15 V Current 0 to 1.5 ACH2: Voltage 0 to 30 V Current 0 to 6 ACH3: Voltage 0 to 30 V Current 0 to 6 ACH4: Voltage 0 to 15 V Current 0 to 1 A
Resolution
1 mV, 1 mA
1 mV, 1 mA
1 mV, 1 mA
Setting Accuracy
Voltage: ±(0.03% of reading+10) mV, Current: ±(0.3% of reading+10) mA
Voltage: ±(0.03% of reading+10) mV, Current: ±(0.3% of reading+10) mA
Voltage: ±(0.03% of reading+10) mV, Current: ±(0.3% of reading+10) mA
Readback Accuracy
Voltage: ±(0.03% of reading+10) mV, Current: ±(0.3% of reading+10) mA
Voltage: ±(0.03% of reading+10) mV, Current: ±(0.3% of reading+10) mA
Voltage: ±(0.03% of reading+10) mV, Current: ±(0.3% of reading+10) mA
Display
4.3" TFT-LCD 5-digit voltage and current display
4.3" TFT-LCD 5-digit voltage and current display
4.3" TFT-LCD 5-digit voltage and current display
Output power
240 W
285 W
400 W
Inbegrepen
1x Siglent SPD4121X Power Supply
1x Power cord (EU)
1x Output test cord (3 A)
1x USB cable
1x Quick start guide
Downloads
Datasheet
Manual
Quick start
Dit boek bevat 50 leuke en spannende projecten met PIC microcontrollers zoals een laser alarm, USB plaagmuis, eierwekker, jongerenverjager, geluidsschakelaar, capacitieve vloeistofniveau meting, 'vinger in het water' sensor, bewaking van een ruimte met een camera, 220 volt lichtdimmer, pratende microcontroller en nog veel meer. Er komen talloze technieken aan de orde zoals relais, wisselstroomregeling (ook 220 volt), I2C, SPI, RS232, USB, puls breedte modulatie, rotary encoder, interrupts, infrarood, analoog-digitaal conversie (en andersom), 7-segment display en zelfs CAN bus.
U kunt dit boek gebruiken om de verschillende projecten na te bouwen en daarna in de praktijk te brengen. Door de duidelijke uitleg, schema's en zelfs foto's van de opstelling is het nabouwen een leuke bezigheid. Bij ieder project wordt uitgelegd waarom het juist op die manier is uitgevoerd, en wordt kort de theorie behandeld. U kunt dit boek dus gebruiken als studieboek, of als basis voor grotere en ingewikkeldere projecten. Alle schakelingen zijn op een steekbord uitgevoerd zodat uitbreiden en aanpassen gemakkelijk is.
De drie PIC microcontrollers die in dit boek gebruikt worden, zijn de 16f877A, 18f4455 en 18f4685. Daarnaast komt aan de orde hoe u de programma's van de ene naar de andere microcontroller kunt overzetten (er worden 15 types ondersteund) inclusief twee praktijkvoorbeelden.
Alle benodigde software kunt u gratis downloaden. Dat geldt ook voor de open source programmeertaal JAL. Deze krachtige maar toch eenvoudig te leren taal wordt zowel door hobbyisten als professionals gebruikt.
Dit boek is ook goed te gebruiken als naslagwerk. U kunt er de uitleg van alle opdrachten van de programmeertaal JAL in terugvinden, en tevens van de gebruikte uitbreidingsbibliotheken. Via de index vindt u gemakkelijk projecten die als voorbeeld kunnen dienen voor de belangrijkste JAL opdrachten. Zelfs wanneer u alle projecten een keer gemaakt hebt, zal dit boek nog lang een plekje naast uw PC behouden.
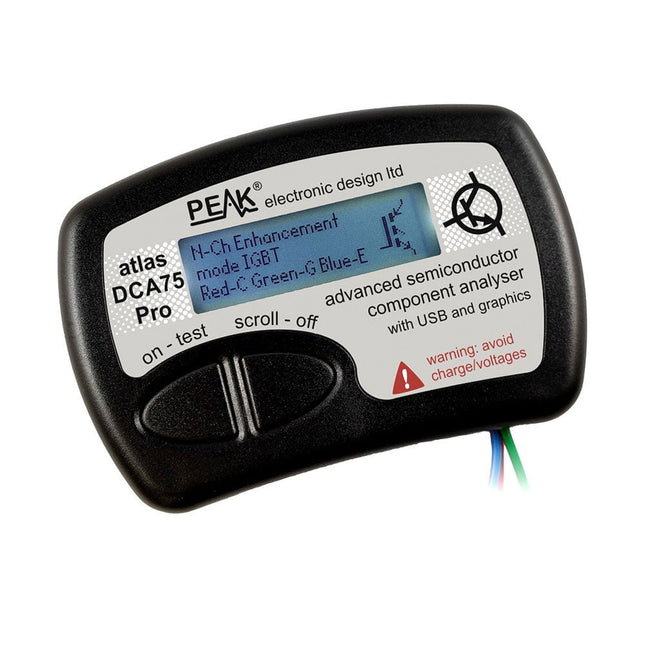
The DCA75 Pro is a great instrument that combines ease-of-use with amazing features. It can automatically identify a huge range of semiconductors, automatically identify pinouts and measure detailed parameters.
Kenmerken
Built-in graphics display (now backlit) to show detailed schematic of the component you're testing as well as pinout and measurement data.
USB connectivity to allow curve tracing, data storage/retrieval and device matching on your Windows PC (Windows 7 and higher).
Single internal AAA alkaline cell for standalone operation.
Component Support
Bipolar transistors (NPN/PNP inc Silicon/Germanium)
Darlington transistors (NPN/PNP)
Enhancement mode MOSFETs (N-Ch and P-Ch)
Depletion mode MOSFETs (N-Ch and P-Ch)
Junction FETs (N-Ch and P-Ch). Both symmetrical and asymmetrical types
Enhancement IGBTs (N-Ch and P-Ch)
Diodes and diode networks (2 and 3 lead types)
Zener diodes (up to about 9 V)
Voltage regulators (up to about 8 V)
LEDs and bi-colour LEDs (2 lead and 3 lead types)
Low power sensitive Triacs and Thyristors (<10 mA trigger and hold)
Measurements
BJT current gain (hFE)
BJT base emitter voltage (Vbe)
BJT collector leakage current
MOSFET on and off gate threshold voltages
MOSFET transconductance
JFET pinch-off voltage
JFET transconductance
JFET IDSS (drain current for Vgs=0)
IGBT on and off gate threshold voltages
IGBT transconductance
Voltage regulator output voltage
Voltage regulator quiescent current consumption
Voltage regulator drop-out voltage
Zener voltage
Diode forward voltage drop
Specificaties
Analyzer type
Semiconductor components
Component detection
Automatic
Pinout detection
Automatic, connect any way round
Display type
Graphic LCD (now backlit)
Interface type
USB for optional PC connection
PC functions
Curve tracing (Windows 7 and higher)
Software
Included on USB drive for Windows 7 and higher
Battery
Single AAA cell (supplied)
Inbegrepen
Peak Atlas DCA75 Pro
PC software on a USB Flash Drive for Windows 11, 10, 8, 7, XP
Micro USB cable
Fitted universal premium hook probes
AAA Alkaline battery
Downloads
Datasheet (EN)
User Guide (EN)
Software Installation Guide (EN)
Software and Firmware Package
The tinySA Ultra+ ZS-407 is a compact, handheld spectrum analyzer and signal generator. Covering 100 kHz to 7.3 GHz in Ultra mode, it lets you visualize and analyze RF signals from HF right through many modern wireless bands – and can even spot signals up to ~12 GHz thanks to harmonic tracking.
The intuitive 4-inch resistive touchscreen and rechargeable battery make it great for fieldwork, while features like a built-in signal generator, switchable bandpass filters, step attenuator, USB-PC control and auto-calibration add serious versatility.
Kenmerken
Screen size: 4 inch (480 x 320)
Spectrum Analyzer for 0.1-900 MHz or, with Ultra mode enabled up to 7.3 GHz, level calibrated up to 7.3 GHz. Can observe signals up to 12 GHz
Signal Generator with sine wave output between 0.1-900 MHz or square wave up to 6.3 GHz or RF test signal output up to 7.3 GHz when not used as Spectrum Analyzer.
Switchable resolution bandpass filters from 200 Hz to 850 kHz
Built-in 20 dB optional LNA
Color display showing max 450 points providing gapless covering up to the full frequency range.
MicroSD card slot for storing measurements, settings and screen captures.
Specificaties (Spectrumanalyzer)
Input frequency range from 100 kHz to 900 MHz in normal mode and up to 7.3 GHz with ULTRA mode enabled
Input impedance 50 ohm when input attenuation set to 10 dB or more.
Selectable manual and automatic input attenuation between 0 dB and 31 dB in 1 dB steps when LNA not active
Maximum +/-5V DC input
Absolute maximum input level of +6 dBm with 0 dB internal attenuation
Absolute maximum short term peak input power of +20 dBm with 30 dB internal attenuation
Suggested maximum input power of +0 dBm with internal attenuation in automatic mode
For best measurements keep input power below -25 dBm
Input Intercept Point of third order modulation products (IIP3) of +15 dBm with 0 dB internal attenuation
1 dB compression point at -1 dBm with 0 dB internal attenuation
Power detector resolution of 0.5 dB and linearity versus frequency of ±2 dB below 5.3 GHz, ±5dB between 5.3 GHz and 6 GHz
Minimum burst length for correct level measurement at 850 kHz RBW in zero span mode of 50 microseconds
Absolute power level accuracy after power level calibration of ±2 dB
Built-in optional 20 dB LNA with Noise Figure of 5 dB up to 6 GHz
Lowest discernible signal without LNA at 30 MHz using a resolution bandwidth of 30 kHz of -102 dBm
Lowest discernible signal with LNA at 30 MHz using a resolution bandwidth of 200 Hz of -145 dBm
Frequency accuracy equal to the selected resolution bandwidth
Phase noise at 30 MHz of -108 dB/Hz at 100 kHz offset and -115 dB/Hz at 1MHz offset
Spur free dynamic range when using a 30 kHz resolution bandwidth of 70 dB
Resolution filters with a width of 0.2, 1, 3, 10, 30, 100, 300, 600 and 850 kHz
On screen resolution of 51, 101, 145, 290 or 450 measurement points.
Scanning speed of over 1000 points/second using largest resolution filters.
Automatic optimization of actual scanning points to ensure coverage of the whole scan range regardless of the chosen resolution bandwidth
Spur suppression option for assessing if certain signals are internally generated or actually present in the input signal
Headphone output for listening to the demodulated audio (AM only). Stereo connector with or without microphone, high impedance is louder, short protected
Specificaties (Signaalgenerator)
Sine wave output with harmonics below -40 dB of fundamental from 100 kHz to 900 MHz
Output level selectable in 1 dB steps between -115 dBm and -19 dBm
Above 800 MHz choice of two output modes:
Cleanest signal mode: square wave, up to 6 GHz with coarse frequency steps and less accurate output level
Highest accuracy mode: reduced harmonics with possibly strong spurs up to 7.3 GHz with frequency resolution equal to below 800 MHz and fine output level steps
Level accuracy ±2 dB up to 800 MHz between -72 dBm and -19 dBm, less accuracy below -72 dBm, even less accuracy below -110 dBm
Output frequency resolution 57.2 Hz
Optional AM or FM modulation frequencies between 50 Hz and 5 kHz (AM) or 1 kHz (FM) or sweep over selectable frequency span
AM modulation depth between 10% and 100%
FM deviation between 1 kHz and 300 kHz
Optional output level sweep over maximum the entire output level range
Inbegrepen
1x tinySA Ultra+ ZS407 Spectrum Analyzer
2x SMA connection cables
1x Barrel connector
1x Antenna with SMA connector
1x USB-C cable
1x microSD card (32 GB)
Downloads
Wiki
A Practical Guide to Tube Electronics
Vacuum tubes continue to exert a special fascination. Their long-lasting operation, robustness, and characteristic behavior fundamentally distinguish them from modern semiconductor technology. Despite their age, tubes are by no means merely historical components; they are still used today in audio technology, measurement technology, and especially in hobbyist applications.
This book is aimed at electronics enthusiasts and hobbyists who want to not only learn about and understand vacuum tubes in theory, but also use them in practice. It conveys the fundamentals of tube technology, explains the different designs and designations, shows typical circuits, and addresses power supplies, measurements, and safety-related aspects. The focus is on practical explanations and realistic examples from the workshop. Numerous tips help you avoid typical mistakes, build circuits, and understand tube devices and their construction. Basic knowledge of electronics is assumed.
Vacuum Tubes: A Practical Guide to Tube Electronics offers an accessible and thorough introduction to tube technology – factual, comprehensible, and with a clear focus on practical applications.
An Introduction to Circuit Simulation
LTspice, developed by Analog Devices, is a powerful, fast, and free SPICE simulator, schematic capture, and waveform viewer with a large database of components supported by SPICE models from all over the world. Drawing a schematic in LTspice is easy and fast. Thanks to its powerful graphing features, you can visualize the voltages and currents in a circuit, and also the power consumption of its components and much more.
This book is about learning to design and simulate electronic circuits using LTspice. Among others, the following topics are treated:
DC and AC circuits
Signal diodes and Zener diodes
Transistor circuits including oscillators
Thyristor/SCR, diac, and triac circuits
Operational amplifier circuits including oscillators
The 555 timer IC
Filters
Voltage regulators
Optocouplers
Waveform generation
Digital logic simulation including the 74HC family
SPICE modeling LTspice is a powerful electronic circuit simulation tool with many features and possibilities. Covering them all in detail is not possible in a book of this size. Therefore, this book presents the most common topics like DC and AC circuit analysis, parameter sweeping, transfer functions, oscillators, graphing, etc. Although this book is an introduction to LTspice, it covers most topics of interest to people engaged in electronic circuit simulation.
The book is aimed at electronic/electrical engineers, students, teachers, and hobbyists. Many tested simulation examples are given in the book. Readers do not need to have any computer programming skills, but it will help if they are familiar with basic electronic circuit design and operation principles. Readers who want to dive deeper can find many detailed tutorials, articles, videos, design files, and SPICE circuit models on the Internet.
All the simulation examples used in the book are available as files at the webpage of this book. Readers can use these example circuits for learning or modify them for their own applications.