Over 45 Builds for the Legendary 555 Chip (and the 556, 558)
The 555 timer IC, originally introduced by the Signetics Corporation around 1971, is sure to rank high among the most popular analog integrated circuits ever produced. Originally called the IC Time Machine, this chip has been used in many timer-related projects by countless people over decades.
This book is all about designing projects based on the 555 timer IC. Over 45 fully tested and documented projects are presented. All projects have been fully tested by the author by constructing them individually on a breadboard. You are not expected to have any programming experiences for constructing or using the projects given in the book. However, it’s definitely useful to have some knowledge of basic electronics and the use of a breadboard for constructing and testing electronic circuits.
Some of the projects in the book are:
Alternately Flashing Two LEDs
Changing LED Flashing Rate
Touch Sensor On/Off Switch
Switch On/Off Delay
Light-Dependent Sound
Dark/Light Switch
Tone Burst Generator
Long Duration Timer
Chasing LEDs
LED Roulette Game
Traffic Lights
Continuity Tester
Electronic Lock
Switch Contact Debouncing
Toy Electronic Organ
Multiple Sensor Alarm System
Metronome
Voltage Multipliers
Electronic Dice
7-Segment Display Counter
Motor Control
7-Segment Display Dice
Electronic Siren
Various Other Projects
The projects given in the book can be modified or expanded by you for your very own applications. Electronic engineering students, people engaged in designing small electronic circuits, and electronic hobbyists should find the projects in the book instructive, fun, interesting, and useful.
Le téléchargement intégral de ce numéro est disponible pour nos membres GOLD et GREEN sur le site Elektor Magazine !Pas encore membre ? Cliquez ici.Pour les yeux et les oreillessortie vidéo sur les microcontrôleurs (1)vidéo compositeelectronica 2022nouvelles du plus grand salon mondial de l'électroniquecaméra ESP32si simple qu'on n'a même pas besoin du wifialimentation ATX pour Raspberry Piamplificateur pour casque 32 Ωune solution simple mais de qualité à trois CIhorloges radiocommandées SDRcinq signaux horaires, six affichagesdémarrer en électroniquediodes spécialessur le viferrances qualitativesrétro-ingénierie d'un badge LED Bluetooth Low Energycomment commander un appareil BLE avec un script Pythonkit de développement MakePython ESP32tout dans une boîtemesure du THD avec un oscilloscope et une FFTcalculer facilement le facteur de distorsionmachines à vision totalela technologie derrière les systèmes de vision industrielle d'aujourd'huiInfographiesl'évolution de la commande vocale et audio des appareils électroniquesbilan du WEEF 2022bilan du salon electronica 2022les innovateurs n'ont pas manqué d'impressionnerThe Tubeun surprenant amplificateur à tubesà quand des biomatériaux pour l'électronique ?commutateur d'antenne Opera Cake pour HackRF Oneconnectez jusqu'à huit antennes à votre SDRconcevoir avec Arduino et plusentretien avec l'auteur Ashwin Pajankarjauge de longueur à lidarmesure jusqu'à 12 mles signaux audios et l'ESP32l'environnement ESP-ADF en pratiqueKit amplificateur de puissance Fortissimo-100 d'Elektorutiliser la lumière pour les effets sonoresfiltre synthétiseur à base de LDR, contrôlé en tension, 24 dB/octamplificateur Hi-Fi d'Elektorle plus bruyant de tous !visite à domicileafficheur volumétrique made in Canadaprojet 2.0corrections, mises à jour et courriers des lecteursHexadoku
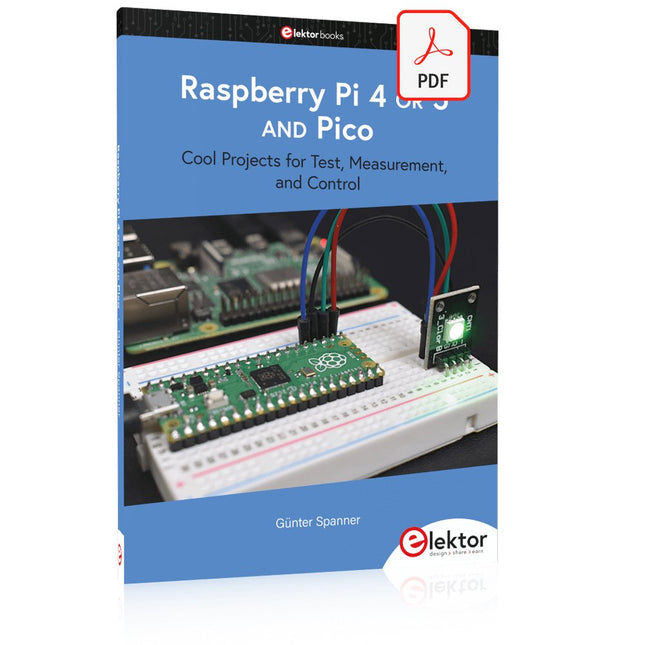
Cool Projects for Test, Measurement, and Control
The Raspberry Pi has dominated the maker scene for many years. Freely accessible I/O pins have made it one of the most popular processor boards of all time. However, the classic Raspberry Pi has no analog inputs. Direct measurement of analog values is therefore not possible. Consequently, photodiodes, NTCs, Hall sensors, etc. cannot be read directly. In addition, the pins are connected directly to the exposed contacts, i.e. without a driver or protection circuit. This can quickly destroy the central controller and thus the entire Raspberry Pi.
These problems can be elegantly solved with the Pico. As a front-end, it can easily handle a wide range of measurement tasks. In addition, the Pico is much cheaper than a classic Raspberry Pi 4 or 5. If a faulty circuit leads to the destruction of the Pico, this is relatively easy to handle. This makes the combination of a classic Raspberry Pi 4 or 5 and the Pico an ideal pair.
The book introduces the broad and highly topical field of modern controller technology using the combined force of a Raspberry Pi 4 or 5 and a Raspberry Pi Pico. In addition to a detailed introduction to the operation and functionality of the controller boards themselves, the book also focuses on data acquisition and processing with digital processors. Especially the combination of both systems offers a wide range of interesting possibilities.
Some practical projects from the contents:
USB between Raspberry Pi 4 or 5 and Pico
I²C Communication and Pico as an I²C device
Voltmeter and Computer Thermometer
Pico W as a Web Server and WLAN Scanner
Frequency Meters and Generators
OLED Displays on Raspberry Pi 4 or 5 and Pico
Energy Saving Monitor
Which Astronauts are in Orbit?
Mini Monitor for Current Bitcoin Exchange Rate
Deze bundel bevat de Red Pitaya STEMlab 125-14 PRO Gen 2 Starter Kit en het nieuwe boek "Experimenteren met Red Pitaya STEMlab Gen 2".
De Red Pitaya STEMlab 125-14 PRO Gen 2 Starter Kit is een krachtig en flexibel platform voor signaalverwerking, data-acquisitie en elektronische meettoepassingen. Deze kit is ontworpen voor ingenieurs, ontwikkelaars, onderzoekers en docenten en biedt alles wat nodig is om te beginnen met het bouwen van geavanceerde meet- en besturingssystemen.
De kern van de kit wordt gevormd door het STEMlab 125-14 PRO Gen 2-bord, een geüpgradede en ultralichte ontwikkeling. Aangedreven door de Xilinx Zynq-7010 SoC met 512 MB RAM, combineert het de programmeerbaarheid van een FPGA met de verwerkingskracht van een ARM-processor om hoogwaardige instrumentatie en aangepaste signaalverwerkingsoplossingen mogelijk te maken.
Het bord biedt een 14-bits ADC- en DAC-resolutie, een bemonsteringsfrequentie van 125 MS/s, een ingangsbereik van ±20 V en een bandbreedte tot 60 MHz. Dankzij de verbeterde ruisarme analoge front-end, USB-C-connectiviteit en het compacte ontwerp is het geschikt voor veeleisende toepassingen zoals RF-ontwikkeling, radarsystemen, fotonica-onderzoek, softwaregedefinieerde radio (SDR) en industriële automatisering.
De Starter Kit bevat alle essentiële accessoires voor onmiddellijk gebruik: een microSD-kaart met vooraf geïnstalleerd besturingssysteem, voeding, ethernetkabel voor toegang op afstand, twee 100 MHz-oscilloscoopprobes en SMA-naar-BNC-adapters voor flexibele signaalaansluitingen.
De Red Pitaya STEMlab 125-14 PRO Gen 2 Starter Kit is een uitstekend platform voor rapid prototyping, FPGA-ontwikkeling, meetinstrumentatie en geavanceerde elektronica-experimenten.
Kenmerken
14-bits ADC- en DAC-resolutie
125 MS/s samplingfrequentie
±20 V ingangsbereik
Tot 60 MHz bandbreedte
Xilinx Zynq-7010 SoC (FPGA + ARM-processor)
512 MB RAM
Ruisarme analoge front- en back-ends
Toepassingen
RF-ontwikkeling en -testen
Radar- en draadloze systemen
Software Defined Radio (SDR)
Fotonica en optisch onderzoek
Industriële automatisering en besturingssystemen
Signaalanalyse en instrumentatie
Snel prototypen van elektronische meetsystemen
Specificaties
Processor
Dual-core ARM Cortex-A9
FPGA
AMD Xilinx Zynq-7010 SoC
RAM
512 MB (4 Gb)
Opslag
microSD-kaart (tot 32 GB)
Besturingssysteem
Linux-gebaseerd Red Pitaya OS
ADC-resolutie
14-bits
DAC Resolutie
14-bits
Bandbreedte
60 MHz (DC)
Sampling rate
125 MS/s
Analoge ingangskanalen
2
Analoge uitgangskanalen
2
Ingangsspanningsbereik
±1 V (LV) / ±20 V (HV)
Ingangsimpedantie
1 MΩ / 10 pF
Uitgangsspanningsbereik
±1 V
Ethernet
1x Gigabit Ethernet (RJ45)
USB
2x USB-C 2.0 (voor voeding en console)
Digitale I/O
16x GPIO (3,3 V)
Communicatie-interfaces
I²C, SPI, UART, CAN
Voeding
5 V/3 A via USB-C
Afmetingen
106,8 x 60,0 x 17,9 mm
Inbegrepen
1x Red Pitaya STEMlab 125-14 PRO Gen 2 Board
2x 100 MHz oscilloscoopprobes
2x SMA-naar-BNC-adapters
1x microSD-kaart met voorgeïnstalleerd besturingssysteem
1x USB-C-voeding
1x Ethernetkabel
Downloads
Documentation
Schematics
Book: Experimenting with Red Pitaya STEMlab Gen 2
Met dit nieuwe boek gaat Red Pitaya verder dan een veelzijdig board. Het wordt een krachtig laboratoriuminstrument voor nauwkeurige metingen, analyse en besturing.
Van de basisprincipes van elektronische projectontwikkeling, monitoring, besturing en ontwerp tot testen: dit boek begeleidt u stap voor stap door alles wat u moet weten om het volledige potentieel van de Red Pitaya-hardware en -software te benutten.
Het boek presenteert real-time, FPGA-gebaseerde projecten die op een PC worden ontwikkeld met de Vivado-omgeving en vervolgens naar de Red Pitaya worden overgebracht voor uitvoering en testen.
U leert over verbeterde prestaties, uitgebreide I/O-mogelijkheden, verbeterde FPGA-functionaliteiten en geavanceerde connectiviteitsopties die nieuwe mogelijkheden openen voor nauwkeurige metingen, monitoring en besturing in uw embedded toepassingen.
In dit boek ontdekt u:
Een diepgaande verkenning van de Red Pitaya-architectuur en het hardwareontwerp
Elektronische experimenten met Red Pitaya voor meting en monitoring
Praktische projecten met de programmeertaal Python
Praktische richtlijnen voor FPGA-programmering met Red Pitaya
Red Pitaya FPGA-projecten met Verilog HDL in de Vivado IDE
Praktisch ontwerp van elektronische projecten inclusief meting en testen
Stapsgewijze voorbeelden die theorie en praktijk met elkaar verbinden
Of u nu uw eigen elektronische schakelingen ontwerpt, tools voor signaalanalyse ontwikkelt of real-time besturings- of monitoringssystemen creëert, dit boek biedt u de kennis en het vertrouwen om het Red Pitaya-platform volledig te leren kennen en aan te passen.
USB to S/PDIF InterfaceDigital audio output for computer, laptop, tablet or smartphone
Practical ESP32 Multitasking (4)Binary semaphores
A Wireless Temperature Sensor for the Nixie Bargraph ThermometerA multipurpose solution with a design trick
Multitasking with Raspberry PiShowcase: a traffic lights controller
Timer for Headphone Amplifier
Open-Network Weather Station Mk.2Part 2: Software
Home Automation Made EasyWith ESPHome, Home Assistant & MySensors
The Storage CRTPeculiar Parts, the series
Artificial Intelligence for Beginners (3)A stand-alone neural network
Programming PICs from the Ground UpAssembler routine to output a sine wave
IKEA Lamp HackEquipping an inexpensive IKEA lamp with NeoPixel LEDs and WLAN
Don't Let Your Hobby Project Collect Dust in a CornerSupply-side time management and spiral development
Starting Out in Electronics (4)Easier than imagined!
Homelab Tours: The Vinyl CutterReturning to the golden age of LPs
The 8-Bit Microcontroller and BeyondInterview with Tam Hanna
Small Circuits RevivalFrom the Elektor suggestions box
Review: Owon OW18E Bluetooth Multimeter
InteractiveCorrections & Updates || Questions & Answers
Steeped in ElectronicsLead-free soldering and EU regulatory zeal
Promising Project: New 50 Hz – 2 MHz LCR meterAccuracy and ease of use
Error AnalysisTips on FMEA, High Current, and More
Developer's ZoneTips & Tricks, Best Practices and Other Useful Information
Review: Siglent SDL1020X Programmable DC Electronic Load
High-Voltage Power Supply with Curve TracerGenerate voltages up to 400 V and trace characteristics curves for valves and transistors
Hexadoku 2009EL
Analogue Electronics DesignCase Study #2 — Part 1: Analogue filter theory
The Elektor StoreNever expensive, always surprising
How to Draw a Circuit Diagram
Analogue Electronics and Microcontrollers Projects
Hobbyist electronics can be a fun way to learn new skills that can be helpful to your career. Those who understand the basics of electronics can design their own circuits and projects. However, before you run, you need to learn to walk.
It all starts with analogue electronics. You should be familiar with the simple components and circuits and understand their basic behaviors and the issues you may encounter. The best way to do this is through real experiments. Theory alone is not enough. This book offers a large number of practical entry-level circuits, with which everyone can gain the basic experience.
Through the widespread introduction of microcontrollers, a new chapter in electronics has begun. Microcontrollers are now performing more and more tasks that were originally solved using discrete components and conventional ICs. Starting out has become easier and easier thanks to platforms including Bascom, Arduino, micro:bit. The book introduces numerous manageable microcontroller applications. It?s now a case of less soldering and more programming.
Open-Source-Code mit Arduino IDE und PlatformIO
Autonomes Fahren: GPS, Accelerometer, Gyroskop
PS3-Controller
Mikrocontroller wie der Arduino und Einplatinenrechner wie der Raspberry Pi haben sich zu beliebten Komponenten entwickelt. Dritter im Bunde ist der ESP32 der Firma Espressif. Mikrocontroller dieser Baureihe zeichnen sich durch eine Vielzahl implementierter Funktionen aus, die bei einem Arduino konventioneller Prägung mit einem Atmel-AVR-Mikrocontroller erst mit weiterer Hardware möglich sind. Prominentes Beispiel sind hier die WiFi- und Bluetooth-Funktionalitäten. Gegenüber einem Raspberry Pi zeichnen sie sich durch einen deutlich geringeren Preis aus.
Allgemeine Informationen für die Realisierung eines Roboterauto-Projekts mit dem ESP32 sind leicht zu finden. Dabei handelt es sich aber oft nur um Ausführungen zu einem Teilaspekt, ohne inhaltliche oder funktionale Abstimmung. So ist nicht nur die Beschaffung der benötigten Informationen mühselig und zeitaufwändig, sie kann auch außerordentlich fehlerträchtig sein.
Ansatzpunkt dieses Buches ist, diese Lücke zu schließen. Es geht auf verschiedene Möglichkeiten eines Chassis ein, vermittelt nötige Kenntnisse und führt schrittweise von einer einfachen Motorsteuerung zu einem komplexen sensor- und sprachgesteuerten Roboterauto. Hacks rund um GPS und eine PlayStation 3 runden die Sache ab.
Inhalt
Bei der Reihenfolge der Kapitel wurde versucht – beginnend bei der Darstellung von grundlegenden Informationen – über die Lösung einfacher Aufgaben zu etwas anspruchsvolleren Techniken zu führen.
Der Mikrocontroller ESP32
Die Software erstellen
Die Stromversorgung
Rund um die Hardware
Das Chassis
Der Gleichstrommotor
Kabellose Steuerung über WiFi
Mit Sensoren Hindernisse erkennen
Eine eigene Roboterauto-App
Servo und Lichtsensor
GPS
Accelerometer / Gyroskop
PS3-Controller
Roboterauto-App
Hinweis zur Software
Die Dateien haben das Suffix (.cpp). Grund ist die Entwicklung mit PlatformIO. Mit Copy & Paste sollten sie auch in der Arduino-IDE verwendet werden können.
TRAITEMENT D'IMAGES AVEC LE KIT JETSON NANO DE NVIDIA2e partie : reconnaissance d'imagesELEKTOR JUMPSTARTER – DU NOUVEAUCampagnes à venirTRACEUR GPS À CODE SOURCE OUVERTTraccar cartographie les déplacements de véhicules, sans recours à un serveur tiers du nuageTESTEUR MULTIFONCTION LCR-T7 DE JOY-ITTest de semi-conducteurs passifs, discrets et de télécommandes IRSYNTHÉTISEUR DE BRUITDu bruit à la musique avec le PRBSynth1DÉMARRER EN ÉLECTRONIQUE…Easier than Imagined! ... Continuing with the CoilVOYAGE DANS LES RÉSEAUX NEURONAUX (2E PARTIE)Les neurones logiquesPROBLÈMES DE SÉCURITÉ ? COMBATTEZ LE FEU PAR LE FEU !Extension à mémoire analogique, protégée par ampoule de flash, pour la boîte à témoin d'effractionKIT DU LCR-MÈTRE 2 MHZ D'ELEKTORBALISES BLUETOOTH : LA PRATIQUEGéolocalisation intra murosC PROGRAMMING ON RASPBERRY PIExtrait : communiquer par Wi-FiTEST DE PRÉCONFORMITÉ CEM POUR UN PROJET ALIMENTÉ EN COURANT CONTINUPartie 2 : le matériel et son utilisationPROPELLER 2 DE PARALLAX (5)La fonction de « broche intelligente »MODBUS SANS FIL (PARTIE 1)Matériel et programmationJUNIOR COMPUTEREn forme après 40 ans de sommeilCONSTRUIRE SON PROPRE ÉTALONNEUR DE HAUTE PRÉCISION−10 V à +10 V, 0 à 40 mA, 0,001 %ARDUINO NANO RP2040 CONNECT EN DÉTAILRaspberry Pi RP2040 + Wi-Fi + BluetoothLE CORPS PHYSIQUE DE L'INTELLIGENCE ARTIFICIELLEPROJET 2.0corrections, mises à jour et courriers des lecteursCRÉATION D'INTERFACES GRAPHIQUES EN PYTHON AVEC GUIZEROInstallez la bibliothèque Python guizero et créez vos propres interfaces graphiques.KIT DE MESURE DU CO2 POUR SALLE DE CLASSEMontage à base d'ESP8266, conçu par l'Université des Sciences Appliquées d'Aix-la-ChapelleMK484, RADIORÉTRO PO/GO...Toujours le plaisir de construire !60 ANS D'ELEKTORQue la lumière soit !HEXADOKUThe Original Elektorized Sudoku
Program and build Arduino-based ham station utilities, tools, and instruments
In addition to a detailed introduction to the exciting world of the Arduino microcontroller and its many variants, this book introduces you to the shields, modules, and components you can connect to the Arduino. Many of these components are discussed in detail and used in the projects included in this book to help you understand how these components can be incorporated into your own Arduino projects. Emphasis has been placed on designing and creating a wide range of amateur radio-related projects that can easily be built in just a few days.
This book is written for ham radio operators and Arduino enthusiasts of all skill levels, and includes discussions about the tools, construction methods, and troubleshooting techniques used in creating amateur radio-related Arduino projects. The book teaches you how to create feature-rich Arduino-based projects, with the goal of helping you to advance beyond this book, and design and build your own ham radio Arduino projects.
In addition, this book describes in detail the design, construction, programming, and operation of the following projects:
CW Beacon and Foxhunt Keyer
Mini Weather Station
RF Probe with LED Bar Graph
DTMF Tone Encoder
DTMF Tone Decoder
Waveform Generator
Auto Power On/Off
Bluetooth CW Keyer
Station Power Monitor
AC Current Monitor
This book assumes a basic knowledge of electronics and circuit construction. Basic knowledge of how to program the Arduino using its IDE will also be beneficial.
Elektor GREEN and GOLD members can download their digital edition here.
Not a member yet? Click here.
CaptureCountAn Object Detector and Counter on the Raspberry Pi 5
Voltage Reference With Arduino Pro MiniLinearize and Calibrate Your Analog Inputs
FPGAs for BeginnersThe Path From MCU to FPGA Programming
Update: STM32 Wireless Innovation Design Contest 2024
Bluetooth LE With MAUIControl Apps for Android & Co.
Port-Expanding Breakout BoardIncrease the Number of I/Os on Your Dev Board
AI SpecialistMachine Learning with the Jetson Nano
2024: An AI OdysseyFirst Forays Into TensorFlow
262,144 Ways to Play The Game of LifeA Reader’s Project in Brief
From Life’s ExperienceThe Chinese Dragon
Get Your (Brushed DC) Motor Running!Sample Projects from the Elektor Motor Control Development Bundle
ESP32-RS-232 AdapterA Wireless Link for Classic Test Equipment
Starting Out in Electronics……More About Opamps
ESP Library Recommendations
Piezoelectric DevicesPeculiar Parts, the Series
A Smart Object CounterImage Recognition Made Easy with Edge Impulse
Resolve Your Trickiest Embedded Development Challenges
ESP32 TerminalA Handheld Device with a Touch-Capable Display
Getting Started With the Zephyr RTOSAs Powerful as It Is Hard to Master
Award-Winning EthicsA Dialog with CTO Alexander Gerfer of Würth Elektronik eiSos on Enabling Innovation and Mindful Behavior
Err-lectronicsCorrections, Updates, and Readers’ Letters
Infographics: Embedded and AI
Square Wave Generation BenchmarksExploring ESP32, Pico, and Other Microcontrollers
Le téléchargement intégral de ce numéro est disponible pour nos membres GOLD et GREEN sur le site Elektor Magazine !
Pas encore membre ? Cliquez ici.
carte émetteur-récepteur audio ESP32 (2)Transmission audio sans fil
émetteur AM par inductionUtiliser les PIO du Pico dans un croquis Arduino
les protocoles sans filUn guide technique
suivi de satellites avec LoRaTinyGS, le réseau open source qui capte les données spatiales
télécommande par sms compatible 4GContrôlez votre équipement à distance
sonde haute vitesseMesure à haute impédance jusqu’à 200 MHz
sur le vifKafka
KrakenSDR
tests de performance avec le RP2350Pico 2 : une vraie amélioration ?
mesures de champ électrique sans contact (2)Un vibromètre laser pour l’analyse des vibrations de la membrane
quartz et oscillateursAméliorer la précision des quartz grâce au choix des condensateurs
démarrer en électroniqueCI audio originaux
se lancer dans le codage d'un projet DIY
SPECTRAN® V6 MobileAnalyseur de spectre temps réel modulaire et configurable pour des mesures fiables sur l’ensemble des plages de fréquences
l’avenir de l’IA repose sur le siliciumEntretien avec Anastasiia Nosova
nœud de capteurs autonome v2.0 (architecture du système)Plateforme de mesure autonome alimentée par énergie solaire, avec GPS intégré, LoRaWAN et plus encore
positionnement précisTests du sondage de canal Bluetooth
développement logiciel piloté par les tests
voiture miniature contrôlée par SmartphoneWi-Fi + ESP32 + Smartphone = contrôle à distance
2025 : une odyssée de l’IAModèles de raisonnement en IA : la révolution de la chaîne de pensée
contrôleur de charge solaire avec MPPT (3)Logiciel et mise en service
caméra Web Raspberry Pi ZeroStreaming avec VPN ZeroTier
Elektor GREEN en GOLD leden kunnen deze uitgave hier downloaden.
Nog geen lid? Klik hier om een lidmaatschap af te sluiten.
USB-meetadaptertest stroom en signaalkwaliteit van USB-poorten
4...20 mA stroom-uitgang voor Arduino Unobetrouwbare, EMI-ongevoelige current loop-interface
Automatische stofzuigerschakelaarhoud uw werkplek schoon
DDS-generator met ATtiny
Opamp-tester v2nieuwe print – nu ook voor SMD’s
550-mW audio ‘Lamp-Amp’voor die warme buizenklank
Zekeringbewakerhoud zekeringen in de gaten met een knipper-LED
Hoogwaardige RIAA-voorversterkerhaal het beste uit uw vinylplaten!
Kalibratie voor draaitafelsArduino-gebaseerde 100/120Hz-stroboscoop
Elektor Classics: Video-versterker
Dimmer met IR-afstandsbedieningcomfortabel en elegant staande halogeen- of LED-lampen regelen
Het gebruik van switch…case bij strings in C++/Arduino IDE
Magneetzoekermet een eenvoudige Hall-effect-sensor
Raspberry Pi: slimme aan/uit-knopeen oplossing voor de Raspberry Pi tot aan model 4
Professionele tipsvan makers voor makers
Praktische projecten met de 555-timerDC-motorbesturing en snelle reactie-uitdaging
Eenvoudige ‘aan-verklikker’spaar energie met een simpele schakeling
Powerpacks parallelschakelendrie dagen ononderbroken stroom
VFO tot 15 MHzimplementatie met Raspberry Pi Pico
Vioolstemmer met ATtiny202
Elektor Classics: Video-ingangsversterker voor zwart/wit-TV
Capaciteitsmeter20 pF tot 600 nF
Quasi-analoog uurwerk Mk IItwee LED-ringen – voor uren en minuten
Niets is onmogelijk(met hulp van het Arduino-ecosysteem)
Neon dobbelsteen
Elektor Classics: RTTY-afstemhulp
Inspirerende hardware-ontwerpen voor uw ESP’s
Elektor Classics: 3 A voeding
RGB-LED’s met geïntegreerde stuurkringlicht met precisie: ICLED’s zetten de standaard
Experiment: een mixed-signal Theremin?moderne time-of-flight sensoren plus de tijdloze analoge XR2206
ESP32 audio-transceiver (deel 1)SD-kaart WAV-speler demo
Elektor infographicschakelingen en schakelingontwerp 2025
Kleine audiomixereenvoudig, veelzijdig en schaalbaar
Slimme timer voor trapverlichtingbespaar op uw energierekening!
Maak uw rolluiken slimmerVelux-hardware besturen met een ESP32 en MQTT
Solid-state voetenwarmercomfortabel en energiezuinig
Is de M5Stamp Fly-quadcopter de nieuwe Tello?
Vergroot het WiFi-bereik van de ESP32-C3 SuperMinieenvoudige en effectieve antennemodificatie
ZD-8968 hetelucht-soldeerstationbudgetvriendelijk werkpaard of gebakken lucht?
Parkeersensor-testervind defecten in het PDC-systeem van een auto