Elektor GREEN en GOLD leden kunnen deze uitgave hier downloaden.
Nog geen lid? Klik hier om een lidmaatschap af te sluiten.
USB-meetadaptertest stroom en signaalkwaliteit van USB-poorten
4...20 mA stroom-uitgang voor Arduino Unobetrouwbare, EMI-ongevoelige current loop-interface
Automatische stofzuigerschakelaarhoud uw werkplek schoon
DDS-generator met ATtiny
Opamp-tester v2nieuwe print – nu ook voor SMD’s
550-mW audio ‘Lamp-Amp’voor die warme buizenklank
Zekeringbewakerhoud zekeringen in de gaten met een knipper-LED
Hoogwaardige RIAA-voorversterkerhaal het beste uit uw vinylplaten!
Kalibratie voor draaitafelsArduino-gebaseerde 100/120Hz-stroboscoop
Elektor Classics: Video-versterker
Dimmer met IR-afstandsbedieningcomfortabel en elegant staande halogeen- of LED-lampen regelen
Het gebruik van switch…case bij strings in C++/Arduino IDE
Magneetzoekermet een eenvoudige Hall-effect-sensor
Raspberry Pi: slimme aan/uit-knopeen oplossing voor de Raspberry Pi tot aan model 4
Professionele tipsvan makers voor makers
Praktische projecten met de 555-timerDC-motorbesturing en snelle reactie-uitdaging
Eenvoudige ‘aan-verklikker’spaar energie met een simpele schakeling
Powerpacks parallelschakelendrie dagen ononderbroken stroom
VFO tot 15 MHzimplementatie met Raspberry Pi Pico
Vioolstemmer met ATtiny202
Elektor Classics: Video-ingangsversterker voor zwart/wit-TV
Capaciteitsmeter20 pF tot 600 nF
Quasi-analoog uurwerk Mk IItwee LED-ringen – voor uren en minuten
Niets is onmogelijk(met hulp van het Arduino-ecosysteem)
Neon dobbelsteen
Elektor Classics: RTTY-afstemhulp
Inspirerende hardware-ontwerpen voor uw ESP’s
Elektor Classics: 3 A voeding
RGB-LED’s met geïntegreerde stuurkringlicht met precisie: ICLED’s zetten de standaard
Experiment: een mixed-signal Theremin?moderne time-of-flight sensoren plus de tijdloze analoge XR2206
ESP32 audio-transceiver (deel 1)SD-kaart WAV-speler demo
Elektor infographicschakelingen en schakelingontwerp 2025
Kleine audiomixereenvoudig, veelzijdig en schaalbaar
Slimme timer voor trapverlichtingbespaar op uw energierekening!
Maak uw rolluiken slimmerVelux-hardware besturen met een ESP32 en MQTT
Solid-state voetenwarmercomfortabel en energiezuinig
Is de M5Stamp Fly-quadcopter de nieuwe Tello?
Vergroot het WiFi-bereik van de ESP32-C3 SuperMinieenvoudige en effectieve antennemodificatie
ZD-8968 hetelucht-soldeerstationbudgetvriendelijk werkpaard of gebakken lucht?
Parkeersensor-testervind defecten in het PDC-systeem van een auto
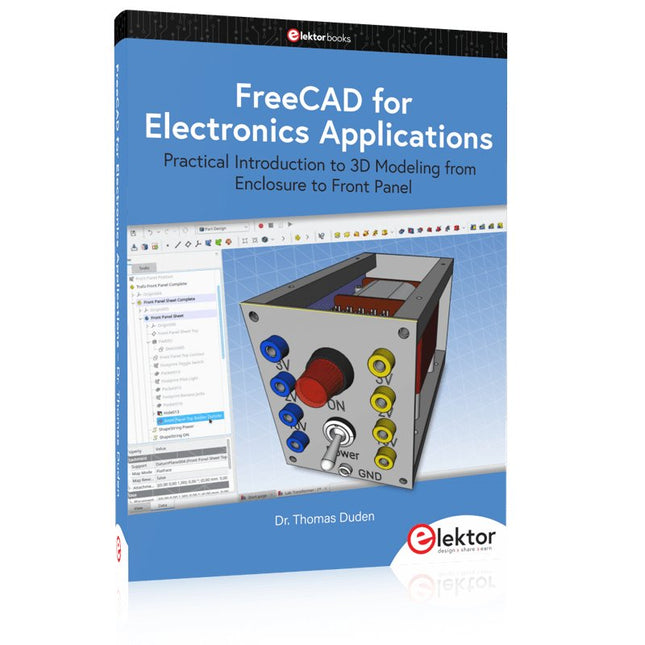
Practical Introduction to 3D Modeling from Enclosure to Front Panel
Embedding a vintage component, creating a professional looking home for a circuit board, or even designing a complex apparatus complete with a chassis – these and many other challenges turn into a stimulating pleasure with FreeCAD. Once you have internalized the basic processes, there are virtually no limits to your imagination.
Starting to use a new software is never straightforward – especially with a tool as versatile as FreeCAD. Manageable, but at the same time easily usable individual components provide the starting point in this book. Putting these components together later results in assemblies.
In the FreeCAD universe, a workable trajectory is demonstrated. The described procedure is illustrative so the examples are easily applied to custom tasks. The devices were made by the author and illustrated with photos.
Creating a 3D design is requiring some effort but the initial investment pays off soon. Besides the impressive spatial representation of the projects, the extracted drawings yield a solid base for documentation and production. Extended FreeCAD capabilities like the unfolding of sheet metal parts enormously add to efficiency and pushes models forward into practical assembly.
Soon you will definitely not want to do without FreeCAD!
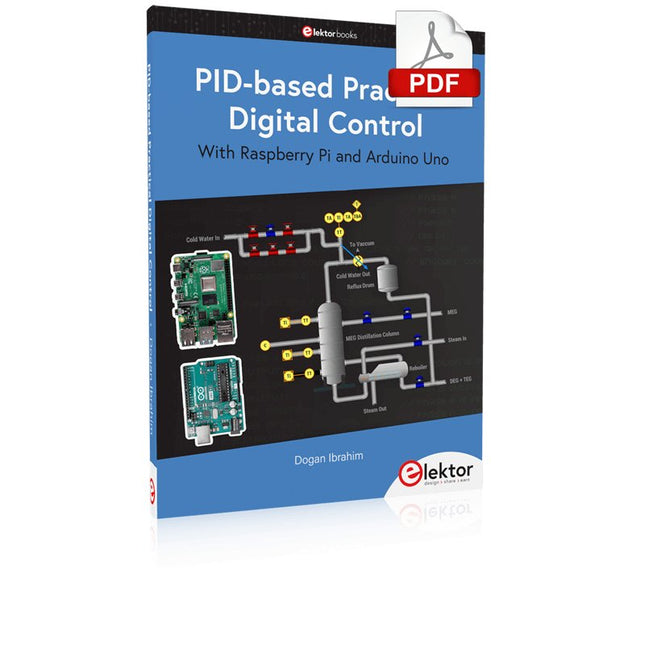
The Arduino Uno is an open-source microcontroller development system encompassing hardware, an Integrated Development Environment (IDE), and a vast number of libraries. It is supported by an enormous community of programmers, electronic engineers, enthusiasts, and academics. The libraries in particular really smooth Arduino programming and reduce programming time. What’s more, the libraries greatly facilitate testing your programs since most come fully tested and working.
The Raspberry Pi 4 can be used in many applications such as audio and video media devices. It also works in industrial controllers, robotics, games, and in many domestic and commercial applications. The Raspberry Pi 4 also offers Wi-Fi and Bluetooth capability which makes it great for remote and Internet-based control and monitoring applications.
This book is about using both the Raspberry Pi 4 and the Arduino Uno in PID-based automatic control applications. The book starts with basic theory of the control systems and feedback control. Working and tested projects are given for controlling real-life systems using PID controllers. The open-loop step time response, tuning the PID parameters, and the closed-loop time response of the developed systems are discussed together with the block diagrams, circuit diagrams, PID controller algorithms, and the full program listings for both the Raspberry Pi and the Arduino Uno.
The projects given in the book aim to teach the theory and applications of PID controllers and can be modified easily as desired for other applications. The projects given for the Raspberry Pi 4 should work with all other models of Raspberry Pi family.
The book covers the following topics:
Open-loop and closed-loop control systems
Analog and digital sensors
Transfer functions and continuous-time systems
First-order and second-order system time responses
Discrete-time digital systems
Continuous-time PID controllers
Discrete-time PID controllers
ON-OFF temperature control with Raspberry Pi and Arduino Uno
PID-based temperature control with Raspberry Pi and Arduino Uno
PID-based DC motor control with Raspberry Pi and Arduino Uno
PID-based water level control with Raspberry Pi and Arduino Uno
PID-based LED-LDR brightness control with Raspberry Pi and Arduino Uno
The Elektor LoRa NodeVersatile, long-range, 868-MHz remote control with state feedback and STM32 Inside
InteractiveCorrections & Updates || Questions & Answers
Analogue Electronics DesignCase Study #1 — Section 2: Preamplifier optimized for MEMS microphone
My IoT Button: A Button for the WebPart 1: IoT architecture
BASIC for the ESP32 and ESP8266Programming with Annex WiFi RDS
ESP32 Doorbell via Telegram“The UPS Man Always Rings Once”
Small Circuits RevivalCapita Selecta from the Elektor Project Suggestions Box
My First LoRaWANWith Blue Pill, LoRa Breakout Board and The Things Network
Elektor Connexions 2003EL
“A Strong Supporter of Open Internet”Interview with Wienke Giezeman, Initiator of The Things Network
The Meadow F7 BoardA great board for .NET developers
Practical ESP32 Multitasking (2)Task priorities
Sigfox and the IoT (3)First steps on the network
Raspberry Pi Bash Command Cheat Sheet
Europe's Most Successful Start-up Accelerator?HighTechXL, Eindhoven, The Netherlands
Review: The Enviro+ RPi-HATMeasure air quality with a Raspberry Pi and the Enviro+ HAT
Steeped in Electronicsordering components from Ukraine and Russia
Review: Andonstar AD407Better than its predecessor?
Lab, Sweet LabA glimpse of The Holy Place — no unauthorized entry.
Optical Probe for OscilloscopesMeasure brightness fluctuations of lighting systems
The 'TABULA' Project - An UpdateTangibles with user feedback
How-To Calculate the Prospective Short-Circuit Current or PSCCand choose the proper circuit breaker
TMS1000 Series Microcontrollers
Peculiar Parts, the series
Starting Out in Electronics (2)
Easier than imagined!
Developer's ZoneTips & Tricks, Best Practices and Other Useful Information
Locating Wayward Wires
Track and trace concealed and defective cables with ease and certainty
Review: Joy-IT DMSO2D72 Portable 3-in-1 Oscilloscope
Homebrew PC for the Electronics LabTips on Component Choice and Construction
The Elektor ‘Intelekt’ Chess Computer (1981)Tiny Chess 86 ported to the Intel 8088
Beyond ElectronicsPCB Art - Pushing the Limits of Industrial Manufacturing
Elektor GREEN en GOLD leden kunnen deze uitgave hier downloaden.
Nog geen lid? Klik hier om een lidmaatschap af te sluiten.
CaptureCountobjectdetector en -teller op de Raspberry Pi 5
Spanningsreferentie met Arduino Pro Minilineariseer en kalibreer analoge ingangen
FPGA’s voor beginnersvan MCU naar FPGA-programmering
Update: STM32 Wireless Innovation Design Contest 2024
Bluetooth LE met MAUIbesturingsapps voor Android en co.
Port Expander breakout-boardmeer I/O’s op je development board
AI-specialistmachine learning met de Jetson Nano
2024: een AI-odysseeeen eerste verkenning van TensorFlow
262.144 manieren om Game of Life te spelenlezersproject in het kort
Uit het leven gegrepende Chinese draak
Draaien met die (DC-borstel)motor!voorbeeldprojecten uit de Elektor Motor Control Development Bundle
ESP32/RS-232-adapterdraadloze verbinding voor klassieke meetinstrumenten
Alle begin......gaat verder met de opamp
Aanbevolen ESP-bibliotheken
Piëzo-elektrische componentenvreemde onderdelen
Slimme objecttellereenvoudige beeldherkenning met Edge Impulse
Oplossingen voor de lastigste uitdagingen bij embedded ontwikkeling
ESP32 Terminalhandheld met aanraakscherm
Aan de slag met Zephyr RTOSkrachtig – maar lastig...
Bekroonde ethiekeen vraaggesprek met Alexander Gerfer, CTO van Würth Elektronik eiSos, over het faciliteren van innovatie en bewust gedrag
Project 2.0correcties, updates en brieven van lezers
Open-Source-Code mit Arduino IDE und PlatformIO
Autonomes Fahren: GPS, Accelerometer, Gyroskop
PS3-Controller
Mikrocontroller wie der Arduino und Einplatinenrechner wie der Raspberry Pi haben sich zu beliebten Komponenten entwickelt. Dritter im Bunde ist der ESP32 der Firma Espressif. Mikrocontroller dieser Baureihe zeichnen sich durch eine Vielzahl implementierter Funktionen aus, die bei einem Arduino konventioneller Prägung mit einem Atmel-AVR-Mikrocontroller erst mit weiterer Hardware möglich sind. Prominentes Beispiel sind hier die WiFi- und Bluetooth-Funktionalitäten. Gegenüber einem Raspberry Pi zeichnen sie sich durch einen deutlich geringeren Preis aus.
Allgemeine Informationen für die Realisierung eines Roboterauto-Projekts mit dem ESP32 sind leicht zu finden. Dabei handelt es sich aber oft nur um Ausführungen zu einem Teilaspekt, ohne inhaltliche oder funktionale Abstimmung. So ist nicht nur die Beschaffung der benötigten Informationen mühselig und zeitaufwändig, sie kann auch außerordentlich fehlerträchtig sein.
Ansatzpunkt dieses Buches ist, diese Lücke zu schließen. Es geht auf verschiedene Möglichkeiten eines Chassis ein, vermittelt nötige Kenntnisse und führt schrittweise von einer einfachen Motorsteuerung zu einem komplexen sensor- und sprachgesteuerten Roboterauto. Hacks rund um GPS und eine PlayStation 3 runden die Sache ab.
Inhalt
Bei der Reihenfolge der Kapitel wurde versucht – beginnend bei der Darstellung von grundlegenden Informationen – über die Lösung einfacher Aufgaben zu etwas anspruchsvolleren Techniken zu führen.
Der Mikrocontroller ESP32
Die Software erstellen
Die Stromversorgung
Rund um die Hardware
Das Chassis
Der Gleichstrommotor
Kabellose Steuerung über WiFi
Mit Sensoren Hindernisse erkennen
Eine eigene Roboterauto-App
Servo und Lichtsensor
GPS
Accelerometer / Gyroskop
PS3-Controller
Roboterauto-App
Hinweis zur Software
Die Dateien haben das Suffix (.cpp). Grund ist die Entwicklung mit PlatformIO. Mit Copy & Paste sollten sie auch in der Arduino-IDE verwendet werden können.
If you can describe it, you can build it
AI coding assistants are changing what makers and solopreneurs can build. Tasks that once demanded weeks of learning a new language, framework, or software stack can now be delegated to an AI—provided you know how to describe the job, judge the result, and keep control of the process.
The Maker’s Guide to AI Coding is a practical guide to doing exactly that. It explains how to work with AI coding tools as collaborators rather than vending machines, how much to delegate, how to write specifications that produce useful results, and how to recognise hallucinations, context drift, overconfidence, and code that runs but is still wrong.
The book is built around four increasingly ambitious projects. You begin with a browser-based RC filter analyser, then develop a live serial data plotter for Arduino and other microcontrollers. Next comes a datasheet questionand- answer tool using retrieval-augmented generation (RAG), followed by a complete multi-user resource booking system with authentication, a database, external services, background jobs, and deployment.
No advanced programming background is required. The emphasis is on thinking clearly, guiding the AI, testing what it produces, and preserving the skills needed to evaluate its work. Along the way, you learn development workflow designed to remain useful as tools evolve.
If you can describe what you want to build, this book shows you how to turn that description into working software.
Projekte mit Arduino Uno und Raspberry Pi
In diesem Buch werden Anwendungen von Arduino Uno und Raspberry Pi 4 in praxisnahen Projekten auf Basis von CAN-Bus detailliert beschrieben. Durch den Einsatz von entweder Arduino Uno oder Raspberry Pi in Verbindung mit handelsüblichen CAN-Bus-Schnittstellenmodulen werden die Entwicklung, Fehlersuche und Fehlerbeseitigung sowie die Überprüfung von Projekten auf CAN-Bus-Basis erheblich erleichtert.
Dieses Buch richtet sich an jeden, der mehr über den CAN-Bus lernen möchte und mit den Grundlagen der Elektronik vertraut ist. Hilfreich ist auch Erfahrung mit den Programmiersprachen C und Python sowie mit der Programmierung von Arduino Uno unter Verwendung seiner IDE und von Raspberry Pi zu haben.
Das Buch ist eine nützliche Informationsquelle und ein Nachschlagewerk für jeden, der Antworten auf eine oder mehrere der folgenden Fragen sucht:
Welche Bussysteme stehen für die Automobilindustrie zur Verfügung?
Was sind die Grundprinzipien des CAN-Bus?
Welche Arten von Frames (oder Datenpaketen) stehen in einem CAN-Bussystem zur Verfügung?
Wie können Fehler in einem CAN-Bussystem erkannt werden, und wie zuverlässig ist ein CAN-Bussystem?
Welche Arten von CAN-Bus-Controllern gibt es?
Welches sind die Funktionsprinzipien des MCP2515 CAN-Bus-Controllers?
Wie kann ich ein CAN-Bus-Projekt mit Arduino Uno realisieren?
Wie kann ich Arduino oder Raspberry Pi CAN-Bus-Projekte mit 2 und 3 Knoten erstellen?
Wie kann ich die Daten auf dem CAN-Bus analysieren?
Wie kann ich ein CAN-Bus-Projekt mit Raspberry Pi ausführen?
Mehr als 50 Grundlagenprojekte mit MicroPython und dem RP2040-Mikrocontroller
Der Raspberry Pi Pico ist eine leistungsstarke Mikrocontroller-Platine, die speziell für das Physical Computing – also hardwarenahe Anwendungen – entwickelt wurde. Der Raspberry Pi Pico kann so programmiert werden, dass er eine einzelne Aufgabe sehr effizient ausführt und ermöglicht so schnelle Steuerungs- und Überwachungsanwendungen in Echtzeit. Der 'Pico', wie wir ihn nennen, basiert auf dem schnellen, effizienten und kostengünstigen Dual-Core ARM Cortex-M0+ RP2040 Mikrocontroller-Chip, der mit bis zu 133 MHz läuft und über 264 KB SRAM und 2 MB Flash-Speicher verfügt. Neben dem großen Speicher hat der Pico noch weitere attraktive Eigenschaften, darunter eine große Anzahl von GPIO-Pins sowie gängige Schnittstellen wie ADC, SPI, I²C, UART und PWM. Als Krönung bietet der Chip schnelle und genaue Timer, eine Hardware-Debug-Schnittstelle und einen internen Temperatursensor.
Zur Programmierung lassen sich leicht die gängigen Hochsprachen wie MicroPython oder C/C++ verwenden. Dieses Buch ist eine Einführung in die Verwendung des Pico mit der Programmiersprache MicroPython. In allen Projekten wird die Thonny-Entwicklungsumgebung (IDE) eingesetzt. Über 50 Projekte decken folgende Themen ab:
Installation von MicroPython auf dem Raspberry Pi Pico
Timer-Interrupts und externe Interrupts
Projekte mit Analog-Digital-Wandler (ADC)
Verwendung des internen sowie externer Temperatursensoren
Datenlogger
Projekte zur PWM, UART, I²C-Bus und SPI-Bus
Wi-Fi und Bluetooth für die Kommunikation mit Smartphones
Projekte mit dem Digital-Analog-Wandler (DAC)
Alle in diesem Buch vorgestellten Projekte wurden vollständig getestet und sind funktionsfähig. Es werden keine Programmier- oder Elektronikkenntnisse vorausgesetzt, um sie nachzuvollziehen. Für alle beschriebenen Projekte gibt es kurze Beschreibungen, Blockdiagramme, detaillierte Schaltpläne und vollständige MicroPython-Programmlistings. Die Listings sind auch auf der zum Buch gehörenden Elektor-Webseite zu finden.
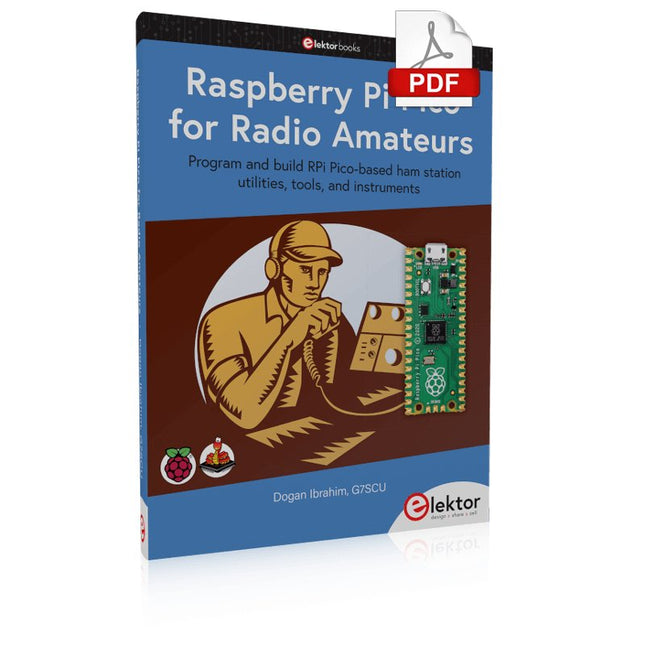
Program and build RPi Pico-based ham station utilities, tools, and instruments
Although much classical HF and mobile equipment is still in use by large numbers of amateurs, the use of computers and digital techniques has now become very popular among amateur radio operators. Nowadays, anyone can purchase a €5 Raspberry Pi Pico microcontroller board and develop many amateur radio projects using the “Pico” and some external components. This book is aimed at amateur radio enthusiasts, Electronic Engineering students, and anyone interested in learning to use the Raspberry Pi Pico to shape their electronic projects. The book is suitable for beginners in electronics as well as for those with wide experience.
Step-by-step installation of the MicroPython programming environment is described. Some knowledge of the Python programming language is helpful to be able to comprehend and modify the projects given in the book. The book introduces the Raspberry Pi Pico and gives examples of many general-purpose, software-only projects that familiarize the reader with the Python programming language. In addition to the software-only projects tailored to the amateur radio operator, Chapter 6 in particular presents over 36 hardware-based projects for “hams”, including:
Station mains power on/off control
Radio station clock
GPS based station geographical coordinates
Radio station temperature and humidity
Various waveform generation methods using software and hardware (DDS)
Frequency counter
Voltmeter / ammeter / ohmmeter / capacitance meter
RF meter and RF attenuators
Morse code exercisers
RadioStation Click board
Raspberry Pi Pico based FM radio
Using Bluetooth and Wi-Fi with Raspberry Pi Pico
Radio station security with RFID
Audio amplifier module with rotary encoder volume control
Morse decoder
Using the FS1000A TX-RX modules to communicate with Arduino
Concrétisez vos rêves, réalisez les projets les plus fous : un odomètre pour la roue de votre hamster, la surveillance complètement automatisée de votre fourmilière avec interface web, ou le Sandwich-O-Mat – une machine qui grille les sandwichs de votre choix.Avec les cartes Arduino et le mouvement DIY (« fais-le toi-même ») ou maker, se mettre à programmer des microcontrôleurs est devenu un jeu d'enfant. Une deuxième révolution a eu lieu : des développeurs ingénieux ont mis sur le marché de petites cartes – appelées « shields » ou modules – qui simplifient considérablement l'utilisation d'autres dispositifs. Ces petits modules contiennent tous les composants électroniques nécessaires pour la connexion au microcontrôleur ; quelques fils avec des fiches suffisent pour le raccordement, ce qui évite d'avoir à câbler et fait gagner du temps. En outre, il est également possible de manipuler de minuscules composants dépourvus de pattes de connexion (ceux de type CMS).ProjetsArduino et le monde extérieurCapteur BMP180, introduction aux bibliothèques et à l'I²CInitiation aux entrées/sorties avec un shield polyvalentAdaptateur I²C pour LCD et afficheurs à matrice de pointsShield clavier & LCDConvertisseur de niveauW5100 : connexion à internetShields d'extension des entrées/sortiesRelais et relais statiquesShield multifonction : unité de commande universelleConnexion d'un lecteur de carte SD par SPITouches et afficheurs à 7 segmentsConvertisseur analogique/numérique à 16 bitsConvertisseur numérique/analogique MCP4725Pilote de servomoteurs à 16 voies PWMLecteur MP3Enregistreur de données GPS avec stockage sur carte SDCapteur tactileJoystickSHT31 : température et humiditéCapteur d'UV-A VEML6070Temps de vol VL53L0XMesure de distance à ultrasonsAfficheur matriciel à LED à base de MAX7219Horloge en temps réel DS3231Circuit d'extension de port MCP23017Communication radio à 433 MHzGyroscope MPU-6050Accéléromètre ADXL345LED RVB WS2812Cartes d'alimentationCapteurs de gaz MQ-xxCapteur de dioxyde de carbone (CO2)Capteur de courant ACS712Capteur de courant INA219Pilote de moteur L298Kit RFID MFRC522Moteur pas à pas 28BYJ-48Carte avec pilote de moteur ultra-silencieux TMC2209Potentiomètre numérique X9C10xÉcran couleur TFT avec contrôleur/pilote ST7735Écran à encre électroniqueModule BluetoothCompteur GeigerModule GSM SIM800LMultiplexeur I²CModule CAN (Controller Area Network)