Elektor GREEN en GOLD leden kunnen deze uitgave hier downloaden.Nog geen lid? Klik hier om een lidmaatschap af te sluiten.
Cloc 2.0de wekker die je altijd al wilde hebben
PIO in de praktijkexperimenten met de programmeerbare I/O van de RP2040
Armeluis chiptweakerwe krijgen je wel (goedkoop) aan de praat...
Echte USB-toevalsgeneratortwee PIC’s voor de prijs van één AVR
Pimp my mike...opvoeren doe je zelf
FFT met Maixduinofrequentiespectra vastleggen
Uit het leven gegrepenontwerp(on)logica
UCN5804 stappenmotordrivervreemde onderdelen
Simuleren met Micro-Capeerste stappen in een complexe wereld
PAUL Award 2022jonge technische talenten en hun creatieve ontwerpen
Mijn eerste Software Defined Radioin minder dan 15 minuten klaar
Microcontroller-documentatie verklaarddeel 1: de opzet van een datasheet
Hoe verder met AI en embedded systems?tools, platforms – en worden schrijvers obsoleet?
Digitalisering van verticale landbouw
Elektor Infographicsembedded en AI vandaag – en morgen
Een introductie tot TinyML
Casestudy KwickPOS
High-performance in elke klassecomputer-on-module standaarden
Alle begin......wordt eindelijk actief!
I²C-communicatie met Node.js en een Raspberry Pibekijk sensordata in een browser
Video-output met microcontrollers (2)VGA en DVI
Het Metronom real-time besturingssysteemeen RTOS voor AVR-processoren
DVI op de RP2040vraaggesprek met Luke Wren, chipontwikkelaar bij Raspberry Pi
Display-HAT Minitoont het weer op de Raspberry Pi
De WEEF 2022 Awardshet goede vieren
Hexadoku
Nahezu alle Menschen werden zunehmend mit den Anwendungen der „Künstlichen Intelligenz“ (KI oder AI für engl. Artificial Intelligence) konfrontiert. Musik- oder Videoempfehlungen, Navigationssysteme, Einkaufsvorschläge etc. basieren auf Verfahren, die diesem Bereich zugeordnet werden können.
Der Begriff „Künstliche Intelligenz“ wurde 1956 auf einer internationalen Konferenz, dem Dartmouth Summer Research Project geprägt. Eine grundlegende Idee war dabei, die Funktionsweise des menschlichen Gehirns zu modellieren und darauf basierend fortschrittliche Computersysteme zu konstruieren. Bald sollte klar sein, wie der menschliche Verstand funktioniert. Die Übertragung auf eine Maschine wurde nur noch als ein kleiner Schritt angesehen. Diese Vorstellung erwies sich als etwas zu optimistisch. Dennoch sind die Fortschritte der modernen KI, beziehungsweise ihrem Teilgebiet dem sogenannten „Machine Learning“, nicht mehr zu übersehen.
Um die Methoden des Machine Learnings näher kennenzulernen, sollen in diesem Buch mehrere verschiedene Systeme zum Einsatz kommen. Neben dem PC werden sowohl der Raspberry Pi als auch der „Maixduino“ in den einzelnen Projekten ihre Fähigkeiten beweisen. Zusätzlich zu Anwendungen wie Objekt- und Gesichtserkennung entstehen dabei auch praktisch einsetzbare Systeme wie etwa Flaschendetektoren, Personenzähler oder ein „Sprechendes Auge“.
Letzteres ist in der Lage, automatisch erkannte Objekte oder Gesichter akustisch zu beschreiben. Befindet sich beispielsweise ein Fahrzeug im Sichtfeld der angeschlossenen Kamera, so wird die Information „I see a car!“ über elektronisch erzeugte Sprache ausgegeben. Derartige Geräte sind hochinteressante Beispiele dafür, wie etwa auch blinde oder stark sehbehinderte Menschen von KI-Systemen profitieren können.
Le téléchargement intégral de ce numéro est disponible pour nos membres GOLD et GREEN sur le site Elektor Magazine !Pas encore membre ? Cliquez ici.Le haut de gamme au cœur du labo ElektorAmplificateur haut de gamme Fortissimo-100Étage de sortie audio entièrement symétrique avec 100/190 WVérification de la fréquence des quartz et des circuits accordésAstuces, bonnes pratiques et autres informations utilestrucs et astuces pour circuits impriméssouder - et alors ?un regard approfondi sur la technologie de soudage modernecommande de porte de garage par Bluetooth à réponse rapideOuvrez votre porte avec votre smartphonecontrôleur de diode idéalecircuits à diodes à faible dissipation de puissanceguirlandes de LED avec ESP32 et FreeRTOSclignotantes et scintillantesdémarrer en électronique...avec plaisir, on continue avec les Zenerrécepteur FM/DAB+le meilleur des deux mondessur le vifElectronica Obscuraprocédé sans fil de débogage de micrologicielsTampon circulaire et serveur web sur l'ESP32Le COVID-19 a-t-il donné un coup de fouet à l'innovation en ingénierie ?Composants et solutions innovants de 2022Ersa i-CON TRACE – la station de soudage connectée pour professionnelsInfographiquesqu'allons-nous faire de toute cette informatique ?Comment piloter l'afficheur E-Paper d'Ynvisibleinnovation de tous les instants chez InnoFaithentretien avec Walter Arkesteijnautomatisation industriellerétrofit IdO facile et évolutifQt pour le Raspberry Piguide pas à pas pour la configuration du framework d'interface graphique utilisateurLes connecteurs linéaires ultra-plats facilitent la gestion de données multi-signauxintelligents - innovants - rentablesles FPGA GateMate conçus et fabriqués en Allemagnedes outils pour soutenir le développement de capteurs à faible coûtfusible réarmable CTPdrôle de composant, la sérieSortie analogique isolée pour Arduino Unovisite à domicile… Découvre le Thérémineelectronica fast forward 2022 — une initiative d'Elektoréquipe et calendrierradiogoniométrieretrouver les capteurs météo sans fil égarésestimer le bruit interne d'un circuit intégréméthode simpleQuestions d'éthiqueInitié par le WEEFÉthique et profit, un mariage de raisonEntretien avec le professeur Stefan Heinemannl'index WEEF 2023logiciel de calcul de filtresOutils de conception de filtres analogiquesÉteins-moi cette télé !avec TV-B-GoneMesure de la qualité de l'air avec le RP2040elekterminalInitiation à Python 3extrait du chapitre : bibliothèque Wand et traitement numérique des imagesSOLARPUNKun avenir prometteurHexadoku
Elektor GREEN and GOLD members can download their digital edition here.
Not a member yet? Click here.
PIO Programming on the Raspberry Pi PicoNine Instructions, Many Possibilities
Breaking AI Out of the BrowserUsing AI CLIs to Code, Compile, and Validate Embedded Projects
The Scrutiny DebuggerDebug, Visualize, and Test Embedded C/C++ Code
Sigfox Breakout Board (1)A Self-Built Radio BoB
Low-Noise Power Supply (2)Construction, Assembly, and Practical Implementation
Simple Signal Generator Using the RP2040Analog and Digital Signals for Around €10
Navigating the Future of Smart Homes with Matter and Edge AIAre Matter’s Latest Updates and the Rise of Edge AI Finally Giving Engineers the Tools to Build the Intelligent, Seamless Smart Homes Users Have Been Promised?
Differential Pressure SensorsPredictive Maintenance in HVAC-Systems
Security by DesignEngineering Fundamentals Limit Failure
Embedded Security Is No Longer Optional
CRA and PQC Are Rewriting Embedded Security PrioritiesWhy Even Small IoT and Industrial Firms Need an Upgrade Plan
embedded world 2026An Interview With Benedikt Weyerer, Executive Director of embedded world
Hands on with I3CUsing Hardware from ST and Microchip
The BLEnky ProjectRapid Prototyping of Bluetooth Low Energy Applications
Pulse Width ModulationFrom a Simple On/Off Thermostat to a Smoothed DC Analog Signal
AudiotronicsEar-Pleasing Electronics for DIY Construction
From Life’s ExperienceRead The F...ing Manual!
ESP32 Audio Transceiver Board (Part 4)Tuning the Clocks - And a Wired Option
2026: An AI OdysseyThe 2025 Vibe-Coding Hangover
Symmetrical DC LoadDC Load, Static or Dynamic, and Symmetrical
Counting Faces with MaixCAMAn Easy Way to Capture Audience Sizes
Raspberry Pi 5 provides two four-lane MIPI connectors, each of which can support either a camera or a display. These connectors use the same 22-way, 0.5 mm-pitch “mini” FPC format as the Compute Module Development Kit, and require adapter cables to connect to the 15-way, 1 mm-pitch “standard” format connectors on current Raspbery Pi camera and display products.These mini-to-standard adapter cables for cameras and displays (note that a camera cable should not be used with a display, and vice versa) are available in 200 mm, 300 mm and 500 mm lengths.
Elektor GREEN and GOLD members can download their digital edition here.
Not a member yet? Click here.
USB Measurement AdapterTesting Current and Signal Quality of USB Ports
4...20 mA Current Output for Arduino UnoA Reliable, EMI-Insensitive Current Loop Interface
Vacuum Cleaner Automatic ControlKeep Your Tools’ Work Area Clean
DDS Generator with ATtiny
Opamp-Tester V2New PCB – Now Also Suitable for SMDs
550-mW “Lamp” Audio AmplifierGet the Warm Sound of Vacuum Tubes With Ease
Fuse GuardMonitoring a Fuse with a Flashing LED
HQ RIAA PreamplifierGet the Most Out of Your Vinyl Records!
Turntable Speed CalibratorAn Arduino-Based 100–120 Hz Strobe Light Generator
Elektor Classics: video buffer/repeater
Infrared Remote-Controlled DimmerControl Your Halogen or LED Floor Lamp Effortlessly and With Style
How to Use switch…case on Strings in C++/Arduino IDE
Magnet FinderWith a Simple Hall-Effect Sensor
Raspberry Pi Smart Power ButtonA Solution for Raspberry Pi Up to Model 4
Essential Maker TipsProfessional Insights for Everyday Making
Practical Projects with the 555 TimerDC Motor Control and Fast Reaction Challenges
Basic AC-Load-On MonitorSave Energy with a Simple Device
Power Banks in ParallelA Three-Day Continuous Power Solution
VFO Up to 15 MHzAn Implementation With Raspberry Pi Pico
Violin Tuner with ATtiny202
Elektor Classics: video amplifier for B/W television sets
Capacitance Meter20 pF to 600 nF
Quasi-Analog Clockwork Mk IITwo LED Rings for Hours and Minutes
You Can Do Anything You Want(with the Arduino Ecosystem at Your Side)
Neon Lamp Dice
Elektor Classics: RTTY calibrator indicator
Inspiring Hardware Designs for Your ESPs
Elektor Classics: variable 3 A power supply
RGB LEDs with Integrated Control CircuitLight with Precision: ICLEDs Set Standards
Experiment: Towards a Mixed-Signal Theremin?Blending Modern Time-of-Flight Sensors With the Timeless XR2206 Analog Generator
ESP32 Audio Transceiver Board (Part 1)SD Card WAV File Player Demo
Infographics: Circuits and Circuit Design 2025
Small Audio MixerA Simple and Versatile Scalable Design
Smart Staircase Light TimerSave More Money on the Energy Bill!
Smarten Up Your ShuttersControlling Velux Hardware With an ESP32 and MQTT
Solid-State Foot WarmerEnergy-Efficient Comfort
Is the M5Stamp Fly Quadcopter the Next Tello?
Boosting Wi-Fi Range of the ESP32-C3 SuperMiniA Simple and Effective Antenna Mod
ZD-8968 Hot-Air Soldering StationA Budget-Friendly Workhorse or Just Hot Air?
Parking Sensor TesterFinding Defects in the PDC System of a Car
Elektor GREEN en GOLD leden kunnen deze uitgave hier downloaden.
Nog geen lid? Klik hier om een lidmaatschap af te sluiten.
PIO programmeren op de Raspberry Pi PicoNegen instructies, veel mogelijkheden
AI buiten de browser brengenAI-CLI's gebruiken voor het coderen, compileren en valideren van embedded projecten
De Scrutiny DebuggerDebuggen, visualiseren en testen van code in Embedded C/C++
Sigfox breakout board (1)Een zelfgebouwde radio BoB
Low-Noise voeding (2)Constructie, montage en praktische implementatie
Eenvoudige signaalgenerator met de RP2040Analoge en digitale signalen voor ongeveer €10
De toekomst van slimme huizen verkennen met Matter en Edge AIBieden de nieuwste updates van Matter en de opkomst van Edge AI technici eindelijk de tools om de intelligente, slimme huizen te bouwen die gebruikers zijn beloofd?
Differentiële druksensorenVoorspellend onderhoud in HVAC-systemen
Security by designTechnische basisprincipes beperken storingen
Embedded security is niet langer optioneel
CRA en PQC herzien prioriteiten voor embedded securityWaarom zelfs kleine IoT- en industriële bedrijven een upgradeplan nodig hebben
embedded world 2026Een interview met Benedikt Weyerer, Executive Director embedded world
Praktijkervaring met I3CGebruik van hardware van ST en Microchip
Het BLEnky-projectSnelle prototyping voor Bluetooth Low Energy toepassingen
Pulsbreedtemodulatievan een eenvoudige aan/uit-thermostaat naar een rimpelloos DC-signaal
AudiotronicaOorstrelende elektronica voor zelfbouw
Uit het leven gegrepenRead the f...ing manual!
ESP32 audio transceiver board (Deel 4)Afstemmen van de kloksignalen en een bekabelde versie
2026: An AI OdysseyDe kater van Vibe-Coding in 2025
Symmetrische DC-belastingStatische of dynamische en symmetrische gelijkstroombelasting
Gezichten tellen met MaixCAMEen eenvoudige methode om de omvang van het publiek vast te leggen
Designing, Wiring, and Controlling
Build Your Own Coffee Roaster is a practical guide to constructing and operating the Cobra Smart Roaster and its companion Open Roaster Controller (ORC).
The e-book walks the reader through every stage of the build, from assembling the powerhead and wiring the system to installing and configuring the controller. Along the way, you’ll learn how to use the Raspberry Pi to bring precision and flexibility to your roasting process.
Clear, step-by-step chapters cover:
Powerhead construction and required components
Low- and high-voltage wiring
Installing the ORC, network setup, and using the web interface
Roasting coffee with the Cobra in different setups, including hand-stir and bread-machine roasting
Advanced topics such as manual mode, fixed profiles, Artisan-Scope connections, and ORC system programming
A complete parts list, practical guidance throughout, and concise explanations make this e-book a useful reference for anyone interested in building, modifying, or understanding their own coffee-roasting system.
The X500 V2 ARF Kit is an affordable, lightweight, and robust carbon fiber professional drone kit that is easy to assemble (less than 15 minutes). It comes with the X500 V2 Frame Kit and motors, ESCs, power distribution boards and propellers preinstalled. It is perfectly compatible with various flight controllers such as the Holybro Pixhawk series, Durandal, Pix32 V5, etc. There are numerous improvements compared the previous model.
Specifications
Wheelbase: 500 mm
Motor mount pattern: 16x16 mm
Frame body: 144x144 mm, 2 mm thick
Landing gear height: 215 mm
Space between top and bottom plates: 28 mm
Weight: 610 g
Flight time: ~18 minutes hover with no additional payload. Tested with 5000 mAh battery.
Payload: 1500 g (without battery, 70% throttle)
Battery recommendation: 4S 3000-5000 mAh 20C+ with XT60 Lipo battery (not Included)
Included
X500 V2 Frame Kit
With Preinstalled Items:
4x Motors: Holybro 2216 KV920 Motor (4 pcs) with XT30 Plug
4x ESCs (BLHeli S ESC 20A)
6x 1045 Propellers
Power Distribution Board – XT60 plug for battery & XT30 plug for ESCs & peripherals
Note: Depth camera mount is sold separately.
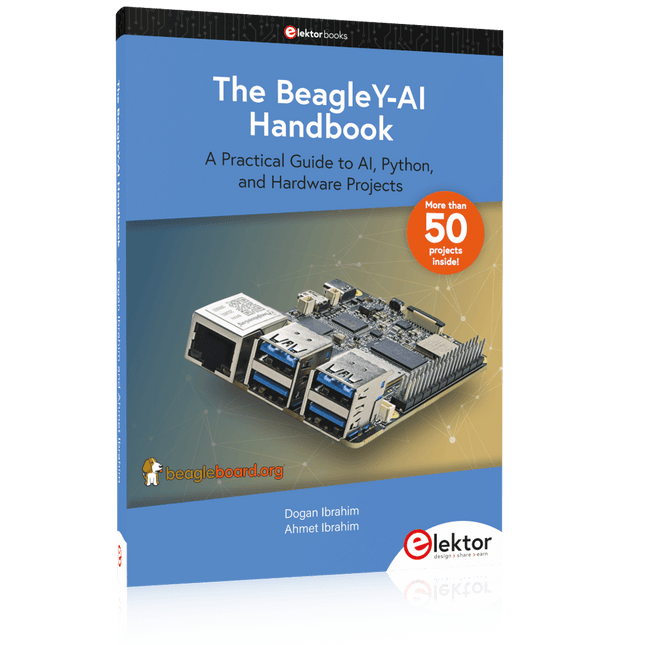
A Practical Guide to AI, Python, and Hardware Projects
Welcome to your BeagleY-AI journey! This compact, powerful, and affordable single-board computer is perfect for developers and hobbyists. With its dedicated 4 TOPS AI co-processor and a 1.4 GHz Quad-core Cortex-A53 CPU, the BeagleY-AI is equipped to handle both AI applications and real-time I/O tasks. Powered by the Texas Instruments AM67A processor, it offers DSPs, a 3D graphics unit, and video accelerators.
Inside this handbook, you‘ll find over 50 hands-on projects that cover a wide range of topics—from basic circuits with LEDs and sensors to an AI-driven project. Each project is written in Python 3 and includes detailed explanations and full program listings to guide you. Whether you‘re a beginner or more advanced, you can follow these projects as they are or modify them to fit your own creative ideas.
Here’s a glimpse of some exciting projects included in this handbook:
Morse Code Exerciser with LED or BuzzerType a message and watch it come to life as an LED or buzzer translates your text into Morse code.
Ultrasonic Distance MeasurementUse an ultrasonic sensor to measure distances and display the result in real time.
Environmental Data Display & VisualizationCollect temperature, pressure, and humidity readings from the BME280 sensor, and display or plot them on a graphical interface.
SPI – Voltmeter with ADCLearn how to measure voltage using an external ADC and display the results on your BeagleY-AI.
GPS Coordinates DisplayTrack your location with a GPS module and view geographic coordinates on your screen.
BeagleY-AI and Raspberry Pi 4 CommunicationDiscover how to make your BeagleY-AI and Raspberry Pi communicate over a serial link and exchange data.
AI-Driven Object Detection with TensorFlow LiteSet up and run an object detection model using TensorFlow Lite on the BeagleY-AI platform, with complete hardware and software details provided.
Open-Source-Code mit Arduino IDE und PlatformIO
Autonomes Fahren: GPS, Accelerometer, Gyroskop
PS3-Controller
Mikrocontroller wie der Arduino und Einplatinenrechner wie der Raspberry Pi haben sich zu beliebten Komponenten entwickelt. Dritter im Bunde ist der ESP32 der Firma Espressif. Mikrocontroller dieser Baureihe zeichnen sich durch eine Vielzahl implementierter Funktionen aus, die bei einem Arduino konventioneller Prägung mit einem Atmel-AVR-Mikrocontroller erst mit weiterer Hardware möglich sind. Prominentes Beispiel sind hier die WiFi- und Bluetooth-Funktionalitäten. Gegenüber einem Raspberry Pi zeichnen sie sich durch einen deutlich geringeren Preis aus.
Allgemeine Informationen für die Realisierung eines Roboterauto-Projekts mit dem ESP32 sind leicht zu finden. Dabei handelt es sich aber oft nur um Ausführungen zu einem Teilaspekt, ohne inhaltliche oder funktionale Abstimmung. So ist nicht nur die Beschaffung der benötigten Informationen mühselig und zeitaufwändig, sie kann auch außerordentlich fehlerträchtig sein.
Ansatzpunkt dieses Buches ist, diese Lücke zu schließen. Es geht auf verschiedene Möglichkeiten eines Chassis ein, vermittelt nötige Kenntnisse und führt schrittweise von einer einfachen Motorsteuerung zu einem komplexen sensor- und sprachgesteuerten Roboterauto. Hacks rund um GPS und eine PlayStation 3 runden die Sache ab.
Inhalt
Bei der Reihenfolge der Kapitel wurde versucht – beginnend bei der Darstellung von grundlegenden Informationen – über die Lösung einfacher Aufgaben zu etwas anspruchsvolleren Techniken zu führen.
Der Mikrocontroller ESP32
Die Software erstellen
Die Stromversorgung
Rund um die Hardware
Das Chassis
Der Gleichstrommotor
Kabellose Steuerung über WiFi
Mit Sensoren Hindernisse erkennen
Eine eigene Roboterauto-App
Servo und Lichtsensor
GPS
Accelerometer / Gyroskop
PS3-Controller
Roboterauto-App
Hinweis zur Software
Die Dateien haben das Suffix (.cpp). Grund ist die Entwicklung mit PlatformIO. Mit Copy & Paste sollten sie auch in der Arduino-IDE verwendet werden können.