A Fast-Lane Ride From Concept to Project
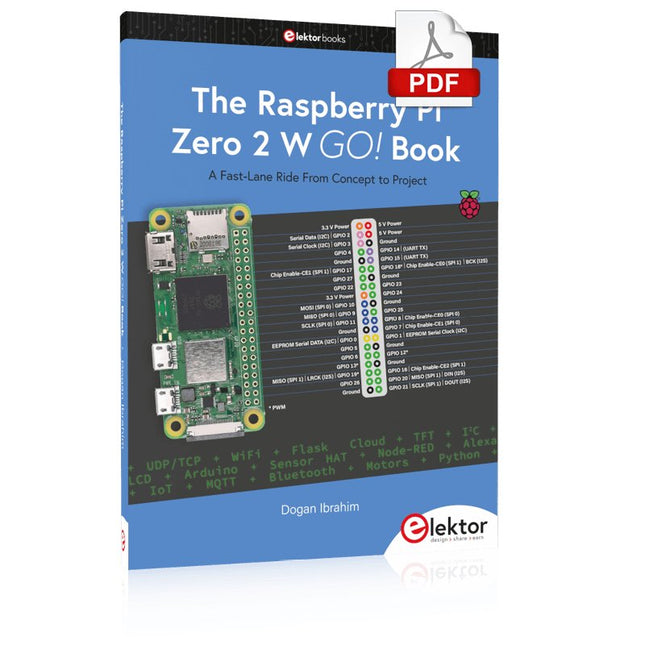
The core of the book explains the use of the Raspberry Pi Zero 2 W running the Python programming language, always in simple terms and backed by many tested and working example projects. On part of the reader, familiarity with the Python programming language and some experience with one of the Raspberry Pi computers will prove helpful. Although previous electronics experience is not required, some knowledge of basic electronics is beneficial, especially when venturing out to modify the projects for your own applications.
Over 30 tested and working hardware-based projects are given in the book, covering the use of Wi-Fi, communication with smartphones and with a Raspberry Pi Pico W computer. Additionally, there are Bluetooth projects including elementary communication with smartphones and with the popular Arduino Uno. Both Wi-Fi and Bluetooth are key features of the Raspberry Pi Zero 2 W.
Some of the topics covered in the book are:
Raspberry Pi OS installation on an SD card
Python program creation and execution on the Raspberry Pi Zero 2 W
Software-only examples of Python running on the Raspberry Pi Zero 2 W
Hardware-based projects including LCD and Sense HAT interfacing
UDP and TCP Wi-Fi based projects for smartphone communication
UDP-based project for Raspberry Pi Pico W communication
Flask-based webserver project
Cloud storage of captured temperature, humidity, and pressure data
TFT projects
Node-RED projects
Interfacing to Alexa
MQTT projects
Bluetooth-based projects for smartphone and Arduino Uno communications
59 Experiments with Arduino IDE and Python
The main aim of this book is to teach the Arduino IDE and MicroPython programming languages in ESP32 based projects, using the highly popular ESP32 DevKitC development board. Many simple, basic, and intermediate level projects are provided in the book using the Arduino IDE with ESP32 DevKitC. All projects have been tested and work. Block diagrams, circuit diagrams, and complete program listings of all projects are given with explanations. In addition, several projects are provided for programming the ESP32 DevKitC using MicroPython. The projects provided in this book are designed to teach the following features of the ESP32 processor:
GPIOs
Touch sensors
External interrupts
Timer interrupts
I²C and I²S
SPI
PWM
ADC
DAC
UART
Hall sensor
Temperature sensor
Infrared controller
Reading and writing to SD card
Reading and writing to flash memory
RTC timer
Chip ID
Security and encryption
Wi-Fi and network programming
Bluetooth BLE programming
Communication mobile devices
Low power design
ESP-IDF programming
The projects have been organized with increasing levels of difficulty. Readers are encouraged to tackle the projects in the order given. A specially prepared hardware kit (SKU 18305) is available from Elektor. With the help of this hardware, it should be easy and fun to build the projects in this book.
Deze verbetere versie 2.0 (exclusief verkrijgbaar bij Elektor) bevat de volgende verbeteringen:
Verbeterde aarding (PE) van het ovenchassis
Extra thermische isolatielaag rond de oven om geuren te verminderen
Aansluiting op een computer, waardoor curvebewerking op een PC mogelijk is
Functies zoals constante temperatuurregeling en timingfuncties
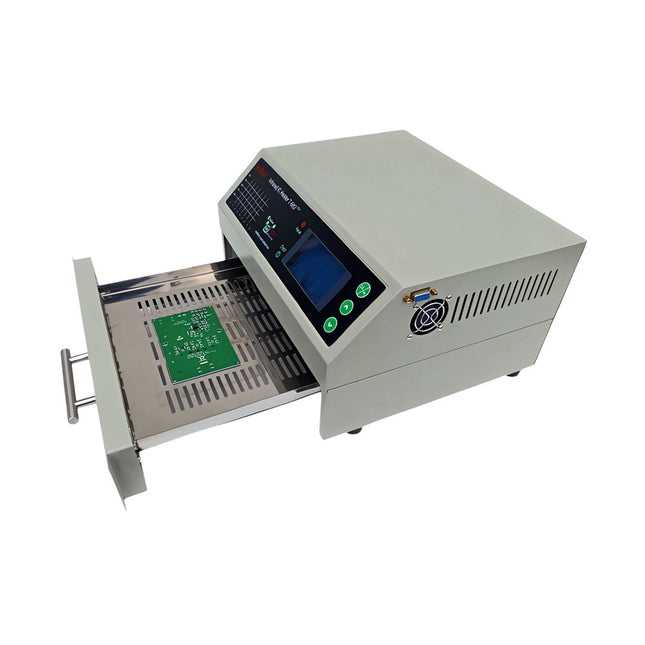
De infrarood IC oven T-962 v2.0 is een microprocessorgestuurde reflow oven die je kunt gebruiken voor het gemakkelijk solderen van diverse SMD en BGA componenten. Het hele soldeerproces kan automatisch worden voltooid en het is heel gemakkelijk in het gebruik. Dit apparaat maakt gebruik van een krachtige infrarood straling en circulatie van de hete luchtstroom, zodat de temperatuur zeer nauwkeurig wordt gehouden en gelijkmatig verdeeld wordt.
Een lade met vensters is ontworpen om het werkstuk vast te houden, en maakt een veilige soldeertechniek mogelijk en het manipuleren van SMD & BGA en andere kleine elektronische onderdelen die op een printplaat gemonteerd zijn. De T-962 v2.0 kan gebruikt worden om soldeer automatisch na te verwarmen om slechte soldeerverbindingen te corrigeren, slechte componenten te verwijderen/vervangen en kleine technische modellen of prototypes te maken.
Kenmerken
Groot infrarood soldeeroppervlak
Effectief soldeergebied: 180 x 235 mm; dit vergroot het gebruik van deze machine drastisch en is daardoor een goede aanschaf.
Keuze uit verschillende soldeercycli
De parameters van acht soldeercycli zijn vooraf ingesteld en het hele soldeerproces kan automatisch verlopen van voorverwarmen, op temperatuur vloeibaar houden tot afkoelen..
Speciale opwarming en temperatuur egalisatie bij alle versies
Gebruikt een energiezuinige infrarood verwarming tot 800 Watt en luchtcirculatie om het soldeer vloeibaar te houden.
Ergonomisch ontwerp, praktisch en gemakkelijk te bedienen
Door de goede bouwkwaliteit, lichte gewicht en de kleine afmetingen kan de T-962 v2.0 gemakkelijk op een werkbank worden geplaatst, of worden vervoerd of opgeborgen.
Groot aantal functies beschikbaar
De T-962 v2.0 kan de meeste kleine componenten van printplaten solderen, bijvoorbeeld CHIP, SOP, PLCC, QFP, BGA enz. Het is de ideale oplossing voor rework, van eenmalige productie tot kleinschalige productie op bestelling.
Specificaties
Soldeeroppervlak (max.)
180 x 235 mm
Vermogen (max.)
800 W
Temperatuurbereik
0-280°C
Verwarmingsmethode
Infrarood
Verwerkingstijd
1-8 minuten
Voeding
220 V AC/50 Hz
Display
LCD met achtergrondverlichting
Bedieningsmodus
8 intelligente temperatuurcurven
Afmetingen
310 x 290 x 170 mm
Gewicht
6,2 kg
Inbegrepen
1x T-962 v2.0 Reflow Soldeeroven (Elektor versie)
2x Zekeringen
1x Netsnoer (EU)
Deze bundel bevat alles wat u nodig hebt om direct aan de slag te gaan met het XIAO ESP32-C3 development board. Leer de basisprincipes van de ESP32-C3 en bouw praktische projecten met Wi-Fi, Bluetooth, sensoren, displays, PWM, Deep Sleep en nog veel meer.
Boek: Build Smart Projects with the XIAO ESP32-C3 Board
Het XIAO ESP32-C3 board combineert de ultracompacte vormfactor van de XIAO-serie met de uitgebreide mogelijkheden van de ESP32-C3-chip, inclusief geïntegreerde Wi-Fi en Bluetooth 5.0. Dit boek is een uitgebreide, praktische gids waarmee u het maximale uit dit krachtige en toch betaalbare development board kunt halen.
De auteur neemt de lezer mee van de basisprincipes tot geavanceerde projecten. Na het laten knipperen en dimmen van leds komen ADC en PWM aan bod voor nauwkeurige sensoraansluiting en PWM-gestuurde lichteffecten. Vervolgens gaat u aan de slag met praktische toepassingen, waaronder:
Een Wi-Fi-weerstation met OLED-display en actuele online weergegevens
Een ultrasone parkeerassistent met akoestische feedback
Een koelkastmonitor met klimaatsensoren en Deep Sleep voor jarenlang batterijgebruik
Een retro Pong-spel dat contactloos met een sensor wordt bestuurd
Een microfoongebaseerde party-app die reageert op handgeklap
En nog veel meer: lichtregeling, reactietijdmeting, analyse van de netfrequentie, bodemvochtmeting, sfeerverlichting met leds en 7-segmentdisplays
Seeed Studio XIAO ESP32C3
De Seeed Studio XIAO ESP32C3 is uitgerust met een sterk geïntegreerde ESP32-C3-chip, gebaseerd op een 32-bits RISC-V-processor met een viertraps pipeline die werkt met een kloksnelheid tot 160 MHz.
Het board beschikt over een sterk geïntegreerde ESP32-C3 SoC. De chip bevat een volledig 2,4-GHz Wi-Fi-subsysteem en ondersteunt daarmee Station-modus, SoftAP-modus, SoftAP & Station-modus en promiscuous-modus voor uiteenlopende Wi-Fi-toepassingen. Tegelijkertijd werkt de chip met een zeer laag energieverbruik en ondersteunt hij Bluetooth 5 en Bluetooth Mesh. Met 400 KB SRAM en 4 MB Flash biedt de chip voldoende programmeerruimte en volop mogelijkheden voor IoT-besturingstoepassingen.
Toepassingen
Internet of Things
Wearables
Gezondheidsmonitoring
Onderwijs
Energiezuinige netwerken
Snelle prototyping
Specificaties
Processor
ESP32-C3 SoC
RISC-V single-core 32-bit chip processor with a four-stage pipeline that operates at up to 160 MHz
Wireless
Complete 2.4GHz Wi-Fi subsystem
Bluetooth Low Energy 5.0/ Bluetooth Mesh
On-chip Memory
400 KB SRAM & 4 MB Flash
Interface
1x UART, 1x I²C, 1x SPI, 11x GPIO (PWM), 4x ADC
1x Reset button, 1x Boot button
Power (Typ.)
Max 3.3 V Output Current: 500 mA Test Condition: BAT Pin Input @ 3.8 V Source Capability: 3 A
Charging current: 380 mA(Fast) / 40 mA(Trickle)
Input voltage (VIN): 5 VInput voltage (BAT): 3.7 V
Deep Sleep Power Consumption
Deep Sleep Mode: 44 μA
Wi-Fi Enabled Power Consumption
Active Mode: 75 mA
Modem-sleep Mode: 25 mA
Light-sleep Mode: 4 mA
BLE Enabled Power Consumption
Modem-sleep Mode: 27 mA
Light-sleep Mode: 10 mA
Dimensions
21 x 17.8 mm
Inbegrepen
1x Seeed Studio XIAO ESP32C3
1x Antenne
2x 7-pins header
Downloads
Wiki
Datasheet
Deze bundel bevat:
Boek: Build Smart Projects with the XIAO ESP32-C3 Board (t.w.v. € 35)
Board: Seeed Studio XIAO ESP32C3 (t.w.v. € 10)
De OWON SDS1102 is een betaalbare benchtop digitale oscilloscoop die solide prestaties combineert met essentiële meetfuncties. Deze 2-kanaals oscilloscoop biedt een bandbreedte van 100 MHz, een sample rate van 1 GS/s, een 7-inch LCD-display en een geheugendiepte van 10 kpts. Daarmee is het een praktische keuze voor dagelijkse elektronicatests, foutopsporing en onderwijs.
De SDS1102 beschikt over een vereenvoudigd triggersysteem met niveau- en flanktriggering, waardoor gangbare signalen eenvoudig kunnen worden vastgelegd en geanalyseerd. Het apparaat is ontworpen voor toepassingen waarvoor geen grote geheugendiepte of geavanceerde triggerfuncties nodig zijn, en biedt een eenvoudige en kostenefficiënte oplossing voor basis-signaalanalyse.
Kenmerken
Bandbreedte: 100 MHz
2 kanalen
Bemonsteringssnelheid: 1 GS/s
Ultradunne behuizing
7-inch lcd met hoge resolutie
Ondersteuning voor SCPI en LabVIEW
Specificaties
Bandbreedte
100 MHz
Horizontale schaal (s/div)
5 ns/div - 1000 s/div
Kanalen
2
Verticale gevoeligheid
5 mV/div - 5 V/div (bij ingang)
DC Gain nauwkeurigheid
3%
Verticale resolutie (A/D)
8 bits (2 kanalen tegelijk)
Ingang
Ingangsimpedantie
1 MΩ, 10 pF
Ingangskoppeling
AC, DC, GND
Max ingangsspanning
± 400 V, CATI, CATII
Passieve probes
x1; 10
Probe verzwakkingsfactor
x1; x10; x100; x1000
Triggersysteem
Trigger mode
Auto, Normal, Single
Trigger type
Flank, Video
Flank triggerbron
CH1, CH2
Video trigger
Sampletype
Real-time
Samplefrequentie
1 GS/s
Equivalente samplesnelheid
No
Golflengte
10K pts
Interpolatie
sin(x)/x
Meet- en rekenkundig bewerkingssysteem
Automatische meting
Vpp, Vavg, RMS, Frequency, Period, Vmax, Vmin, Vtop, Vbase, Width, Overshoot, Pre-shoot Rise time, Fall time, +Width, -Width, +Duty, -Duty, Delay A->B, Delay A->B, area, cycle area
Rekenkundige functies
Addition, Subtraction, Multiplication, Division, FFT
Algemene kenmerken
Display maat
7" color LCD
Display resolutie
800 x 480
Voeding
100-240 V, 45-440 Hz, <15 W
Afmetingen
301 x 70 x 152 mm
Gewicht
1,1 kg
Inbegrepen
1x OWON SDS1102 Oscilloscoop
2x Oscilloscoopsonde
1x Sonde aanpassen
1x Netsnoer
1x USB-kabel
1x CD-Rom
1x Snelstartgids
Downloads
Quick Guide
Manual
PC Software
SCPI Commands
VOYAGE DANS LES RÉSEAUX NEURONAUX (1ÈRE PARTIE)Les neurones artificielsTEST DE PRÉCONFORMITÉ CEM POUR UN PROJET ALIMENTÉ EN COURANT CONTINUPartie 1 : RSIL double continuCHARGE ÉLECTRONIQUE EN CC ET CAJusqu'à 400 V et 10 A (crête)DÉMARRER EN ÉLECTRONIQUE (9)N'ayez pas peur du choc... un peu de « self control » suffit !TRAITEMENT D'IMAGES AVEC LE MODULE JETSON NANO DE NVIDIA (1ÈRE PARTIE)Matériel et logicielZOOM SUR LES TRANSFORMATEURS SECTEURComportement transitoire à l'allumage et l'extinction« YES WE CAN » AVEC PICAN 3Module de bus CAN pour le Raspberry Pi 4CENTRALE SOLAIRE SUR BALCONUn investissement vite amortiPRISE DE VUE ET DIFFUSION VIDÉO EN CONTINU AVEC UN RASPBERRY PI 4La caméra Raspberry Pi HQ en actionUTILISATION D'ÉCRANS DANS LES PROJETS RASPBERRY PIExtrait : écrans à diodes électroluminescentes organiques (OLED)PROPELLER 2 DE PARALLAX (4)Envoi de chaînes de caractères60 ANS D'ELEKTORRegard sur septembreDANS L'ANTRE DE…Menno van der Veen et de ses tubes amplificateursCIRCUITS HYBRIDESROSE DES VENTS AVEC LE CAPTEUR GY-271Ou pourquoi il faut faire des huit pour calibrer un capteurMESUREZ VOTRE EMPREINTEÉlectronique et émissions de gaz à effet de serreTHERMOSTAT CONNECTÉ À ESP32Conservez votre vin à la bonne température !LÉVITATION MAGNÉTIQUE, VERSION NUMÉRIQUEComparateur analogique remplacé par un ESP32 PicoULTIMATE ARDUINO UNO HARDWARE MANUAL - FR TRANSLATIONExtrait : chargeur d'amorçage du microcontrôleur principalMICROPYTHON POUR L'ESP32 ET SES COPAINSPartie 2 : piloter facilement les écrans matricielsCARTE MADMACHINE SWIFTIOUn langage récent pour du matériel tout nouveauSUR LE VIFPassions incertainesHEXADOKUCasse-tête pour elektorniciens
Projects Using Arduino IDE and the LVGL Graphics Library
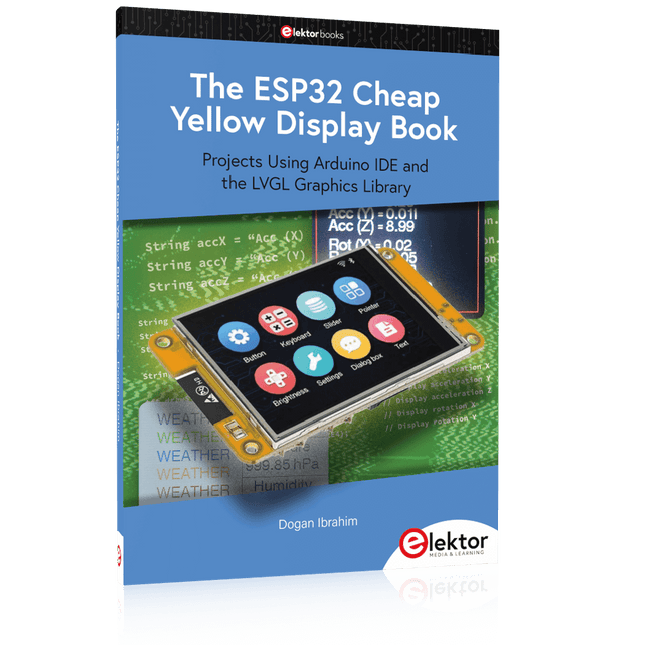
The ESP32 is probably one of the most popular microcontrollers used by many people, including students, hobbyists, and professional engineers. Its low cost, coupled with rich features makes it a popular device to use in many projects. Recently, a board called the ESP32 Cheap Yellow Display (CYD for short) is available from its manufacturers. The board includes a standard ESP32 microcontroller together with a 320x240 pixel TFT display. Additionally, the board provides several connectors for interfaces such as GPIO, serial port (TX/RX), power and Ground. The inclusion of a TFT display is a real advantage as it enables users to design complex graphics-based projects without resorting to an external LCD or graphics displays.
The book describes the basic hardware of the ESP32 CYD board and provides details of its on-board connectors. Many basic, simple, and intermediate-level projects are given in the book based on the ESP32 CYD, using the highly popular Arduino IDE 2.0 integrated development environment. The use of both the basic graphics functions and the use of the popular LVGL graphics library are discussed in the book and projects are given that use both types of approaches.
All the projects given in the book have been tested and are working. The block diagram, circuit diagram, and the complete program listings and program descriptions of all the projects are given with explanations. Readers can use the LVGL graphics library to design highly popular eye-catching full-color graphics projects using widgets such as buttons, labels, calendars, keypads, keyboards, message boxes, spinboxes, sliders, charts, tables, menus, bars, switches, drop-down lists, animations, and many more widgets.
A Project-Based Introduction to Microcontrollers and Drone Control
A Practical Introduction to Embedded Systems with the ESP32
This book is intended for readers who are new to embedded systems and looking for a structured, example-driven way to begin. If you’ve explored general-purpose electronics or Arduino-based resources but found them too broad or lacking in practical application, this guide offers a more focused alternative.
With a small, affordable set of components – such as LEDs, sensors, an OLED screen and a motion sensor – you’ll build and work with the same hardware setup throughout the book. This allows you to focus on learning and experimenting without constant reconfiguration.
Topics include:
Understanding and programming the ESP32 microcontroller
Using the Arduino IDE to write and deploy code
Exploring cyber-physical systems, culminating in basic drone control
No prior experience with Arduino or embedded development is required. Each section includes hands-on examples and mini-projects designed to reinforce core concepts and encourage deeper exploration. By the end, you’ll be equipped not only to reproduce the book’s examples, but also to extend them toward your own ideas and applications.
Whether your interest is in learning embedded programming, building interactive systems, or exploring educational drone control, this book provides a clear and practical path to getting started.
Trek de hendel naar beneden voor de hoogste score!Deze Elektor Circuit Classic uit 1984 toont een speelse toepassing van logische IC's uit de CMOS 400x serie in combinatie met leds, destijds een zeer populaire combinatie. Het project imiteert een gokkast met ronddraaiende cijfers.Het spelVoordat het spel start dient u eerst het aantal rondes af te spreken. Speler 1 trekt de schakelhendel naar beneden zo lang als hij wenst en laat hem dan los. De leds tonen vervolgens de score die de som is van de 20-10-5-2-1 leds die oplichten. Mocht het Play Again! ledje gaan branden dan heeft speler 1 een extra 'gratis' ronde. Zo niet, dan is speler 2 aan de beurt. De spelers houden hun scores bij en de hoogste score wint.Kenmerken
Leds geven de score aan
Meerdere spelers en Play Again!
Elektor Heritage circuit symbolen
Uitgeprobeerd en getest door Elektor Labs
Educatief en nerdy project
Through-hole onderdelen
Inbegrepen
Printplaat
Alle componenten
Houten standaard
Stuklijst
Weerstanden (5%, 250 mW)
R1, R2, R3, R4 = 100 kΩ
R5, R6, R7, R8, R9, R10 = 1 kΩ
Condensatoren
C1 = 4,7 nF, 10 %, 50 V, 5 mm
C2 = 4,7 μF, 10%, 63 V, axiale
C3, C4 = 100 nF, 10 %, 50 V, keramiek X7R, 5 mm
Halfgeleiders
Led1 – Led6 = rood, 5 mm (T1 3/4)
IC1 = 74HC4024
IC2 = 74HC132
Diversen
S1 = schakelaar, tuimel, 21 mm hendel, SPDT, kortstondig
S2 = schakelaar, tactiel, 24 V, 50 mA, 6x6 mm
S3 = schakelaar, schuif, SPDT
IC1, IC2 = IC-voetje, DIP14
BT1 = CR2032 PCB batterijhoudertje
Tafel standaard
PCB 230098-1
Niet inbegrepen: BT1 = CR2032 knoopcel batterij
Deze bundel gaat helemaal over het ontwerpen van projecten gebaseerd op de 555 timer IC. Het boek bevat meer dan 45 volledig geteste en gedocumenteerde projecten. Samen met de kit, die meer dan 130 through-hole componenten bevat, kunt u alle beschreven projecten bouwen op een breadboard. De opzet maakt het ook gemakkelijk om de projecten aan te passen en ermee te experimenteren.
Meer dan 45 builds voor de legendarische 555 Chip (en de 556, 558)
Enkele van de projecten in het boek zijn:
Afwisselend knipperende twee LED's
De knippersnelheid van de LED's wijzigen
Aan/uit-schakelaar van de aanraaksensor
In-/uitschakelvertraging
Lichtafhankelijk geluid
Donker/lichtschakelaar
Tone Burst-generator
Timer voor lange duur
LED's achtervolgen
LED-roulettespel
Verkeerslichten
Continuïteitstester
Elektronisch slot
Schakel over naar debouncen van contacten
Elektronisch speelgoedorgel
Alarmsysteem met meerdere sensoren
Metronoom
Spanningsvermenigvuldigers
Elektronische dobbelstenen
Weergaveteller met 7 segmenten
Motorbesturing
Dobbelstenen met 7 segmenten
Elektronische sirene
Diverse andere projecten
Kit-inhoud
Weerstanden
1x 15 kΩ
1x 68 kΩ
2x 47 kΩ
1x 82 kΩ
2x 820 Ω
1x 8,2 kΩ
3x 10 kΩ
1x 1,8 kΩ
1x 6,8 kΩ
14x 2,2 kΩ
10x 680 Ω
1x 27 kΩ
1x 5,6 kΩ
1x 560 kΩ
1x 4,7 kΩ
1x 3,3 kΩ
3x 33 kΩ
1x 36 kΩ
2x 100 kΩ
5x 1 kΩ
1x 3,9 kΩ
2x 56 kΩ
2x 12 kΩ
1x 10 kΩ potentiometer
1x 1 MΩ potentiometer
2x 50 kΩ potentiometer
3x 20 kΩ potentiometer
1x 10 kΩ potentiometer
1x 10 kΩ potentiometer
1x 50 kΩ potentiometer
1x 100 kΩ potentiometer
1x 50 kΩ potentiometer
Condensatoren
1x 0,33 μF
1x 1 μF
1x 10 nF
1x 22 nF
1x 47 nF
1x 100 nF
1x 10 μF elektrolytisch
1x 33 μF elektrolytisch
2x 100 μF elektrolytisch
LED's
10x 5 mm rode LED
10x 3 mm rode LED
3x 3 mm gele LED
3x 3 mm groene LED
1x 7-segment-LED met gemeenschappelijke kathode
Semiconductors
3x 555 timer
1x CD4017 counter
1x CD4026 counter
1x CD4011 NAND-poort
4x 1N4148-diode
1x IRFZ46N MOSFET
1x Thermistor
1x Lichtafhankelijke weerstand (LDR)
Diverse
1x Passieve buzzer
1x Actieve buzzer
1x SG90 servo
1x 8 Ω miniluidspreker
1x 9 V DC borstelmotor
1x 5 V relais
1x 9 V batterijclip
7x Drukknopschakelaars
1x Broodplank
1x Breadboard-jumperdraden
For Raspberry Pi, ESP32 and nRF52 with Python, Arduino and Zephyr
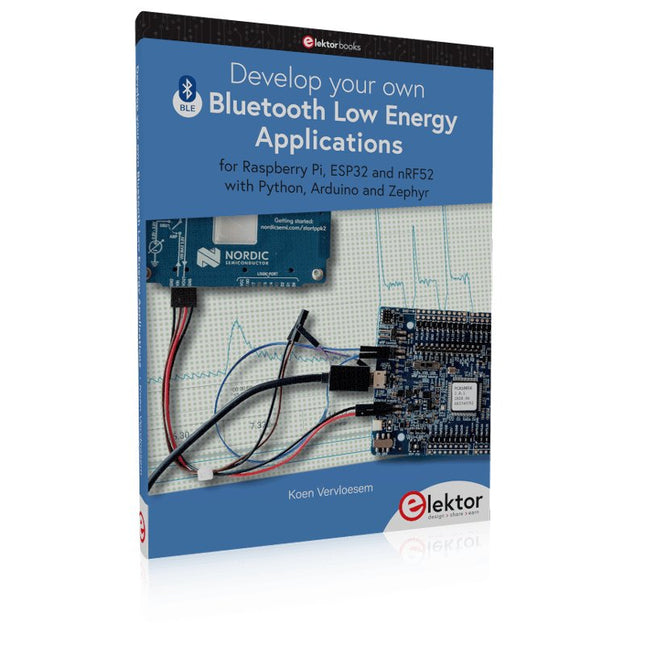
Bluetooth Low Energy (BLE) radio chips are ubiquitous from Raspberry Pi to light bulbs. BLE is an elaborate technology with a comprehensive specification, but the basics are quite accessible.
A progressive and systematic approach will lead you far in mastering this wireless communication technique, which is essential for working in low power scenarios.
In this book, you’ll learn how to:
Discover BLE devices in the neighborhood by listening to their advertisements.
Create your own BLE devices advertising data.
Connect to BLE devices such as heart rate monitors and proximity reporters.
Create secure connections to BLE devices with encryption and authentication.
Understand BLE service and profile specifications and implement them.
Reverse engineer a BLE device with a proprietary implementation and control it with your own software.
Make your BLE devices use as little power as possible.
This book shows you the ropes of BLE programming with Python and the Bleak library on a Raspberry Pi or PC, with C++ and NimBLE-Arduino on Espressif’s ESP32 development boards, and with C on one of the development boards supported by the Zephyr real-time operating system, such as Nordic Semiconductor's nRF52 boards.
Starting with a very little amount of theory, you’ll develop code right from the beginning. After you’ve completed this book, you’ll know enough to create your own BLE applications.