Elektor GREEN and GOLD members can download their digital edition here.
Not a member yet? Click here.
DIY Solar Energy StorageBuild Your Own Energy Store for a PV Solar Array
Solar Module SimulatorA Solution for Testing and Optimizing MPP Trackers and Inverters
The STM32 Edge AI ContestExplore the new STM32N6 and Compete for a Share of €5,000 in Prizes!
Widening the BandgapWhy There Is So Much Interest in SiC and GaN
Notebook Power BankExtend the Life of Your Aged Laptop
Medical RobotsOvercoming Technical and Regulatory Hurdles
Frost Guard for Fruit Plants With Temperature Data Logger
The Analog ThingThe Arduino of Analog Computing?
Energy Saving Relay DriverSaves 90% of Relay Drive Power
Improving the ET5410A+ DC loadKeep Cool and Be Quiet, Please
electronica 2024 in Review
Electromagnetic CompatibilityEMC in a Nutshell!
Starting Out in Electronics……Filters Actively
Reducing Power Dissipation With Dropping CapacitorsA Clever Use of Capacitive Reactance
The Affordable MCP4725 12-Bit Digital-to-Analog ConverterAn EEPROM Feature Enables Safe Switch-On Behavior
Fnirsi LCR-ST1 Smart LCR SMD Tweezers
Raspberry Pi-Based Private Test & Measurement LabFirst Things First: The ADC
Electronic Load ResistorAn Out-of-the-Box Project
2025: An AI OdysseySome Projects to See in the New Year
AmpVolt v2.0 Project Update100 Amps and Beyond!
Err-lectronicsCorrections, Updates, and Readers’ Letters
Unveiling Ethical TransparencyInsights from Ethics in Electronics’s 2024 Survey
Elektor Audio DSP FX Processor Board (2)Creating Applications
Open-Network Weather Station Mk.2Part 1: Introduction and hardware elements
Artificial Intelligence for Beginners (1)Object recognition using the Maixduino board
Universal Triac Control Module with ATmegaSwitch and dim a variety of loads
GitHub For DummiesHow to download something from GitHub
My IoT Button: A Button for the WebPart 2: Prototyping with board and cloud
TMS0280 Speech SynthesizerPeculiar Parts, the series
InteractiveCorrections & Updates || Questions & Answers
BASIC for the ESP32/ESP8266 (2)An hourglass with the ESP8266 and Annex WiFi RDS
Developer's ZoneTips & Tricks, Best Practices and Other Useful Information
BalBot: a Self-Balancing RobotModern acceleration sensors ease the construction process
Starting Out in Electronics (3)Easier than imagined!
Small Circuits RevivalCapita Selecta from the Elektor Project Suggestions Box
Tamper-Evident BoxSend data securely through postal services
Elektor New Precise Nixie Clock RevisitedAn engineering bulletin for enthusiastic users new and old
Practical ESP32 Multitasking (3)Software timers
SigFox and the IoT (4)Setting up a dashboard
Start-Up Update: The Elektor Investment Program
Review: Joy-IT HD35 Electronic USB LoadTest & verify USB power performance
CAN Bus + Arduino for Solar PV Cell MonitoringDetect and locate serviceable panels in large arrays
Analogue Electronics Design (3)Case Study #1 — Section 3: Preamplifier response optimization and trade-offs
Inexpensive E-ScooterHow does Lidl's "road approved" 300 euro E-scooter perform?
Steeped in ElectronicsLead-free soldering and EU regulatory zeal
Lab, Sweet LabA glimpse of The Holy Place — no unauthorized entry.
Review: The PeakTech 6080 A Lab Power SupplyA neat lab PSU for not much money
A Big ChallengeSafe products in the IoT era
Elektor 1.2 GHz Multifunction Frequency Meter (1992/93)Crossing the magic 1 GHz border
Hexadoku
The software simulation of gauges, control-knobs, meters and indicators which behave just like real hardware components on a PC’s screen is known as virtual instrumentation.
In this book, the Delphi program is used to create these mimics and PIC based external sensors are connected via a USB/RS232 converter communication link to a PC.
Detailed case studies in this Book include a virtual compass displayed on the PC’s screen, a virtual digital storage oscilloscope, virtual -50 to +125 degree C thermometer, and FFT sound analyser, a joystick mouse and many examples detailing virtual instrumentation Delphi components. Arizona’s embedded microcontrollers – the PIC's are used in the projects and include PIC16F84A, PIC16C71, DSPIC30F6012A, PIC16F877, PIC12F629 and the PIC16F887. Much use is made of Microchip’s 44 pin development board (a virtual instrument ‘engine)’, equipped with a PIC16F887 with an onboard potentiometer in conjunction with the PIC’s ADC to simulate the generation of a variable voltage from a sensor/transducer, a UART to enable PC RS232 communications and a bank of 8 LED's to monitor received data is also equipped with an ISP connector to which the ‘PICKIT 2’ programmer may easily be connected.
Full source code examples are provided both for several different PIC’s, both in assembler and C, together with the Pascal code for the Delphi programs which use different 3rd party Delphi virtual components.
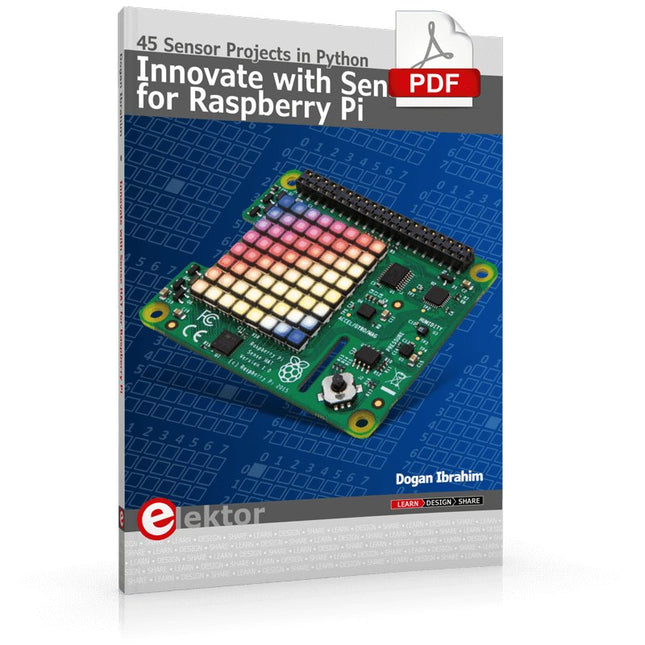
Ready to explore the world around you? By attaching the Sense HAT to your Raspberry Pi, you can quickly and easily develop a variety of creative applications, useful experiments, and exciting games.
The Sense HAT contains several helpful environmental sensors: temperature, humidity, pressure, accelerometer, magnetometer, and gyroscope. Additionally, an 8x8 LED matrix is provided with RGB LEDs, which can be used to display multi-color scrolling or fixed information, such as the sensor data. Use the small onboard joystick for games or applications that require user input. In Innovate with Sense HAT for Raspberry Pi, Dr. Dogan Ibrahim explains how to use the Sense HAT in Raspberry Pi Zero W-based projects. Using simple terms, he details how to incorporate the Sense HAT board in interesting visual and sensor-based projects. You can complete all the projects with other Raspberry Pi models without any modifications.
Exploring with Sense HAT for Raspberry Pi includes projects featuring external hardware components in addition to the Sense HAT board. You will learn to connect the Sense HAT board to the Raspberry Pi using jumper wires so that some of the GPIO ports are free to be interfaced to external components, such as to buzzers, relays, LEDs, LCDs, motors, and other sensors.
The book includes full program listings and detailed project descriptions. Complete circuit diagrams of the projects using external components are given where necessary. All the projects were developed using the latest version of the Python 3 programming language. You can easily download projects from the book’s web page. Let’s start exploring with Sense HAT.
The QAV250 Kit is the perfect way to get started developing on either PX4 or Ardupilot. It pairs a carbon fiber 250 racing frame and essential electronics with Pixhawk 6C mini autopilot. The kit is easy to assemble. No soldering needed.
Specifications
Micro Power Module (PM06 v2)
Motors: 2207 KV1950
Wheelbase: 250 mm
Dimensions: 198 x 235 x 70 mm
Weight: 347 g
Included
Carbon fiber 250 airframe with hardware
Micro Power Module (PM06 v2)
Motors: 2207 KV1950
5" Plastic Props
Fully assembled Power Management Board with ESCs (BLHeli S ESC 20A)
Battery Straps
Note: LiPo battery is not included.
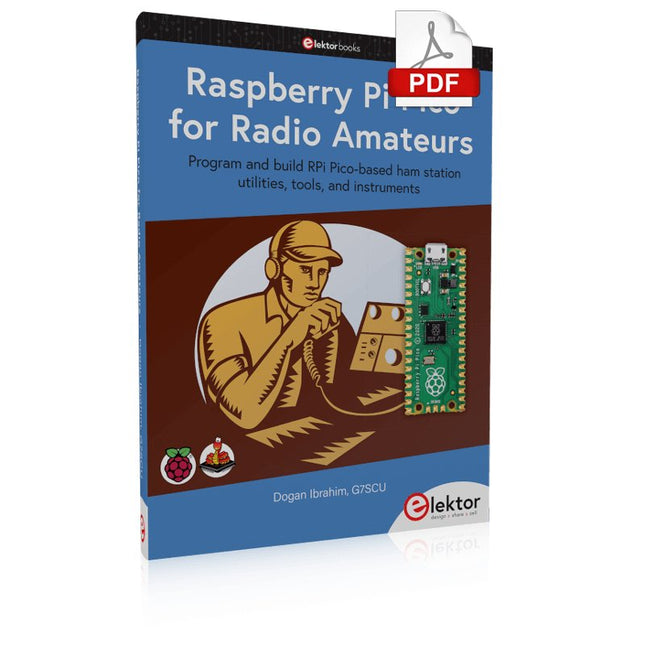
Program and build RPi Pico-based ham station utilities, tools, and instruments
Although much classical HF and mobile equipment is still in use by large numbers of amateurs, the use of computers and digital techniques has now become very popular among amateur radio operators. Nowadays, anyone can purchase a €5 Raspberry Pi Pico microcontroller board and develop many amateur radio projects using the “Pico” and some external components. This book is aimed at amateur radio enthusiasts, Electronic Engineering students, and anyone interested in learning to use the Raspberry Pi Pico to shape their electronic projects. The book is suitable for beginners in electronics as well as for those with wide experience.
Step-by-step installation of the MicroPython programming environment is described. Some knowledge of the Python programming language is helpful to be able to comprehend and modify the projects given in the book. The book introduces the Raspberry Pi Pico and gives examples of many general-purpose, software-only projects that familiarize the reader with the Python programming language. In addition to the software-only projects tailored to the amateur radio operator, Chapter 6 in particular presents over 36 hardware-based projects for “hams”, including:
Station mains power on/off control
Radio station clock
GPS based station geographical coordinates
Radio station temperature and humidity
Various waveform generation methods using software and hardware (DDS)
Frequency counter
Voltmeter / ammeter / ohmmeter / capacitance meter
RF meter and RF attenuators
Morse code exercisers
RadioStation Click board
Raspberry Pi Pico based FM radio
Using Bluetooth and Wi-Fi with Raspberry Pi Pico
Radio station security with RFID
Audio amplifier module with rotary encoder volume control
Morse decoder
Using the FS1000A TX-RX modules to communicate with Arduino
PCBite is the complete solution handling your circuit board during the development phase. Powerful magnets together with a stainless base plate makes the system flexible, mobile and user friendly. The holder can easily be repositioned to handle circuit boards of varying shape and sizes. The probes are steady but yet flexible made for instant measurements or total hands-free operations together with your multimeter or prefered tool. Included 4x PCBite holder 2x Banana to DuPont test wires red/black 2x SP10 probe with red/black probe head and pin tipped test needles 2x Extra crown tipped test needle 1x Set of yellow insulation washers 1x Large Baseplate (A4) 1x Microfiber cloth Downloads User Guide
For Speed, Area, Power, and Reliability
This book teaches the fundamentals of FPGA operation, covering basic CMOS transistor theory to designing digital FPGA chips using LUTs, flip-flops, and embedded memories. Ideal for electrical engineers aiming to design large digital chips using FPGA technology.
Discover:
The inner workings of FPGA architecture and functionality.
Hardware Description Languages (HDL) like Verilog and VHDL.
The EDA tool flow for converting HDL source into a functional FPGA chip design.
Insider tips for reliable, low power, and high performance FPGA designs.
Example designs include:
Computer-to-FPGA UART serial communication.
An open-source Sump3 logic analyzer implementation.
A fully functional graphics controller.
What you need:
Digilent BASYS3 or similar FPGA eval board with an AMD/Xilinx FPGA.
Vivado EDA tool suite (available for download from AMD website free of charge).
Project source files available from author’s GitHub site.
Over 50 Circuits & Projects US-Style Siren Two Rotary Encoders on One Analog Input How to Build a Digital 220-V AC Dimmer with Arduino Current Source for LEDs Detect Four Switches with 1 Pin Tiny On/Off Switch with Battery Level Check DIY Hand Sanitizer Dispenser A Simple Electronic Organ Ultra-Simple Stereo Amplifier Sound Activated Switch for Amplifiers Balanced/Unbalanced Converter External Mains Filter Button-Free Door Control DI Box for a Smartphone Fun With Running Lights One-Button Thyristor Control Quasi-Analog Exposure Timer for the Dark Room Circuits Galore From the Hackster.io Community Analog Tanning Timer Yet Another Single-Wire LCD Interface Simple AVR ATtiny13-Based PWM Generator Second Life for Batteries Touch Switch for LED Lights Tester for LEDs and DIP Switches Go/No-Go IR Control Tester Power Semiconductor Tester SPI for WS2812(B) LEDs Measuring Power Inductors One Plug for Raspberry Pi and Audio DAC DIY Test Fixture for the LCR Meter Arduino Ammeter Two-Finger Organ Low Noise ADC Calibrator DC/DC Boost Converter Two Potentiometers on One Digital Input Acoustic Proximity Sensor Battery-Free Radiator Sensor A Circuit for Detecting Bugs and Wireless Cameras Car Interior Light Timer Candle Simulator Digital Kitchen Timer Milliohm Meter Hot Water Production Delay Timer Simple Charger for 2S 18650 Cells Tiny Frequency Reference Low-Power IR Switch Recycle Your Car’s Telephone Charger Microphone Pre-Amp for Arduino DIY EMI Filters Electronic Dice Without an MCU Finger Capacitor A Self-Charging LED Flasher Also in this edition KiCad 6 – Five Features to Consider Flashback – The Elektor SC/MP Computer Interview – Making Art with Electricity My First PCB – Going Head First Into KiCad Minimizing Hardware with Smart Software Infographics – Facts and Figures New Devices from Analog Flashback – The Elektor Metal Detector Hexadoku – The Original Elektorized Sudoku
Elektor GREEN en GOLD leden kunnen deze uitgave hier downloaden.
Nog geen lid? Klik hier om een lidmaatschap af te sluiten.
Het AlertAlfred AI-beveiligingssysteemmet Raspberry Pi 5 en Hailo 8L-module
AI in elektronica-ontwikkelingeen update na slechts één jaar
AI-algoritmen – een inleidingprompt: welke algoritmen implementeren AI-tools?
Single-board computers voor AI-projectenachtergrond en overzicht
Van sensordata naar machine learning-modelgebarendetectie met een versnellingsmeter en Edge Impulse
Bouw uw eigen lekkend integreer-en-vuur neuronkunstmatige intelligentie zonder software
Elektronica ontwerpen met ChatGPTdoet GPT-4o het beter?
Breng AI naar de edgemet ESP32-P4
Spraakfuncties verkennen met een Raspberry Pi Zerooverklokken geeft recht van spreken
De groeiende rol van Edge-AIeen trend die de toekomst vormgeeft
De kracht van Edge-AI ontsluiteneen gesprek met François de Rochebouët van STMicroelectronics
Een VHDL-klok gemaakt met ChatGPThoe AI de manier waarop we leren transformeert
De werkelijke impact van AISayash Kapoor over ‘Haarlemmer AI-olie’ en meer
Het laatste nieuws van BeagleBoardBeagleY-AI, BeagleV-Fire, BeagleMod, BeaglePlay en BeagleConnect Freedom
Muggen detecterenmet open datasets en Arduino Nicla Vision
AI nu en morgen:gedachten van Espressif, Arduino en SparkFun
Tijdlijn kunstmatige intelligentie
BeagleY-AIde nieuwste SBC voor AI-toepassingen
AI in beeldgedachten uit de Elektor-community
Machine vision met OpenMVmaak een frisdrankblik-detector
Een gesprek met het digitale breinChatGPT versus Gemini
“Skilling Me Softly with This Bot?”mislukt de AI-revolutie op elektronisch gebied door een gebrek aan sociale precisie?
Elektor GREEN en GOLD leden kunnen deze uitgave hier downloaden.
Nog geen lid? Klik hier om een lidmaatschap af te sluiten.
PbMonitor v2.0 updateBatterijbewaking met verbeterd analoog ontwerp
Audio latency-metingEen tool om fouten en latency in audiotransmissie te checken
Blokgolf versus Bode-diagramDe prestaties van een audioapparaat controleren
embedded world 2026
Slim programmeren met AIAI in softwareontwikkeling voor elektronica-ontwikkelaars
QA403-audioanalysatorBetaalbare precisie voor audioprofessionals en hobbyisten
EasyGimbalAutonome cameratracking met AI, stappenmotoren en servomotoren
Sigfox breakoutboard (2)Berichten verzenden
CircuitbeschermingOverpanningspieken beheersen met TVS-diodes
Nieuwe methoden voor het testen van batterijenEen nieuw tijdperk van diagnostiek
AudiotronicaEen eerste voorversterker
CANopenTermEen open-source tool die CAN toegankelijk maakt voor makers en technici
Stabilisatie van operationele versterkersFeedbackinstabiliteit voorkomen
Err-lectronicsCorrecties, updates en lezersbrieven
SignaalconditioneringTips en tricks om spanningsbereiken aan te passen
TDR-opzetstuk voor oscilloscopenLengte, kortsluiting, mismatch: kabels meten met behulp van reflecties!
Uit het leven gegrepenLED it be
Luidsprekeroscillator en resonantietesterEen volledig experimenteel project voor uw luidsprekers
Visies van de Elektor-community op testen en meten
ESP32 Audio tranceiver board (Deel 5)Audioverwerking en afstandsbediening
2026: Een AI-OdysseeAI heeft een contextprobleem
Batterijopslag voor balkon-zonnepanelenKleine batterijen, grote impact
Open-Source-Code mit Arduino IDE und PlatformIO
Autonomes Fahren: GPS, Accelerometer, Gyroskop
PS3-Controller
Mikrocontroller wie der Arduino und Einplatinenrechner wie der Raspberry Pi haben sich zu beliebten Komponenten entwickelt. Dritter im Bunde ist der ESP32 der Firma Espressif. Mikrocontroller dieser Baureihe zeichnen sich durch eine Vielzahl implementierter Funktionen aus, die bei einem Arduino konventioneller Prägung mit einem Atmel-AVR-Mikrocontroller erst mit weiterer Hardware möglich sind. Prominentes Beispiel sind hier die WiFi- und Bluetooth-Funktionalitäten. Gegenüber einem Raspberry Pi zeichnen sie sich durch einen deutlich geringeren Preis aus.
Allgemeine Informationen für die Realisierung eines Roboterauto-Projekts mit dem ESP32 sind leicht zu finden. Dabei handelt es sich aber oft nur um Ausführungen zu einem Teilaspekt, ohne inhaltliche oder funktionale Abstimmung. So ist nicht nur die Beschaffung der benötigten Informationen mühselig und zeitaufwändig, sie kann auch außerordentlich fehlerträchtig sein.
Ansatzpunkt dieses Buches ist, diese Lücke zu schließen. Es geht auf verschiedene Möglichkeiten eines Chassis ein, vermittelt nötige Kenntnisse und führt schrittweise von einer einfachen Motorsteuerung zu einem komplexen sensor- und sprachgesteuerten Roboterauto. Hacks rund um GPS und eine PlayStation 3 runden die Sache ab.
Inhalt
Bei der Reihenfolge der Kapitel wurde versucht – beginnend bei der Darstellung von grundlegenden Informationen – über die Lösung einfacher Aufgaben zu etwas anspruchsvolleren Techniken zu führen.
Der Mikrocontroller ESP32
Die Software erstellen
Die Stromversorgung
Rund um die Hardware
Das Chassis
Der Gleichstrommotor
Kabellose Steuerung über WiFi
Mit Sensoren Hindernisse erkennen
Eine eigene Roboterauto-App
Servo und Lichtsensor
GPS
Accelerometer / Gyroskop
PS3-Controller
Roboterauto-App
Hinweis zur Software
Die Dateien haben das Suffix (.cpp). Grund ist die Entwicklung mit PlatformIO. Mit Copy & Paste sollten sie auch in der Arduino-IDE verwendet werden können.