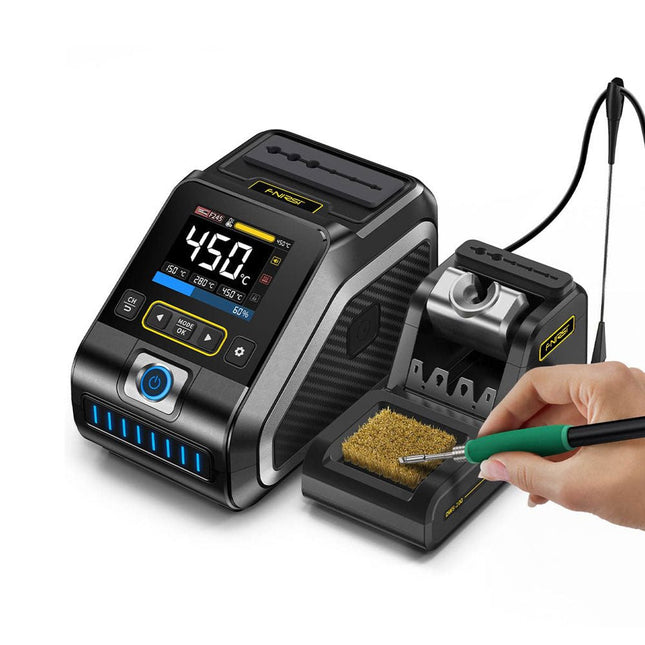
De FNIRSI DWS-200 is een krachtig 200 W slim soldeerstation, ideaal voor elektronische soldeertoepassingen. Hij wordt gevoed door een schakelende voeding en werkt soepel met een breed spanningsingangsbereik van 100-240 V. Het station biedt een instelbaar temperatuurbereik van 100°C tot 450°C en maakt eenvoudig schakelen tussen °C en °F mogelijk.
Om de efficiëntie te verbeteren, ondersteunt het maximaal drie vooraf ingestelde temperatuurwaarden en kan het worden aangesloten op een soldeerboutstandaard voor activering van de standby-modus. Het station beschikt ook over een dynamische temperatuurcurvemodus voor realtime gegevensbewaking, waardoor nauwkeurige en consistente prestaties bij veeleisende soldeertaken worden gegarandeerd.
Kenmerken
Maximaal uitgangsvermogen van 200 W, waardoor snelle verwarming mogelijk is
Brede adaptieve spanningsingang van 100-240 V
2,8" HD-TFT-kleurenscherm met intelligente bediening
Meerdere vooraf ingestelde groepen om snel tussen verschillende instellingen te schakelen
Ondersteunt de typen soldeerhandgrepen F245 en F210 en biedt flexibiliteit voor verschillende soldeertoepassingen
Realtime slaapmodus om de levensduur van de soldeerpunt te verlengen
Multi-mode real-time monitoring van de stroom- en temperatuurstatus, waardoor de veiligheid en precisie worden verbeterd
Specificaties
Piekvermogen
200 W (max)
Temperatuurbereik
100°C~450°C
Display
2,8" TFT HD-kleurenscherm
Verwarmingstijd
1 seconde
Smelttijd
3 seconden
Ingangsspanning
100-240 V (AC)
Ingangszekering
3 A
Type soldeergreep
F245
Afmetingen (station)
156 x 96 x 103 mm
Gewicht (station)
475 g
Inbegrepen
1x FNIRSI DWS-200 soldeerstation
1x Soldeerhandgreep F245
6x Soldeertips (B, KU, K, C2, I, JS)
1x Verbindingskabel
2x Helpende handen
1x Voedingskabel (EU)
Downloads
Manual
Firmware V1.3
USB to S/PDIF InterfaceDigital audio output for computer, laptop, tablet or smartphone
Practical ESP32 Multitasking (4)Binary semaphores
A Wireless Temperature Sensor for the Nixie Bargraph ThermometerA multipurpose solution with a design trick
Multitasking with Raspberry PiShowcase: a traffic lights controller
Timer for Headphone Amplifier
Open-Network Weather Station Mk.2Part 2: Software
Home Automation Made EasyWith ESPHome, Home Assistant & MySensors
The Storage CRTPeculiar Parts, the series
Artificial Intelligence for Beginners (3)A stand-alone neural network
Programming PICs from the Ground UpAssembler routine to output a sine wave
IKEA Lamp HackEquipping an inexpensive IKEA lamp with NeoPixel LEDs and WLAN
Don't Let Your Hobby Project Collect Dust in a CornerSupply-side time management and spiral development
Starting Out in Electronics (4)Easier than imagined!
Homelab Tours: The Vinyl CutterReturning to the golden age of LPs
The 8-Bit Microcontroller and BeyondInterview with Tam Hanna
Small Circuits RevivalFrom the Elektor suggestions box
Review: Owon OW18E Bluetooth Multimeter
InteractiveCorrections & Updates || Questions & Answers
Steeped in ElectronicsLead-free soldering and EU regulatory zeal
Promising Project: New 50 Hz – 2 MHz LCR meterAccuracy and ease of use
Error AnalysisTips on FMEA, High Current, and More
Developer's ZoneTips & Tricks, Best Practices and Other Useful Information
Review: Siglent SDL1020X Programmable DC Electronic Load
High-Voltage Power Supply with Curve TracerGenerate voltages up to 400 V and trace characteristics curves for valves and transistors
Hexadoku 2009EL
Analogue Electronics DesignCase Study #2 — Part 1: Analogue filter theory
The Elektor StoreNever expensive, always surprising
How to Draw a Circuit Diagram
Elektor GREEN and GOLD members can download their digital edition here.
Not a member yet? Click here.
The ESP-BLASTA Mini ESP32 Rocket Drone That Flies 100 km/h+
Wireless Workshop (1)Radio Modules Unlocked: 433 MHz CC1101 Sub-GHz Transceiver
AM TransmitterWith Square/Sine Wave Generator on Raspberry Pi Pico
STM32Cube Innovation ChallengeCompete with Your Best STM32C5 Design
CoffeeCallerHow a Long Hallway Led to a Custom Mesh-Networked PCB
AudiotronicsTotal Harmonic Distortion
Elektor at 65Projects from Septembers and Octobers Past
Bluetooth Channel Sounding for Asset TrackingCentimeter-Level Precision Ranging for Next-Generation IoT
2026: An AI OdysseyQuantum Computing Is Not the Next GPU
Protecting the Cloud Demands Security at the Edge
First Experiences with the HackRF ProPractical Tests with the New SDR Hardware
Modem Upgrade from GPRS/2G to LTE/4GUsing a Wireless Alarm Control Panel as an Example
Loop Antenna with RF BricksPart 1: A DIY Shortwave Antenna with Adjustable Directivity
Internet Radio to AM ConverterUsing an ESP32-S3 as Transmitter
Err-lectronics
mioty — An OverviewFraunhofer’s Approach to LPWAN
Workbench WisdomPractical Tips from Experts
Walter, the Compact IoT ModulePart 2: Accessing Weather and Data Services
De Pro Tech Toolkit is het enige dat elke doe-het-zelver, fixer, hacker, hobbyist en professional nodig heeft om elke klus te klaren.
Elk gereedschap in de Pro Tech Toolkit is opnieuw ontworpen om beter te zijn. Van de 64 Bit Driver Kit tot de iFixit Opening Picks, elk gereedschap is speciaal ontworpen en geselecteerd om uw reparatiemogelijkheden te maximaliseren.
De kern van deze kit is de iFixit 64 Bit Driver Kit, ontworpen met uitgebreid onderzoek naar welke soorten bevestigingsmiddelen momenteel worden gebruikt in de consumentenelektronica-industrie en welke oudere bevestigingsmiddelen nog steeds in trek zijn bij consumenten. Van de Apple Watch met zijn nieuwe piepkleine Tri-Point schroeven tot oude Nintendo-spelconsoles met gamebit-bevestigingen, de 64 bit-kit dekt ze allemaal met CNC-bewerkte bits van de hoogste kwaliteit. Zelfs de stevige behuizing is zorgvuldig ontworpen, heeft geen scharnieren of grendels die kunnen breken en is voorzien van een sorteerbakje in het magnetisch bevestigde deksel.
Kwalitatieve toolkit voor alle elektronica-reparaties
De perfecte toolkit voor zowel professionals als knutselaars
Bevat alle tools voor het openen van en werken aan consumentenelektronica
Volledig opnieuw samengesteld met alle tools die je nodig hebt, maar geen een teveel.
Inbegrepen
Bithouder met 64 bits – alle bits die je nodig hebt
Antistatische polsband – beschermt elektronica tegen statische spanningen
Kleine zuignap – voor het vasthouden van objecten zonder handvaten
3x iFixit Opening Tool – wrikgereedschap van zacht plastic
6x iFixit Opening Picks – smalle tool voor het openen van apparaten
Omgedraaid pincet met nylon tip – voor het vasthouden en bekijken van je werk
ESD-veilige gebogen pincet – met ribbels voor een betere grip
ESD-veilige stompe pincet - met ribbels voor een betere grip
2x plastic spudger – stevige antistatische tool voor van alles en nog wat
Metalen spudger – voor het stevigere schraap- en wrikwerk
Jimmy – Handige tool om elektronica mee open te ‘Jimmy-en’
Magnetische pad – houdt kleine schroefjes en metalen onderdelen vast bij reparaties
Opberg-etui – duurzaam en compact
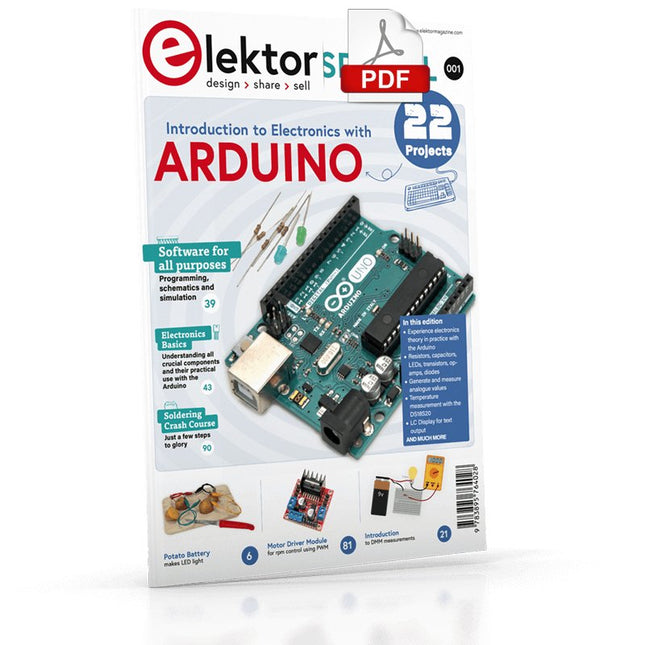
Although the Arduino isn’t a novelty any longer, there are still many beginners who want to try programming and development with a microcontroller, and to them, it is all new. All beginnings can be difficult, though they should be light and enjoyable.
You do not need much or expensive equipment for the examples. The circuits are built on a small breadboard, and, if necessary, connected to an Arduino Uno, which you can program on a Windows PC. You will find clear examples of how to build all circuits, ensuring easy and error-free reproduction.
Projects Discussed
Current & Voltage – How it all began
Arduino Hardware
Arduino Programming
The Electrical Circuit
Measuring with the Multimeter
Circuit Diagrams and Breadboards
Creating Circuit Diagrams
Breadboard Views with Fritzing
Online Circuit Simulation
Indispensable: Resistors (Part 1)
Hands-on with Resistors (Part 2)
Variable Resistors
Diodes: One-way Street for Current
The Transistor Switch
Electromagnetism
Relays and Motors
op-amps: Operational Amplifiers
Capacitors
The NE555 Timer
PWM and Analogue Values with Arduino
7-Segment Temperature Display
Introduction to Soldering and LCDs
The BB830T is a solderless (plug-in) transparent breadboard with 830 connection tie-points (i.e. 830 wire insertion holes). It has 4 power rails. Solderless breadboards are great for building and testing new circuits because parts can be easily inserted and removed. They are completely re-usable. The BB830T has a 630 tie-point IC-circuit area plus four 50 tie-point power rails.
Specifications
830 tie points total: 630 tie-point IC-circuit area plus two 100 tie-point distribution strips providing 4 power rails.
ABS plastic/transparent body with black printed legend. Color legend on distribution strips.
Contacts are Phosphor Bronze with Plated Nickel Finish, rated for 50,000 insertions.
Rated at 36 Volts, 2 Amps.
Insertion Wire Size is 21 to 26 AWG, 0.016 to 0.028 inches diameter (0.4 to 0.7mm diameter).
Peelable adhesive tape backing provided for attaching to a surface. Metal back plate provided.
USB-Logikanalysatoren am PC mit Arduino, Raspberry Pi und Co
Schritt-für-Schritt-Anleitungen führen Sie in die Analyse moderner Protokolle von I²C, SPI, UART, RS-232, NeoPixel, WS28xx, HD44780 und 1-Wire ein. Anhand von zahlreichen Experimentierschaltungen mit dem Raspberry Pi Pico, Arduino Uno und dem Bus Pirate üben Sie die praxisnahe Anwendung gängiger USB-Logikanalysatoren ein.
Alle in diesem Buch vorgestellten Experimentierschaltungen wurden vollständig getestet und sind funktionsfähig. Die notwendigen Programmlistings sind enthalten, es sind keine besonderen Programmier- oder Elektronikkenntnisse für diese Schaltungen notwendig. Es werden die Programmiersprachen MicroPython und C mit den Entwicklungsumgebungen Thonny und Arduino IDE eingesetzt.
Dieses Buch verwendet mehrere Modelle flexibler und weit verbreiteter USB-Logikanalysatoren und zeigt die Stärken und Schwächen jeder Preisklasse. Sie werden kennenlernen, welche Kriterien für Ihre Arbeit wichtig sind und in der Lage sein, das für Sie passende Gerät zu finden.
Egal ob Arduino, Raspberry Pi oder Raspberry Pi Pico: Die abgebildeten Beispielschaltungen ermöglichen einen schnellen Start in die Protokollanalyse und können auch als Grundlage für eigene weitere Experimente dienen.
Sie werden alle wichtigen Begriffe und Zusammenhänge kennenlernen, eigene Experimente durchführen, selbstständig Protokolle analysieren und nach der Lektüre dieses Buches – im Bereich der digitalen Signale und Protokolle – ein umfassendes Wissen aufgebaut haben.
Elektor GREEN and GOLD members can download their digital edition here.
Not a member yet? Click here.
Digital Load for High-Current TestingFrom Necessity to Innovation
Vocal RemoverInstant Karaoke Circuit
Audio A/B Selector With Gain ControlSwitches from Microphone to Line Inputs
Better Charging for the LIR2032Be Kind to Your Coin Cells
Touch Sensing Made SimpleA DIY Guide for Any Microcontroller
Universal Infrared Remote SwitchA New Life for Old Remotes
Microcontroller-Powered Moo BoxMaking Playful Sounds With a Microcontroller
USB Battery Interface
Powering Low-Draw Devices With Power BanksA “Stay Alive” Solution
Small Class-A Audio Amplifier With Current OutputDrive Speakers with Current Instead of Voltage
Pseudo-Balanced ModuleHigh CMRR with Unbalanced Audio Links
Ni-MH Cells Automatic ChargerRefill All Your Battery Packs in One Go!
Thyristor-Based Power Supply Protection
Fingerprint Sensor SwitchA Useful Proof-of-Identity Device
DC-DC 3-A Power ConverterUpgrade Your Fixed-Voltage Sources
Remote Water Heater MonitorVoltage and Current Detection for AC Lines
Attenuators for Audio Signals (1)Adjustable Via Jumpers
Pimp My Car Battery Charger (Part 1)Don’t Throw It Away, Mod It!
A Board for the Blue OnePCB for Alps Motorized Potentiometer with Feedback
50-Hz Reference from 60-Hz Mains VoltageHow to Use 50-Hz Electronics in 60-Hz Environments
Digital IsolatorsRealizing Galvanic Isolation Easily
Compact 12-W Hi-Fi Mono AmplifierSmall But Powerful
LM386 Ramp Generator
Three-Phase GeneratorWith Raspberry Pi Pico
Door Opener for the Musically Talented
Elektor Classic: Surf SynthesizerOcean Watersports Background Sound Generator (OWBSG)
Pimp my Car Battery Charger (Part 2)Don’t Throw It Away, Mod It!
Lamp Current MonitorWith a Raspberry Pi Pico
Infrared Telegraphy
Fnirsi SWM-10Repair Battery Packs With This Portable Intelligent Spot Welding Machine
Stereo Audio Codec for the ESP32 and Co.No Need to Be Afraid of Audio Measurement Technology
Tin Soldering TechniquesMake Them Well Right Away!
Attenuators for Audio Signals (2)Switching Via Relays
USB-C PowerDrawing Power from USB-C Power Adapters
Three Circuits with Two and Three Counter ICs4017 ICs Working Together
Active Components – The Diode
A Timer For Ultra-Long DelaysSet It, and Forget It!
Jack In and Jack OutA Useful Insert Option for Audio Circuits
Power an ESP32 from a Single Li-ion Cell
Hexadoku
De OWON SDS1102 is een betaalbare benchtop digitale oscilloscoop die solide prestaties combineert met essentiële meetfuncties. Deze 2-kanaals oscilloscoop biedt een bandbreedte van 100 MHz, een sample rate van 1 GS/s, een 7-inch LCD-display en een geheugendiepte van 10 kpts. Daarmee is het een praktische keuze voor dagelijkse elektronicatests, foutopsporing en onderwijs.
De SDS1102 beschikt over een vereenvoudigd triggersysteem met niveau- en flanktriggering, waardoor gangbare signalen eenvoudig kunnen worden vastgelegd en geanalyseerd. Het apparaat is ontworpen voor toepassingen waarvoor geen grote geheugendiepte of geavanceerde triggerfuncties nodig zijn, en biedt een eenvoudige en kostenefficiënte oplossing voor basis-signaalanalyse.
Kenmerken
Bandbreedte: 100 MHz
2 kanalen
Bemonsteringssnelheid: 1 GS/s
Ultradunne behuizing
7-inch lcd met hoge resolutie
Ondersteuning voor SCPI en LabVIEW
Specificaties
Bandbreedte
100 MHz
Horizontale schaal (s/div)
5 ns/div - 1000 s/div
Kanalen
2
Verticale gevoeligheid
5 mV/div - 5 V/div (bij ingang)
DC Gain nauwkeurigheid
3%
Verticale resolutie (A/D)
8 bits (2 kanalen tegelijk)
Ingang
Ingangsimpedantie
1 MΩ, 10 pF
Ingangskoppeling
AC, DC, GND
Max ingangsspanning
± 400 V, CATI, CATII
Passieve probes
x1; 10
Probe verzwakkingsfactor
x1; x10; x100; x1000
Triggersysteem
Trigger mode
Auto, Normal, Single
Trigger type
Flank, Video
Flank triggerbron
CH1, CH2
Video trigger
Sampletype
Real-time
Samplefrequentie
1 GS/s
Equivalente samplesnelheid
No
Golflengte
10K pts
Interpolatie
sin(x)/x
Meet- en rekenkundig bewerkingssysteem
Automatische meting
Vpp, Vavg, RMS, Frequency, Period, Vmax, Vmin, Vtop, Vbase, Width, Overshoot, Pre-shoot Rise time, Fall time, +Width, -Width, +Duty, -Duty, Delay A->B, Delay A->B, area, cycle area
Rekenkundige functies
Addition, Subtraction, Multiplication, Division, FFT
Algemene kenmerken
Display maat
7" color LCD
Display resolutie
800 x 480
Voeding
100-240 V, 45-440 Hz, <15 W
Afmetingen
301 x 70 x 152 mm
Gewicht
1,1 kg
Inbegrepen
1x OWON SDS1102 Oscilloscoop
2x Oscilloscoopsonde
1x Sonde aanpassen
1x Netsnoer
1x USB-kabel
1x CD-Rom
1x Snelstartgids
Downloads
Quick Guide
Manual
PC Software
SCPI Commands
ARM Cortex-M Embedded Design from 0 to 1
Hobbyists can mash together amazing functional systems using platforms like Arduino or Raspberry Pi, but it is imperative that engineers and product designers understand the foundational knowledge of embedded design. There are very few resources available that describe the thinking, strategies, and processes to take an idea through hardware design and low-level driver development, and successfully build a complete embedded system. Many engineers end up learning the hard way, or never really learn at all.
ARM processors are essentially ubiquitous in embedded systems. Design engineers building novel devices must understand the fundamentals of these systems and be able to break down large, complicated ideas into manageable pieces. Successful product development means traversing a huge amount of documentation to understand how to accomplish what you need, then put everything together to create a robust system that will reliably operate and be maintainable for years to come.
This book is a case study in embedded design including discussion of the hardware, processor initialization, low‑level driver development, and application interface design for a product. Though we describe this through a specific application of a Cortex-M3 development board, our mission is to help the reader build foundational skills critical to being an excellent product developer. The completed development board is available to maximize the impact of this book, and the working platform that you create can then be used as a base for further development and learning.
The Embedded in Embedded program is about teaching fundamental skill sets to help engineers build a solid foundation of knowledge that can be applied in any design environment. With nearly 20 years of experience in the industry, the author communicates the critical skill development that is demanded by companies and essential to successful design. This book is as much about building a great design process, critical thinking, and even social considerations important to developers as it is about technical hardware and firmware design.
Downloads
EiE Software Archive (200 MB)
IAR ARM 8.10.1 (Recommended IDE version to use) (1.2 GB)
IAR ARM 7.20.1 (Optional IDE version to use) (600 MB)
Diese Ausgabe steht allen GOLD- und GREEN-Mitgliedern auf der ElektorMagazine-Website zum Download bereit!
Sie sind noch kein Mitglied? Hier klicken!
Drehscheibentelefon als FernbedienungLicht einschalten, wählen Sie die 1, Kaffeemaschine einschalten, wähle Sie die 2
GPS-gestützte GeschwindigkeitsüberwachungNie mehr rasen, nie mehr Knöllchen!
RGB-Stroboskop mit ArduinoFarbenfrohe Anwendung eines nützlichen Werkzeugs
Drahtloser Notruf-TasterErhöhte Sicherheit mit LoRa
Aller Anfang......muss nicht schwer sein: Folgen Sie dem Emitter!
Beliebige und unabhängige Hysteresestufen für Komparatorenmit Simulationen, Tabellenkalkulationen und etwas Algebra
ESP32-basierter Impedanz-AnalysatorEinfach, wenige Bauteile und preiswert!
Das besondere ProjektErmutigung zum Heimwerken
Mikrocontroller-Praxiskurs für Arduino-Einsteiger mit TrainingsboardAll-in-One-Trainingshardware für den Mikrocontroller-Kurs
Aus dem Leben gegriffenModerner Luddismus
Sensor 1x1: Temperatur-Sensor DS18B20Anschluss am 1-Draht-Bus
Rettet Matter das Smart Home?Neue Standards zur Vereinfachung der Hausautomatisierung
Eine Frage der ZusammenarbeitEntwickeln mit dem Board Thing Plus Matter und dem Simplicity Studio
Infografik: IoT und Sensoren
Matter, ExpressLink, Rainmaker - Worum geht es eigentlich?Interview mit Amey Inamdar von Espressif
Development-Kits für IoT- und IIoT-ApplikationenÜber die Auswahl von Mikrocontroller-Entwicklungsboards
Kondensatoren verhalten sich nicht immer kapazitiv
Eine NTP-Uhr mit CircuitPythonWarum Sie diese Programmiersprache verwenden sollten
Bauen Sie ein cooles IoT-DisplayMit dem Phambili Newt
Der Doppler-Bewegungssensor HB100Theorie und Praxis eines ungewöhnlichen Sensors
Eine Anleitung zur Bare-Metal-ProgrammierungTeil 1: STM32 und andere Controller
Siglent-Multimeter SDM3045X
Mikroprozessoren für eingebettete SystemeBemerkenswerte Bauteile
Mikrocontroller-Dokumentation verstehenTeil 3: Blockdiagramme und mehr
LoRa-Wetterstation mit niedriger StromaufnahmeBauen Sie Ihre entfernte Wetterstation selbst!
Transverter für das 70-cm-Band
Climate Calling EngineersMove Fast and Fix Things
Hexadoku
Mastering the I²C Bus takes you on an exploratory journey of the I²C Bus and its applications. Besides the Bus protocol, plenty of attention is given to the practical applications and designing a stable system. The most common I²C compatible chip classes are covered in detail.
Two experimentation boards are available that allow for rapid prototype development. These boards are completed by a USB to I²C probe and a software framework to control I²C devices from your computer. All samples programs can be downloaded from the 'Attachments/Downloads' section on this page.
Projects built on Board 1:
USB to I²C Interface, PCA 9534 Protected Input, PCA 9534 Protected Output, PCA 9553 PWM LED Controller, 24xxx EEPROM Module, LM75 Temperature Sensor, PCA8563 Real-time Clock with Battery Backup, LCD and Keyboard Module, Bus Power Supply.
Projects built on Board 2:
Protected Input, Protected Output, LM75 Temperature Sensor, PCF8574 I/O Board, SAA1064 LED Display, PCA9544 Bus Expander, MCP40D17 Potentiometer, PCF8591 AD/DA, ADC121 A/D Converter, MCP4725 D/A Converter, 24xxx EEPROM Module.