This is the second edition of a book aimed at engineers, scientists, and hobbyists who want to interface PCs with hardware projects using graphical user interfaces. Desktop and web-based applications are covered.
The programming language used is Python 3, which is one of the most popular languages around: speed of programming being a key feature. The book has been revised and updated with an emphasis on getting the user to produce practical designs with ease – a text editor is all that is required to produce Python programs.
Hardware interfacing is achieved using an Arduino Uno as a remote slave. A full description and source code of the communication interface is given in the book. The slave provides digital and analog input and outputs. Multiple Unos can be included in one project with all control code written in Python and running on a PC One project involves a PIC microcontroller with the code provided that can be loaded into the PIC using the Uno.
The web applications and server are all implemented in Python, allowing you to access your electronic hardware over the Internet. The Raspberry Pi computer can be used as your web server. An introductory chapter is provided to get you started with using Linux.
The book is written for use with Debian or variations including Mint or Ubuntu. All of the programs in the book are freely available, ready to use and experiment with by way of a download from Elektor.
TurtleBot 4 is the next-generation of the world’s most popular open source robotics platform for education and research, offering better computing power, better sensors and a world class user experience at an affordable price point.TurtleBot 4 Lite is equipped with an iRobot Create 3 mobile base, a powerful Raspberry Pi 4 running ROS 2, OAK-D spatial AI stereo camera, 2D LiDAR and more. All components have been seamlessly integrated to deliver an out-of-the-box development and learning platform.Specifications
Base platform
iRobot Create 3
Wheels (Diameter)
72 mm
Ground Clearance
4.5 mm
On-board Computer
Raspberry Pi 4 (4 GB)
Maximum linear velocity
0.31 m/s in safe mode0.46 m/s without safe mode
Maximum angular velocity
1.90 rad/s
Maximum payload
9 kg
Operation time
2h 30m – 4h depending on load
Charging time
2h 30m
Lidar
RPLIDAR A1M8
Camera
OAK-D-Lite
User Power
VBAT @1.9 A5 V @ Low current3.3 V @ Low current
USB Expansion
2x USB 2.0 (Type A)2x USB 3.0 (Type A)
Programmable LEDs
Create 3 Lightring
Buttons and Switches
2x Create 3 User buttons1x Create 3 Power Button
Battery
26 Wh Lithium Ion (14.4 V nominal)
Charging Dock
Included
Size (L x W x H)
342 x 339 x 192 mm
Weight
3.3 kg
DownloadsUser Manual
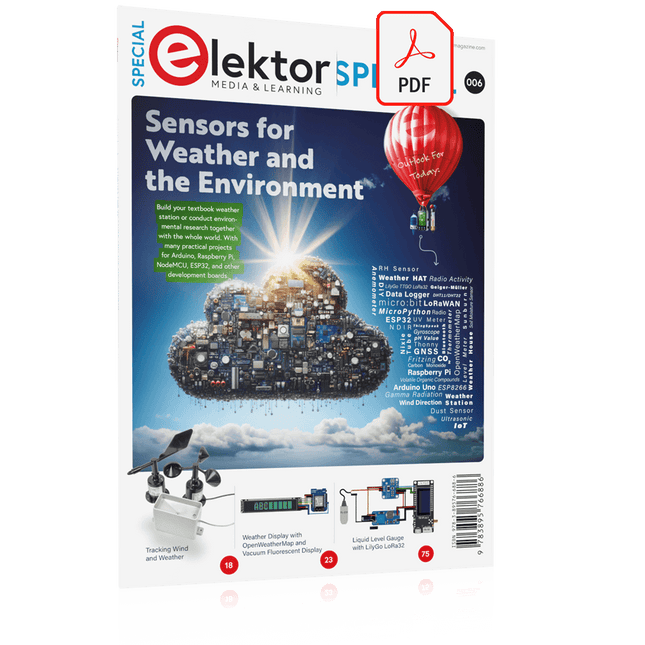
Build your textbook weather station or conduct environmental research together with the whole world. With many practical projects for Arduino, Raspberry Pi, NodeMCU, ESP32, and other development boards.
Weather stations have enjoyed great popularity for decades. Every current and even every long discontinued electronics magazine has regularly featured articles on building your own weather station. Over the years, they have become increasingly sophisticated and can now be fully integrated into an automated home — although this often requires loyalty to an (expensive) brand manufacturer across all components.
With your own weather and environmental data, you can keep up and measure things that no commercial station can. It’s also fun: expand your knowledge of electronics, current microcontroller development boards and programming languages in a fun and meaningful way. For less than 10 euros you can get started and record your first environmental data — with time and growing interest, you will continue to expand your system.
In this Edition
Which Microcontroller Fits My Project?
The Right Development Environment
Tracking Wind and Weather
Weather Display with OpenWeatherMap and Vacuum Fluorescent Display
Volatile Organic Compounds in the Air We Breathe
Working with MQ Sensors: Measuring Carbon Monoxide — Odorless but Toxic
CO2 Traffic Light with ThingSpeak IoT Connection
An Automatic Plant Watering System
Good Indoor Climate: Temperature and Humidity are Important criteria
Classy Thermometer with Vintage Tube Technology
Nostalgic Weather House for the Whole Family
Measuring Air Pressure and Temperature Accurately
Sunburn Warning Device
DIY Sensor for Sunshine Duration
Simple Smartphone Says: Fog or Clear View?
Identifying Earthquakes
Liquid Level Measurement for Vessels and Reservoirs
Water pH Value Measurement
Detecting Radioactive Radiation
GPS: Sensor Location Service Across the Globe
Saving and Timestamping Log Files on SD Cards
LoRaWAN, The Things Network, and ThingSpeak
Operating a LoRaWAN Gateway for TTN
Defying "Wind and Weather"
Mega Display with Weather Forecasz
Maîtrise de la puce RP2040 avec plus de 60 projets à réaliser et à programmer
Les cartes Raspberry Pi Pico et Pico W sont animées par un microcontrôleur ARM Cortex M0+ RP2040 à double coeur, rapide, efficace et peu coûteux, qui fonctionne jusqu'à 133 MHz et dispose de 264 Ko de SRAM et de 2 Mo de mémoire Flash. Outre une vaste mémoire, le Pico et le Pico W disposent de nombreuses broches GPIO et d'interfaces telles que CA/N, SPI, I²C, UART, MLI, de fonctions de temporisation, d'une interface de débogage matériel et d'un capteur de température interne.
La carte Raspberry Pi Pico W comporte en plus une puce CYW43439 Bluetooth et Wi-Fi d'Infineon. Au moment de la rédaction de ce livre, le micrologiciel Bluetooth pour le Pico W n'était pas encore disponible. Le Wi-Fi à 2,4 GHz est toutefois entièrement pris en charge avec les protocoles 802.11b/g/n.
Ce livre est une introduction à l'utilisation du Raspberry Pi Pico W avec le langage de programmation MicroPython. Les quelque soixante projets testés et opérationnels sont présentés à l'aide de l'environnement de développement intégré (EDI) Thonny. Les sujets abordés sont nombreux :
Installation de MicroPython sur le Raspberry Pi Pico depuis un PC
Interruptions de l'horloge et interruptions externes
Convertisseur analogique-numérique (CA/N)
Capteurs de température interne et externe
Capteurs externes (pression, humidité, pouls, à ultrasons)
Enregistrement de données
MLI, UART, I²C et SPI
Bluetooth, Wi-Fi et applis sur smarphone
Convertisseur numérique-analogique (CN/A)
Tous les projets ont été testés et éprouvés. Ils peuvent être mis en oeuvre sur le Raspberry Pi Pico ainsi que sur le Raspberry Pi Pico W. Toutefois les projets avec une liaison Wi-Fi ne fonctionnent que sur le Pico W. Une petite expérience en programmation et en électronique est nécessaire pour suivre les projets. De brèves descriptions, des schémas fonctionnels, des schémas détaillés du câblage des montages et des listings MicroPython complets sont fournis pour tous les projets.
Elektor GREEN and GOLD members can download their digital edition here.
Not a member yet? Click here.
PIO Programming on the Raspberry Pi PicoNine Instructions, Many Possibilities
Breaking AI Out of the BrowserUsing AI CLIs to Code, Compile, and Validate Embedded Projects
The Scrutiny DebuggerDebug, Visualize, and Test Embedded C/C++ Code
Sigfox Breakout Board (1)A Self-Built Radio BoB
Low-Noise Power Supply (2)Construction, Assembly, and Practical Implementation
Simple Signal Generator Using the RP2040Analog and Digital Signals for Around €10
Navigating the Future of Smart Homes with Matter and Edge AIAre Matter’s Latest Updates and the Rise of Edge AI Finally Giving Engineers the Tools to Build the Intelligent, Seamless Smart Homes Users Have Been Promised?
Differential Pressure SensorsPredictive Maintenance in HVAC-Systems
Security by DesignEngineering Fundamentals Limit Failure
Embedded Security Is No Longer Optional
CRA and PQC Are Rewriting Embedded Security PrioritiesWhy Even Small IoT and Industrial Firms Need an Upgrade Plan
embedded world 2026An Interview With Benedikt Weyerer, Executive Director of embedded world
Hands on with I3CUsing Hardware from ST and Microchip
The BLEnky ProjectRapid Prototyping of Bluetooth Low Energy Applications
Pulse Width ModulationFrom a Simple On/Off Thermostat to a Smoothed DC Analog Signal
AudiotronicsEar-Pleasing Electronics for DIY Construction
From Life’s ExperienceRead The F...ing Manual!
ESP32 Audio Transceiver Board (Part 4)Tuning the Clocks - And a Wired Option
2026: An AI OdysseyThe 2025 Vibe-Coding Hangover
Symmetrical DC LoadDC Load, Static or Dynamic, and Symmetrical
Counting Faces with MaixCAMAn Easy Way to Capture Audience Sizes
Open-Source-Code mit Arduino IDE und PlatformIO
Autonomes Fahren: GPS, Accelerometer, Gyroskop
PS3-Controller
Mikrocontroller wie der Arduino und Einplatinenrechner wie der Raspberry Pi haben sich zu beliebten Komponenten entwickelt. Dritter im Bunde ist der ESP32 der Firma Espressif. Mikrocontroller dieser Baureihe zeichnen sich durch eine Vielzahl implementierter Funktionen aus, die bei einem Arduino konventioneller Prägung mit einem Atmel-AVR-Mikrocontroller erst mit weiterer Hardware möglich sind. Prominentes Beispiel sind hier die WiFi- und Bluetooth-Funktionalitäten. Gegenüber einem Raspberry Pi zeichnen sie sich durch einen deutlich geringeren Preis aus.
Allgemeine Informationen für die Realisierung eines Roboterauto-Projekts mit dem ESP32 sind leicht zu finden. Dabei handelt es sich aber oft nur um Ausführungen zu einem Teilaspekt, ohne inhaltliche oder funktionale Abstimmung. So ist nicht nur die Beschaffung der benötigten Informationen mühselig und zeitaufwändig, sie kann auch außerordentlich fehlerträchtig sein.
Ansatzpunkt dieses Buches ist, diese Lücke zu schließen. Es geht auf verschiedene Möglichkeiten eines Chassis ein, vermittelt nötige Kenntnisse und führt schrittweise von einer einfachen Motorsteuerung zu einem komplexen sensor- und sprachgesteuerten Roboterauto. Hacks rund um GPS und eine PlayStation 3 runden die Sache ab.
Inhalt
Bei der Reihenfolge der Kapitel wurde versucht – beginnend bei der Darstellung von grundlegenden Informationen – über die Lösung einfacher Aufgaben zu etwas anspruchsvolleren Techniken zu führen.
Der Mikrocontroller ESP32
Die Software erstellen
Die Stromversorgung
Rund um die Hardware
Das Chassis
Der Gleichstrommotor
Kabellose Steuerung über WiFi
Mit Sensoren Hindernisse erkennen
Eine eigene Roboterauto-App
Servo und Lichtsensor
GPS
Accelerometer / Gyroskop
PS3-Controller
Roboterauto-App
Hinweis zur Software
Die Dateien haben das Suffix (.cpp). Grund ist die Entwicklung mit PlatformIO. Mit Copy & Paste sollten sie auch in der Arduino-IDE verwendet werden können.
LoRa with the Raspberry Pi PicoFun with MicroPython
What Is RISC-V?And Why the Industry Is So Excited About a New Processing Core!
Elektor @ 60Circuits of Summer Past
Versatile Power Supply for BreadboardsPositive and Negative Voltages Out of 5 V from USB
Raspberry Pi Pico EssentialsSample Chapter: Wi-Fi with the Raspberry Pi Pico
Magnetic Levitation the Easy Way
Hands On the Parallax Propeller 2Part 3: Smart Pins and Serial Data (UART)
Nucleo Boards Programming with the STM32CubeIDESample Chapter: FreeRTOS for the STM32 MCU
Developer's ZoneTips & Tricks, Best Practices and Other Useful Information
Miniware DT71 Digital Tweezers
Wearable Wi-Fi Gadget: ESPHome Does the Job Again
Starting out in ElectronicsEasier Than Imagined! This Concludes the Subject of “Capacitors”
Simple Sketches Using the Qwiic Ecosystem
Java on the Raspberry Pi (Part 2)Controlling GPIOs with a Spring REST Service
Raspberry Pi Compute Module 4A Raspberry Pi for Industry
Portable, Stand-Alone Air Quality Display for 2.5 µm ParticlesKeep(s) an Eye on Your Health
From Life’s ExperienceThe Future Was Better in the Past
MicroPython for the ESP32 and FriendsPart 1: Installation and Our First Programs
Charge-Coupled Devices in OscilloscopesPeculiar Parts, the series
ESD – The Invisible DestroyerComponents Trashed by a Bolt from the Blue
Solar Power for Mowing RobotsEcological, Inexpensive, Simple!
Europe’s Efforts to Tame Big Tech
HexadokuThe Original Elektorized Sudoku
DIY LiPo Supercharger BundleGreatScott and Elektor's LiPo Charger, Booster, and Protector
MTheCamA Simple Mini Thermal Camera
Weller WE 1010Soldering Station
electronica Fast Forward 2020 Winners
I2S Test Signal Generator with AVR Microcontroller32-Bit 1-kHz Digital Sine, fs 192 kHz, Level Adjustable from 0 to -110 dB
Control Your Home with Raspberry PiRPi snoops on 433.92 MHz
Simulate Circuits Online
From Life's ExperienceThe Fine Line Between Order and Chaos
Starting Out in ElectronicsEasier Than imagined!
Homebrew CPUsThe Discrete Microcontroller
Connect Your Thermostat with ESPHomeAn Attempt at Doing Home Automation the Right Way
Developer’s ZoneTips & Tricks, Best Practices and Other Useful Information
Small Circuits RevivalFrom the Elektor suggestions box
Raspberry Pi Full StackRPi and RF24 at the heart of a sensor network
Practical ESP32 Multitasking (6)Event Groups
Multi-Channel Power Analyzer: Up to 3 Channels, with Graphic and Alphanumeric Display
Analogue Filter Design (Part 3)Passive Filters
JOY-iT VAX-1030Wireless Measurement Module
New LCR Meter 50 Hz - 2 MHz Part 2Operation, Calibration, and Firmware Programming
Error AnalysisTips on Voltage Regular Circuits, PCB Design, and More
The Open Hardware ObservatoryCommunity-Based Open Source Hardware Assessment
Java on the Raspberry PiAn Interview with Frank Delporte
Data Analysis and Artificial Intelligence in PythonInterpreting Real Data with NumPy, pandas and scikit-learn
Project 2.0Corrections, Updates and Readers’ letters
Getting to Know the Parallax Propeller 2 (Part 1)An Introduction
Hexadoku
KI in der Praxis
Tauchen Sie ein in die faszinierende Welt der Robotik und Automatisierung!
Dieses Elektor Special zeigt, wie Sie mit Kreativität, etwas Know-how und günstiger Technik eigene Roboter bauen können. Vom ersten DIY-Projekt mit Arduino oder Raspberry Pi bis hin zu intelligenten Systemen mit KI – dieses Heft macht moderne Robotik verständlich und greifbar.
Entdecken Sie praxisnahe Anleitungen, inspirierende Projekte und spannende Einblicke in die Maker-Szene. Lernen Sie, wie aus Experimentierfreude, Gemeinschaft und Offenheit echte Innovation entsteht – und warum Robotik weit mehr ist als nur ein technisches Hobby.
Inhalt
Phantasie wird Realität
Arduino-controlled Drawing Robot
GalaxyRVR Mars Rover Kit for Arduino
YDLIDAR X4Pro Lidar
xHuskyLens AI Camera
DOF Robot Arm mit Raspberry Pi Pico
Fertigungsroboter mit Fischertechnik
Pneumatischer Industrieroboter
Warum bauen wir immer wieder Roboterhunde?
Elektor Mini-Wheelie
Roboterfahrzeuge und autonomes Fahren
Bouw uw eigen RISC-V-controllerEerste stappen met de NEORV32 RISC-V softcore voor goedkope FPGA’s
Het gebruik van Arduino’s seriële plotterGrafieken plotten met Arduino is gemakkelijk
CLUE van AdafruitEen slimme oplossing voor IoT-projecten
Bufferboard voor de Raspberry Pi 400Bescherm uw I/O’s Raspberry Pi RP2040-boards in overvloed
Een handboek voor DHZ elektronische beveiliging en spionageSRAM – gebakken of diepgevroren
Onderdelen identificerenTips & trucs, vakkunstigheden en andere nuttige informatie DHZ aanraakloze lichtschakelaar
Alle begin......gaat compenseren en transformeren
Nieuwe embedded-ontwikkelingenRust en het up-to-date houden van IoT-implementaties Infographics Hoe de industrie- en automobielsector zullen profiteren van 5G
Relais met bewegende spoelVreemde onderdelen
Oost West Lab BestAlles draait om de bank...
Kennismaking met neuronen in neurale netwerkenDeel 4: embedded neuronen
Magnetische levitatie “the very easy way”De derde en meest compacte versie
PLC-programmering met de Raspberry Pi en het OpenPLC-projectVisualisatie van PLC-programma’s met AdvancedHMI
Uit het leven gegrepenInpakken en wegwezen
Onder de radarMicrocontrollers die u zou moeten kennen
Draadloos monitoren en debuggenvoor Arduino, ESP32 en co.
Draagbare temperatuur- en vochtigheidsmetermet gebruiksklare modules
Lithium-accupacks reparerenSpaart geld + geeft meer kracht!
GUI's maken met PythonMeme-Generator
De drie grote vraagtekensWaarom wat wie Hexadoku
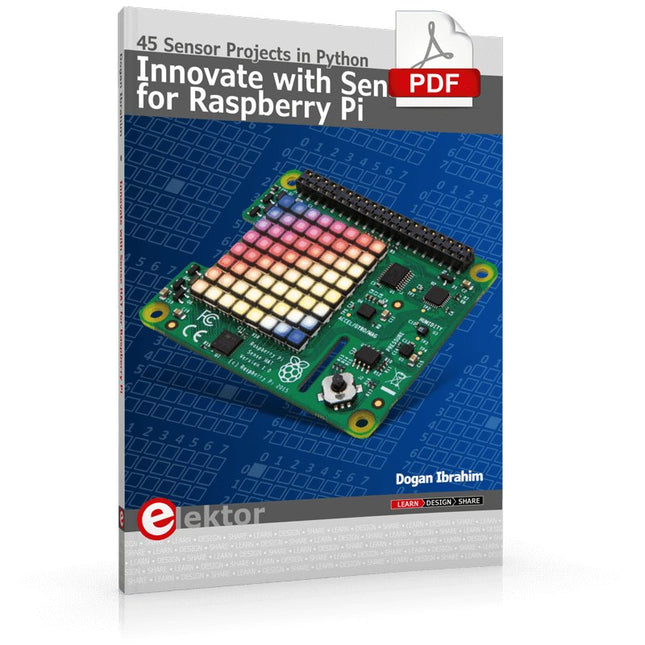
Ready to explore the world around you? By attaching the Sense HAT to your Raspberry Pi, you can quickly and easily develop a variety of creative applications, useful experiments, and exciting games.
The Sense HAT contains several helpful environmental sensors: temperature, humidity, pressure, accelerometer, magnetometer, and gyroscope. Additionally, an 8x8 LED matrix is provided with RGB LEDs, which can be used to display multi-color scrolling or fixed information, such as the sensor data. Use the small onboard joystick for games or applications that require user input. In Innovate with Sense HAT for Raspberry Pi, Dr. Dogan Ibrahim explains how to use the Sense HAT in Raspberry Pi Zero W-based projects. Using simple terms, he details how to incorporate the Sense HAT board in interesting visual and sensor-based projects. You can complete all the projects with other Raspberry Pi models without any modifications.
Exploring with Sense HAT for Raspberry Pi includes projects featuring external hardware components in addition to the Sense HAT board. You will learn to connect the Sense HAT board to the Raspberry Pi using jumper wires so that some of the GPIO ports are free to be interfaced to external components, such as to buzzers, relays, LEDs, LCDs, motors, and other sensors.
The book includes full program listings and detailed project descriptions. Complete circuit diagrams of the projects using external components are given where necessary. All the projects were developed using the latest version of the Python 3 programming language. You can easily download projects from the book’s web page. Let’s start exploring with Sense HAT.