Elektor GREEN en GOLD leden kunnen deze uitgave hier downloaden.Nog geen lid? Klik hier om een lidmaatschap af te sluiten.
Cloc 2.0de wekker die je altijd al wilde hebben
PIO in de praktijkexperimenten met de programmeerbare I/O van de RP2040
Armeluis chiptweakerwe krijgen je wel (goedkoop) aan de praat...
Echte USB-toevalsgeneratortwee PIC’s voor de prijs van één AVR
Pimp my mike...opvoeren doe je zelf
FFT met Maixduinofrequentiespectra vastleggen
Uit het leven gegrepenontwerp(on)logica
UCN5804 stappenmotordrivervreemde onderdelen
Simuleren met Micro-Capeerste stappen in een complexe wereld
PAUL Award 2022jonge technische talenten en hun creatieve ontwerpen
Mijn eerste Software Defined Radioin minder dan 15 minuten klaar
Microcontroller-documentatie verklaarddeel 1: de opzet van een datasheet
Hoe verder met AI en embedded systems?tools, platforms – en worden schrijvers obsoleet?
Digitalisering van verticale landbouw
Elektor Infographicsembedded en AI vandaag – en morgen
Een introductie tot TinyML
Casestudy KwickPOS
High-performance in elke klassecomputer-on-module standaarden
Alle begin......wordt eindelijk actief!
I²C-communicatie met Node.js en een Raspberry Pibekijk sensordata in een browser
Video-output met microcontrollers (2)VGA en DVI
Het Metronom real-time besturingssysteemeen RTOS voor AVR-processoren
DVI op de RP2040vraaggesprek met Luke Wren, chipontwikkelaar bij Raspberry Pi
Display-HAT Minitoont het weer op de Raspberry Pi
De WEEF 2022 Awardshet goede vieren
Hexadoku
A Reference and User Guide for the Arduino Mega 2560 Hardware and Firmware
A manual providing up-to-date hardware information for the Arduino Mega 2560.
The Arduino Mega 2560 is an upgrade to the popular Arduino Uno board, providing more pins, serial ports and memory. Arduino is the easy to use open-source electronics platform used by hobbyists, makers, hackers, experimenters, educators and professionals.
Get all the information that you need on the hardware and firmware found on Arduino Mega 2560 boards in this handy reference and user guide. Ideal for the workbench or desktop. This manual covers the Arduino Mega 2560 hardware and firmware, and is a companion volume to the Ultimate Arduino Uno Hardware Manual, which covers the Arduino Uno hardware and firmware.
Contains all of the Arduino Mega 2560 hardware information in one place
Covers Arduino / Genuino Mega 2560 revision 3 and earlier boards
Easily find hardware technical specifications with explanations
Pin reference chapter with interfacing examples
Diagrams and illustrations for easy reference to pin functions and hardware connections
Learn to back up and restore firmware on the board, or load new firmware
Basic fault finding and repair procedures for Arduino Mega 2560 boards
Power supply circuits simplified and explained
Mechanical dimensions split into five easy to reference diagrams
Contains circuit diagrams, parts list and board layout to easily locate components
A chapter on shield compatibility explains how shields work across different Arduino boards
De Elektor Zenerdiode-tester is in wezen een constante-stroombron die in stappen van 1 tot 50 mA kan worden geschakeld. Hij kan worden gebruikt om zenerdiodes tot een maximum van 54 V te testen. Dankzij een 60-V step-upconverter kan het apparaat worden gevoed met de gebruikelijke 5 tot 12 V.
Het principe van deze tester is eenvoudig. Een zenerdiode of een ander DUT (device under test, zoals een LED) wordt gevoed door een instelbare stroombron. De spanning over het DUT kan met een multimeter worden gemeten. De spanning van de meeste (kleine) zenerdiodes wordt gespecificeerd bij een stroom van 5 mA. Afhankelijk van de toepassing kan ook de spanning bij andere stromen interessant zijn. Daarom zijn er zes stroominstellingen beschikbaar: 1, 2, 5, 10, 20 en 50 mA. LED’s worden vaak gespecificeerd bij een stroom van 20 mA.
Wat kan worden getest:
Of een zenerdiode defect is (kortsluiting of hoogohmig).
Of een zenerdiode de juiste zenerspanning heeft.
Hoe een zenerspanning verandert bij verschillende stromen.
Welke exacte spanning aanwezig is bij een geïntegreerde spanningsreferentie.
Of LED’s in een serieschakeling verschillen in helderheid (vandaar de stroom van 20 mA).
Wat de stroomversterking is bij verschillende basisstromen in (vermogens)transistoren.
De kit bevat alle onderdelen die in de stuklijst staan vermeld, inclusief printplaat en behuizing.
Specificaties
Voedingsspanning
5…12 V/2 A (USB-C)
Voedingsstroom (Itest = 50 mA)
1,1 A bij 5 V / 412 mA bij 12 V
Selecteerbare stromen
1, 2, 5, 10, 20 en 50 mA
Max. testspanning
>54 V bij Itest ≥1 mA
Max. uitgangsspanning
60 V bij Itest = 0 mA
Spanningslimiet bij 5 V
4,5 V bij Itest = 1 mA / 5,18 V bij Itest = 50 mA
Afmetingen (behuizing)
110 x 82 x 44 mm
Afmetingen (PCB)
105,4 x 67,3 mm
Aansluitingen
4 mm banaanstekkerbussen voor multimeter
2 mm banaanstekkerbussen voor testklemmen
USB-C-aansluiting voor voeding
Inbegrepen
Weerstanden
R1 = 3.3 kΩ, 600 mW, 1%
R2 = 0.15 Ω, 1 W, 5%, LS 12.7 mm, ø 3.5 mm
R3, R8 = 180 Ω, 600 mW, 1%
R4, R6, R16 = 1 kΩ, 600 mW, 1%
R5, R19 = 47 kΩ, 600 mW, 1%
R7 = 3.9 kΩ, 1 W, 5%, LS 12.7 mm, ø 3.5 mm
R9, R10, R12 = 10 kΩ, 600 mW, 1%
R11, R13 = 100 Ω, 600 mW 1%
R14 = 249 Ω, 600 mW, 1%
R15 = 499 Ω, 600 mW, 1%
R17 = 2.49 kΩ, 250 mW, 1%
R18 = 4.99 kΩ, 250 mW, 1%
Condensatoren
C1 = 470 uF / 35 V, 20%, Ir = 1.86 A, ø 12.5 mm, LS 5 mm, ESR = 0.038 Ω (Panasonic EEUTP1V471)
C2 = 1 uF / 100 V, 10%, X7R, LS 5 mm
C3 = 2.2 nF / 50 V, 10%, X7R, LS 5 mm
C4, C7 = 100 nF / 100 V, 10%, X7R, LS 5 mm
C5 = 100 uF / 100 V, 20%, ø 14 mm max., LS 5 mm
C6 = 1 nF / 100 V, 10%, X7R, LS 5 mm
Inductor
L1 = 100 uH, Irms = 2.4 A, Isat = 3.5 A, 0.09 Ω, radial, pitch 2.5/5/10 mm, ø 14 mm max. (Kemet SBC8-101-242)
Halfgeleiders
D1 = MUR120G, DO-41
D2, D4 = STPS3150RL, DO-201AD
D3 = Z-diode, 18 V, 1.3 W (BZX85C18)
D5 = Z-diode, 5.1 V, 0.5 W (1N5231B)
LED1 = LED in pushbutton S1
LED2 = LED, green, 3 mm
IC1 = MC34063, DIP-8
IC2 = LM4040BIZ-5.0/NOPB, TO-92 (TO-226AA-3)
IC3 = TL051CP, DIP-8
T1 = BC327.25, TO-92
T2 = STP40NF10L, TO-220
T3 = IRF9510PBF, TO-220
T4 = 2N7000, TO-92
Overige
K1, K2, S1, S3 = 2-way screw terminal block, LS 3.5 mm, max. 1.5 mm²
connected to K1 = USB-C socket, 30 V/3 A, chassis mounted, wired, 9 x 16 mm
connected to K2 = Banana Connector, 2 mm, Socket, 60 VDC, Panel Mount, red (Multicomp 24.102.1)
connected to K2 = Banana Connector, 2 mm, Socket, 60 VDC, Panel Mount, black (Multicomp 24.102.2)
Test clip, red, 30 VAC/60 VDC (Hirschmann 931467101)
Test clip, black, 30 VAC/60 VDC (Hirschmann 931467100)
S1 = Pushbutton, panel mount, SPST-NO, 30 DC/100 mA, with red LED
S2 = Rotary Switch, 6 position, 2 pole, 30°, 250 V/150 mA
S3 = Toggle switch, panel mount, SPDT, solder lugs, 28 VDC
T2, T3 = Heat sink, 15°C/W, FK 214 SA-CB
Enclosure Hammond 1591XXSSBK, ABS, 110 x 82 x 44 mm
Knob for S2, round shaft 6 mm, ø 21 mm, with indicator line (Multicomp CP-LB21-6-6D)
4 x Self-tapping screw #4-1/4", carbon steel, pan head
Banana plug, red, 2 mm, 60 VDC (Multicomp 25.205.1)
Banana plug, black, 2 mm, 60 VDC (Multicomp 25.205.2)
Banana socket, black 4 mm, panel mount
Banana socket, red 4 mm, panel mount
for LED1, LED2 = Pin header, 1 x 2, vertical, pitch 2.54 mm
for LED1, LED2 = Pin socket, 1 x 2, vertical, pitch 2.54 mm
for T2, T3 = M3 screw, 10 mm, steel, pan head
2 x M3 washer, plain, steel
4 x M3 nut
for IC1, IC3 = DIP-8 socket
Wire, black, 0.25 mm² (24 AWG), stranded 14 x 0.15 mm, 1 m
Wire, red, 0.25 mm² (24 AWG), stranded 14 x 0.15 mm, 1 m
PCB 250772-1 v1.1
Links
Artikel
Elektor Labs
Elektor GREEN en GOLD leden kunnen deze uitgave hier downloaden.
Nog geen lid? Klik hier om een lidmaatschap af te sluiten.
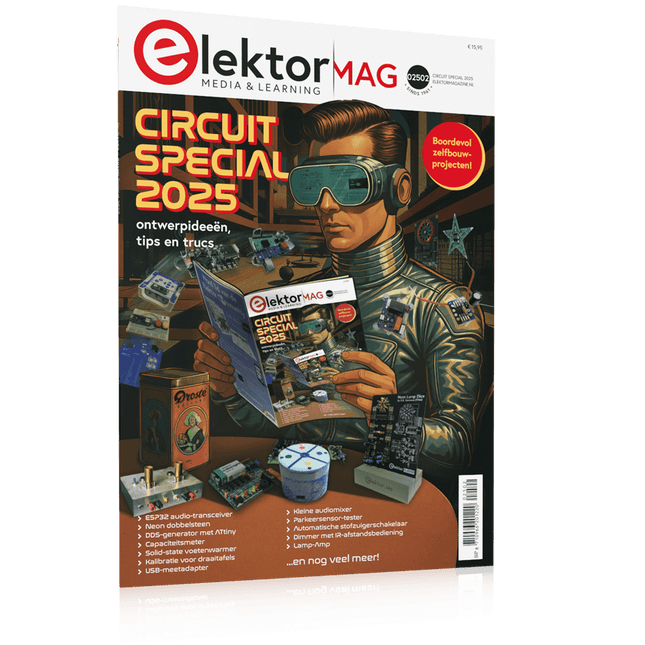
USB-meetadaptertest stroom en signaalkwaliteit van USB-poorten
4...20 mA stroom-uitgang voor Arduino Unobetrouwbare, EMI-ongevoelige current loop-interface
Automatische stofzuigerschakelaarhoud uw werkplek schoon
DDS-generator met ATtiny
Opamp-tester v2nieuwe print – nu ook voor SMD’s
550-mW audio ‘Lamp-Amp’voor die warme buizenklank
Zekeringbewakerhoud zekeringen in de gaten met een knipper-LED
Hoogwaardige RIAA-voorversterkerhaal het beste uit uw vinylplaten!
Kalibratie voor draaitafelsArduino-gebaseerde 100/120Hz-stroboscoop
Elektor Classics: Video-versterker
Dimmer met IR-afstandsbedieningcomfortabel en elegant staande halogeen- of LED-lampen regelen
Het gebruik van switch…case bij strings in C++/Arduino IDE
Magneetzoekermet een eenvoudige Hall-effect-sensor
Raspberry Pi: slimme aan/uit-knopeen oplossing voor de Raspberry Pi tot aan model 4
Professionele tipsvan makers voor makers
Praktische projecten met de 555-timerDC-motorbesturing en snelle reactie-uitdaging
Eenvoudige ‘aan-verklikker’spaar energie met een simpele schakeling
Powerpacks parallelschakelendrie dagen ononderbroken stroom
VFO tot 15 MHzimplementatie met Raspberry Pi Pico
Vioolstemmer met ATtiny202
Elektor Classics: Video-ingangsversterker voor zwart/wit-TV
Capaciteitsmeter20 pF tot 600 nF
Quasi-analoog uurwerk Mk IItwee LED-ringen – voor uren en minuten
Niets is onmogelijk(met hulp van het Arduino-ecosysteem)
Neon dobbelsteen
Elektor Classics: RTTY-afstemhulp
Inspirerende hardware-ontwerpen voor uw ESP’s
Elektor Classics: 3 A voeding
RGB-LED’s met geïntegreerde stuurkringlicht met precisie: ICLED’s zetten de standaard
Experiment: een mixed-signal Theremin?moderne time-of-flight sensoren plus de tijdloze analoge XR2206
ESP32 audio-transceiver (deel 1)SD-kaart WAV-speler demo
Elektor infographicschakelingen en schakelingontwerp 2025
Kleine audiomixereenvoudig, veelzijdig en schaalbaar
Slimme timer voor trapverlichtingbespaar op uw energierekening!
Maak uw rolluiken slimmerVelux-hardware besturen met een ESP32 en MQTT
Solid-state voetenwarmercomfortabel en energiezuinig
Is de M5Stamp Fly-quadcopter de nieuwe Tello?
Vergroot het WiFi-bereik van de ESP32-C3 SuperMinieenvoudige en effectieve antennemodificatie
ZD-8968 hetelucht-soldeerstationbudgetvriendelijk werkpaard of gebakken lucht?
Parkeersensor-testervind defecten in het PDC-systeem van een auto
Projecten met Arduino, ESPHome, Home Assistant en Raspberry Pi & Co.
Dit e-book bevat verschillende voorbeeldprojecten, te beginnen met een inleiding tot elektronica. Het legt ook uit hoe je Home Assistant installeert op een Raspberry Pi, hoe je binnenklimaatsensoren gebruikt voor temperatuur en vochtigheid, hoe je het MQTT-protocol en andere interfaces implementeert, en hoe je ESPHome gebruikt om sensoren en actuatoren te integreren in Home Assistant. Talrijke video tutorials vullen het boek aan.
The book begins with an introduction to electrical engineering. You will learn the basics of voltage, current, resistors, diodes and transistors.
Arduino and microcontrollers
A complete section is dedicated to the Arduino Uno. You will get to know the structure, write your first programs and work on practical examples.
Home Assistant and automation
You will learn how to set up Home Assistant on a Raspberry Pi and how to use automations, scenes and devices. In addition, Zigbee, MQTT and ESP-NOW – important technologies for home automation – will be discussed.
ESP8266, ESP32 and ESP32-CAM
The popular ESP microcontrollers are covered in detail. A theoretical introduction is followed by practical projects that show you how to get the most out of these devices.
Sensors and actuators
The book explains the functionality and application of numerous sensors such as temperature and humidity sensors, motion detectors and RFID readers. For actuators, stepper motors, e-ink displays, servo motors and much more are covered. There are practical application examples for all devices.
ESPHome
This chapter shows you how to integrate sensors and actuators into Home Assistant without any programming effort. You will be guided step by step through the setup with ESPHome.
LEDs and lighting technology
In this chapter, you will learn about different types of LEDs and how they can be used. The basics of lighting technology are also explained.
Node-RED
A whole chapter is dedicated to Node-RED. You will learn the basics of this powerful tool and be guided step by step through its setup and use.
Integrated Circuits (ICs)
In electronics, there are numerous ICs that make our lives easier. You will get to know the most important ones and apply your knowledge in practical projects.
Professional programming
Advanced topics such as the correct use of buttons, the use of interrupts and the use of an NTP server for time synchronisation are covered in detail in this chapter.
Downloads
GitHub
Mein eigener RISC-V-ControllerErste Schritte mit dem NEORV32 RISC-V Softcore für preiswerte FPGAs
Wie man den Seriellen Plotter der Arduino-IDE nutztEinfaches Plotten von Kurven mit Arduino
CLUE - ein Clou von Adafruit?Angriff auf den micro:bit
Puffer-Board für den Raspberry Pi 400Schützen Sie die I/Os!
FrühjahrskollektionInteressante Raspberry Pi RP2040 Boards
Ein DIY-Handbuch zu elektronischer Sicherheit und E-SpionageSRAM erhitzt oder tiefgefroren
Identifizierung von BauteilenTipps & Tricks, Best Practices und andere nützliche Informationen
Ein Touch-Schalter ohne TouchKonzeption und Umsetzung eines berührungslosen Lichtschalters
Aller Anfang...ist gar nicht schwer: Anpassen und Transformieren
Was gibt's Neues in der Embedded-Entwicklung?Rust und die Aktualisierung von IoT-Implementierungen
Infografiken Elektor Industry
Neue Wege für Industrie und Automobilbranche mit 5G
DrehspulrelaisBemerkenswerte Bauteile
Zutritt für Unbefugte verbotenAlles dreht sich um die Werkzeuge...
Die Neuronen in neuronalen Netzen verstehenTeil 4: Eingebettete Neuronen
Magnetische Levitation auf die sehr sehr einfache ArtDie dritte und kompakteste Version
SPS-Programmierung mit dem Raspberry Pi und dem OpenPLC-ProjektVisualisierung von SPS-Programmen mit AdvancedHMI
Aus dem Leben gegriffenEinpacken und weg damit
Unter dem RadarUnbekannte Mikrocontroller, über die Sie Bescheid wissen sollten
Drahtloses Monitoring und DebuggenSerielle Funk-Schnittstelle für Arduino, ESP32 und Co.
Tragbares Temperatur- und FeuchtemessgerätGebaut mit vorgefertigten Modulen
Lithium-Akkus reparierenGeld sparen + mehr Power!
GUIs mit PythonMeme-Generator
Die drei FragezeichenWarum? Was? Wer?
Hexadoku
Program and build Arduino-based ham station utilities, tools, and instruments
In addition to a detailed introduction to the exciting world of the Arduino microcontroller and its many variants, this book introduces you to the shields, modules, and components you can connect to the Arduino. Many of these components are discussed in detail and used in the projects included in this book to help you understand how these components can be incorporated into your own Arduino projects. Emphasis has been placed on designing and creating a wide range of amateur radio-related projects that can easily be built in just a few days.
This book is written for ham radio operators and Arduino enthusiasts of all skill levels, and includes discussions about the tools, construction methods, and troubleshooting techniques used in creating amateur radio-related Arduino projects. The book teaches you how to create feature-rich Arduino-based projects, with the goal of helping you to advance beyond this book, and design and build your own ham radio Arduino projects.
In addition, this book describes in detail the design, construction, programming, and operation of the following projects:
CW Beacon and Foxhunt Keyer
Mini Weather Station
RF Probe with LED Bar Graph
DTMF Tone Encoder
DTMF Tone Decoder
Waveform Generator
Auto Power On/Off
Bluetooth CW Keyer
Station Power Monitor
AC Current Monitor
This book assumes a basic knowledge of electronics and circuit construction. Basic knowledge of how to program the Arduino using its IDE will also be beneficial.
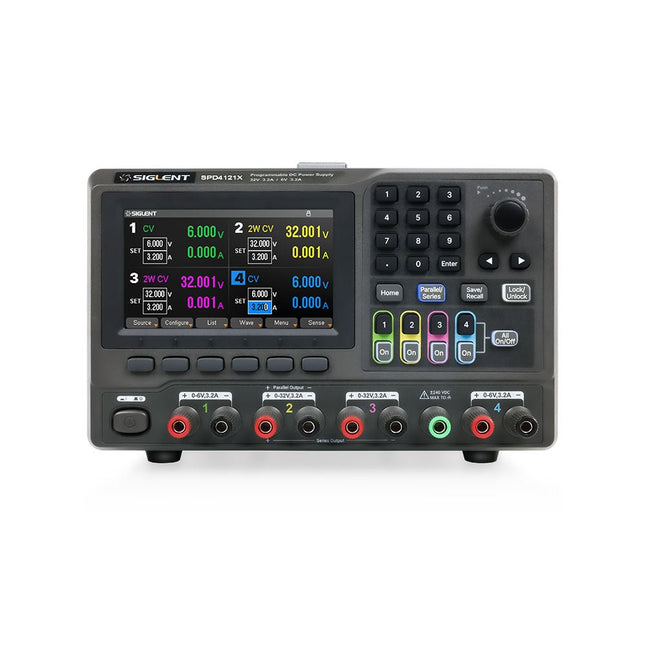
The Siglent SPD4121X is a 4-channel DC Linear Programmable Power Supply equipped with a 4.3-inch TFT-LCD display, friendly human-machine interface, and excellent performance indicators. Real-time waveform display provides engineers with an informative user interface.
SPD4121X offers a total output power of 285 W with a resolution of 1 mV/1 mA. The maximum voltage and current for each channel are as follows:
CH1: 15 V/1.5 A
CH2: 12 V/10 A
CH3: 12 V/10 A
CH4: 15 V/1.5 A
Kenmerken
Rated output power: 285 W
Rated voltage: 32 V, 12 V, 30 V
Up to four high-precision power supplies with independent controllable outputs, supporting CH2 and CH3 series and parallel connections
Clear graphical interface with waveform and timer display modes
5-digit voltage and current display with minimum resolution of 1 mV, 1 mA
Fast output response time: <50us
The high current channel support remote voltage compensation sense function. The maximum compensation voltage is 0.6 V
Overvoltage protection and overcurrent protection or safe and accurate operation
Equipped with a 4.3-inch TFT-LCD display (480 x 272 resolution)
USB and LAN standard communication
USB-GPIB module is optional
Excellent channel density with up to 4 channels in a 3U half rack package
Internal data storage for setups and parameters
Embedded Web Server with instrument communication that doesn’t require software installation
Fully SCPI programming command set support as well as a LabView driver for remote control and system automation
Specificaties
SPD4323X
SPD4121X
SPD4306X
Channel Output
CH1: Voltage 0 to 6 V Current 0 to 3.2 ACH2: Voltage 0 to 32 V Current 0 to 3.2 ACH3: Voltage 0 to 32 V Current 0 to 3.2 ACH4: Voltage 0 to 6 V Current 0 to 3.2 A
CH1: Voltage 0 to 15 V Current 0 to 1.5 ACH2: Voltage 0 to 12 V Current 0 to 10 ACH3: Voltage 0 to 12 V Current 0 to 10 ACH4: Voltage 0 to 15 V Current 0 to 1.5 A
CH1: Voltage 0 to 15 V Current 0 to 1.5 ACH2: Voltage 0 to 30 V Current 0 to 6 ACH3: Voltage 0 to 30 V Current 0 to 6 ACH4: Voltage 0 to 15 V Current 0 to 1 A
Resolution
1 mV, 1 mA
1 mV, 1 mA
1 mV, 1 mA
Setting Accuracy
Voltage: ±(0.03% of reading+10) mV, Current: ±(0.3% of reading+10) mA
Voltage: ±(0.03% of reading+10) mV, Current: ±(0.3% of reading+10) mA
Voltage: ±(0.03% of reading+10) mV, Current: ±(0.3% of reading+10) mA
Readback Accuracy
Voltage: ±(0.03% of reading+10) mV, Current: ±(0.3% of reading+10) mA
Voltage: ±(0.03% of reading+10) mV, Current: ±(0.3% of reading+10) mA
Voltage: ±(0.03% of reading+10) mV, Current: ±(0.3% of reading+10) mA
Display
4.3" TFT-LCD 5-digit voltage and current display
4.3" TFT-LCD 5-digit voltage and current display
4.3" TFT-LCD 5-digit voltage and current display
Output power
240 W
285 W
400 W
Inbegrepen
1x Siglent SPD4121X Power Supply
1x Power cord (EU)
1x Output test cord (3 A)
1x USB cable
1x Quick start guide
Downloads
Datasheet
Manual
Quick start
Diese Ausgabe steht allen GOLD- und GREEN-Mitgliedern auf der ElektorMagazine-Website zum Download bereit!
Sie sind noch kein Mitglied? Hier klicken!
Raspberry Pi Pico als Spektrum-AnalyserFFTs auf preiswerter Hardware-Basis
±40 V Linearer SpannungsreglerEine alternative Stromversorgung für die Fortissimo-100-Endstufe... und andere!
Drahtlose MCU-Kommunikation flexibel gemachtEEPROM eröffnet Netzwerk-Perspektiven für drahtlose MCUs
5.000 € zu gewinnen!Machen Sie mit beim STM32 Wireless Innovation Design Contest!
2023: Odyssee in der KILoslegen mit dem Code-Interpreter von ChatGPT
LoRa, ein Schweizer TaschenmesserTeil 1: Das LoRa-Protokoll und seine Vorteile
Einstellbare Stromsenke mit integriertem TaktgeberZum Testen von Netzteilen, Spannungswandlern und Batterien
Zwei neue Arduino UNO R4 Boards: Minima und WiFi
Logarithmische PotentiometerSie sind exponentiell!
Motortreiber-Breakout-BoardEin BoB für einen 5-A-Treiber für DC-Motoren mit einer Größe von 3×3 mm
Aus dem Leben gegriffenGefährliche Elektronik
Ist Mobilfunk die energiesparendste Option für das IoT?LTE-M und NB-IoT: Energieanforderungen in LPWAN-Implementierungen
Kabellose Kommunikation in IoT-Systemen mit Modulen MKR von ArduinoKommunikationsstandards der Arduino-Module für IoT
AC-Verluste in magnetischen BauteilenVermeiden Sie heiße Induktivitäten!
Messungen für eine optimale Cloud-Implementierung
Matter-Implementierung: Was braucht es, um Matter-Geräte einzusetzen?
Neue 2,4 GHz-Funkeinheiten von Circuit DesignPrädestiniert für Fernsteuerung und Überwachung
PIC o’Clock – am Puls der ZeitDesign eines SDR-Zeitzeichen-Empfängers
Due Diligence DirectiveBusiness as Usual Will Not Do
Aller Anfang...Ist gar nicht schwer: Spannungsverstärkung
Infraschall-Rekorder mit dem Arduino Pro MiniEin Beispielprojekt aus dem Elektor-Buch „Arduino & Co.“
Cloud-basierter EnergiezählerMit ESP32-Modul und PZEM-004T-Spannungs-/ Stromsensor
Eine Anleitung zur Bare-Metal-ProgrammierungTeil 2: Exaktes Timing, UART und Debugging
Diese Ausgabe steht allen GOLD- und GREEN-Mitgliedern auf der ElektorMagazine-Website zum Download bereit!
Sie sind noch kein Mitglied? Hier klicken!
Kleine WärmebildkameraRealisiert mit einem Arduino UNO
Projekt-Update #3: Energiemessgerät mit ESP32Integration und Test mit Home Assistant
2024: Eine Odyssee in die KIVerbessern der Objekterkennung: Nutzung verfeinerter Techniken
Raspberry Pi Goes KINeues Kit enthält M.2-HAT mit KI-Beschleuniger
Sensoren für WetterstationenWelchen Sensor sollte man wählen?
KI-gestützter WasserzählerTeil 1: Bringen Sie Ihren alten Zähler ins IoT!
Ein GSM-AlarmNutzung der GSM-Technologie für die Fernüberwachung von Garagen
Low-Power-Thread-Geräte optimiert und getestetNiedriger Energiebedarf ... Niedrige Leistung?
Aus dem Leben gegriffenDer Gender-Gap
Nebelkammer selbstgebautUnsichtbare Strahlung sichtbar machen
SparkFun Thing Plus MatterEin vielseitiges Matter-basiertes IoT-Entwicklungsboard
IoT-RetrofittingRS232-Geräte fit für Industrie 4.0 machen
IoT mit 8-Bit-Mikrocontrollern
Technologie als Motor der NachhaltigkeitNeuerungen führen zu Energieeffizienz in vielen Applikationen
AWS für Arduino und Co.Teil 1: AWS-IoT-ExpressLink in der Praxis
Luftstromdetektor (nur) mit ArduinoKeine externen Sensoren erforderlich!
WasserleckdetektorVerbunden mit der Arduino-Cloud
QuarzeBemerkenswerte Bauteile
Universeller Garten-LoggerEin Schritt auf dem Weg zur KI-gestützten Gartenarbeit
Analoger 1-kHz-GeneratorSinuswellen mit geringen Verzerrungen
Miletus: Web-Apps offline nutzenSystem- und Gerätezugriff inklusive
Von 4G zu 5GIst es wirklich so einfach?
Aller Anfang...muss nicht schwer sein: Der Ausgleich
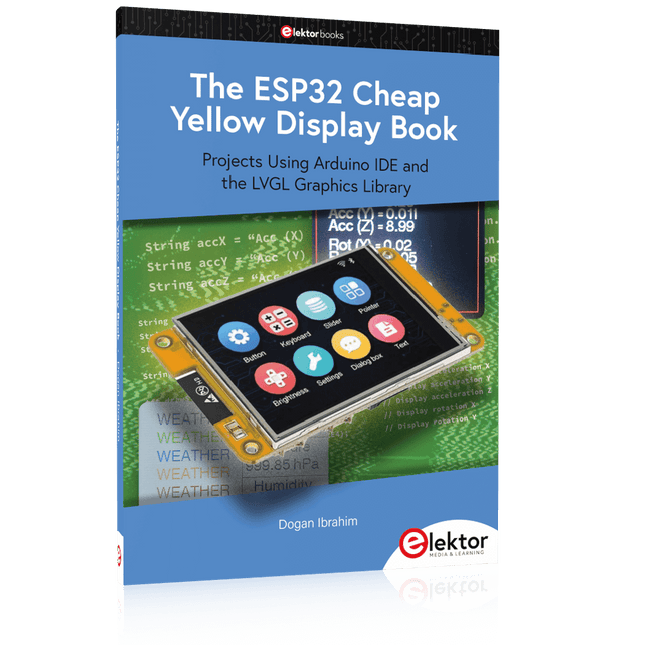
Projects Using Arduino IDE and the LVGL Graphics Library
The ESP32 is probably one of the most popular microcontrollers used by many people, including students, hobbyists, and professional engineers. Its low cost, coupled with rich features makes it a popular device to use in many projects. Recently, a board called the ESP32 Cheap Yellow Display (CYD for short) is available from its manufacturers. The board includes a standard ESP32 microcontroller together with a 320x240 pixel TFT display. Additionally, the board provides several connectors for interfaces such as GPIO, serial port (TX/RX), power and Ground. The inclusion of a TFT display is a real advantage as it enables users to design complex graphics-based projects without resorting to an external LCD or graphics displays.
The book describes the basic hardware of the ESP32 CYD board and provides details of its on-board connectors. Many basic, simple, and intermediate-level projects are given in the book based on the ESP32 CYD, using the highly popular Arduino IDE 2.0 integrated development environment. The use of both the basic graphics functions and the use of the popular LVGL graphics library are discussed in the book and projects are given that use both types of approaches.
All the projects given in the book have been tested and are working. The block diagram, circuit diagram, and the complete program listings and program descriptions of all the projects are given with explanations. Readers can use the LVGL graphics library to design highly popular eye-catching full-color graphics projects using widgets such as buttons, labels, calendars, keypads, keyboards, message boxes, spinboxes, sliders, charts, tables, menus, bars, switches, drop-down lists, animations, and many more widgets.
Elektor GREEN en GOLD leden kunnen deze uitgave hier downloaden.
Nog geen lid? Klik hier om een lidmaatschap af te sluiten.
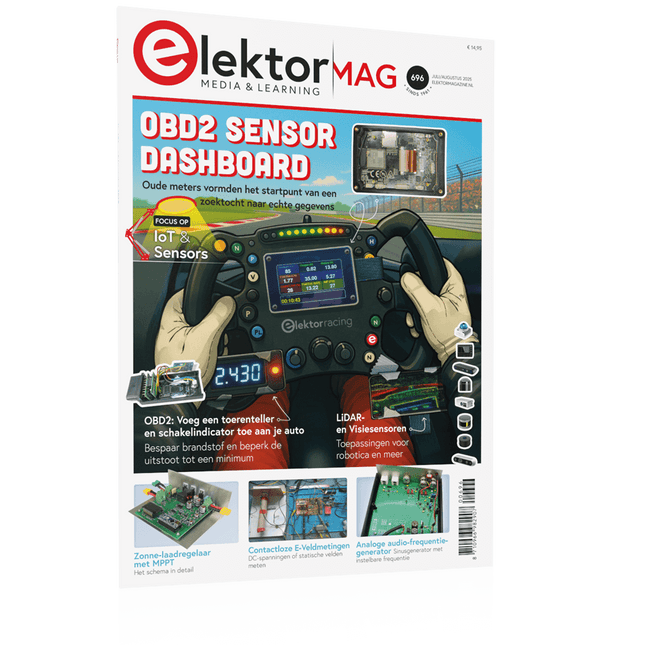
OBD2-sensordashboardOude meters vormden het startpunt van een zoektocht naar echte gegevens
OBD2: voeg een toerenteller en schakelindicator toe aan je autoRetro, maar uiterst nuttig
LiDAR- en Visiesensoren voor Robotica
Sensor+Test 2025 en PCIM 2025
Contactloze E-Veldmetingen (1)Een Trillende Membraan voor het Detecteren van Gelijkspanningen of Statische Elektrische Velden
Draadloze brievenbusmeldervan optische sensoren tot radar: enkele mogelijkheden
Elektor Mini-Wheelieeen zelfbalancerende robot
ZonnecellenVreemde onderdelen, de serie
Aan de slag met een moderne radarsensorStaat een nauwkeurige meting op uw radar?
Uit het leven gegrepenpapierfabriek
CybersecurityZware tijden voor hackers
Infographics: IoT en sensoren 2025
Bluetooth 6.0 brengt verbeterde toepassingen voor afstandsbepalingNieuwe versie biedt betere apparaatpositionerings- en -locatieservices
Draadloze communicatie verkennen met BeagleY-AI
Err-lectronicsCorrecties, updates en lezerspost
Alle begin......sluit het thema opamps af
Een krachtige AI-codeerassistentsneller ontwikkelen met Continue en Visual Studio Code
Zonne-laadregelaar met MPPT (2)Het schema
Ultrasone obstakeldetectoreen eenvoudig project om slechtzienden te helpen
2025: Een AI-odysseeHalfjaaroverzicht
Raspberry Pi Standalone MIDI-synthesizer (3)Het slimmer maken en een gebruikersinterface toevoegen
Meshtastic: een demonstratieprojectEen slim netwerk van LoRa-radio's
Analoge audio-frequentiegeneratorHoogwaardige sinusgenerator met instelbare frequentie