Elektor GREEN and GOLD members can download their digital edition here.
Not a member yet? Click here.
USB Measurement AdapterTesting Current and Signal Quality of USB Ports
4...20 mA Current Output for Arduino UnoA Reliable, EMI-Insensitive Current Loop Interface
Vacuum Cleaner Automatic ControlKeep Your Tools’ Work Area Clean
DDS Generator with ATtiny
Opamp-Tester V2New PCB – Now Also Suitable for SMDs
550-mW “Lamp” Audio AmplifierGet the Warm Sound of Vacuum Tubes With Ease
Fuse GuardMonitoring a Fuse with a Flashing LED
HQ RIAA PreamplifierGet the Most Out of Your Vinyl Records!
Turntable Speed CalibratorAn Arduino-Based 100–120 Hz Strobe Light Generator
Elektor Classics: video buffer/repeater
Infrared Remote-Controlled DimmerControl Your Halogen or LED Floor Lamp Effortlessly and With Style
How to Use switch…case on Strings in C++/Arduino IDE
Magnet FinderWith a Simple Hall-Effect Sensor
Raspberry Pi Smart Power ButtonA Solution for Raspberry Pi Up to Model 4
Essential Maker TipsProfessional Insights for Everyday Making
Practical Projects with the 555 TimerDC Motor Control and Fast Reaction Challenges
Basic AC-Load-On MonitorSave Energy with a Simple Device
Power Banks in ParallelA Three-Day Continuous Power Solution
VFO Up to 15 MHzAn Implementation With Raspberry Pi Pico
Violin Tuner with ATtiny202
Elektor Classics: video amplifier for B/W television sets
Capacitance Meter20 pF to 600 nF
Quasi-Analog Clockwork Mk IITwo LED Rings for Hours and Minutes
You Can Do Anything You Want(with the Arduino Ecosystem at Your Side)
Neon Lamp Dice
Elektor Classics: RTTY calibrator indicator
Inspiring Hardware Designs for Your ESPs
Elektor Classics: variable 3 A power supply
RGB LEDs with Integrated Control CircuitLight with Precision: ICLEDs Set Standards
Experiment: Towards a Mixed-Signal Theremin?Blending Modern Time-of-Flight Sensors With the Timeless XR2206 Analog Generator
ESP32 Audio Transceiver Board (Part 1)SD Card WAV File Player Demo
Infographics: Circuits and Circuit Design 2025
Small Audio MixerA Simple and Versatile Scalable Design
Smart Staircase Light TimerSave More Money on the Energy Bill!
Smarten Up Your ShuttersControlling Velux Hardware With an ESP32 and MQTT
Solid-State Foot WarmerEnergy-Efficient Comfort
Is the M5Stamp Fly Quadcopter the Next Tello?
Boosting Wi-Fi Range of the ESP32-C3 SuperMiniA Simple and Effective Antenna Mod
ZD-8968 Hot-Air Soldering StationA Budget-Friendly Workhorse or Just Hot Air?
Parking Sensor TesterFinding Defects in the PDC System of a Car
Diese Ausgabe steht allen GOLD- und GREEN-Mitgliedern auf der ElektorMagazine-Website zum Download bereit!
Sie sind noch kein Mitglied? Hier klicken!
electronica Fast Forward Start- & Scale-Up AwardsDie Vorbereitungen laufen auf Hochtouren!
Bluetooth Low Energy mit dem ESP32-C3 und ESP32Es muss nicht immer WLAN sein!
Bluetooth-LE-SnifferMit dem makerdiary nRF52840 MDK USB-Dongle
Magischer RGB-LED-WürfelHardware-Design rund um einen RP2040
Automatischer Ein/Ausschalter für Lötpastenkompressor
Elektor - live und in FarbeLivestreams, Webinare und Kurse für Ingenieure und Maker
Fahrrad elektrifizierenE-Bike-Nachrüstkit in der Praxis
Aller Anfang ...Muss nicht schwer sein: Multiplikation von Spannungen
Aus dem Leben gegriffenNebenbeschäftigungen
Teensy 4.0 - warum ist das Board so schnell?Oder: Geschwindigkeit ist keine Hexerei!
Simulation von Audio-Leistungsverstärkern mit TINADer „Try-Before-You-Build“-Ansatz
LoRaWAN-Knoten im IoTEin Beispiel-Kapitel: Die LoRaWAN-Module Dragino LHT65, LDS01 und LDS02
Projekt 2.0Korrekturen, Updates und Leserbriefe
5G für mich alleinVollständige Kontrolle über 5G-Implementierungen in privaten Mobilfunknetzen
Infographics 7-8/2022
Wie lernt mein Gerät funken?Applikationen mit WiFi-Schnittstellen ausrüsten
Rheinturmuhr – Wecker de luxe
Audio-Spektrum-Analysator mit DekatronsEine neue Art, alte Röhren zu verwenden
Senden von Daten an TelegramEin ESP32 und ein paar Bauteile erledigen den Job32 and a Few Parts
Fliege-Bandsperre für Audio-MessungenBesseres Messen durch Notch-Filterung
CO2-Messgerät auseinandergenommenIst das Gerät hackbar für Ihre Projekte?
Spielereien mit PUTsAnaloge Entwürfe mit dem Programmierbaren Unijunction-Transistor
Ein runder Touchscreen für den Raspberry PiHyperPixel 2.1 Round von Pimoroni
Fernwirken und die Erkennung von Verbindungsverlustenmit Hilfe von nRF24L01+ Modulen
Digitaler UKW-EmpfängerMit Arduino Nano und TEA5767
OLED-Display - aus SPI mach I²C
Zutritt für Unbefugte verboten!Ein Hobby geht nicht in Rente!
Ein Jahrzehnt der Ethik in der ElektronikTessel Renzenbrink sinniert über die digitale Gesellschaft
HexadokuSudoku für Elektroniker
Construisez votre station météo idéale ou explorez les données environnementales avec le monde entier. Avec de nombreux projets pratiques pour Arduino, Raspberry Pi, NodeMCU, ESP32 et autres cartes de développement.
Les stations météo jouissent d’une grande popularité depuis des décennies. Tous les magazines d’électronique, qu’ils soient récents ou non, ont publié et publient régulièrement des articles sur la construction d’une station météo. Au fil des années, elles sont devenues de plus en plus sophistiquées et peuvent aujourd’hui être entièrement intégrées dans la maison intelligente. Ceci implique toutefois souvent une fidélité à un fabricant de produits de marque (coûteux) pour tous les composants.
Cependant, avec votre propre station météo, vous pouvez facilement suivre le rythme et même capturer des relevés que les appareils commerciaux ne peuvent pas réaliser. Le plaisir ne manque pas : vous développerez de manière ludique vos connaissances en électronique, en cartes de développement de microcontrôleurs modernes et en langages de programmation. Pour moins de dix euros, vous pouvez collecter des données environnementales initiales et étendre votre système au fur et à mesure que votre intérêt grandit.
Dans ce numéro
Sur la route du vent et de la météo
Écran météo OpenWeatherMap à affichage fluorescent
Les composés organiques volatils dans l‘air que nous respirons
Travailler avec les capteurs MQ : mesurer le monoxyde de carbone
Détecteur de CO2 avec connexion IdO vers ThingSpeak
Un arrosage automatique pour vos plantes
Un climat intérieur sain : la température et l‘humidité de l‘air sont importants
Thermomètre avec tubes Nixie
Une maison météo rétro pour toute la famille
Mesurez la pression atmosphérique et la température avec précision
Un détecteur de coups de soleil
Capteur maison pour la durée d‘ensoleillement
Le smartphone l‘indique : brouillard ou bonne visibilité ?
Détecter les tremblements de terre
Les niveaux des cours d‘eau et des réservoirs
Évaluer la valeur du pH de l’eau
Détecter les rayonnements radioactifs
Avec le GPS, vous savez où se trouve votre capteur
Enregistrer les fichiers journaux avec horodatage sur des cartes SD
LoRaWAN, The Things Network et ThingSpeak
Exploiter la passerelle LoRaWAN pour le TTN
Affichage géant à led avec prévisions météo
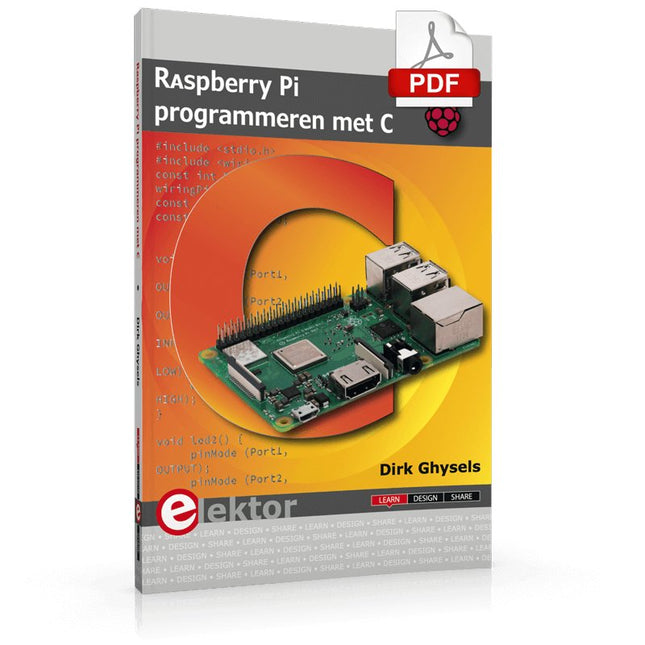
Dit boek gaat over de Raspberry Pi, en over het programmeren in C. De programmeertaal C en het besturingssysteem Linux (Raspbian) passen uitstekend bij elkaar. Alles wat we nodig hebben om in C te programmeren wordt meegeleverd met het besturingssysteem van de Raspberry Pi.
In dit boek leert u hoe C gebruikt wordt met de Raspberry Pi, en krijgt u een overzicht van de taal.
WiringPi is een softwarebibliotheek voor de Raspberry Pi waarmee C hardware-uitbreidingen kan benaderen. Die bibliotheek wordt gebruikt om sensoren uit te lezen en om extra hardware aan te sturen. U gaat experimenteren met LED’s en schakelaars, met motoren, met geluid en met sensoren voor temperatuur, luchtdruk, en luchtvochtigheid.
Met een Linux-systeem kunt u een webserver maken, inclusief interactieve websites met PHP en WiringPi. Daarom is ook een beknopt overzicht van HTML en PHP in het boek opgenomen. In de voorbeelden worden sensoren via het web uitgelezen en worden apparaten bestuurd. In het laatste voorbeeld wordt een temperatuurlogger gemaakt. Die meet elk kwartier de temperatuur. Een tabel met de meetwaarden kan via het web worden uitgelezen.
Alle voorbeeldprogramma’s kunnen worden gedownload van de website van Elektor.
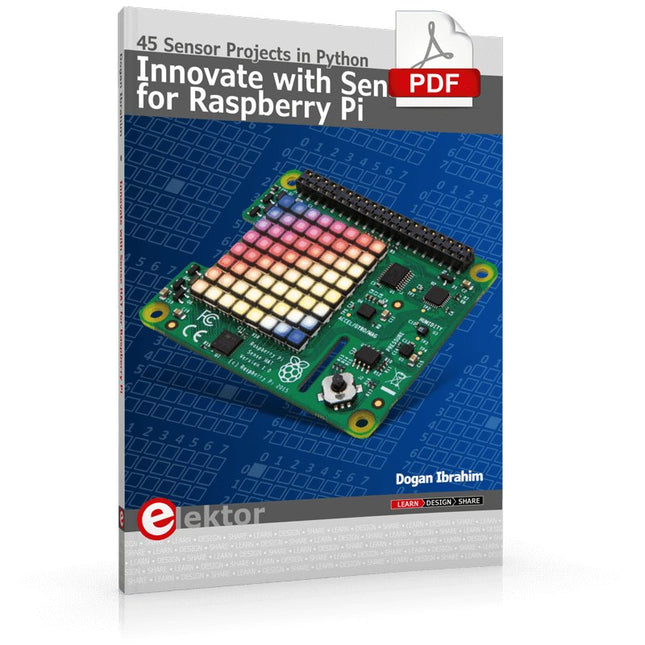
Ready to explore the world around you? By attaching the Sense HAT to your Raspberry Pi, you can quickly and easily develop a variety of creative applications, useful experiments, and exciting games.
The Sense HAT contains several helpful environmental sensors: temperature, humidity, pressure, accelerometer, magnetometer, and gyroscope. Additionally, an 8x8 LED matrix is provided with RGB LEDs, which can be used to display multi-color scrolling or fixed information, such as the sensor data. Use the small onboard joystick for games or applications that require user input. In Innovate with Sense HAT for Raspberry Pi, Dr. Dogan Ibrahim explains how to use the Sense HAT in Raspberry Pi Zero W-based projects. Using simple terms, he details how to incorporate the Sense HAT board in interesting visual and sensor-based projects. You can complete all the projects with other Raspberry Pi models without any modifications.
Exploring with Sense HAT for Raspberry Pi includes projects featuring external hardware components in addition to the Sense HAT board. You will learn to connect the Sense HAT board to the Raspberry Pi using jumper wires so that some of the GPIO ports are free to be interfaced to external components, such as to buzzers, relays, LEDs, LCDs, motors, and other sensors.
The book includes full program listings and detailed project descriptions. Complete circuit diagrams of the projects using external components are given where necessary. All the projects were developed using the latest version of the Python 3 programming language. You can easily download projects from the book’s web page. Let’s start exploring with Sense HAT.
Open-Source-Code mit Arduino IDE und PlatformIO
Autonomes Fahren: GPS, Accelerometer, Gyroskop
PS3-Controller
Mikrocontroller wie der Arduino und Einplatinenrechner wie der Raspberry Pi haben sich zu beliebten Komponenten entwickelt. Dritter im Bunde ist der ESP32 der Firma Espressif. Mikrocontroller dieser Baureihe zeichnen sich durch eine Vielzahl implementierter Funktionen aus, die bei einem Arduino konventioneller Prägung mit einem Atmel-AVR-Mikrocontroller erst mit weiterer Hardware möglich sind. Prominentes Beispiel sind hier die WiFi- und Bluetooth-Funktionalitäten. Gegenüber einem Raspberry Pi zeichnen sie sich durch einen deutlich geringeren Preis aus.
Allgemeine Informationen für die Realisierung eines Roboterauto-Projekts mit dem ESP32 sind leicht zu finden. Dabei handelt es sich aber oft nur um Ausführungen zu einem Teilaspekt, ohne inhaltliche oder funktionale Abstimmung. So ist nicht nur die Beschaffung der benötigten Informationen mühselig und zeitaufwändig, sie kann auch außerordentlich fehlerträchtig sein.
Ansatzpunkt dieses Buches ist, diese Lücke zu schließen. Es geht auf verschiedene Möglichkeiten eines Chassis ein, vermittelt nötige Kenntnisse und führt schrittweise von einer einfachen Motorsteuerung zu einem komplexen sensor- und sprachgesteuerten Roboterauto. Hacks rund um GPS und eine PlayStation 3 runden die Sache ab.
Inhalt
Bei der Reihenfolge der Kapitel wurde versucht – beginnend bei der Darstellung von grundlegenden Informationen – über die Lösung einfacher Aufgaben zu etwas anspruchsvolleren Techniken zu führen.
Der Mikrocontroller ESP32
Die Software erstellen
Die Stromversorgung
Rund um die Hardware
Das Chassis
Der Gleichstrommotor
Kabellose Steuerung über WiFi
Mit Sensoren Hindernisse erkennen
Eine eigene Roboterauto-App
Servo und Lichtsensor
GPS
Accelerometer / Gyroskop
PS3-Controller
Roboterauto-App
Hinweis zur Software
Die Dateien haben das Suffix (.cpp). Grund ist die Entwicklung mit PlatformIO. Mit Copy & Paste sollten sie auch in der Arduino-IDE verwendet werden können.
Measuring Does Not Have to be Expensive
Low-Cost Audio TesterUsing PC-Based Software and a USB Audio Interface
AC Grid Frequency MeterMonitor Mains Frequency and Voltage
A Modest Inductance MeterAn Affordable Solution for Your Workbench
Acoustic Wave HoveringA Look at the Makerfabs Acoustic Levitation Kit
Starting Out in ElectronicsRectifiers E-FFWD: Looking Ahead Again!
Get Started With Your OscilloscopeFind Your Way Through the Knobs and Buttons
Raspberry Pi Pico Makes an MSF-SDRDecode a Time Signal with a Pi Pico SDR
Moisture Sensors for Watering SystemsAutomatic Watering
Disruption in Test and Measurement EquipmentInnovation from the Smaller Players Infographics 7-8/2022
Inspiration, That’s What It’s All AboutInterview with Entrepreneur Walter Arkesteijn, InnoFaith Beauty Sciences Minimizing EMC Interference from Storage Chokes
GUIs with Python (Part 5)Tic-Tac-Toe
Reed RelaysPeculiar Parts, the series Simple Analog ESR Meter With Moving-Coil Meter Precision
Sigfox CO2 Traffic LightNo Wi-Fi Network Needed!
Women in Tech“It's All About Merit Until Merit Has Tits”
Low-Budget Tablet Oscilloscope ADS1013DGood Value for Money?
Smart Plug TeardownWhich Ones Are Hacker-Friendly?
Skin Impedance and Skin CapacitanceSmall Experiments
From Life’s ExperienceNo Local Business
Pokit Meter ReviewA Swiss army knife of test gear
HexadokuThe Original Elektorized Sudoku
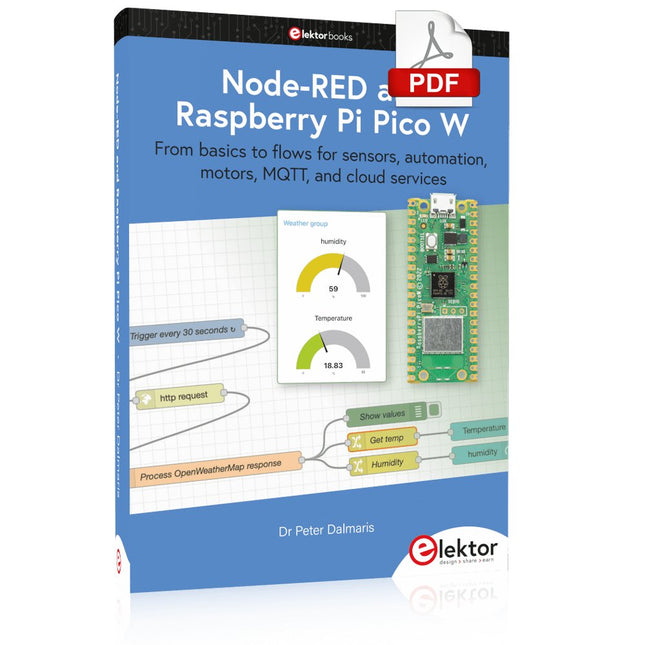
From basics to flows for sensors, automation, motors, MQTT, and cloud services
This book is a learning guide and a reference. Use it to learn Node-RED, Raspberry Pi Pico W, and MicroPython, and add these state-of-the-art tools to your technology toolkit. It will introduce you to virtual machines, Docker, and MySQL in support of IoT projects based on Node-RED and the Raspberry Pi Pico W.
This book combines several elements into a platform that powers the development of modern Internet of Things applications. These elements are a flow-based server, a WiFi-enabled microcontroller, a high-level programming language, and a deployment technology. Combining these elements gives you the tools you need to create automation systems at any scale. From home automation to industrial automation, this book will help you get started.
Node-RED is an open-source flow-based development tool that makes it easy to wire together devices, APIs, and online services. Drag and drop nodes to create a flowchart that turns on your lights at sunset or sends you an email when a sensor detects movement. Raspberry Pi Pico W is a version of the Raspberry Pi Pico with added 802.11n Wi-Fi capability. It is an ideal device for physical computing tasks and an excellent match to the Node-RED.
Quick book facts
Project-based learning approach.
Assumes no prior knowledge of flow-based programming tools.
Learn to use essential infrastructure tools in your projects, such as virtual machines, Docker, MySQL and useful web APIs such as Google Sheets and OpenWeatherMap.
Dozens of mini-projects supported by photographs, wiring schematics, and source code. Get these from the book GitHub repository.
Step-by-step instructions on everything.
All experiments are based on the Raspberry Pi Pico W. A Wi-Fi network is required for all projects.
Hardware (including the Raspberry Pi Pico W) is available as a kit.
Downloads
GitHub
USB to S/PDIF InterfaceDigital audio output for computer, laptop, tablet or smartphone
Practical ESP32 Multitasking (4)Binary semaphores
A Wireless Temperature Sensor for the Nixie Bargraph ThermometerA multipurpose solution with a design trick
Multitasking with Raspberry PiShowcase: a traffic lights controller
Timer for Headphone Amplifier
Open-Network Weather Station Mk.2Part 2: Software
Home Automation Made EasyWith ESPHome, Home Assistant & MySensors
The Storage CRTPeculiar Parts, the series
Artificial Intelligence for Beginners (3)A stand-alone neural network
Programming PICs from the Ground UpAssembler routine to output a sine wave
IKEA Lamp HackEquipping an inexpensive IKEA lamp with NeoPixel LEDs and WLAN
Don't Let Your Hobby Project Collect Dust in a CornerSupply-side time management and spiral development
Starting Out in Electronics (4)Easier than imagined!
Homelab Tours: The Vinyl CutterReturning to the golden age of LPs
The 8-Bit Microcontroller and BeyondInterview with Tam Hanna
Small Circuits RevivalFrom the Elektor suggestions box
Review: Owon OW18E Bluetooth Multimeter
InteractiveCorrections & Updates || Questions & Answers
Steeped in ElectronicsLead-free soldering and EU regulatory zeal
Promising Project: New 50 Hz – 2 MHz LCR meterAccuracy and ease of use
Error AnalysisTips on FMEA, High Current, and More
Developer's ZoneTips & Tricks, Best Practices and Other Useful Information
Review: Siglent SDL1020X Programmable DC Electronic Load
High-Voltage Power Supply with Curve TracerGenerate voltages up to 400 V and trace characteristics curves for valves and transistors
Hexadoku 2009EL
Analogue Electronics DesignCase Study #2 — Part 1: Analogue filter theory
The Elektor StoreNever expensive, always surprising
How to Draw a Circuit Diagram
Deze verbetere versie 2.0 (exclusief verkrijgbaar bij Elektor) bevat de volgende verbeteringen:
Verbeterde aarding (PE) van het ovenchassis
Extra thermische isolatielaag rond de oven om geuren te verminderen
Aansluiting op een computer, waardoor curvebewerking op een PC mogelijk is
Functies zoals constante temperatuurregeling en timingfuncties
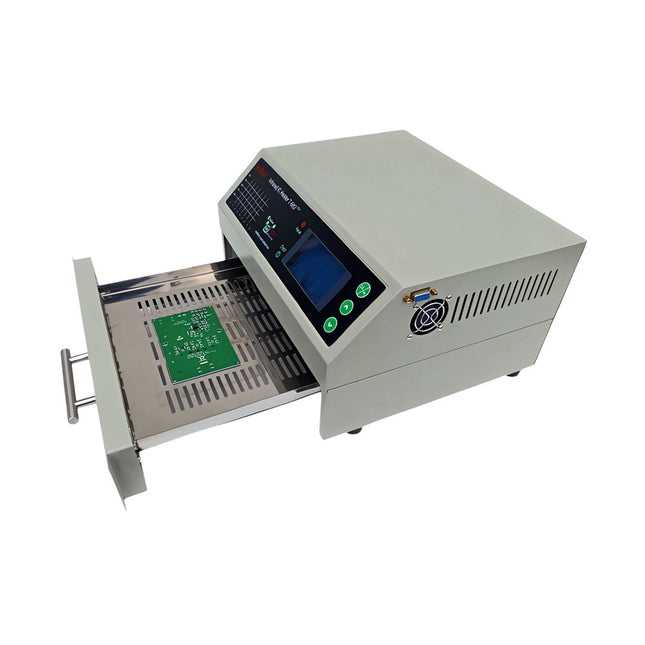
De infrarood IC oven T-962 v2.0 is een microprocessorgestuurde reflow oven die je kunt gebruiken voor het gemakkelijk solderen van diverse SMD en BGA componenten. Het hele soldeerproces kan automatisch worden voltooid en het is heel gemakkelijk in het gebruik. Dit apparaat maakt gebruik van een krachtige infrarood straling en circulatie van de hete luchtstroom, zodat de temperatuur zeer nauwkeurig wordt gehouden en gelijkmatig verdeeld wordt.
Een lade met vensters is ontworpen om het werkstuk vast te houden, en maakt een veilige soldeertechniek mogelijk en het manipuleren van SMD & BGA en andere kleine elektronische onderdelen die op een printplaat gemonteerd zijn. De T-962 v2.0 kan gebruikt worden om soldeer automatisch na te verwarmen om slechte soldeerverbindingen te corrigeren, slechte componenten te verwijderen/vervangen en kleine technische modellen of prototypes te maken.
Kenmerken
Groot infrarood soldeeroppervlak
Effectief soldeergebied: 180 x 235 mm; dit vergroot het gebruik van deze machine drastisch en is daardoor een goede aanschaf.
Keuze uit verschillende soldeercycli
De parameters van acht soldeercycli zijn vooraf ingesteld en het hele soldeerproces kan automatisch verlopen van voorverwarmen, op temperatuur vloeibaar houden tot afkoelen..
Speciale opwarming en temperatuur egalisatie bij alle versies
Gebruikt een energiezuinige infrarood verwarming tot 800 Watt en luchtcirculatie om het soldeer vloeibaar te houden.
Ergonomisch ontwerp, praktisch en gemakkelijk te bedienen
Door de goede bouwkwaliteit, lichte gewicht en de kleine afmetingen kan de T-962 v2.0 gemakkelijk op een werkbank worden geplaatst, of worden vervoerd of opgeborgen.
Groot aantal functies beschikbaar
De T-962 v2.0 kan de meeste kleine componenten van printplaten solderen, bijvoorbeeld CHIP, SOP, PLCC, QFP, BGA enz. Het is de ideale oplossing voor rework, van eenmalige productie tot kleinschalige productie op bestelling.
Specificaties
Soldeeroppervlak (max.)
180 x 235 mm
Vermogen (max.)
800 W
Temperatuurbereik
0-280°C
Verwarmingsmethode
Infrarood
Verwerkingstijd
1-8 minuten
Voeding
220 V AC/50 Hz
Display
LCD met achtergrondverlichting
Bedieningsmodus
8 intelligente temperatuurcurven
Afmetingen
310 x 290 x 170 mm
Gewicht
6,2 kg
Inbegrepen
1x T-962 v2.0 Reflow Soldeeroven (Elektor versie)
2x Zekeringen
1x Netsnoer (EU)
Lancé en mars 2012, plus les 30 millions d'exemples nanométriques du Raspberry Pi exposés. Il s’agit d’une contribution à la révolution des technologies de l’information et d’un grand stimulant pour le développement du monde de l’électronique. Le succès de la « tarte à la framboise » (traduction littérale de Raspberry Pie) est le résultat de l'industrie micro-électronique de transformation des produits.
Eben Upton, son créateur, âme à l'origine, les acheteurs étaient presque tous des makers , adultes en général. Cependant la plupart d'entre eux étaient également des ingénieurs professionnels. Rapidité, les gens sont responsables de leurs activités personnelles lors de l'utilisation du Raspberry Pi avec une plateforme informatique stable, et ils sont également adoptés pour leur métier.
La Fondation Raspberry Pi édite un magazine édité par la communauté Raspberry Pi : le MagPi (en anglais). Le magazine aborde les passions selon la nature du numérique nano-ordonné et global. Il contient des bancs d'essai de nouveaux produits, de nombreux tutoriels et un grand nombre de projets. Les membres de la communauté Raspberry Pi participent à leur expérience.
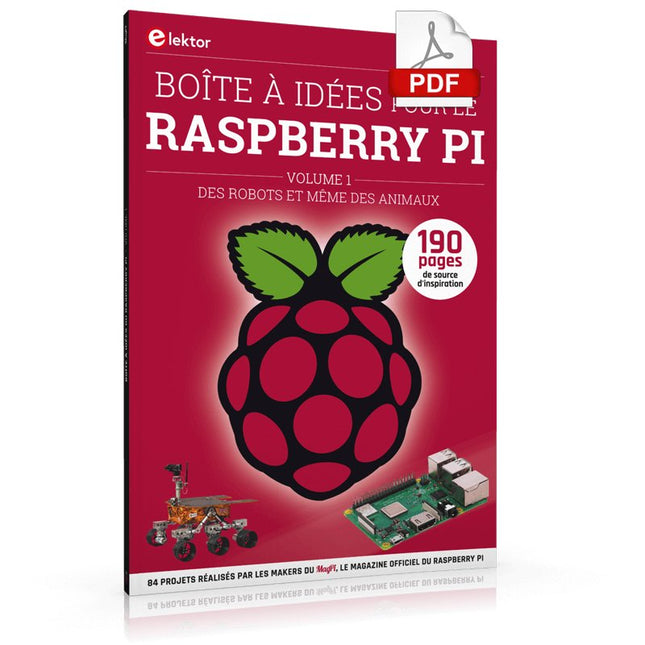
La maison d'édition Elektor s'associe à la Fondation Raspberry Pi pour la publication dans le magazine français MagPi. Il est conçu pour assembler 84 projets publics du MagPi en développant l'utilisation du Raspberry Pi et son inspiration.
Grâce à la taille fine et aux possibilités du Raspberry Pi, les créateurs du monde sont fiers des idées des plus folles.
Partez en voyage dans un monde où est faisable !
Le Raspberry Pi à toutes les sauces pour ?
s'inspirateur des projets réalisés par les membres de la communauté
dénicher des utilisations inouïes
découvrir des accessoires et technologies diverses
entrer dans une communauté intégrée et active de Raspberry Pi
Le téléchargement intégral de ce numéro est disponible pour nos membres GOLD et GREEN sur le site Elektor Magazine !
Pas encore membre ? Cliquez ici.
petite caméra thermiqueréalisée avec un Arduino UNO
mise à jour du projet #3 : compteur d'énergie basé sur l'ESP32intégration et test avec Home Assistant
2024 : l'odyssée de l'IAaméliorer la détection d'objets : intégration de techniques avancées
Raspberry Pi se met à l'IAun nouveau kit comprenant un accélérateur IA matériel et un adaptateur M.2 HAT+
capteurs de stations météorologiqueslequel choisir ?
Relevé des compteurs d'eau basé sur l'IA (1)intégrez votre ancien compteur dans l'IdO !
une alarme GSMun module GSM protège votre garage à distance
optimisation et contrôle des appareils Thread à faible consommation d'énergiefaible consommation... peu d’effort ?
sur le vifmontrez-moi là où ça fait mâle
chambre à brouillard à faire soi-mêmevisualiser les rayonnements invisibles
SparkFun Thing Plus Mattercarte de développement IdO polyvalente basée sur Matter
Rétroéquipement IoTAdaptation des machines à interface RS232 à l'industrie 4.0
ajouter l’IoT grâce aux microcontrôleurs 8 bits
la technologie au service du développement durableles avancées technologiques favorisent une utilisation plus efficace de l’énergie dans de nombreuses applications
AWS pour Arduino et Cie. (1)utiliser AWS IoT ExpressLink en pratique
détecteur de flux d'air Arduinoaucun capteur externe n'est nécessaire !
détecteur de fuite d'eauconnecté à l’Arduino Cloud
le quartzdrôle de composant, la série
enregistreur universel de données de jardinageun pas vers l’Intelligence Artificielle au Jardin.
un générateur analogique 1 kHzondes sinusoïdales à faible distorsion
Miletus : utiliser les applications Web hors ligneaccès aux fonctions de l’appareil et du système
de la 4G à la 5Gest-ce une étape si facile à franchir ?
démarrer en électronique…connexions symétriques